Learn How to Start With Polymer Clay For Beginners: A Simple Guide.
Polymer clay is one of those craft materials that can look complicated until you actually pick up a piece and start working with it. You can turn a small block of clay into beads, charms, decorations, miniature objects, jewelry pieces, and many other creative projects.
The best part is that you do not need a huge craft room or an expensive collection of tools to begin. With a few basic supplies, a clean work surface, and some patience, you can learn the fundamentals at home.
If you have been searching for polymer clay for beginners, this guide will help you understand where to start without feeling overwhelmed. Instead of buying every tool you see online, you will learn which supplies matter, how to condition clay, how to shape it, how to fix common mistakes, and how to bake your finished pieces safely.
Most importantly, you will learn the basic skills in the right order.
So, grab your clay and let’s begin.
Ready to experiment with another material? Wood Burning Craft Ideas: How to Make Beginner Friendly Projects You Can Display or Sell offers projects you can display or turn into products to sell.
First, understand what polymer clay actually is
Before making your first project, it helps to understand the material you are working with.
Polymer clay is a modeling material made from a polymer-based mixture that stays workable until it is cured with heat. Unlike air-dry clay, it does not simply harden because it is exposed to air.
That difference makes it especially useful for detailed projects.
You can take your time while shaping it. If you notice that something looks uneven, you can often reshape it. If you change your mind about a small detail, you can remove it and try again.
For people exploring polymer clay for beginners, this flexibility is one of the biggest advantages.
However, flexibility does not mean the clay requires no preparation.
Most polymer clay needs to be conditioned before you use it. Conditioning makes the clay more flexible and helps it become easier to shape. Once you understand this step, many other techniques become much easier.
Polymer clay also comes in many colors and finishes. Depending on the brand, you may find basic colors, metallic shades, translucent varieties, glitter finishes, and specialty clays.
You do not need all of them.
In fact, starting with a small color selection is usually better because it lets you focus on learning the material instead of spending all your time choosing supplies.
For a homemade beginner-friendly crafts for kids, this How to Make Rainbow Crafts at Home With Kids
What do you actually need for your first project?
One common beginner mistake is buying too many supplies before learning the basics.
Craft stores and online shops can make it seem as though you need dozens of specialized tools. Fortunately, that is not the case.
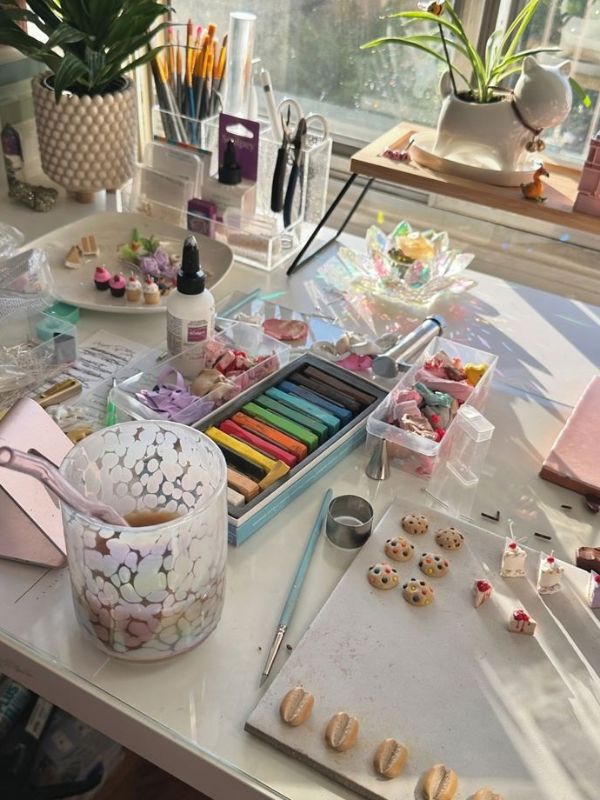
For your first few projects, keep your setup simple.
Your essential supplies
Start with:
- Polymer clay
- A smooth work surface
- A clay roller or suitable smooth rolling tool
- A craft blade intended for clay work
- Basic shaping tools
- Baking equipment that follows the clay manufacturer’s instructions
- Storage materials for unused clay
That is enough to begin practicing.
You may eventually want cutters, texture sheets, molds, sanding materials, jewelry findings, specialty blades, and other accessories. However, those can wait.
When learning polymer clay for beginners, the goal should be skill development first.
A small amount of clay can teach you more than a large box of unused colors.
Optional supplies that can come later
Once you become comfortable, you can add:
- Cookie-style cutters made for craft use
- Texture plates
- Silicone shaping tools
- Acrylic rollers
- Clay conditioning machines
- Dotting tools
- Jewelry findings
- Jump rings
- Earring components
- Brooch backs
- Decorative powders
- Compatible finishes
- Small storage containers
There is no need to buy everything at once.
Instead, notice what slows you down during your projects. Then buy a tool that solves that specific problem.
That approach saves money and keeps your craft area manageable.
Let young children get comfortable with the material through Clay Crafts for Kindergarten Kids That Are Easy, Fun, and Great for Little Hands
Choosing your first polymer clay

Not every block of polymer clay feels exactly the same.
Some varieties are softer and easier to manipulate. Others are firmer and may hold fine details better. The ideal choice depends on your project, your hands, and the brand you choose.
For polymer clay for beginners, a medium-soft clay can be a comfortable starting point because it is usually easier to condition.
Still, softer is not always better.
Very soft clay can sometimes become difficult to handle when you are making thin pieces or detailed shapes. Firm clay, meanwhile, may take more effort to condition.
Therefore, do not worry if your first clay feels slightly different from another person’s clay.
Give yourself time to learn its behavior.
Start with a small color palette
You could begin with a few basic colors rather than purchasing an enormous collection.
For example, choose:
- White
- Black
- One warm color
- One cool color
- One color you personally love
You can mix some colors together to create new shades.
That makes your small collection more useful.
As your skills improve, you can decide which colors you actually use most often.
When clay is not quite what you feel like making, Creative DIY Crafts for Adults: 20 Fun Crafts for Adults to Try When You’re Bored at Home gives you plenty of alternatives.
Create a beginner-friendly workspace
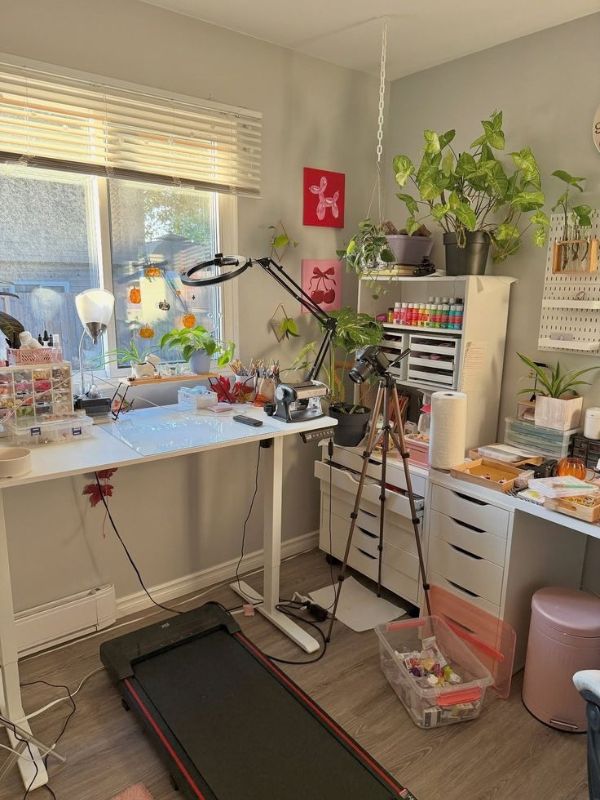
Your workspace can make polymer clay much easier to enjoy.
You do not need a large table. A small, stable area is enough.
The surface should be smooth and easy to clean. A craft mat or another suitable non-porous work surface can help protect your table.
Good lighting also matters.
Tiny imperfections are much easier to notice when you can see your project clearly. A bright workspace can help you spot fingerprints, crumbs, uneven edges, and unwanted marks before you bake the piece.
Keep your clay away from dust, hair, fabric fibers, and crumbs.
Polymer clay can pick up tiny particles surprisingly easily.
If you have pets, for example, keep the work area separate from places where fur frequently collects.
Keep food preparation separate
This point is especially important.
Do not automatically assume that household kitchen tools are appropriate for polymer clay. Some materials used with clay should not later be used for food.
Unless the manufacturer specifically states otherwise, keep craft tools and food-preparation equipment separate.
Likewise, finished polymer clay pieces should not automatically be treated as food-safe.
A decorative clay bowl may look beautiful, but that does not mean it is suitable for serving food.
When working with polymer clay for beginners, it is better to build safe habits from your first project.
For a smaller project that can double as decor, try Mini Terra Cotta Pots Crafts for Cute Budget-Friendly DIY Home Decor.
The first skill to master: conditioning
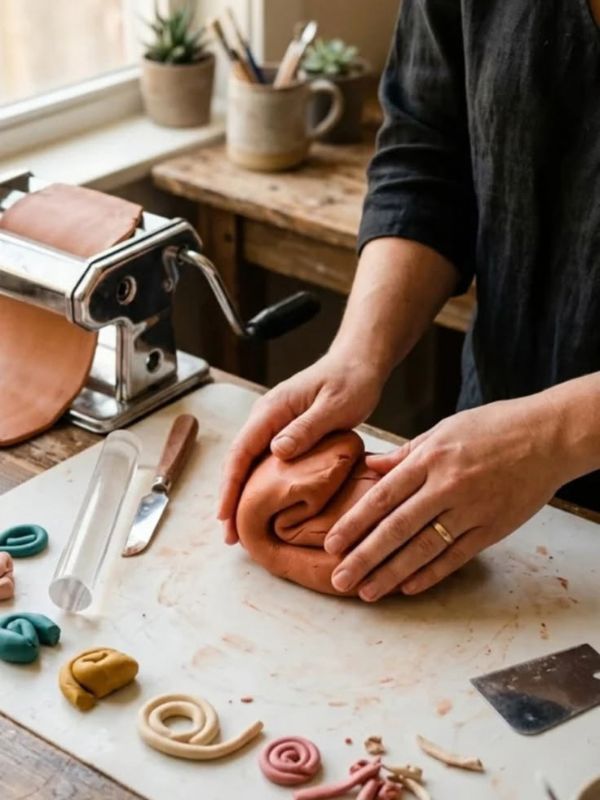
Conditioning is one of the most important polymer clay skills.
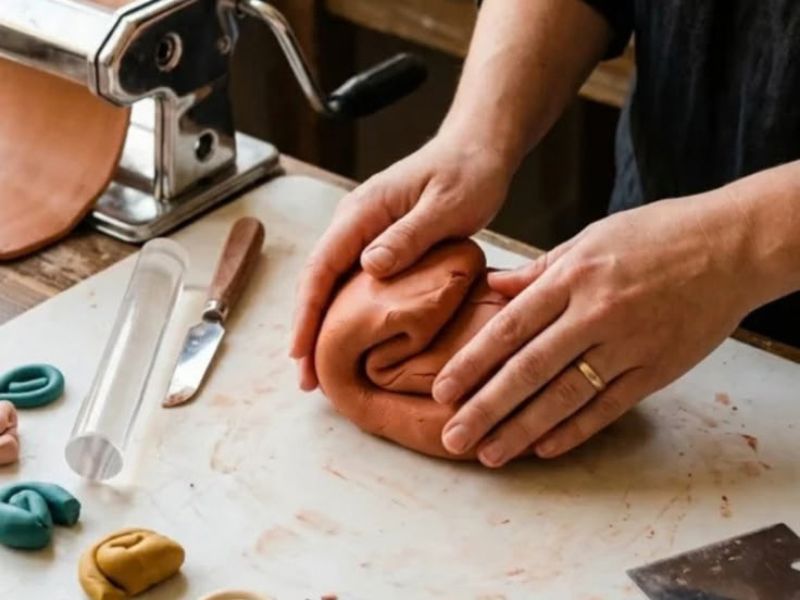
It simply means working the clay until it becomes flexible, smooth, and ready to shape.
If you skip this step, the clay may crack, break, or feel difficult to manipulate.
Step 1: Cut off a manageable piece
Start with a small amount.
Working with the entire block at once can be tiring, especially when you are still learning.
Cut or separate a manageable portion using an appropriate clay-working tool.
Step 2: Warm it through your hands
Gently work the clay between your fingers and palms.
The goal is not to rush.
As the clay becomes warmer from handling, it should gradually become easier to manipulate.
Step 3: Fold and press
Fold the clay over itself.
Then press it together.
Repeat this process several times.
You can also roll it into a short log, bend it, and fold it again.
Keep working until the texture becomes more consistent.
Step 4: Check the texture
Conditioned clay should feel flexible rather than dry and crumbly.
It should also hold together when you roll or bend it.
If the clay continues to crack badly, give it more conditioning time. If it becomes too soft and sticky, allow it to rest according to the manufacturer’s recommendations before continuing.
Different brands behave differently, so always follow the instructions supplied with your particular clay.
Why conditioning matters
Think of conditioning as preparing the clay for the work ahead.
Once the clay is properly conditioned, rolling becomes easier. Shapes hold together better. Small details are easier to add. You also reduce the chance of unnecessary cracking.
That is why conditioning should become automatic for anyone practicing polymer clay for beginners.
Learn What Can I Make With an Egg Carton? Easy Ideas for Kids
Learn these basic shaping techniques
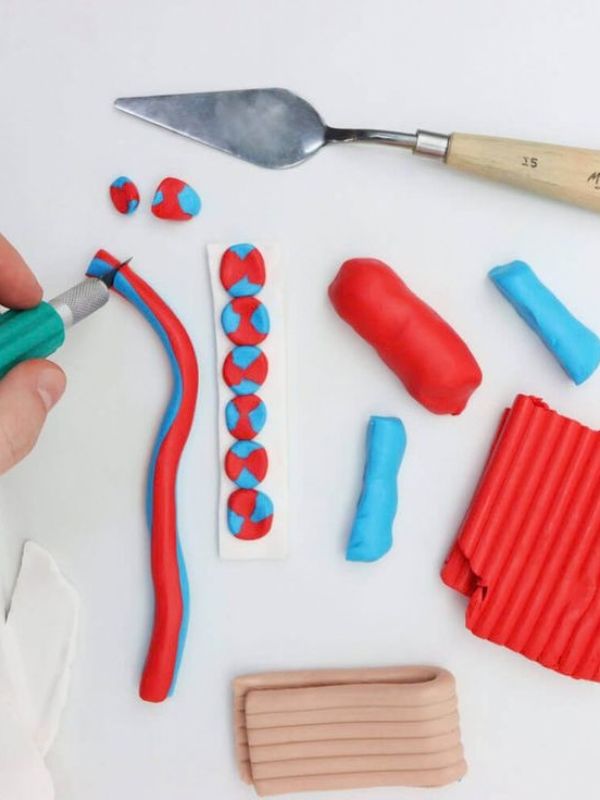
You do not need to learn complicated sculpting immediately.
Start with a handful of simple movements.
These techniques form the foundation for many projects.
Rolling
Place the conditioned clay between your palms or on your work surface.
Roll it gently.
With practice, you can create:
- Balls
- Cylinders
- Ropes
- Tubes
- Rounded shapes
Rolling is useful because many projects begin with a simple ball or log.
Flattening
Place a clay ball on your work surface.
Press it gently with your fingers or a suitable smooth tool.
You can create a flat disk, oval, or irregular shape.
Flattening is especially useful for charms and decorative pieces.
Pinching
Pinching allows you to create points and raised edges.
Hold the clay between your fingers and gently press.
This technique can help form leaves, petals, ears, small peaks, and other details.
However, use gentle pressure.
Too much force can distort a small piece.
Coiling
Roll clay into a long, thin strand.
You can then curve or spiral the strand into different shapes.
Coiling is useful for borders, decorative details, miniature designs, and simple patterns.
Blending
Place two pieces of clay together.
Press their edges gently.
Then work the join until the transition becomes smoother.
Blending is useful when you want one color to flow into another.
It also helps attach small pieces to a larger base.
Cutting
Cutting allows you to create clean shapes and edges.
Use tools designed for clay work and handle blades carefully.
Never rush this step.
A clean cut can make a simple project look much more polished.
Texturing
Texture can completely change the appearance of clay.
You can press suitable textured objects or craft tools into the surface to create patterns.
For example, you might create:
- Lines
- Dots
- Waves
- Fabric-like patterns
- Geometric marks
- Leaf-inspired textures
Experiment on scrap clay first.
That way, you can see how deep the impression will be before using it on your final piece.
For a homemade squishy ideas, check out DIY Squishy: How to Make a Homemade Squishy You’ll Want to Squeeze
How to use tools without buying everything
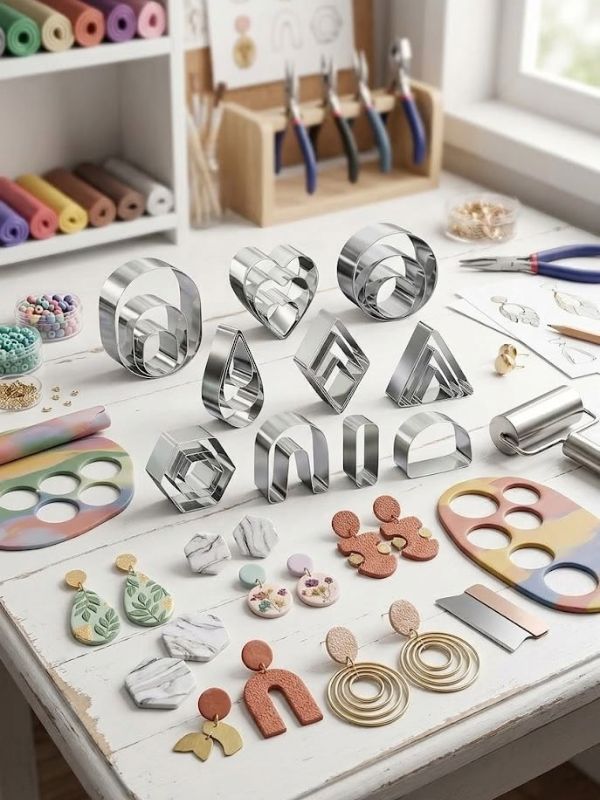
Tools are helpful, but they should not become a barrier.
- A beginner can learn a surprising amount with only a few basic tools.
- A roller helps flatten clay.
- A blade helps create clean cuts.
- A pointed or rounded shaping tool can help with small details.
- A cutter can make repeated shapes quickly.
As you practice, you will discover which tools suit your style.
For polymer clay for beginners, it is better to master a small toolkit than to own dozens of tools you do not know how to use.
Keep your tools clean
Color transfer can become a frustrating problem.
Imagine working with bright white clay after handling a deep red piece. Even a small amount of leftover pigment can leave a noticeable mark.
Therefore, clean your work surface and tools between colors.
This matters especially when working with:
- White
- Cream
- Pastel colors
- Translucent clay
- Very light pinks
- Light blue
Dark pigments can be particularly noticeable against lighter clay.
Looking for crafts that the preschoolers can also made this post 20 Easy Flower Activities for Preschoolers to Make and Learn got you covered.
Your First Practice Project: A Simple Bead
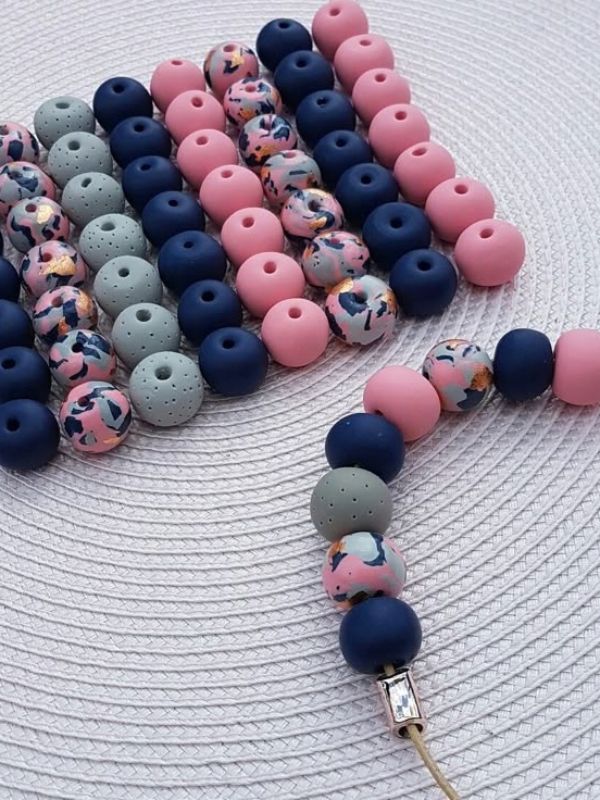
Before attempting a complicated miniature sculpture, practice making a bead.
It teaches several basic skills at once.
Step 1: Condition the clay
Prepare a small piece until it is smooth and flexible.
Step 2: Roll a ball
Place the clay between your palms.
Roll it gently until you have a reasonably round ball.
It does not need to be perfect.
Step 3: Create the hole
Use an appropriate tool to make a hole through the bead.
Work slowly.
Try to keep the opening centered.
Step 4: Inspect the shape
Look for cracks or obvious dents.
Smooth them gently with your fingers.
Step 5: Prepare it for curing
Follow the manufacturer’s instructions for baking or curing.
Do not guess the temperature or curing time.
Different polymer clay products can have different requirements.
This tiny project teaches you why polymer clay for beginners should focus on basic control before complicated designs.
Bookmark these posts Rhinestone and Bedazzle Crafts You Can Make at Home for Stylish DIY Decor and Gifts and How to Make Easy Popsicle Stick Crafts for Kids: 15 Fun DIY Ideas
Try a flat charm next
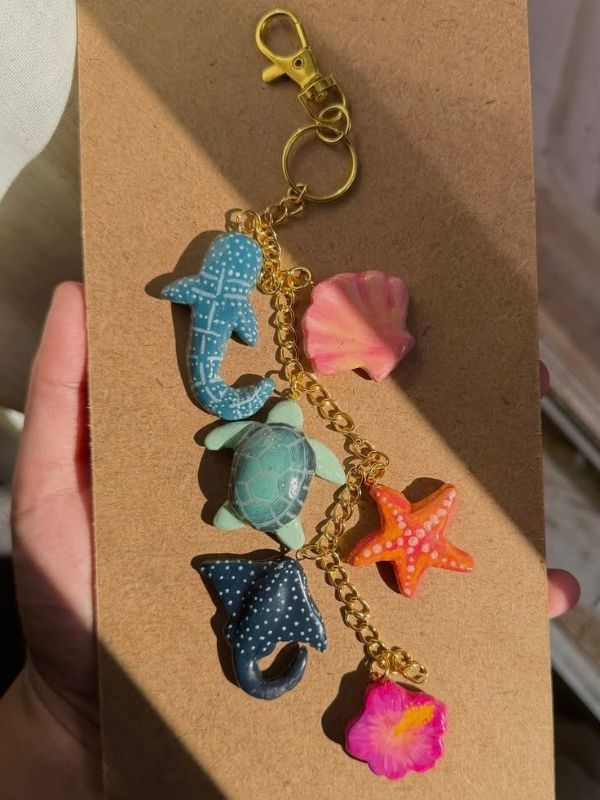
After practicing a bead, make a simple flat charm.
You can choose a basic shape such as:
- Heart
- Star
- Flower
- Cloud
- Circle
- Initial
- Leaf
The goal is not perfection.
Instead, focus on keeping the thickness relatively even.
Roll the clay evenly
Flatten conditioned clay using your roller.
Try to create an even sheet.
Uneven thickness can make the final result look less polished and may affect how the piece cures.
Cut your shape
Use a suitable cutter or carefully create the outline with a craft tool.
Remove excess clay around the shape.
Add simple details
You could add:
- Tiny dots
- Lines
- A second color
- A small border
- A simple texture
Avoid adding too many details during your first attempt.
Simple designs are easier to control.
If your child enjoys making crafts that could become useful products, check out How to Make Crafts: 20 Easy Crafts to Sell and Make Profits From Home If You Need Extra Income for more handmade project inspiration.
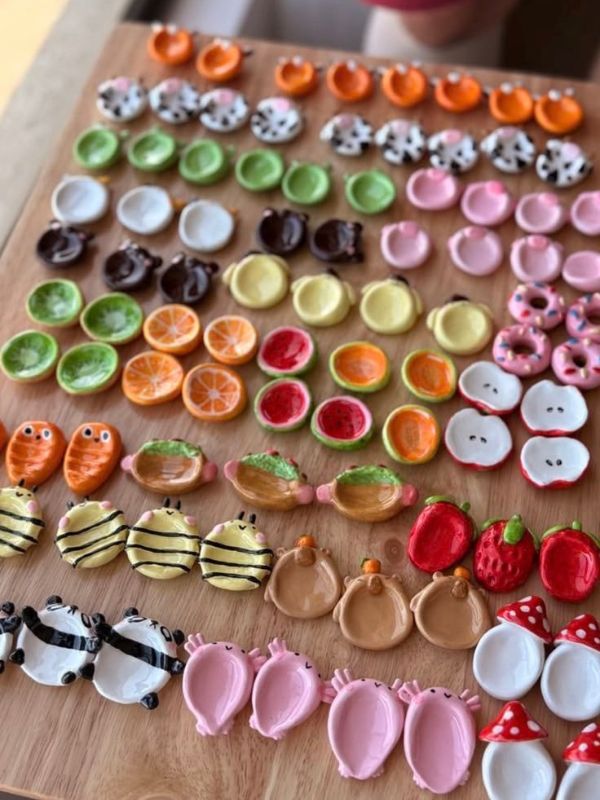
Practice making a miniature decorative dish

A small decorative dish is another useful practice project.
It teaches you how to create a larger form without requiring advanced sculpting.
Roll out a sheet of conditioned clay.
Shape it into a simple shallow form.
You can gently press the edges upward to create a rim.
However, remember that a handmade polymer clay dish should be treated as decorative unless the specific materials and finishing process are explicitly confirmed as suitable for food contact.
It can hold small non-food items such as:
- Hair clips
- Jewelry
- Paper clips
- Craft supplies
- Decorative objects
This is a great way to practice smooth edges and consistent thickness.
Start with Hand Crafts for Seniors With Limited Mobility That Are Creative, Practical, and Worth Making for gentle project ideas that pair well with a slower, more relaxed crafting pace.
How to avoid the most common beginner mistakes
Making mistakes is part of learning.
Still, understanding common problems can save you time and clay.
Mistake 1: Skipping conditioning
Unconditioned clay may feel stiff.
It can also crack while you work.
The solution is simple: spend enough time preparing the clay before shaping it.
Mistake 2: Working too quickly
Rushing can cause fingerprints, uneven shapes, weak attachments, and accidental dents.
Slow down.
Small corrections are much easier before the clay is cured.
Mistake 3: Making pieces too thin
Very thin clay can be fragile.
If a project requires a thin section, follow the clay manufacturer’s guidance and consider how the piece will be handled after curing.
Mistake 4: Adding too many details
More detail does not always mean a better design.
Sometimes a simple piece looks more polished.
Start with one main idea.
Then add only the details that support it.
Mistake 5: Mixing colors carelessly
If you mix too much, you may lose the original colors.
Instead, combine small pieces first.
That lets you test the resulting shade before committing more clay.
Mistake 6: Ignoring fingerprints
Fingerprints are normal.
However, they can become more visible after curing.
Handle finished surfaces gently.
You can also practice smoothing techniques before baking.
Mistake 7: Leaving dust on the clay
Dust and fibers become especially obvious on light colors.
Keep your workspace clean.
Wash and dry your hands before working, especially after touching dusty surfaces.
Mistake 8: Forgetting the manufacturer’s instructions
This is one of the most important mistakes to avoid.
Do not use a random baking temperature or time simply because another clay brand uses it.
Read the packaging for your exact product.
This Crafts for Seniors in Assisted Living When the Days Feel Long and the Usual Activities Get Old offers more calm, low pressure project ideas worth exploring.
Baking polymer clay safely
Baking is the stage where your soft creation becomes a cured object.
It is also the stage where safety matters most.
Polymer clay brands can have different curing requirements.
Therefore, polymer clay for beginners should always be approached with the specific product instructions in mind.
Follow the package instructions
Read the manufacturer’s directions before putting your project into an oven.
Check:
- Recommended temperature
- Recommended curing time
- Maximum thickness guidance
- Any special instructions
- Ventilation recommendations
Do not assume that every polymer clay product uses the same settings.

Use adult help with the oven
If you are not an adult, ask a parent, guardian, or another responsible adult to help with oven use.
The oven and hot baking surfaces can cause serious burns.
Let the adult handle placing and removing the tray when appropriate.
Do not microwave polymer clay unless the manufacturer specifically says it is designed for that method
A standard kitchen microwave should not be treated as a substitute for the curing method specified by the manufacturer.
Use the method recommended for your product.
Avoid overbaking
More heat is not a shortcut to a better result.
Too much heat can damage a project.
Therefore, follow the manufacturer’s temperature and time instructions carefully.
Let the piece cool
Freshly cured clay can be hot and may still feel somewhat flexible.
Do not immediately judge the final strength while the piece is still warm.
Allow it to cool completely.
Add colour and personality on your ceramic bowl at home with How to Paint Ceramic Bowls at Home: Easy Creative Ideas for Beginners That Actually Last.
What happens after your clay is cured?
Once the piece has cooled, inspect it carefully.
Look at the edges.
Check the surface.
Examine any attachments.
If the project has multiple parts, make sure they are securely joined.
You may decide that the piece is finished exactly as it is.
That is completely fine.
Not every polymer clay project needs a glossy coating, paint, or extra finish.
Sanding and smoothing
Some projects benefit from gentle smoothing after curing.
However, sanding creates dust.
If you choose to sand a suitable cured piece, use appropriate protective practices and clean the work area afterward.
Follow the product manufacturer’s guidance for any finishing process.
Adding compatible finishes
Some creators use finishes to change the surface appearance.
A finish might create a glossy, satin, or other effect.
However, not every varnish or sealant is compatible with polymer clay.
Always check whether the product is suitable before applying it.
Testing on a scrap piece is a smart habit.
For a different way to build without a pottery wheel, try Coil Clay Ideas: 13 Projects You Can Make Without a Pottery Wheel.
How to store unfinished polymer clay
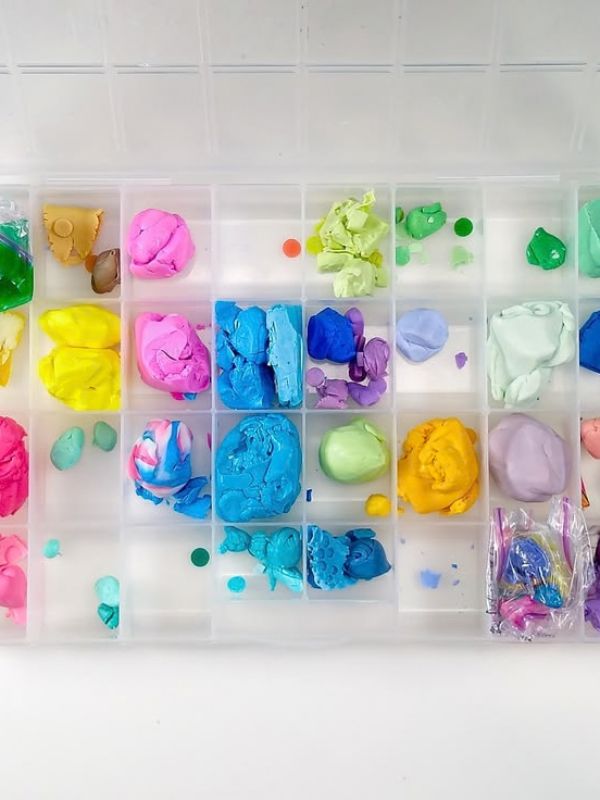
Good storage can make your clay last longer and keep your supplies organized.
Keep unused clay away from excessive heat and direct sunlight.
Store colors separately when necessary to reduce unwanted color transfer.
You can use suitable storage containers or packaging that is compatible with polymer clay.
Labeling colors is also helpful.
Once you have several similar shades, it can become surprisingly difficult to remember which one you used for a particular project.
A simple label can save you time.
What should you do with leftover clay?
Never assume leftover clay has to be thrown away.
Scraps can become useful.
You can combine small pieces into:
- Marble effects
- Color experiments
- Miniature patterns
- Practice shapes
- Texture tests
- Decorative accents
Keep scraps in a separate container.
Later, you can use them for practice.
This is especially helpful when learning polymer clay for beginners, because practice does not always need to use fresh clay.
Not sure what to do with leftover clay? What Can You Make With a Lump of Clay? 11 Easy Clay Ideas Worth Trying gives you simple projects to start with.
How to create a simple marble effect
Marbling is one of the easiest ways to make a basic clay project look interesting.
Choose two or more colors.
Condition them separately.
Roll each color into a thin strand.
Place the strands together.
Twist them gently.
Then roll the combined clay lightly.
Do not overmix.
If you continue mixing for too long, the colors may blend into one shade instead of maintaining visible swirls.
Once you like the pattern, flatten the clay.
You can use the sheet for charms, decorative pieces, or other simple projects.
How to combine colors without making muddy clay
Color mixing is fun, but beginners often mix too aggressively.
Start with small quantities.
If you want a lighter color, add a small amount of white.
If you want a darker shade, add a little of a darker color.
Mix gradually.
This gives you more control.
For example, instead of combining an entire block of blue and white, start with a small piece of blue and add white little by little.
That way, you can stop when you reach the shade you want.
How to make your pieces look cleaner
A polished project is not always about advanced skill.
Often, it comes down to small details.
First, keep your work surface clean.
Next, handle light colors carefully.
Then, check the edges before curing.
After that, inspect the piece from different angles.
Finally, remove obvious fingerprints or unwanted marks before baking.
These habits can make even simple designs look more intentional.
For anyone learning polymer clay for beginners, neatness is a skill worth practicing from the start.
A simple seven-day polymer clay practice plan
If you are unsure how to practice, give yourself one week.
You do not need to create a masterpiece every day.
The goal is to build control.
Day 1: Learn conditioning
Spend your session conditioning clay.
Practice folding, rolling, and pressing.
Do not worry about creating a finished project.
Your goal is simply to understand the texture.
Day 2: Practice basic shapes
Make:
- Balls
- Logs
- Disks
- Ovals
- Small coils
Repeat each shape several times.
Notice how your hands affect the clay.
Day 3: Practice texture
Create a flat piece.
Try different textures.
Compare shallow impressions with deeper ones.
Choose the textures you like.
Day 4: Practice color mixing
Take small pieces of two colors.
Mix them gradually.
Record combinations you like if you want to recreate them later.
Day 5: Make a simple charm
Choose one easy shape.
Keep the design simple.
Focus on smooth edges and consistent thickness.
Fall crafting can also become a keepsake with How to Make Easy Fall Handprint Crafts for Kids That Turn Into Meaningful Keepsakes.
Day 6: Repeat something you already made
This step is important.
Do not always chase a new project.
Make the same charm or bead again.
You will probably notice that the second attempt is easier.
Day 7: Create a small final project
Now combine the skills you practiced.
Make a small decorative piece, charm, bead set, or miniature object.
The project does not need to be complicated.
Your goal is to finish the week with more confidence than you had on Day 1.
How to know when you are ready for harder projects
You do not need to wait until every piece looks perfect.
Instead, look for consistency.
You are ready to move forward when you can:
- Condition clay without much difficulty
- Roll reasonably even sheets
- Make basic shapes
- Attach small pieces carefully
- Control simple color combinations
- Create clean edges
- Follow curing instructions
- Recognize and fix common mistakes
Once these skills become comfortable, you can explore more advanced techniques.
For example, you might eventually try canes, miniature food designs, detailed flowers, figurines, jewelry components, patterned slabs, or more complex sculptures.
The important thing is to increase difficulty gradually.
Beginner project ideas to try next
Once you have practiced the basics, you can branch out.
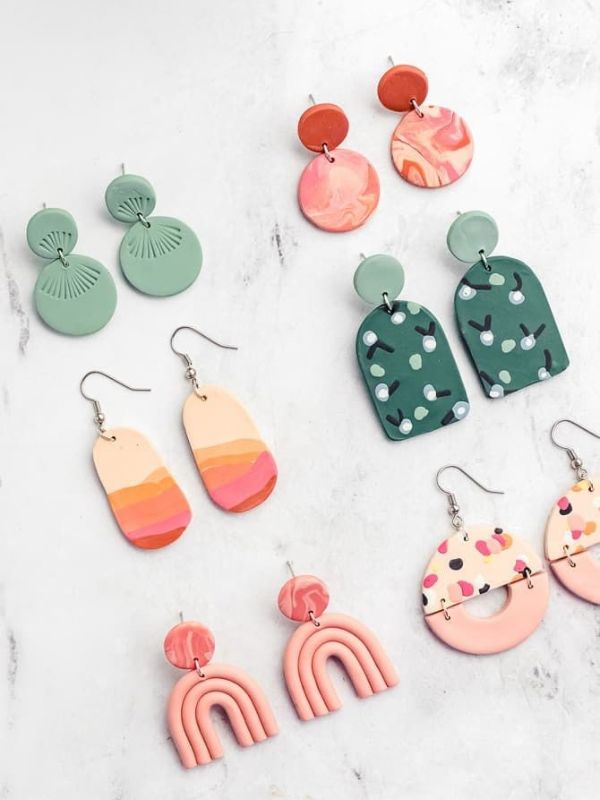
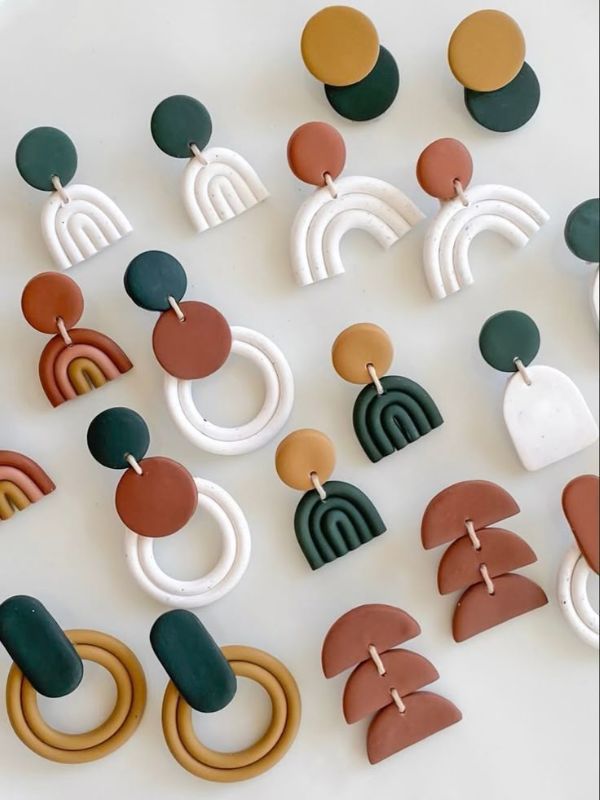
Simple earrings
Small clay earrings are a popular project because they allow you to practice repeated shapes.
You can create matching pairs using:
- Circles
- Arches
- Flowers
- Leaves
- Geometric shapes
Keep both pieces similar in size and thickness.
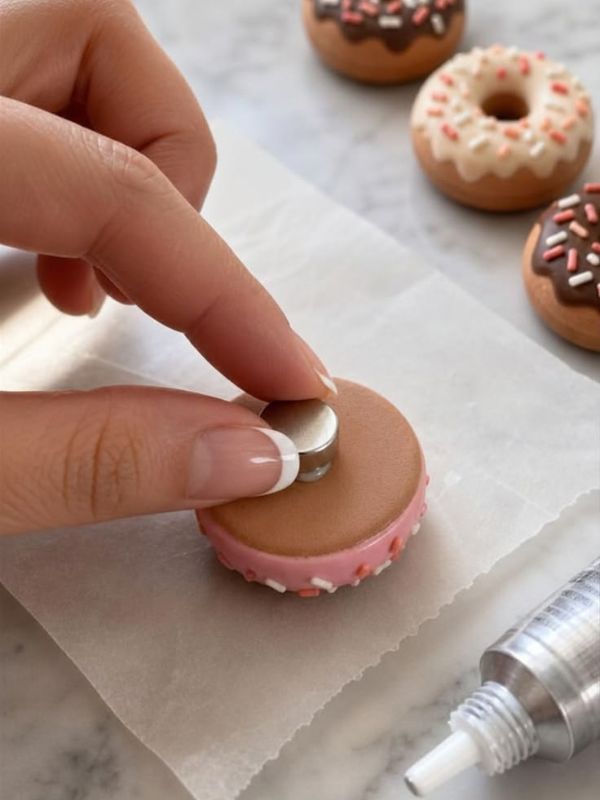
Decorative magnets
Flat clay shapes can become decorative magnets after curing and suitable assembly.
You can make simple:
- Fruits
- Flowers
- Stars
- Letters
- Hearts
- Tiny animals
Use appropriate adhesive and hardware for the project.
Miniature plants
You can practice sculpting leaves, stems, and small pots.
Start with simple shapes.
Do not worry about making them perfectly realistic.
Personalized charms
Create initials, simple symbols, or favorite shapes.
These are useful for practicing small-scale details.
Decorative buttons
Buttons can help you practice consistent shapes and evenly positioned holes.
Remember that craft buttons should be used appropriately for the intended item and securely attached.
How to keep improving without getting frustrated

Crafting can be surprisingly emotional.
One project may turn out beautifully.
The next one may look completely different from what you imagined.
That is normal.
Instead of throwing away every imperfect piece, examine it.
Ask yourself:
- What worked?
- What went wrong?
- Was the clay conditioned enough?
- Did I rush?
- Was the shape too thin?
- Did I add too much detail?
- Did I handle it too much?
This turns mistakes into information.
The more you understand why something happened, the easier it becomes to improve.
That mindset is particularly useful for polymer clay for beginners because progress often comes through small experiments rather than one dramatic breakthrough.
Five Habits That Will Make You a Better Clay Artist
1. Practice Before Starting Important Projects
Before beginning an important project, take some time to practice the technique first. Rather than experimenting on a special gift, test it with scrap clay. This way, you can make mistakes, adjust your approach, and become more confident before working on the final piece.
2. Photograph Your Progress
Additionally, take quick photos of your clay projects as you practice. After a few weeks, look back at those pictures and compare your earlier work with your recent pieces. As a result, you may notice improvements that are difficult to recognize from day to day.
3. Keep a Small Inspiration Folder
Another helpful habit is keeping a folder filled with designs, colors, and ideas that inspire you. However, use these references to spark your creativity rather than copying every detail. Over time, this allows your own artistic style to develop naturally.
4. Learn One Technique at a Time
Meanwhile, avoid trying to master several advanced techniques in one project. Instead, choose one skill, practice it, and become comfortable with it before moving forward. Consequently, learning feels less overwhelming, and your confidence can grow gradually.
5. Keep Your Workspace Organized
Finally, keep your workspace tidy and organized. When your tools and materials are easy to find, you can spend less time searching and more time creating. Moreover, a clear workspace makes it easier to focus and enjoy the crafting process.
How to handle translucent clay
Translucent clay can be beautiful, but it tends to show imperfections.
Fingerprints, dust, and unwanted color transfer may be more noticeable.
Therefore, treat translucent clay as a material that rewards patience.
Keep your hands and workspace clean.
Avoid excessive handling.
Store it carefully.
Most importantly, do not judge your technique based on your first translucent project.
It can be less forgiving than ordinary opaque colors.
A simple beginner checklist
Before starting your next project, run through this checklist.
Before you begin
- Choose a clean workspace.
- Gather only the tools you need.
- Read your clay’s instructions.
- Wash and dry your hands.
- Choose your colors.
- Condition the clay.
While you work
- Handle the clay gently.
- Keep your tools clean.
- Check the shape regularly.
- Avoid adding unnecessary details.
- Keep light-colored clay away from strong pigments.
- Take breaks if your hands become tired.
Before curing
- Inspect the piece.
- Smooth obvious fingerprints.
- Check the edges.
- Make sure attached pieces are secure.
- Confirm the manufacturer’s curing instructions.
After curing
- Let the project cool completely.
- Inspect it carefully.
- Add compatible finishing materials only if needed.
- Store the finished item appropriately.
Following a simple checklist can make the process much less stressful.
When you are ready to move beyond the basics
Once the beginner techniques feel comfortable, you can explore more advanced methods.
You might learn how to create patterned canes.
You could experiment with miniature food.
Another option is detailed floral sculpting.
You may also enjoy making jewelry.
Some creators focus on tiny figurines, while others prefer abstract designs, home decorations, personalized gifts, or functional craft pieces.
There is no single correct direction.
Your style can develop naturally.
The important thing is to build a strong foundation first.
Learning polymer clay for beginners is not about rushing toward the most complicated project you can find. It is about understanding how the material responds to your hands.
Once that understanding grows, more advanced techniques become much less intimidating.
Frequently Asked Questions
Is polymer clay good for complete beginners?
Yes. Polymer clay can be a good craft material for beginners because it stays workable until it is cured. This gives you time to practice shaping and correcting small mistakes.
However, beginners should still learn basic conditioning, shaping, handling, and safe curing practices before attempting complicated projects.
How long does it take to learn polymer clay?
There is no fixed timeline.
You can learn basic shapes during your first few sessions. More detailed techniques can take longer.
The key is consistent practice.
Even short practice sessions can help you develop better control.
Do I need expensive tools to start?
No.
A few basic tools are enough for many beginner projects.
As your skills develop, you can decide which specialized tools are genuinely useful for your style.
Why does my polymer clay keep cracking?
Cracking can happen for several reasons.
The clay may need more conditioning. The piece may also be too thin or handled in a way that puts stress on it.
Start by checking whether the clay is properly conditioned.
Then examine the thickness and construction of the project.
Why is my clay too soft?
Some polymer clay is naturally softer than other varieties.
Warm conditions and extended handling can also make clay softer.
Work with smaller amounts and follow the manufacturer’s recommendations for managing the specific product.
Can I mix different polymer clay colors?
Yes.
Mixing colors is one of the most useful things to learn.
Start with small quantities so you can test the result before using more clay.
Can I mix different polymer clay brands?
Some makers do combine brands, but different products can have different characteristics and curing requirements.
If you want to experiment, test a small amount first and follow the instructions for the products involved.
Can I use polymer clay for food?
Do not assume that a polymer clay item is food-safe.
Craft clay products and finishes may not be designed for food contact.
For that reason, treat decorative dishes and containers as non-food items unless the manufacturer specifically confirms suitability for the intended use.
Does polymer clay dry out?
Polymer clay does not air-dry in the same way as air-dry clay.
However, it can become difficult to work with if stored improperly or if its condition changes over time.
Proper storage and handling can help.
Conclusion
Starting a new craft can feel intimidating, especially when you see beautiful projects made by experienced artists. However, remember that every skilled artist started as a beginner.
Your first clay ball may not be perfectly round, and your first charm may have fingerprints. Similarly, your first color blend might not look exactly as you imagined. Nevertheless, these small imperfections simply mean that you are learning.
So, start small. Practice conditioning the clay, create basic shapes, experiment with textures, and try simple beads or charms. As you continue, your hands will become more confident, and working with clay will begin to feel easier.
Most importantly, you do not need expensive tools, countless colors, or perfect skills to begin. You only need some clay, a suitable workspace, safe curing practices, and patience.
Over time, you will move beyond following instructions and start creating designs based on your own ideas. Ultimately, that is the real beauty of polymer clay for beginners.
Keep practicing, embrace the little mistakes, and allow your creativity to grow with every project.