
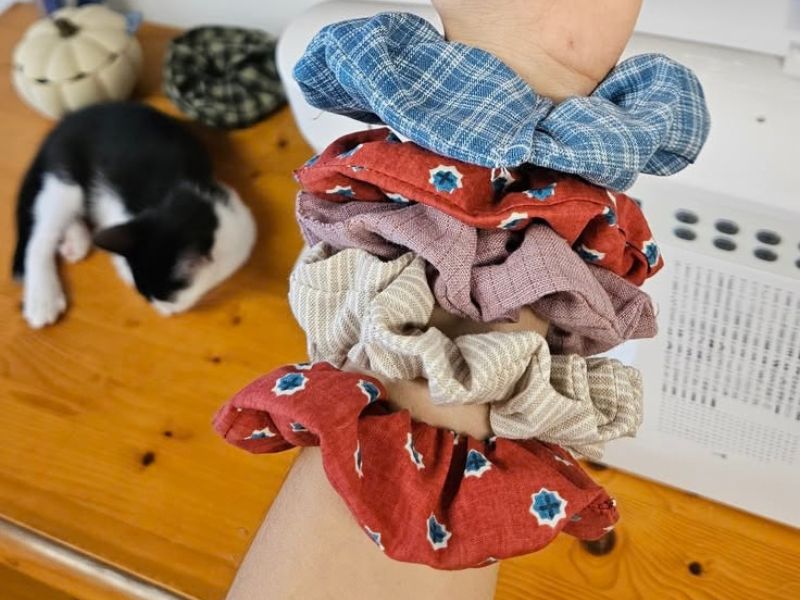
Making your own hair accessories can be much easier than it looks. If you have a small piece of fabric, some elastic, a needle, and thread, you already have most of what you need. In fact, how to sew scrunchies for beginners is one of the easiest sewing projects to try when you are still learning basic sewing skills.
A scrunchie is useful, simple, and quick to make. It also gives you a chance to practice several important sewing techniques. You can learn how to cut fabric, sew a straight seam, work with elastic, turn fabric right side out, and finish an opening neatly. These skills can help you with many other sewing projects later.
The best part is that you do not need a large amount of fabric. A leftover piece from an old sewing project can work well. You can also choose cotton, satin, velvet, linen, or another fabric that is easy to handle. However, beginners may find cotton easier to control.
This guide explains how to sew scrunchies for beginners from start to finish. Each step is broken down into smaller parts, so you can follow along without rushing. You will also learn how to avoid common mistakes and how to make your finished scrunchie look neat.
Whether you are sewing by hand or using a sewing machine, the basic process stays almost the same. So, gather your supplies, clear a small workspace, and let us begin.
Bookmark this How to Make Easy Popsicle Stick Crafts for Kids: 15 Fun DIY Ideas
How to Sew Scrunchies For Beginners: A Simple Step-By-Step Tutorial
Step 1. Gather everything you need before sewing
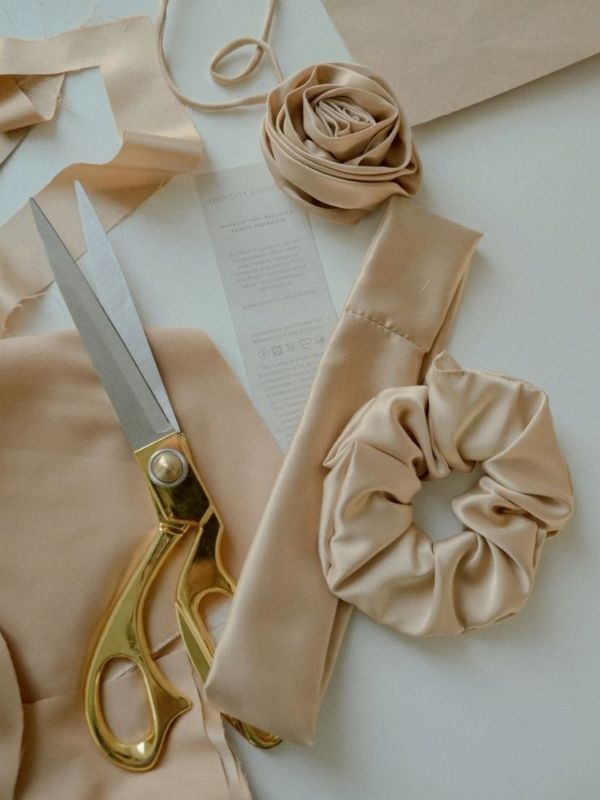
Good preparation makes sewing much easier. Before learning how to sew scrunchies for beginners, place all your materials close to you. This saves time and helps you stay focused on the project.
You do not need a large sewing kit. A few basic supplies are enough for a simple scrunchie. If you are using a sewing machine, make sure it is threaded and ready before you begin.
For a beginner project, choose tools that are comfortable to use. Sharp fabric scissors will give you cleaner edges. A ruler or measuring tape will also help you cut a straight strip.
Basic materials for one scrunchie
You will need:
- A piece of fabric
- Elastic
- Sewing thread
- A needle or sewing machine
- Fabric scissors
- Measuring tape or ruler
- Safety pin or bodkin
- Sewing pins or clips
- An iron
- An ironing surface
A fabric strip around 10 to 12 inches long and 3 to 4 inches wide works well for a standard scrunchie. You can change the size later.
For the elastic, about 7 to 9 inches is a useful starting point. The exact length depends on how tight you want the finished scrunchie.
If you are practicing how to sew scrunchies for beginners, avoid starting with expensive fabric. Use a simple cotton scrap first. That way, mistakes will not feel stressful.
Check out our Coil Clay Ideas: 13 Projects You Can Make Without a Pottery Wheel
Step 2. Choose the right fabric for your first scrunchie
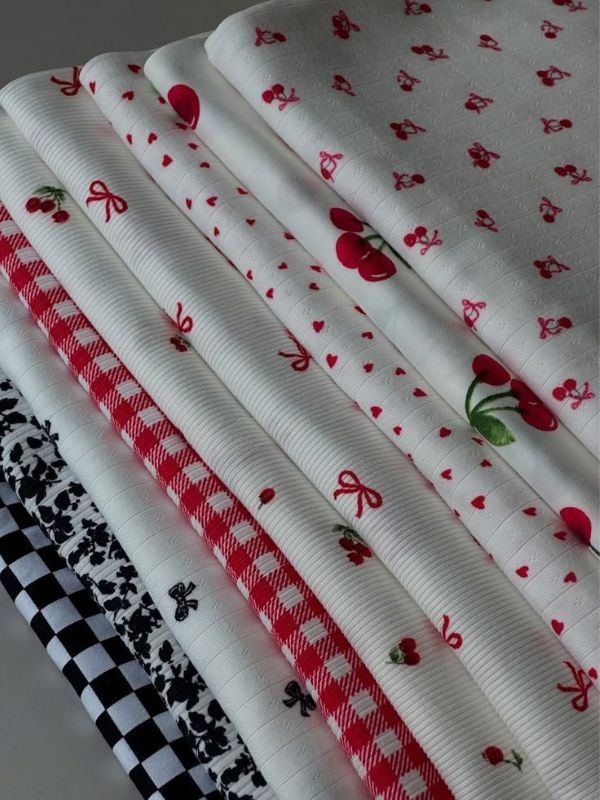
Fabric choice can make a big difference when you are learning how to sew scrunchies for beginners. Some fabrics are much easier to sew than others.
Cotton is usually a good starting choice. It does not slide around too much, and it is easy to press. It also holds its shape well while you sew.
Lightweight cotton can create a soft and flexible scrunchie. Medium-weight cotton can create a slightly fuller result. Both options are useful for practice.
Satin and silk can also make beautiful scrunchies. However, they may move while you sew. For that reason, they can be better once you feel more comfortable with basic sewing.
Check your fabric before cutting
Look at your fabric carefully before you start. Check for stains, holes, loose threads, or damaged areas.
If the fabric is very wrinkled, press it first. A smooth fabric is easier to measure and cut.
You should also check whether the fabric stretches. Most beginner scrunchies are made with woven fabric, which has little stretch.
If you want to practice how to sew scrunchies for beginners with a special fabric, make one test scrunchie first. This helps you understand how the material behaves.
Do not worry if your first scrunchie is not perfect. The goal is to learn the process.
If your child enjoys making crafts that could become useful products, check out How to Make Crafts: 20 Easy Crafts to Sell and Make Profits From Home If You Need Extra Income for more handmade project inspiration.
Step 3. Measure and cut the fabric strip

Accurate cutting is an important part of how to sew scrunchies for beginners. A clean fabric strip makes the rest of the project easier.
For a basic scrunchie, cut a rectangle around 10 to 12 inches long and 3 to 4 inches wide. You can use 11 inches by 4 inches as a simple starting measurement.
A longer strip can create more gathers. A wider strip can create a fuller scrunchie.
Place the fabric flat on your work surface. Smooth out any wrinkles before measuring.
Mark the fabric carefully
Use a ruler and fabric marker or chalk to mark the measurements. Make sure your lines are straight.
Cut slowly instead of rushing. Keep your scissors close to the fabric surface as you cut.
If you are making several scrunchies, you can create a paper template. Place the template on your fabric and trace around it.
This can make how to sew scrunchies for beginners much faster when you want to make several pieces.
Try to keep every strip the same size if you want matching scrunchies. Small differences are fine, but large differences can change the final shape.
Looking for handmade gift you can make, cgeck out this simple ideas you can make yourself How to Make Handmade Gifts on a Budget: Simple Ideas Anyone Can Make
Step 4. Fold the fabric with the right sides together

Now that your fabric is ready, you can begin forming the tube. This is another important part of how to sew scrunchies for beginners.
Place your fabric on the table with the printed or attractive side facing upward. Then fold the long edges together so the right sides touch.
The fabric should now form a long, narrow rectangle with the wrong side facing outward.
Line up the long edges carefully. Uneven edges can make the sewing line harder to follow.
Pin or clip the long edge
Use sewing pins or clips to hold the long edges together.
If you are using pins, place them across the fabric rather than directly along the sewing line. This makes them easier to remove as you sew.
You do not need to use many pins. A few well-spaced pins are enough for a short piece of fabric.
Check the edges again before sewing. Make sure the folded fabric has not shifted.
This simple preparation step makes how to sew scrunchies for beginners much easier because the fabric stays in place.
Easy and budget-friendly crafts ideas How to Make Rainbow Crafts at Home With Kids
Step 5. Sew along the long edge
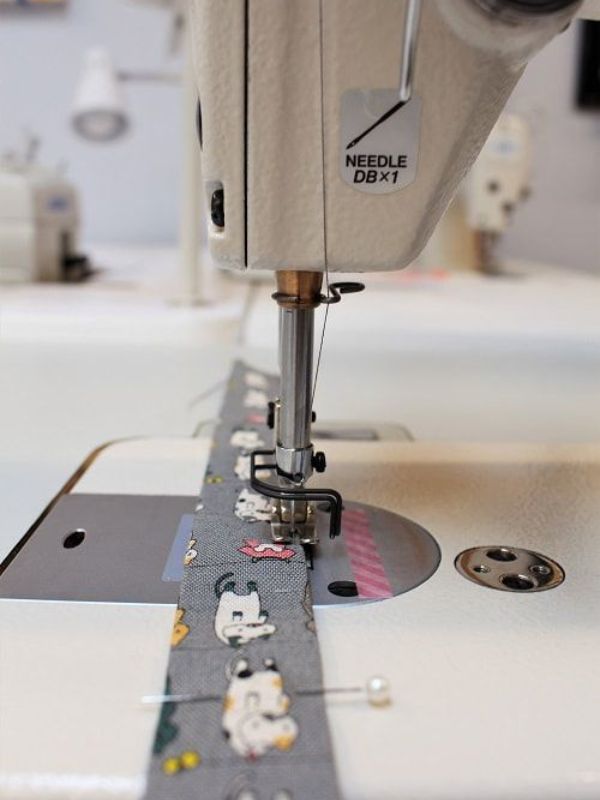
The next stage is sewing the long edge to create a fabric tube. This is where the main sewing begins.
If you are using a sewing machine, use a straight stitch. A medium stitch length is usually suitable for ordinary cotton.
If you are sewing by hand, use small, even stitches. Keep your stitches close enough together to create a secure seam.
Keep the seam straight
Start near one short end and sew along the long edge.
Do not sew across the short ends yet. Those areas will be used later when the elastic is added.
Keep the seam allowance fairly small and even. Around ¼ inch is a useful starting point.
If you are using a sewing machine, backstitch at the beginning and end. This helps prevent the seam from opening.
If you are learning how to sew scrunchies for beginners by hand, make a few extra stitches at both ends of the seam.
When you finish sewing, inspect the seam. If you notice a large gap, sew over that section before moving forward.
When a store-bought gift feels too impersonal, How to Make Meaningful DIY Gifts for Friends When You Don’t Know What to Give Them That Actually Last offers thoughtful handmade alternatives.
Step 6. Turn the fabric tube right side out

After sewing the long seam, your fabric will look like a narrow tube. The next step is turning it right side out.
This part of how to sew scrunchies for beginners may feel tricky at first, but there are simple ways to make it easier.
You can use a safety pin, turning tool, or even a small object designed for sewing. The goal is to pull one end of the tube through the inside.
Use a safety pin to turn the tube
Attach a safety pin to one end of the fabric tube.
Make sure the pin is securely closed. Then push the pin into the tube and begin moving it through the fabric.
Hold the fabric behind the pin and gently pull the pin forward. Continue working until the entire tube turns right side out.
Do not pull too hard. If you use too much force, you may damage the seam.
Once the tube is turned, gently push out the corners. Your fabric should now show the right side.
Learning this technique is useful beyond how to sew scrunchies for beginners. It can also help when sewing straps, fabric tubes, small bags, and other projects.
Save special childhood moments in one place with How to Create a DIY Memory Box for Kids That Preserves Their Favourite Childhood Moments.
Step 7. Press the fabric tube for a neat finish

Pressing may seem like a small detail, but it can make your finished scrunchie look much better.
After turning the tube, the fabric may look slightly twisted or wrinkled. An iron can help smooth it out.
Press without flattening the whole shape
Place the fabric tube on your ironing surface. Press it gently.
You do not need to make the tube completely flat. The goal is simply to remove wrinkles and help the fabric sit neatly.
Check the temperature setting on your iron. Different fabrics need different heat levels.
Cotton can usually handle more heat than delicate fabrics. If you are unsure, use a lower setting first.
Good pressing is an important part of how to sew scrunchies for beginners because it gives the finished accessory a cleaner appearance.
Do not skip pressing if your fabric is very wrinkled. A few seconds of careful ironing can make the next step easier.
Add a small handmade touch to shelves, desks, or windowsills with Mini Terra Cotta Pots Crafts for Cute Budget-Friendly DIY Home Decor.
Step 8. Measure and prepare the elastic
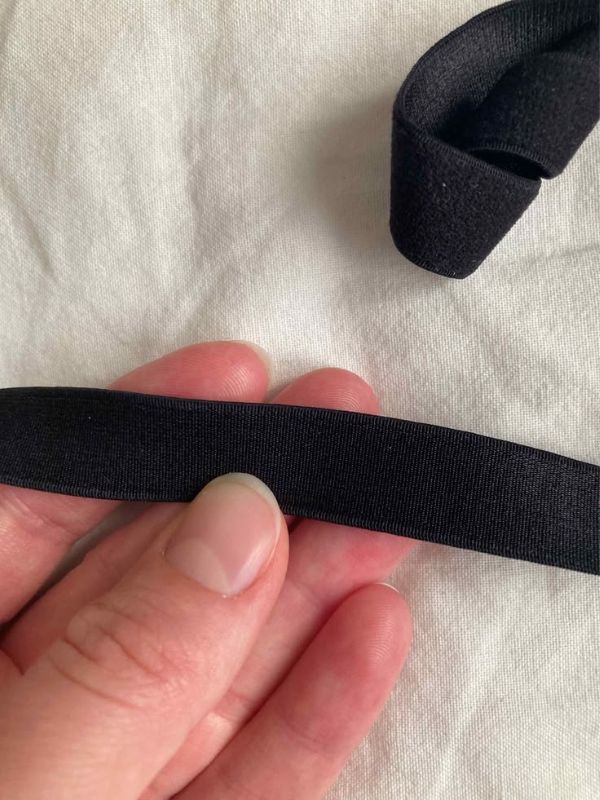
Now you need to prepare the elastic that will make the scrunchie stretch.
The elastic is what turns your fabric tube into a usable hair accessory. This is a key part of how to sew scrunchies for beginners.
For a standard scrunchie, start with around 7 to 9 inches of elastic. You can adjust this based on the size and stretch of the elastic.
If the elastic is very stretchy, you may need less. If it has less stretch, you may need more.
Choose a comfortable elastic length
Wrap the elastic loosely around your wrist or compare it with the size of a hair tie you already like.
Do not pull the elastic too tightly while measuring. It needs enough length to stretch around hair comfortably.
Cut the elastic using sharp scissors.
Before moving on, check that the elastic is not twisted. A twisted elastic can make the finished scrunchie uncomfortable and uneven.
When you understand this part of how to sew scrunchies for beginners, you can experiment with different elastic lengths to create different results.
Crafts for Seniors in Assisted Living When the Days Feel Long and the Usual Activities Get Old offers more calm, low pressure project ideas worth trying.
Step 9. Thread the elastic through the fabric tube
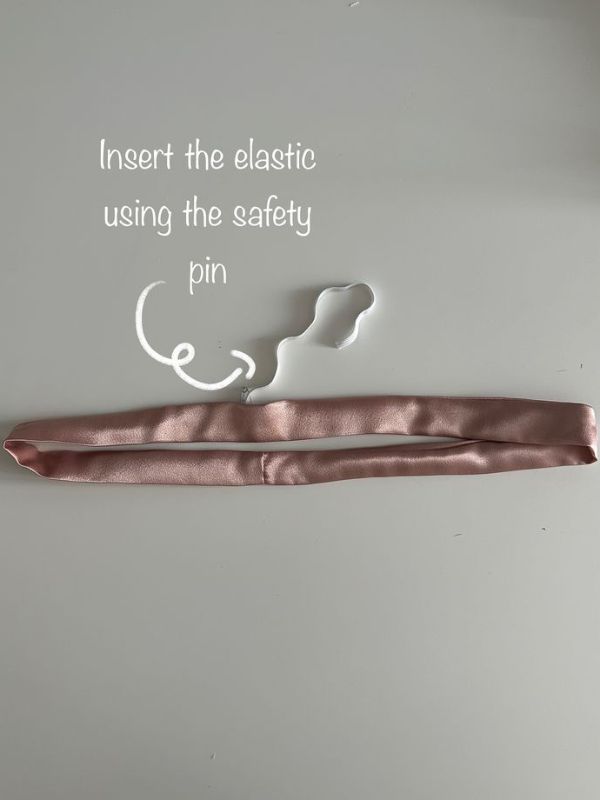
This step brings the scrunchie together. You will pull the elastic through the fabric tube.
Attach one end of the elastic to a safety pin. Make sure the pin is firmly closed.
Insert the pin into one end of the fabric tube. Then guide it through the tube.
Pull the elastic carefully
Use one hand to push the safety pin forward through the fabric. Use the other hand to gather the fabric behind it.
Keep going until the safety pin comes out of the opposite opening.
Be careful not to let go of the other end of the elastic. If both ends disappear inside the tube, you will have to retrieve them.
Once the elastic is through, hold both ends firmly.
The fabric should now gather along the elastic. This is when your project will start to look like a real scrunchie.
If the fabric gathers unevenly, spread it along the elastic before joining the ends.
This threading technique is one of the most useful skills in how to sew scrunchies for beginners.
Got air-dry clay sitting around with no clear plan? Air Dry Clay Crafts for When You Have Clay but No Idea What to Make—For Keeps or Display gives you plenty of ways to put it to use.
Step 10. Join the elastic ends securely
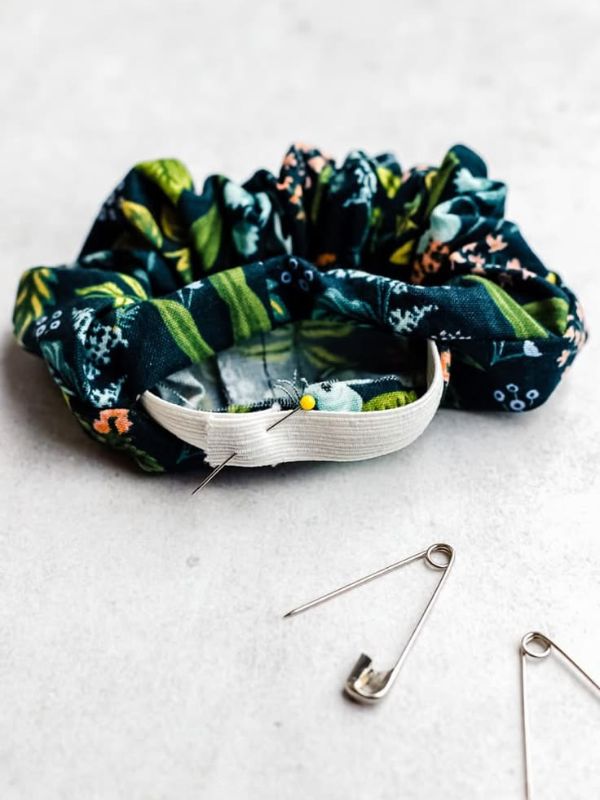
Your elastic is now inside the fabric tube. The next step is joining the two elastic ends.
This connection needs to be secure. If it comes apart, the scrunchie will lose its shape.
Overlap the elastic before sewing
Place the two elastic ends on top of each other.
Overlap them by around ½ inch. Hold them firmly with your fingers or a small clip.
Sew across the overlapping section several times. You can sew a straight line, then sew another line for extra security.
If you are sewing by hand, make several strong stitches. Do not rely on one or two stitches.
Check the connection by gently pulling the elastic. It should stay joined.
When learning how to sew scrunchies for beginners, this is one place where taking a little extra time can prevent problems later.
Avoid pulling the elastic as hard as possible. A gentle test is enough.
Patience pays off with other small, layered crafts, an idea explored further in What Can You Make With a Lump of Clay? 11 Easy Clay Ideas Worth Trying.
Step 11. Close the fabric opening

The elastic is joined, but the fabric tube still has an opening. You now need to close it.
This is the final sewing section of how to sew scrunchies for beginners.
Bring the two fabric openings together. Tuck the raw edges slightly inward.
The goal is to hide the unfinished fabric edges.
Use a small neat stitch
A small hand stitch works well for closing the opening.
Fold the raw edges inside the tube. Hold them together with your fingers or a clip.
Sew around the opening with small stitches. Try to keep the stitches close together.
For a cleaner finish, you can use a ladder stitch. This stitch helps bring the folded edges together without creating a large visible seam.
When you finish, secure the thread with a knot. Trim the excess thread carefully.
If you are using a sewing machine, you can also close the opening with a short straight seam. However, hand stitching often gives a cleaner finish for this small area.
This finishing technique is an important part of how to sew scrunchies for beginners because it helps the accessory look polished.
The idea of starting small before scaling up as a beginner applies well to gift crafting in general, similar to the approach shown in What Can I Embroider as a Gift? Easy Personalized Embroidery Ideas for Every Occasion.
Step 12. Shape and inspect your finished scrunchie
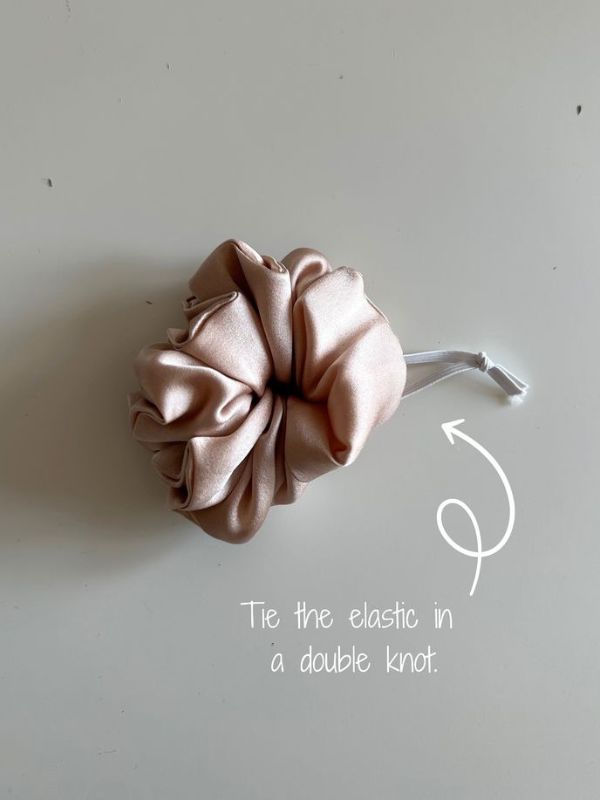
You are almost finished. Now it is time to shape the scrunchie and check your work.
Gently move the fabric around the elastic. Spread the gathers so they are distributed evenly.
This is where you can see whether your measurements and stitching worked well.
Check the important details
Look at the entire scrunchie.
Check these areas:
- Is the fabric gathered evenly?
- Is the elastic secure?
- Is the final opening completely closed?
- Are there loose threads?
- Does the scrunchie stretch properly?
- Are there any large gaps in the seams?
If you find a loose thread, trim it carefully.
If the gathers are uneven, move the fabric around the elastic until the scrunchie looks balanced.
If one area has too much fabric, spread it toward the thinner areas.
These small adjustments can make a big difference.
When practicing how to sew scrunchies for beginners, do not immediately throw away a project that looks slightly uneven. Many small problems can be fixed without starting again.
Hand Crafts for Seniors With Limited Mobility That Are Creative, Practical, and Worth Making for gentle, low pressure project ideas that pair nicely with a slower crafting pace.
Step 13. Test the scrunchie and make improvements

The final step is testing your scrunchie. This helps you learn what worked and what you should change next time.
Place the scrunchie around your hair gently. Check whether it stretches enough and holds the hair comfortably.
Do not pull it excessively. A simple test is enough.
Use your first scrunchie as a learning project
Your first scrunchie does not need to be perfect.
Perhaps the fabric strip was too wide. Maybe the elastic was too short. You may also notice that your stitches need to be smaller.
Write down anything you want to change.
For your next scrunchie, you can try a different fabric size, a different elastic length, or another fabric type.
This is how how to sew scrunchies for beginners becomes easier with practice. Each scrunchie gives you another chance to improve your cutting, sewing, measuring, and finishing skills.
Once you are comfortable with the basic method, you can make several scrunchies in one sitting.
You can also use different fabrics to create sets. For example, you could make matching scrunchies for different outfits or create a small collection using leftover fabric.
Younger children may enjoy a simplified version using larger stones and safer, washable glue, similar in spirit to Clay Crafts for Kindergarten Kids That Are Easy, Fun, and Great for Little Hands. Larger pieces are also easier for small hands to grip and place correctly.
Common mistakes to avoid when sewing scrunchies
Learning how to sew scrunchies for beginners is easier when you know which mistakes to avoid. Most beginner problems are simple to fix.
Cutting the fabric unevenly
Uneven cutting can make the tube difficult to sew.
Take your time when measuring. Use a ruler or measuring tape.
A straight fabric strip will give you a cleaner result.
Using an elastic that is too short
Very short elastic may make the scrunchie too tight.
Start with a reasonable length. Test the stretch before cutting the final piece.
You can adjust the measurement as you make more scrunchies.
Forgetting to secure the seams
A seam can open if the stitches are not secured.
Use backstitching on a sewing machine. If you sew by hand, add a few extra stitches at the beginning and end.
Pulling the fabric too much
Do not stretch the fabric while sewing the long seam.
Let the fabric move naturally under the needle.
This helps prevent a wavy or distorted seam.
Making the fabric tube too narrow
A very narrow tube can be difficult to turn.
If you are new to sewing, use a slightly wider fabric strip. Once you become more confident, you can experiment with narrower designs.
Forgetting to distribute the gathers
After inserting the elastic, the fabric may bunch up in one area.
Move the fabric along the elastic until the gathers are even.
This simple step improves the final appearance.
Easy ways to customize your handmade scrunchies
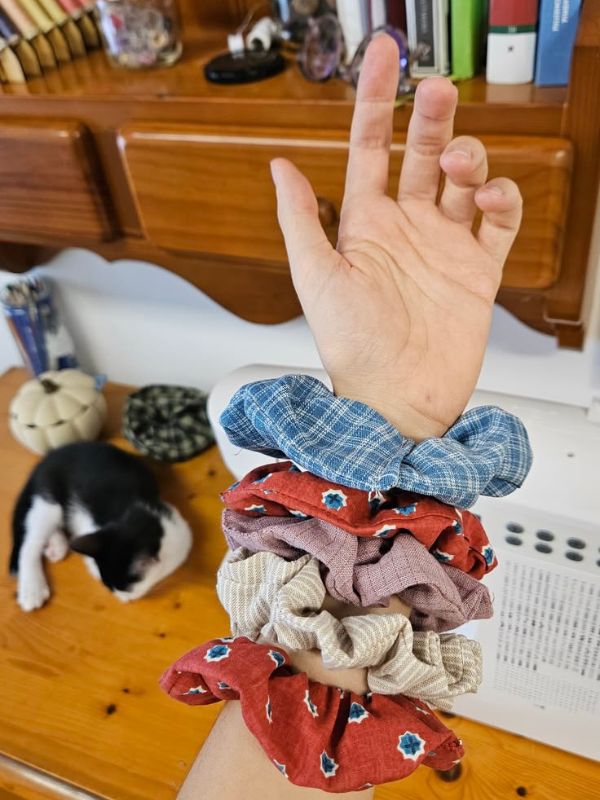
Once you understand how to sew scrunchies for beginners, you can change the basic design in many ways.
Try different fabric types
Cotton is great for practice, but you can also try satin, velvet, linen, or lightweight patterned fabrics.
Each material creates a different look.
Make oversized scrunchies
Use a longer and wider fabric strip if you want a larger scrunchie.
Oversized scrunchies usually have more fabric and create fuller gathers.
Make smaller scrunchies
For a smaller accessory, reduce the fabric width and length.
Keep the measurements balanced so the scrunchie can still cover the elastic properly.
Add a simple bow
You can make a small fabric bow and attach it to the finished scrunchie.
This creates a different style without changing the basic sewing method.
Use leftover fabric
Scrunchies are useful for fabric scraps.
Small pieces that are too little for a larger project may still work perfectly for a scrunchie.
This makes how to sew scrunchies for beginners a practical way to use leftover materials instead of throwing them away.
How to make sewing scrunchies easier
If you are still learning how to sew scrunchies for beginners, there are several ways to make the process smoother.
Prepare several fabric strips at once
If you want to make multiple scrunchies, cut your fabric pieces together.
Measure each piece before cutting.
This saves time and helps you create matching scrunchies.
Keep your sewing area organized
Place your scissors, thread, pins, elastic, and ruler within easy reach.
An organized workspace helps you avoid interruptions.
Practice straight stitching
Before making several scrunchies, practice sewing straight lines on fabric scraps.
This helps you become more comfortable with your sewing machine or needle.
Press as you work
Do not wait until the end to use your iron.
Pressing small sections during the process can help the fabric stay neat.
Do not rush
Fast sewing is not always better sewing.
If you are learning how to sew scrunchies for beginners, focus on accuracy first. Speed will come naturally with practice.
Frequently Asked Questions
1. Is sewing a scrunchie easy for beginners?
Yes. A scrunchie is a beginner-friendly sewing project because it uses simple materials and basic sewing techniques.
The project teaches several useful skills. You learn how to measure fabric, sew a seam, turn a fabric tube, insert elastic, and close an opening.
That is why how to sew scrunchies for beginners is a useful project for someone who wants to practice basic sewing.
2. What fabric is best for a beginner scrunchie?
Cotton is one of the easiest choices for beginners.
It is stable, easy to cut, and usually easy to sew. It also does not slide around as much as some smooth fabrics.
Once you feel confident, you can try satin, velvet, linen, or other fabrics.
If you are learning how to sew scrunchies for beginners, start with fabric that is easy to control.
3. How much fabric do I need to sew one scrunchie?
A common starting size is around 10 to 12 inches long and 3 to 4 inches wide.
However, you can change these measurements based on the style you want.
A longer strip creates more gathers. A wider strip creates a fuller scrunchie.
If you are practicing how to sew scrunchies for beginners, 11 by 4 inches is a simple size to test.
4. How long should the elastic be for a scrunchie?
Around 7 to 9 inches is a useful starting range for standard scrunchies.
However, the best length depends on the elastic and the amount of stretch you want.
You can test the elastic before sewing it into the fabric.
When learning how to sew scrunchies for beginners, make a test scrunchie first. Then adjust the elastic length for your next project.
5. Can I sew a scrunchie by hand?
Yes. You do not need a sewing machine.
Hand sewing can work well for a scrunchie because the project is small.
Use small, secure stitches and take your time.
A sewing machine can make the process faster, but it is not required for how to sew scrunchies for beginners.
6. Do I need a sewing machine to make scrunchies?
No. A needle and thread are enough.
A sewing machine is helpful if you want to make many scrunchies quickly. However, beginners can learn the basic method by hand.
If you are starting how to sew scrunchies for beginners, choose the sewing method that feels most comfortable.
7. Why does my scrunchie keep coming apart?
The elastic connection or fabric seam may not be secure.
Check the elastic join first. It should have several strong stitches.
Then check the fabric seam for gaps.
When learning how to sew scrunchies for beginners, securing the beginning and end of each seam can prevent many problems.
Conclusion
Learning how to sew scrunchies for beginners does not have to feel complicated. With a small piece of fabric, elastic, thread, and a few basic sewing tools, you can create a useful hair accessory from scratch.
The process also teaches skills that you can use for other sewing projects. You practice measuring, cutting, sewing straight seams, turning fabric, inserting elastic, and closing openings.
Start with cotton if you are new to sewing. It is easier to control and gives you room to practice. Measure your fabric carefully, keep your stitches secure, and take your time with the elastic.
Most importantly, do not expect your first scrunchie to look perfect. Small mistakes are part of learning. Each new attempt can help you become more comfortable with your sewing tools.
Once you understand how to sew scrunchies for beginners, you can experiment with different fabrics, sizes, colors, and designs. You can also use leftover fabric to create new pieces without buying a lot of supplies.
So, gather your materials and start with one simple scrunchie. After that first successful project, you may find that sewing more becomes much easier and much more enjoyable.