Learn How to Create a DIY Memory Box for Kids That Preserves Their Favourite Childhood Moments.
Children grow up faster than any parent is ever truly ready for. One minute you’re folding impossibly tiny socks. The next, you’re signing permission slips for school trips. The small, ordinary things a lopsided drawing of the family, a handprint stamped in bright paint, the birthday card written in phonetic spelling, they slip away quietly unless you make a real point of holding onto them.
That’s exactly what a DIY memory box for kids is for. Not a complicated project and not an expensive one. Just a dedicated, personal space where the best little pieces of your child’s childhood actually get preserved instead of accidentally landing in the recycling bin.
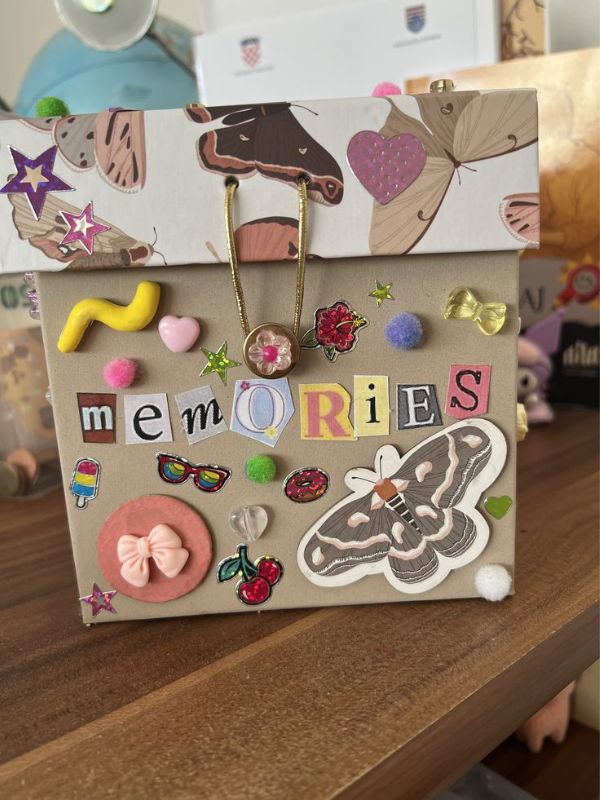
So even if you’re making one for your own child, gifting one to a new parent, or starting a set for every child in the family, this guide has everything you need. A well-made DIY memory box for kids costs very little but means everything especially years from now when you crack it open together.
Before you dive in, check out our How to Make Easy Fall Handprint Crafts for Kids That Turn Into Meaningful Keepsakes one of the most beautiful first keepsake pieces you can tuck straight into a memory box from day one.
Why a DIY Memory Box for Kids Is Worth Making
There’s something different about holding a physical object. Scrolling through a phone gallery is convenient, but picking up a folded note where your child wrote their name for the first time that’s a completely different experience. One you can feel.
A DIY memory box for kids turns scattered keepsakes into an actual collection. A hospital bracelet, a drawing of “our house,” a shell from a summer trip that seemed ordinary at the time, they sit together as a story. And stories need a home to live in.
Beyond the sentimental value, making the box is also a genuinely enjoyable project. It doesn’t take advanced craft skills. You don’t need a big budget. Most parents end up loving the making just as much as the filling.
If you enjoy hands-on creative projects and want more ideas beyond this one, our post on Creative DIY Crafts for Adults: 20 Fun Crafts to Try When You’re Bored at Home has plenty of inspiring ideas for when you’re in the making mood.
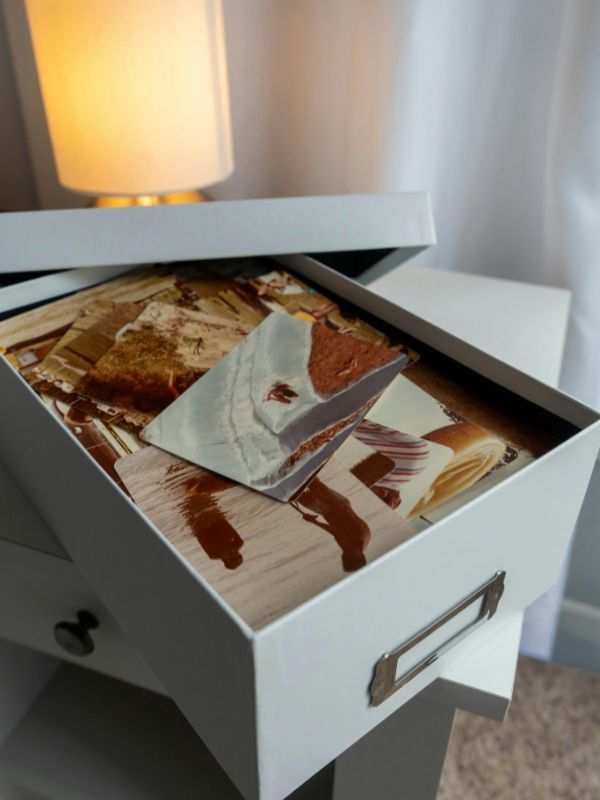
There’s also a real benefit for children who get involved. Being asked which drawing is worth keeping gives a child a quiet sense of pride. Their things, their tiny treasures matter enough to be stored carefully. That message stays with them.
For more ideas on supporting young children through tactile, meaningful activities, our post on Sensory Activities for Nursery Children Using Everyday Items to Support Early Learning is a wonderful companion read for parents of little ones.
What to Keep Inside Your DIY Memory Box for Kids
The contents of a thoughtful DIY memory box for kids look different for every family and that’s exactly the point. But these categories give you a solid, flexible starting point.
Handprints and Footprints
Nothing captures how small they once were quite like an actual handprint. Stamp them in paint or clay each year from birth onward. You’ll have a visual record of growth that no height chart can come close to matching.
Artwork and Drawings
You can’t keep everything they create, and honestly, you shouldn’t try. Instead, choose two or three pieces per year that genuinely reflect where they were at that particular age. A drawing of the family from age three looks completely different from one made at seven and both deserve a home.
Photographs
Print a small selection of physical photos each year rather than relying entirely on digital albums. A photo of their first birthday cake, a candid from a family holiday, a picture with a nursery best friend — a visual timeline adds so much to the overall story of the box.

Nature Finds and Pressed Botanicals
Shells, smooth river stones, pressed autumn leaves, dried wildflowers children are natural collectors, and their outdoor finds translate beautifully into keepsake material. Laminate anything delicate so it survives long-term storage without crumbling.
School Milestones
A class photo from each school year. An early piece of their own writing. Their first report card. These quietly document an entire school career, and you’ll be enormously glad you held onto them when your child is grown.
Meaningful Keepsake Crafts
Some handmade projects deserve more than the recycling bin. A hand-painted card made for a grandparent, or a craft from an activity they loved, tells its own quiet story about who they were at that particular age.
Looking for a meaningful, story-based craft project that produces exactly the kind of keepsake worth preserving? Check out our Daniel and the Lion Den Craft: An Easy Bible Activity That Helps Kids Remember the Story the kind of hands-on piece that belongs in a memory box for years to come.
Small Physical Keepsakes
A hospital bracelet. A baby tooth in a labelled envelope. A button from the coat they grew out of before you were ready. These tiny objects carry enormous emotional weight while taking up almost no space.
Letters from You
One of the most powerful additions to any memory box is a short, handwritten letter written each year, what made you laugh that year, what they were obsessed with, what you were proudest of. When they read these as adults, nothing in the box will mean more.
Choosing the Right Box for Your DIY Memory Box for Kids
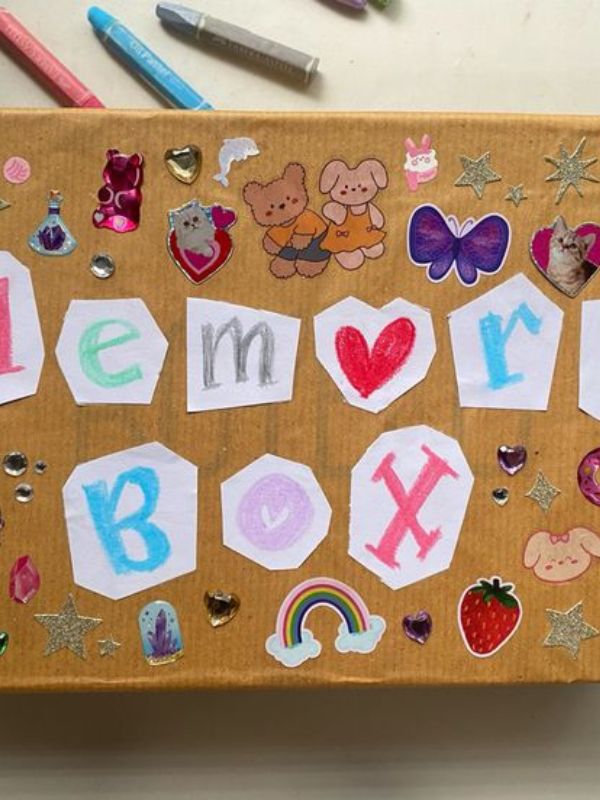
The container sets the whole tone. Your DIY memory box for kids doesn’t need to be expensive or elaborate. But it does need to be sturdy, the right size, and something that will last for years.
Wooden Keepsake Box
A wooden box is the most popular choice, and for good reason. It’s durable, it paints and personalizes beautifully, and it has a natural warmth that plastic storage simply can’t replicate. A medium craft store wooden box is usually the perfect starting point.
Want to take your wooden box to another level? Our post on Wood Burning Craft Ideas: How to Make Beginner Friendly Projects You Can Display or Sell walks you through how to personalize a wooden box with your child’s name, a meaningful illustration, or a birth year using a pyrography pen with results that look genuinely custom.
Decorated Shoebox
A sturdy shoebox works surprisingly well, especially for younger children. Cover it with scrapbook paper or patterned fabric, add a ribbon and a hand-lettered label, and it becomes something genuinely lovely. The size is also just right for one year’s worth of additions.
Vintage Suitcase or Decorative Tin
Small vintage suitcases and decorative tins have charm built right in. They’re roomy enough to hold several years’ worth of memories and look beautiful on a shelf without needing much decoration at all. Charity shops and online marketplaces often have great finds.
Fabric-Covered Box
A fabric-covered box made from a cardboard base is a budget-friendly option full of personality. Choose a fabric that reflects your child’s interests and apply it with decoupage glue for a smooth, polished result.
For beautiful textured fabric effects that elevate the look of any handmade box, our post on Textured Crochet Stitches You’ll Actually Want to Use for Your Next DIY Project gives you a gorgeous range of techniques to work with when decorating or lining your box.
Essential Supplies for Your DIY Memory Box for Kids
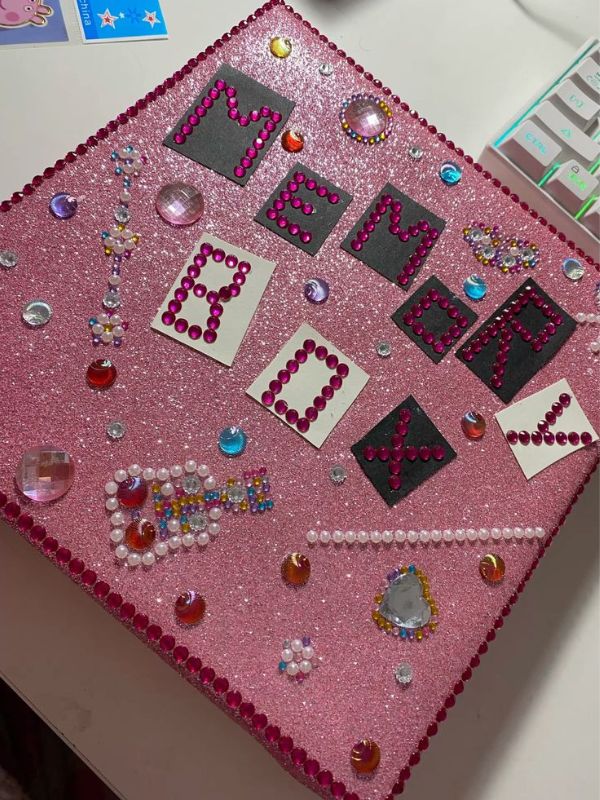
Before you start your DIY memory box for kids, gather these basic materials. Most are inexpensive and easy to find at Dollar Tree, Walmart, or any craft store.
Materials Needed
- A wooden, cardboard, or shoebox in the right size for your child’s age
- Acrylic paint in your child’s favourite colours
- Mod Podge or decoupage glue
- Scrapbook paper, decorative tissue paper, or fabric scraps
- Foam stamps or alphabet stamps
- Hot glue gun and glue sticks
- Ribbon, twine, or decorative trim
- Chalk marker or permanent pen for labelling
- Clear protective sealant spray (for wooden boxes)
- Archival-quality zip bags and envelopes for fragile items inside
- Photos, stickers, and personal decorative elements
If you enjoy making handmade projects using collected natural materials, our post on Outdoor Crafts for Kids: Fun and Easy Summer DIY Ideas is full of nature-inspired projects that turn outdoor finds into keepsake-worthy pieces your child will actually want to keep.
Safety Tips Before You Begin
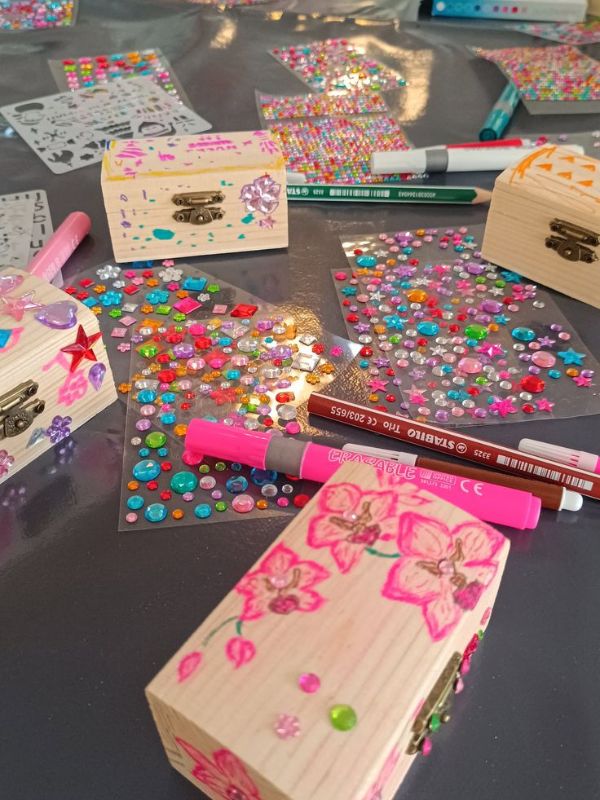
Hot glue guns and acrylic paint are straightforward to use safely as long as you follow a few simple rules, especially when your child is crafting alongside you.
- Use child-safe, non-toxic acrylic paint if little ones are joining in.
- Always handle the hot glue gun yourself and rest it on its stand between uses.
- Sand any rough edges on a wooden box before children handle it.
- Work in a well-ventilated area when applying sealant spray.
- Allow all painted and glued surfaces to dry completely before moving to the next step.
- Use acid-free envelopes and zip bags inside the box to protect delicate keepsakes.
These small habits protect both your child and the memories you’re working so hard to preserve.
Step-by-Step: How to Make Your DIY Memory Box for Kids
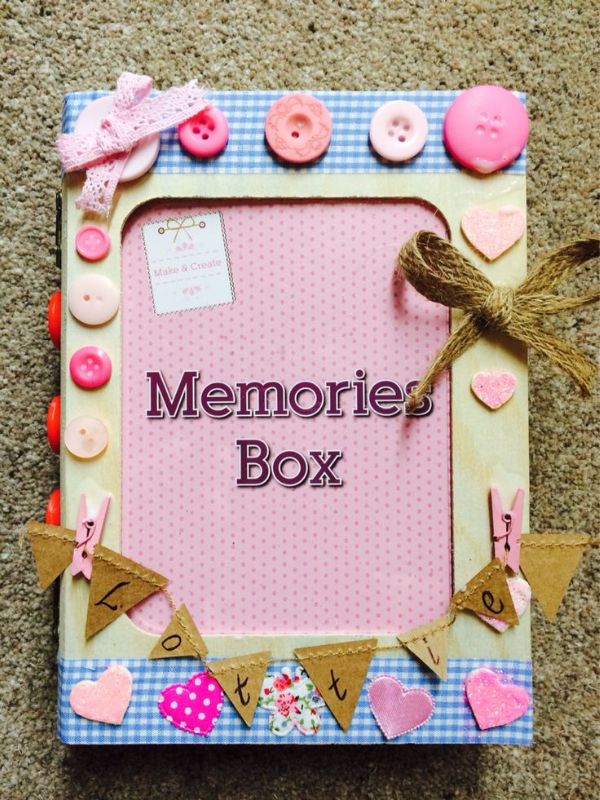
This beginner-friendly DIY memory box for kids tutorial uses a wooden box and takes about one afternoon to complete. No previous craft experience is needed.
What You Need for This Project
- One medium-sized wooden box from a craft store
- Acrylic paint; base colour and one accent colour
- Mod Podge or decoupage glue
- Scrapbook paper or fabric for decoupage
- Foam stamps or stencils
- Hot glue gun and glue sticks
- Ribbon, trim, or small decorative charms
- Clear protective sealant spray
Step 1: Sand and Prepare the Box
Lightly sand the entire wooden surface to remove any rough patches. Wipe away the dust with a dry cloth before applying anything. Starting clean makes every coat of paint look smoother.
Step 2: Apply the Base Coat
Paint the outside of the box in your chosen colour. Two thin coats always give a more even finish than one thick one. Let each coat dry completely before moving on to the next.
Step 3: Add Your Decorative Layer
Here’s where personality comes in. Use stamps, stencils, or brushwork to add patterns, your child’s name, or a meaningful motif. Stars, florals, initials, or a favourite animal all work beautifully. Keep it personal, this box belongs to one specific child.
Step 4: Decoupage Paper or Printed Photos
Brush Mod Podge onto the surface, press your scrapbook paper or photos into place, and smooth out any air bubbles. Once dry, add another coat of Mod Podge on top to seal everything permanently.
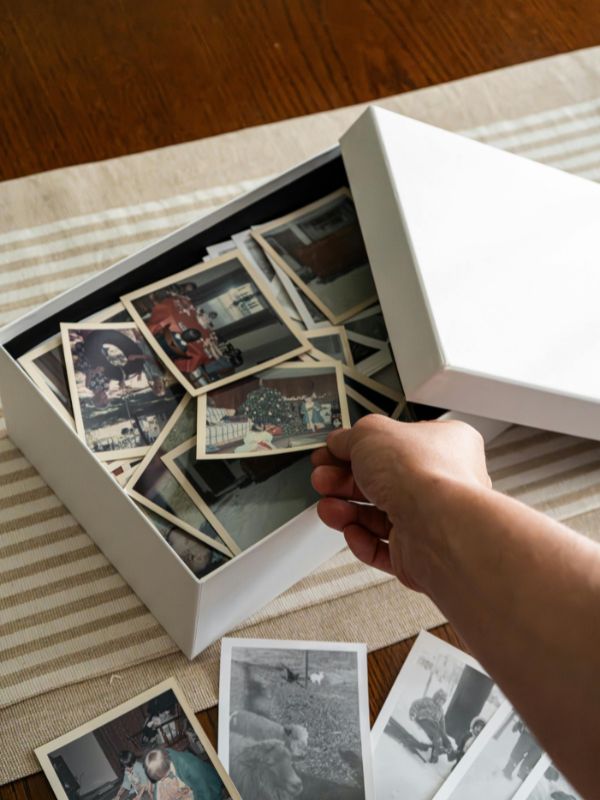
Step 5: Line the Interior
A soft fabric lining inside the box protects fragile keepsakes and gives the whole project a professional, finished quality. A rectangle of felt or cotton fabric glued in with Mod Podge works perfectly.
Want to add a handmade crocheted trim or woven ribbon detail to the lining? Our post on How to Crochet for Beginners: Everything You Need to Start Your First Project Today is a friendly, step-by-step guide for anyone just starting out.
Step 6: Add Trim and Embellishments
Hot glue ribbon along the edges of the lid. Add small buttons, charms, or a wooden initial. Every detail should feel intentional nothing fussy, nothing generic.
Step 7: Label the Box
Write your child’s name and birth year on the front with a chalk marker. Tuck a handwritten label inside the lid that makes the box feel completely official and entirely theirs.
Step 8: Seal the Surface
Apply a clear protective sealant over the decorated exterior. This step protects all your work from dust, moisture, and handling so the box stays beautiful through every year of use.
Creative Ways to Decorate Your DIY Memory Box for Kids

Once you understand the basic technique, you can take your DIY memory box for kids in almost any creative direction. Here are twelve decoration ideas to spark your imagination.
1. Hand-Painted Self-Portrait on the Lid
Get your child to paint their own face directly onto the lid. Nothing is more charming or more unmistakably personal than their own interpretation of themselves looking back from the box. Seal it well and it lasts forever.
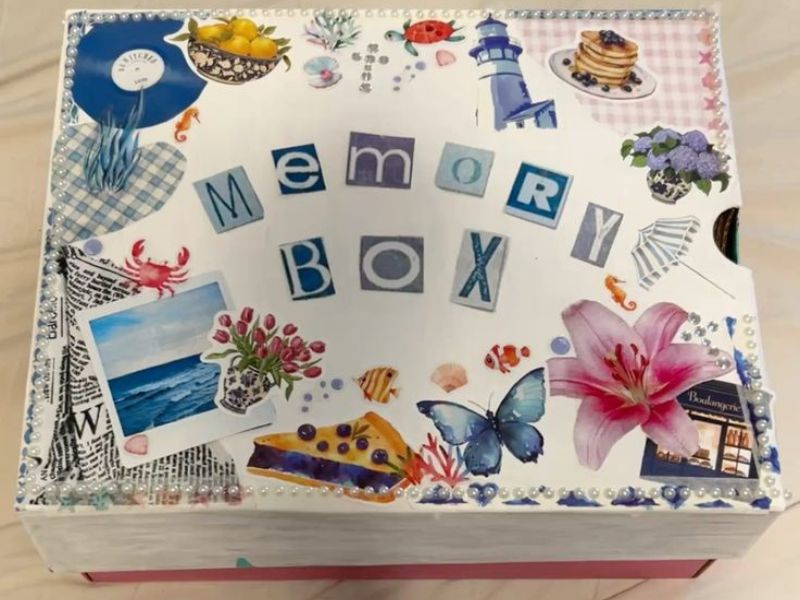
2. Decoupage with Favourite Book Pages
Cut or print pages and illustrations from a favourite book they’ve outgrown and decoupage them in a layered patchwork pattern across the surface. It gives the box a storybook quality that feels genuinely magical.
3. Stamped All-Over Pattern
Use foam stamps in a simple repeated shape: stars, hearts, dinosaurs, butterflies, across the lid and sides. Bold and graphic with very little effort. This is also a decoration activity your child can do almost entirely by themselves.
4. Watercolour Wash Effect
Dilute acrylic paint heavily with water and apply loose, overlapping washes of two or three colours. Once dry, add your child’s name in bold white lettering on top. The result looks painterly and genuinely artistic.
5. Constellation Map of Their Star Sign
Paint the lid deep navy blue and add small white dots in the arrangement of their birth constellation. It’s personal, beautiful, and far simpler to paint than it looks. A tiny label naming the constellation finishes it off.
6. Nature-Pressed Flower Collage
Arrange pressed flowers and leaves across the lid and seal them under several coats of Mod Podge. This works especially well for children who love spending time outside and who are already collecting natural materials for the inside of the box too.
For simple, nature-inspired project ideas that also produce beautiful keepsake materials to add to the box itself, check out our DIY Gardening Ideas for Small Spaces and Tiny Backyards — a wonderful resource for families who love crafting with what nature provides.
7. Washi Tape Patchwork
Layer strips of washi tape in coordinating colours to create stripes, chevrons, or a patchwork grid across the surface. No paint or glue is needed. This is an ideal activity for children to help with directly, with zero mess and satisfying results.
8. Wood Burning Personalization
A pyrography pen lets you burn your child’s name, birth date, or a meaningful illustration directly into a wooden box. The results look truly professional and permanent, the kind of keepsake that genuinely feels like an heirloom.
9. Photo Collage Decoupage
Print small square photos and decoupage them in a tiled pattern across the box exterior. Use photos from each year, or choose a theme that can be holidays, family moments, favourite people. Seal with multiple Mod Podge coats for a durable surface.
10. Map Decoupage with a Personal Story
Print a map of somewhere meaningful to your family, the city where your child was born, a place you visit every summer and decoupage it across the whole box. It makes the container itself part of the memory.
Older children genuinely love decorating their own memory boxes. For more creative, age-appropriate project ideas that actually appeal to older kids and teens, our post on Fun DIY Crafts for Teens: Creative and Trendy Projects That Actually Feel Cool to Make is packed with hands-on ideas they’ll actually be excited to try.
How to Organize Your DIY Memory Box for Kids
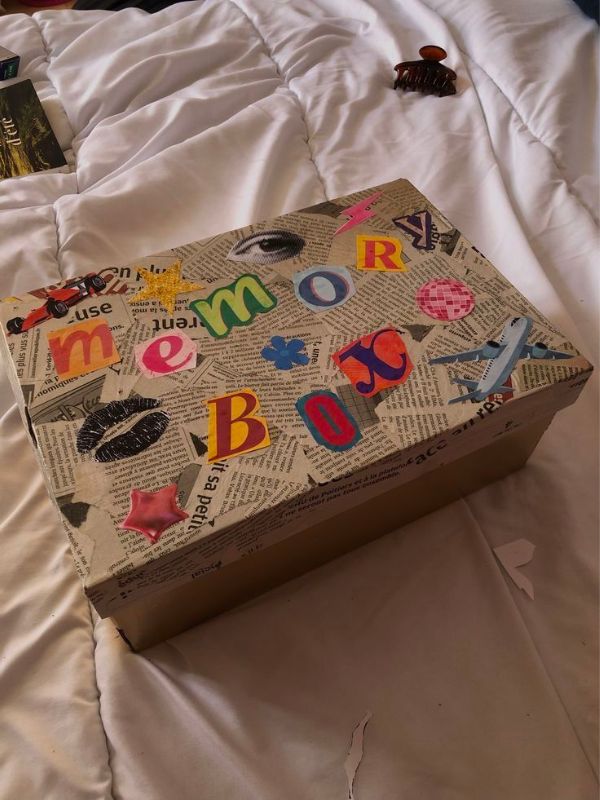
A well-organized DIY memory box for kids is far easier to enjoy and add to over time. A simple system even a basic one makes all the difference between a beautiful collection and a jumbled pile.
Use labelled envelopes. A small envelope for each year keeps flat items like photos, notes, and drawings easy to find without damaging each other.
Use zip-lock bags. Seal tiny keepsakes, a tooth, a badge, a folded note in labelled zip bags. They stay protected without being hard to see or access when you want them.
Roll and ribbon larger drawings. Roll big drawings around a cardboard tube, tie with ribbon, and add a handwritten label with the year and your child’s age. It saves space and keeps edges from creasing.
Add a yearly contents card. Tuck a handwritten card inside the lid each year listing what you added and a sentence or two about where your family was at that moment. Reading these years later is one of the most moving experiences you’ll ever have.
Photograph the contents annually. Lay everything out once a year and photograph it before closing the box. It gives you a digital backup and tells its own visual story of how the collection has grown.
DIY Memory Box for Kids by Age: What to Focus On at Each Stage
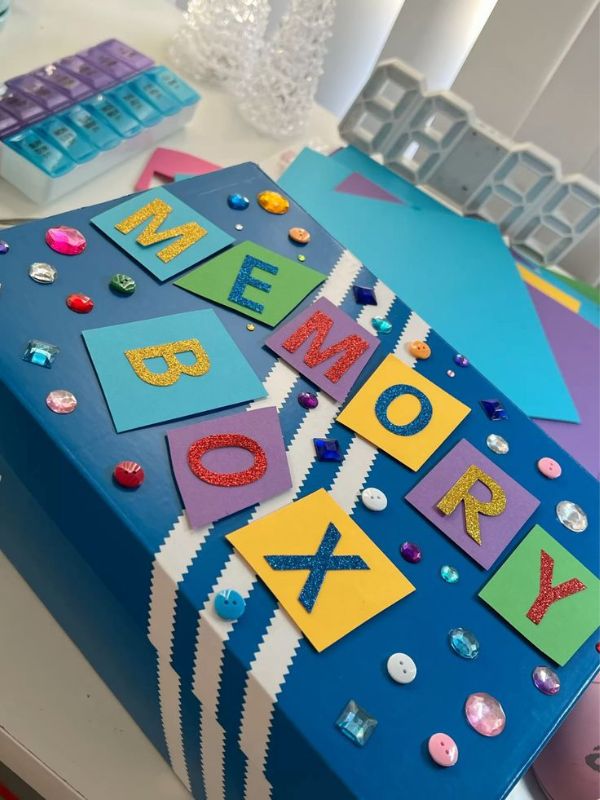
The items worth preserving change considerably as children grow. This guide breaks down what makes the most sense to include in your DIY memory box for kids at each stage of childhood.
Newborns and Babies (Birth to 18 Months)
This stage produces the smallest keepsakes and the biggest feelings. Focus on: the hospital ID bracelet, a lock of hair from the first haircut, a handprint or footprint stamped in paint or clay, the birth announcement card, a few favourite photos from each season, and the first pair of tiny shoes.
Toddlers (18 Months to 3 Years)
Toddlers begin producing recognizable artwork and forming real attachments to their favourite things. Focus on: early drawings, a photo from each season, a small toy they’ve outgrown, a handprint stamp, and a handwritten note about their favourite words and phrases at this age.
Toddler summers go by especially fast. Our post on DIY Water Table for Kids That Creates the Cutest Backyard Playtime shows a wonderful outdoor activity that creates exactly the kind of joyful, fleeting moments worth photographing and preserving inside the memory box.
Preschool (3 to 5 Years)
Preschoolers form strong opinions, vivid imaginations, and deep interests in this stage. Focus on: drawings that show a developing artistic style, early writing attempts (even just their name), a class photo, a certificate from an activity they loved, and a pressed flower or leaf from a walk they remember.
For hands-on nature projects that preschoolers love and that produce beautiful keepsake pieces, see our post on Garden Crafts for Preschool: Fun and Easy Nature Projects for Kids — many of the finished pieces make perfect additions to a memory box at this stage.
School Age (5 to 12 Years)
School-age children have richer friendships, deeper interests, and far more complex artwork. Focus on: a year-by-year school photo, academic certificates, a piece of writing from each year, a drawing that shows their growing style, a note about their best friend, and their favourite book from that particular year.
Teens (12 to 18 Years)
By the teenage years, many children genuinely want to curate their own box. A concert ticket stub, a photo with close friends, a finished school project they’re proud of, a letter they write to their future self, these items carry far more weight when the teenager chooses them personally.
How to Turn Your DIY Memory Box for Kids Into a Small Business
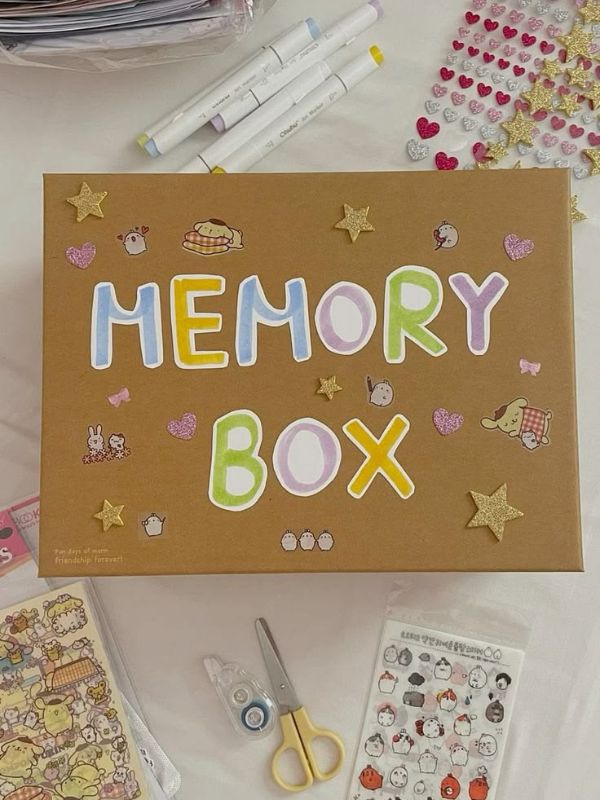
A beautifully made DIY memory box for kids is one of the most consistently popular handmade gift items available. Parents, grandparents, and godparents actively look for something more personal than a standard baby gift — and a handmade, personalized keepsake box is exactly that.
When pricing your work, account for the full cost of materials, your time at a fair hourly rate, packaging, and any marketplace fees. A simple decorated wooden box typically sells for $30–$50. A hand-personalized box with a burned name, custom fabric lining, and gift packaging can comfortably command $70–$120 or more.
The personalization factor is what drives the price up. Adding a child’s name, birth date, and a meaningful design transforms a generic craft project into something completely irreplaceable.
For a detailed guide on pricing, selling, and building a handmade business around craft projects like this one, our post on How to Make Crafts: 20 Easy Crafts to Sell and Make Profits From Home If You Need Extra Income covers everything you need to get started from platform choice to profit margins.
Seasonal Memories to Add to Your DIY Memory Box for Kids All Year Round

Your DIY memory box for kids isn’t only for birthdays and school milestones. Some of the very best keepsakes come from the seasons themselves, the ordinary moments inside a specific time of year that feel unremarkable until they’re gone.
Christmas and the Holiday Season
Christmas produces more keepsake material than almost any other time of year. A photo in front of the tree. A handmade ornament they painted themselves. The wishlist drawn at age five in careful crayon letters. These items tell a story about childhood joy that nothing else can replicate.
For affordable, beautiful holiday craft ideas that make wonderful keepsake pieces, our post on Christmas Crochet Projects You Can Actually Finish Before the Holidays for Gifts, Decor, and More is full of festive project inspiration that pairs perfectly with a memory box tradition.
Halloween
A photo in their costume. A ticket from a Halloween event. A hand-decorated treat bag from the year they went as a dragon. Halloween produces some of the most joyful and personality-revealing moments of any child’s year — and they go by in a blink.
For fun, creative Halloween project ideas that older kids love and that produce keepsake-worthy results, our post on Halloween Crafts for Teens: 15 Projects for Room Decor, Costumes, and Fun is packed with ideas worth trying before the season wraps up.
Autumn Keepsakes
Leaves pressed under heavy books, a handprint turkey made in October, an acorn collected on a Sunday walk, autumn produces some of the most textural and colourful keepsake materials of the whole year. Dry everything properly before it goes into the box.
For budget-friendly autumn craft ideas that produce beautiful keepsake pieces alongside seasonal decor, our post on Dollar Tree Fall Crafts That Look Expensive (Easy DIY Decor Anyone Can Make) is full of ideas that pair perfectly with a fall memory box tradition.
Father’s Day and Special Occasion Keepsakes
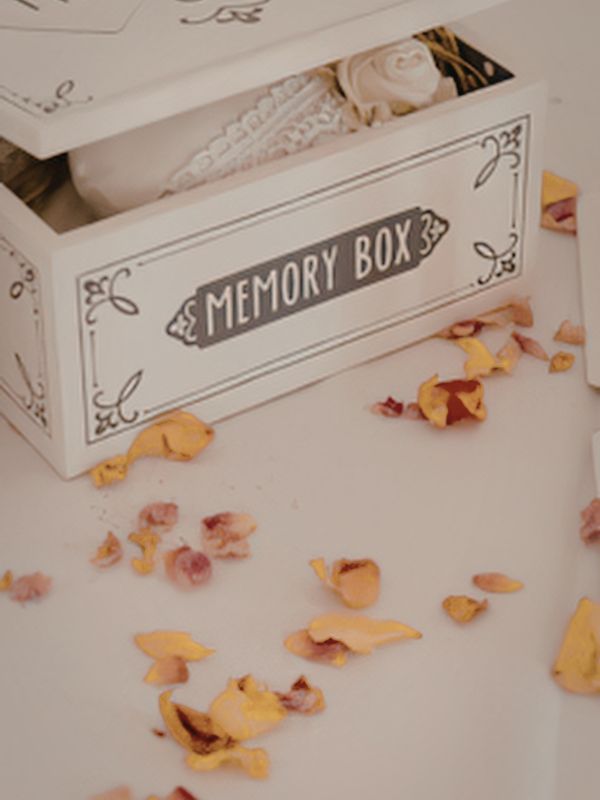
A handmade card from your child to their dad. A photo from a special outing. A drawing made specifically as a gift. These seasonal moments produce some of the warmest and most personal items inside any memory box — and they work beautifully as gifts in their own right.
For beautiful Father’s Day craft ideas that produce genuinely moving keepsakes, our post on Fathers Day Crafts That Make Dad Feel Celebrated, Seen, and Genuinely Loved has everything you need to create something meaningful together — including pieces worth tucking straight into the memory box.
Summer Adventures
Summer is one of the richest seasons for childhood memories. Ice cream photos. Beach shells. A pressed wildflower from a picnic. A postcard from a holiday destination. All of it belongs in the box because summer childhood memories are the ones most adults carry longest.
For bright, simple summer craft ideas that children love and that produce beautiful keepsake pieces, take a look at our Cute Summer Crafts: Bright and Simple DIY Ideas for Sunny Days You’ll Want to Try for easy projects to enjoy together on sunny afternoons.
For a full season’s worth of wonderful toddler summer activity ideas that create genuinely memorable moments, our post on Summer Crafts for Toddlers That Keep Little Hands Busy All Day will keep you and your little one happily busy and well-supplied with keepsake pieces for the box.
Frequently Asked Questions
What should I put in a DIY memory box for kids?
A DIY memory box for kids works best when it includes a mix of items: something visual (photos, drawings, handprints), something physical (a bracelet, a tooth, a shell), something written (school reports, a letter from a parent), and something seasonal. Start with what feels most meaningful for your own family and add to it each year.
How big should a memory box be?
A shoebox-sized container is perfect for one year’s worth of additions. If you’re collecting across a full childhood, a medium wooden or fabric box gives you more room. Most families keep one box per child, updated year by year, and find that a box roughly 30 x 20 x 15 cm is the sweet spot.
Can I make a DIY memory box for kids on a small budget?
Absolutely. A decorated shoebox costs almost nothing. A plain wooden box from a craft store is usually under $10 before decorating. Most of the supplies, paint, Mod Podge, ribbon, stamps are inexpensive and available at Dollar Tree. The finished result looks far more valuable than the cost of the materials.
When should I start involving my child in filling their own box?
Most children from the age of three onwards enjoy choosing what goes inside. Younger children love the ritual of opening it even when they don’t fully understand what it means yet. By school age, many children are deeply invested in their boxes and actively look forward to the annual update.
What is the best container for a DIY memory box for kids?
A wooden box is the most durable and beautiful long-term option. But a well-decorated shoebox, a fabric-covered cardboard box, or a vintage tin all work beautifully too. The most important qualities are that it holds its shape, seals properly, and is large enough to accommodate the items you plan to store without cramming.
Time to Start Preserving the Little Things
A DIY memory box for kids is one of the most genuinely meaningful things you will ever make for your child. It costs very little. It takes one afternoon. But thirty years from now, when your child opens it and holds a handprint from the year they turned four nothing you ever bought them will compare.
Every DIY memory box for kids is completely different, and that’s the whole point. Yours will reflect your child’s specific personality, your family’s particular adventures, and the ordinary moments that made your years together exactly what they were.
So gather your supplies. Choose your box. Start with something small. The best childhood memories aren’t waiting to happen, they’re already here, right now, asking to be kept.