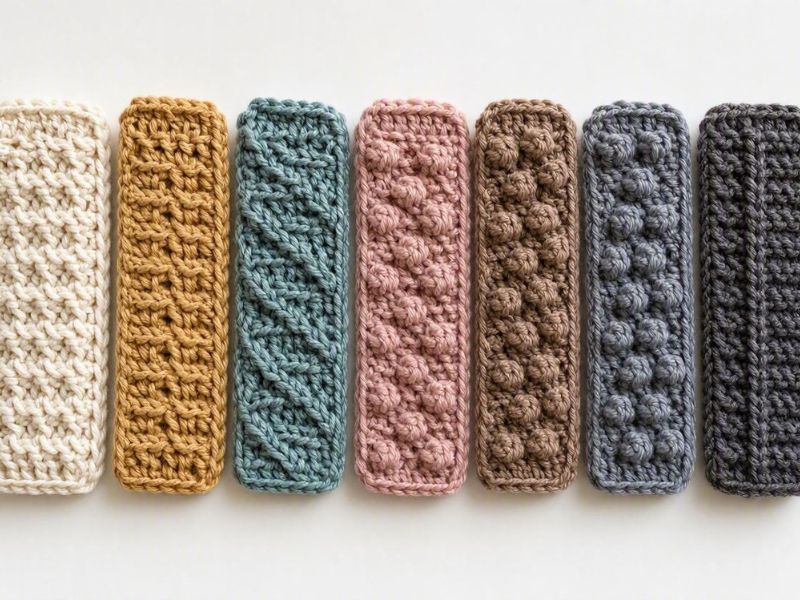
Give flat crochet projects more life with textured crochet stitches that add depth, dimension, and character without making the fabric overly bulky too.
A crochet project can have a beautiful stitch pattern and still look surprisingly flat. Sometimes the problem isn’t the yarn or the color, it is that the fabric needs more texture to give the stitches somewhere to stand out.
That is where the right stitch can make a difference.
Raised post stitches, bobbles, puffs, popcorns, and dense patterns such as waffle or basketweave don’t all create the same kind of texture.
Some add soft bumps, some create deep relief, while others change the whole feel and structure of the fabric.
The trick is knowing which textured crochet stitches suit the result you want. A stitch that looks perfect on a blanket may make a sweater too bulky, and a beautiful raised pattern can lose its definition when paired with the wrong yarn.
This guide breaks down what actually creates texture, how the main textured stitches differ, and what to consider before putting one into your next project.
Start with the basics in How to Crochet for Beginners: What You Need to Know Before Your First Stitch before trying more advanced textured stitches.
What Actually Creates Texture in Crochet?
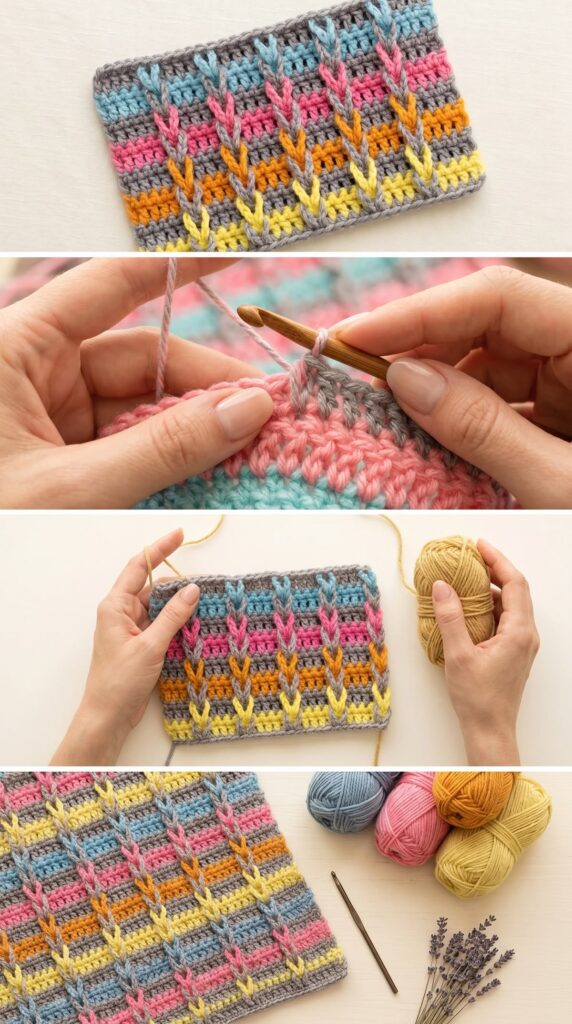
Texture in crochet comes from how the stitches are built and where they sit in relation to one another. A fabric can feel raised, ridged, bumpy, woven, or deeply patterned without using a complicated yarn.
The main difference is what the stitches are doing to the surface of the fabric.
Raised stitches
Post stitches create texture by working around the vertical post of an existing stitch instead of simply working through its top loops. Front-post and back-post stitches can be combined to push sections of the fabric forward or backward, creating ribs and raised patterns.
This is the basic idea behind textured designs such as waffle and basketweave.
Clusters and grouped stitches
Stitches such as puffs, bobbles, and popcorns concentrate several loops or stitches into a small area, producing a raised section on the fabric.
They may look similar, but they are constructed differently and don’t produce exactly the same result. A puff tends to have a softer, fuller appearance, while a popcorn creates a more defined protrusion.
Stitch placement
Texture can also come from where you place the hook. Working into different loops, around stitch posts, or into spaces rather than the usual top loops can change the direction and height of the fabric.
This is why two projects using the same basic crochet stitches can still have very different surfaces.
Stitch combinations
Sometimes the texture comes from the relationship between several ordinary stitches rather than one special stitch.
Alternating stitches, crossing them, skipping stitches, or repeating raised and recessed sections can create ridges, diamonds, waves, grids, and woven effects.
Your tension matters too
Even the right textured stitch can look flat if your tension is inconsistent. Raised stitches need enough definition to stand out, while pulling them excessively tight can distort the surrounding fabric.
So when choosing textured crochet stitches, don’t look only at the stitch name. Look at how the stitch is constructed, how much it raises the fabric, and what that will do to the finished project.
Choosing Texture by the Fabric You Want
The best textured stitch is not necessarily the one with the most dramatic pattern. Think about how you want the finished fabric to look, feel, and behave before choosing the stitch.
Soft, rounded texture
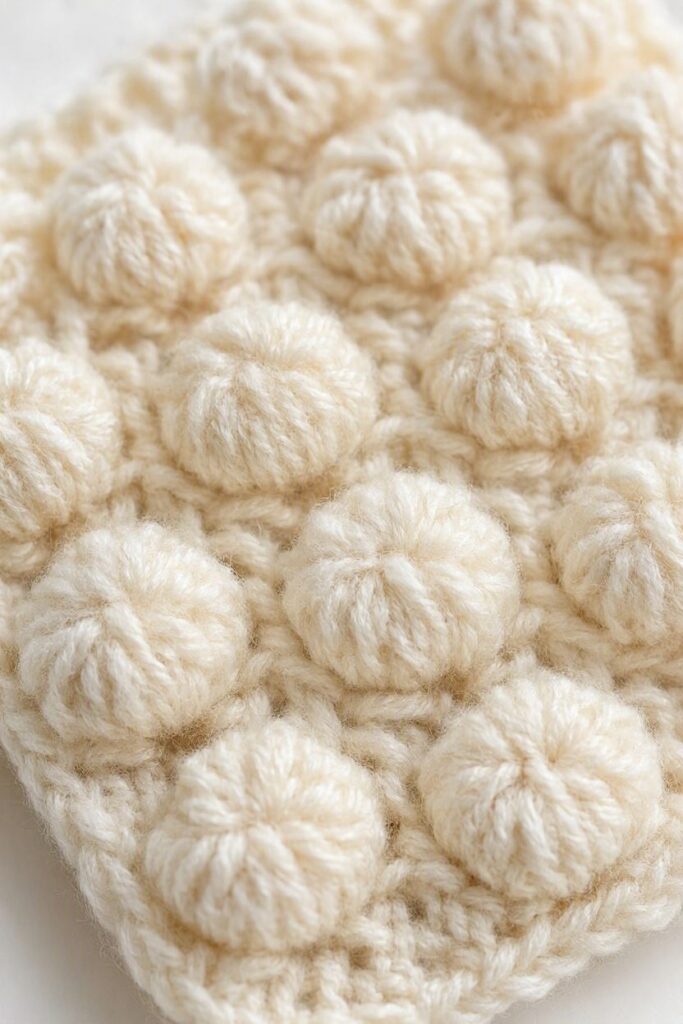
Puff stitches create fuller, rounded bumps that give the surface dimension without the sharper definition of some other raised stitches. They can be a good choice when you want texture that still feels relatively soft.
Clearly raised details
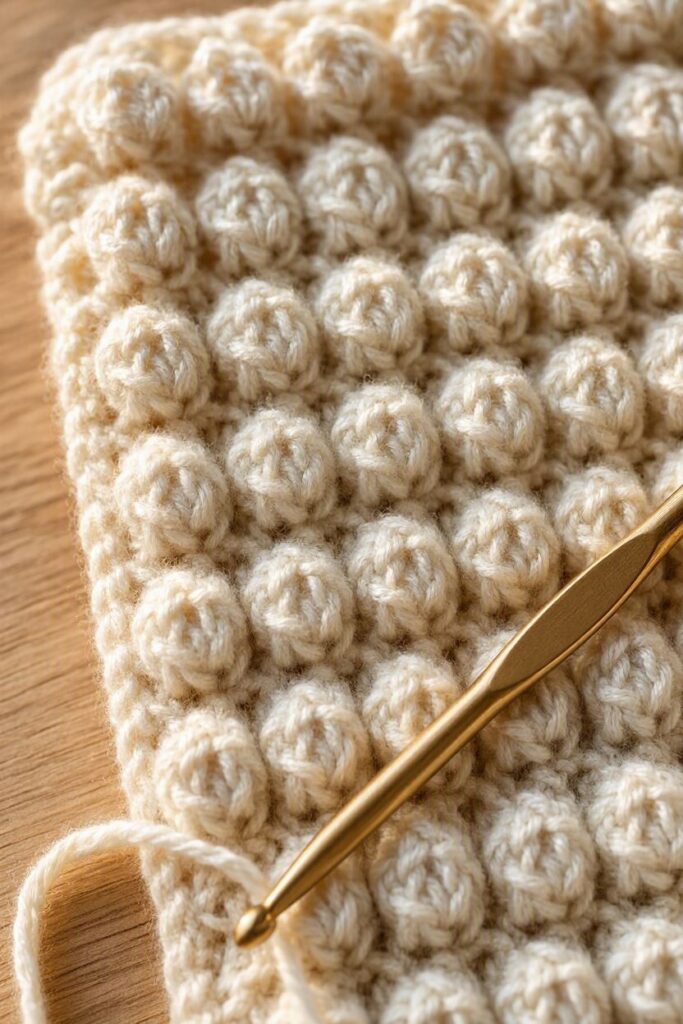
Bobble and popcorn stitches produce more prominent bumps that stand out from the surrounding fabric. They are useful for decorative details and repeated motifs, although covering an entire project with them can increase both yarn use and fabric weight.
Ribbed or flexible texture
Front-post and back-post stitches are useful when you want raised vertical ribs or recessed channels. Alternating them changes which parts of the fabric sit forward and backward, making these stitches useful for cuffs, borders, and larger textured patterns.
A thick, cushioned surface
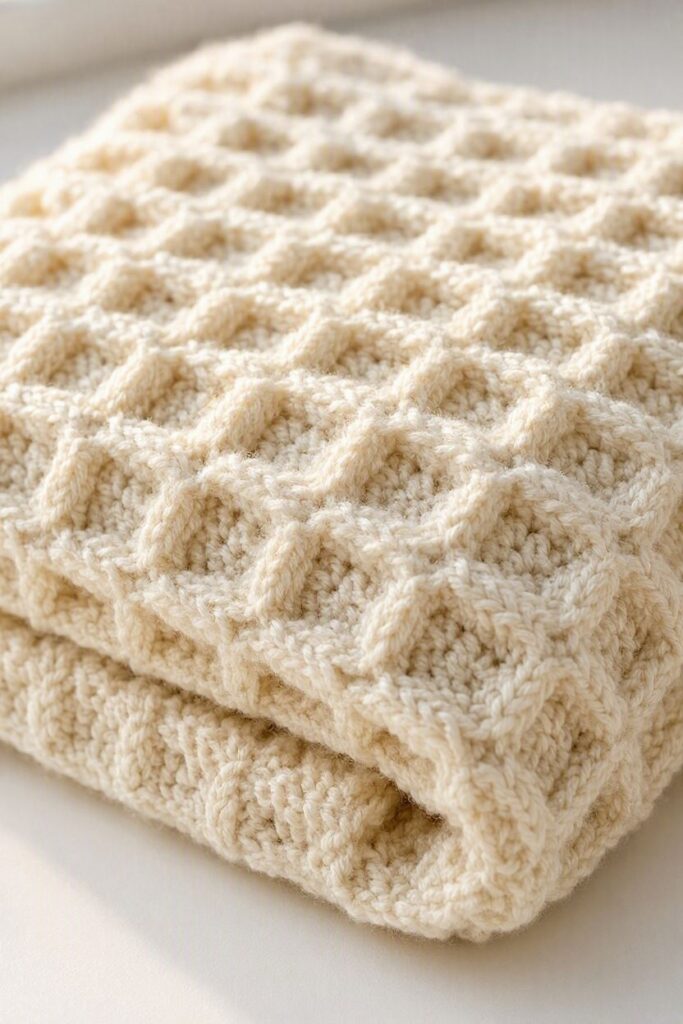
Waffle stitch creates a pronounced grid using post stitches. Its texture gives the fabric considerable depth and can also make it thicker, so it is better suited to projects where that added substance is desirable.
A woven-looking surface
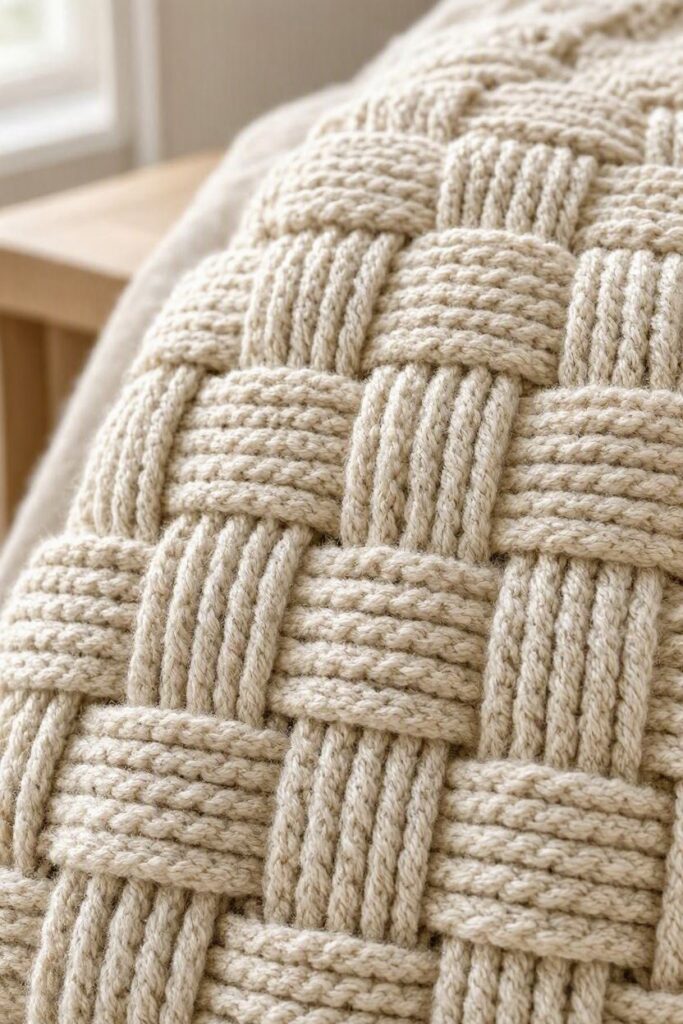
Basketweave patterns arrange front- and back-post stitches into blocks that resemble woven fabric. The resulting fabric tends to be denser and more structured than one made with simple flat stitches.
Directional raised texture
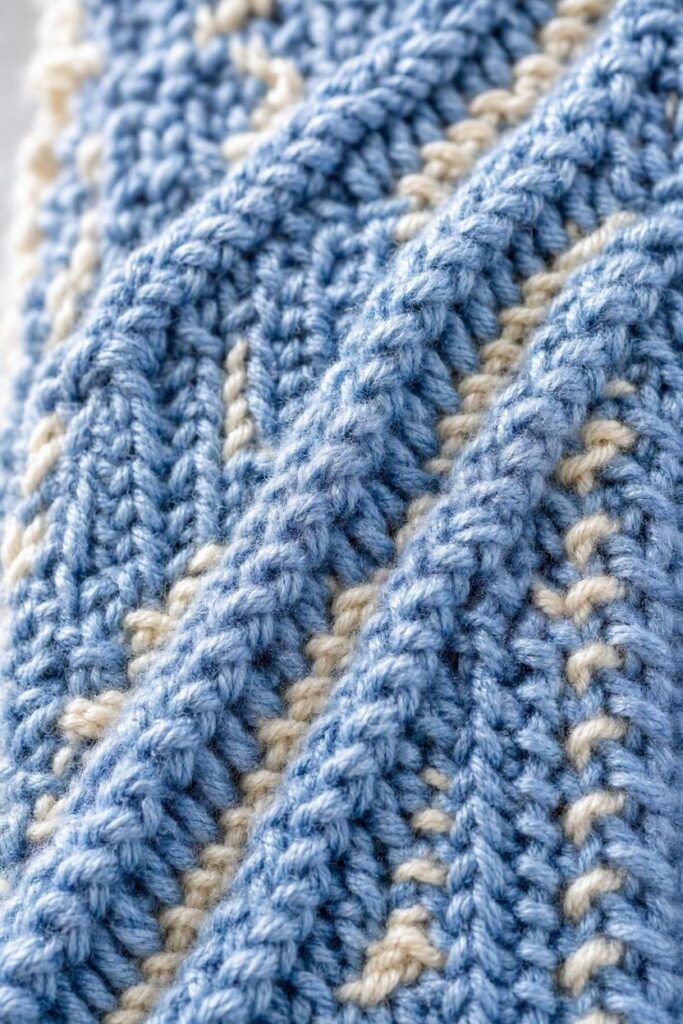
Alpine stitch combines raised stitches with flatter sections to create a staggered relief pattern. Instead of making isolated bumps, it gives the surface a sense of movement that can work particularly well across larger flat pieces.
Before settling on any of these textured crochet stitches, look beyond the photograph.
Consider the softness, thickness, drape, stretch, and weight you need from the finished project. A stitch that looks beautiful on a blanket may not give a sweater the movement you need.
Once you’re comfortable with the fundamentals, try adding texture to wearable projects with 10 Easy Crochet Sweater Patterns Beginners Can Actually Finish, Not Just Start.
Waffle, Basketweave, and Alpine: Which One Gives You the Look You Want?
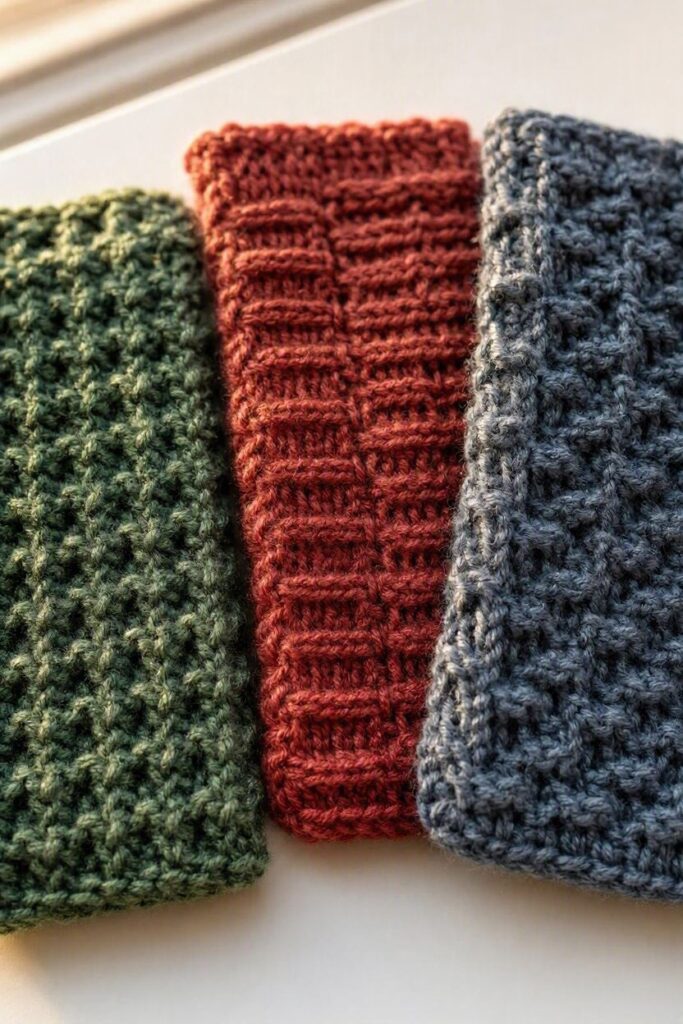
These three stitches are often grouped together because they all create deep, raised texture, but they do not give you the same fabric. Choosing between them is less about which stitch is “prettier” and more about what you need the finished crochet piece to look and feel like.
All three rely on post-stitch techniques, but the stitches are arranged differently, which changes the surface pattern and the character of the fabric.
1. Waffle Stitch: Deep, Cushioned Texture
Waffle stitch creates a raised grid of squares that gives the fabric a thick, almost cushioned appearance. It is built with regular stitches alongside front- and back-post stitches, which push sections of the fabric forward and create those deep valleys between the raised areas.
This is a good choice when you want the texture itself to be obvious rather than delicate.
The trade-off is that waffle stitch produces a thicker and denser fabric than many simpler stitch patterns. That can be excellent for blankets, scarves, and other projects where warmth and substance are welcome, but it may not be what you want in a garment that needs plenty of drape.
Choose waffle when: you want pronounced, cushioned, grid-like texture and don’t mind a heavier fabric.
2. Basketweave: Texture That Looks Woven
Basketweave has a different visual effect. Instead of forming the regular raised grid associated with waffle stitch, it groups front-post and back-post stitches into blocks, then switches their arrangement in later rows.
This creates the appearance of overlapping horizontal and vertical sections, similar to woven material.
The texture is substantial, so it works particularly well when you want your crochet to have body and structure. It is commonly used for blankets, scarves, bags, and other projects where a dense fabric is useful.
One thing to remember: because the pattern depends on carefully placed post stitches, it can be harder to read while you’re learning it. You need to pay attention to which stitches are meant to sit in front and which should sit behind.
Choose basketweave when: you want a structured, woven-looking surface rather than a uniform grid.
3. Alpine Stitch: Raised Texture With More Movement
Alpine stitch creates a noticeably different effect. It combines ordinary stitches with front-post stitches worked into earlier rows, with the raised stitches offset from one row to the next.
That arrangement produces staggered, vertical-looking areas of relief rather than the blocks of basketweave or the grid of waffle stitch.
It gives you plenty of dimension while allowing the individual raised sections to remain visually distinct. The resulting fabric is also relatively dense and warm, so it is useful for items such as blankets, scarves, hats, and other projects where you want substantial texture.
The main learning point is that placement matters. If the raised stitches are not offset correctly, the characteristic Alpine pattern won’t develop properly.
Choose Alpine when: you want pronounced texture with a more flowing, staggered appearance rather than a geometric grid.
The easiest way to decide
Think about the surface you want when you place the finished project on a table:
- Waffle: raised squares with deep valleys
- Basketweave: blocks that resemble woven fabric
- Alpine: staggered raised sections with more directional movement
And don’t choose from a photograph alone. Make three small swatches with the same yarn and hook, place them beside each other, and feel the fabric.
You’ll quickly notice differences in thickness, flexibility, and surface relief that a picture cannot show.
That small test can prevent a frustrating mistake: spending hours on a beautiful textured pattern only to discover that the finished fabric is too thick, too stiff, or simply not the look you wanted.
Bobble vs. Puff vs. Popcorn
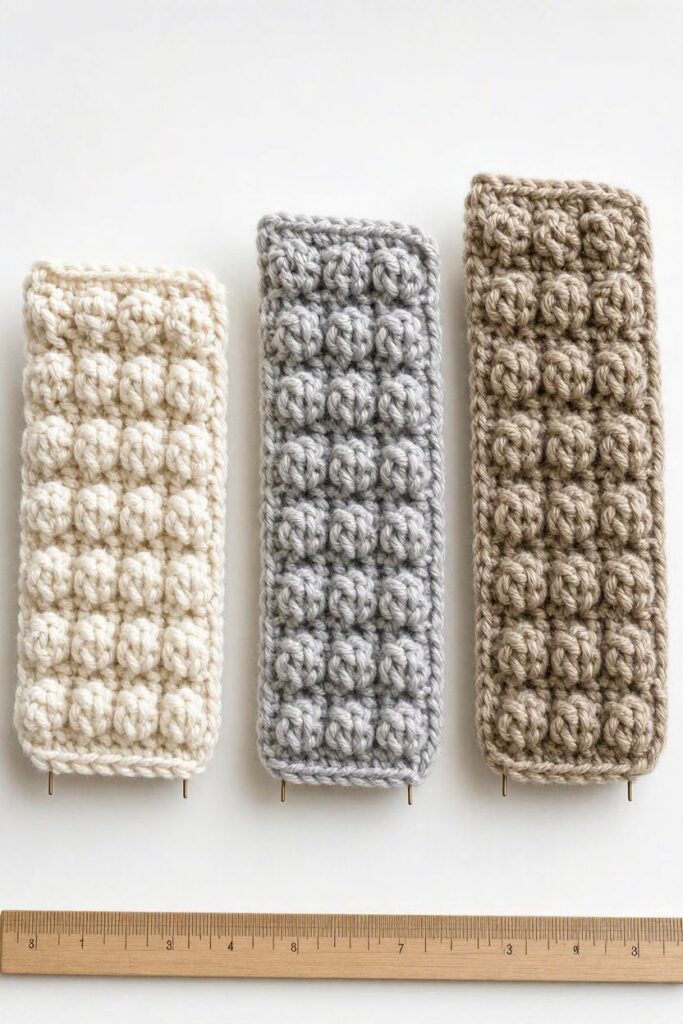
These three stitches are easy to confuse because they all create a raised, rounded texture. The important difference is how they are constructed, because that affects how the finished bump looks and feels.
There is also no single universal formula for each one, patterns can use different numbers or heights of stitches, so always follow the stitch definition given by the pattern.
Puff stitch
Puff stitch is built by making repeated yarn-overs and pulling up loops in the same stitch or space, then drawing through the accumulated loops to close the puff. This gives it a softer, fuller appearance.
It works well when you want a gentle, rounded texture rather than a sharply defined bump.
Bobble stitch
Bobble is commonly made from several partially completed double crochet stitches worked into the same stitch or space and closed together at the top. This creates a more defined, substantial bump than a typical puff.
Because bobbles can be made with different stitch heights and counts, their size and firmness can vary considerably from one pattern to another.
Popcorn stitch
Popcorn is made differently again. You work several complete double crochet stitches into the same stitch or space, then join the group together by pulling the working loop through the first stitch. This produces a distinct, structured bump that stands out from the fabric.
So, which one should you choose?
Think about the effect you’re trying to create:
- Puff: softer, fuller-looking texture
- Bobble: defined, prominent raised texture
- Popcorn: structured, clearly separated bumps
All three can add dimension, but they can also affect fabric thickness, flexibility, and yarn use differently. That’s why choosing between them should be based on the project, not simply which stitch looks prettiest in a swatch.
Post Stitches: The Technique Behind So Much Crochet Texture
A lot of the deep texture you see in crochet comes from one simple change: instead of working into the top of a stitch, you work around its post.
The post is the vertical part of a stitch beneath its top loops. When you work a crochet stitch around that post, the new stitch pushes the existing stitch forward or backward, creating raised lines and recessed areas on the fabric.
This is the basic technique behind many textured crochet stitches, including ribbed and basketweave-style patterns.
Front-post and back-post stitches
A front-post stitch is worked around the post from the front of the fabric. It brings that section forward and creates a raised ridge.
Back-post stitch is worked around the post from behind. It pushes the texture toward the opposite side.
When you alternate the two, you can create a ribbed surface rather than a flat row of stitches.
Why this matters when choosing a textured stitch
Post stitches are useful because they give you control over where the texture appears. You can use a few raised stitches to create a border, repeat them across a row for ribbing, or arrange them in blocks to create a deeper pattern.
That flexibility is also why post-stitch patterns can look complicated when they are actually built from a small number of techniques repeated in different arrangements.
A common problem: the fabric becomes too tight
If your post stitches are pulled very tightly, the surrounding fabric can become compressed and the pattern may lose its shape. Your work may also become noticeably less flexible than the same fabric worked in ordinary stitches.
Don’t try to fix this automatically by using a larger hook. Check the pattern, make a small swatch, and pay attention to your tension first.
The goal is to create defined relief without pulling the fabric out of shape.
Once you understand how front-post and back-post stitches change the position of the fabric, many seemingly complicated textured crochet stitches become easier to read.
You’re no longer memorising every pattern as something completely new, you can recognise the technique being used to create the texture.
The Yarn Can Make or Break Your Textured Crochet Stitches
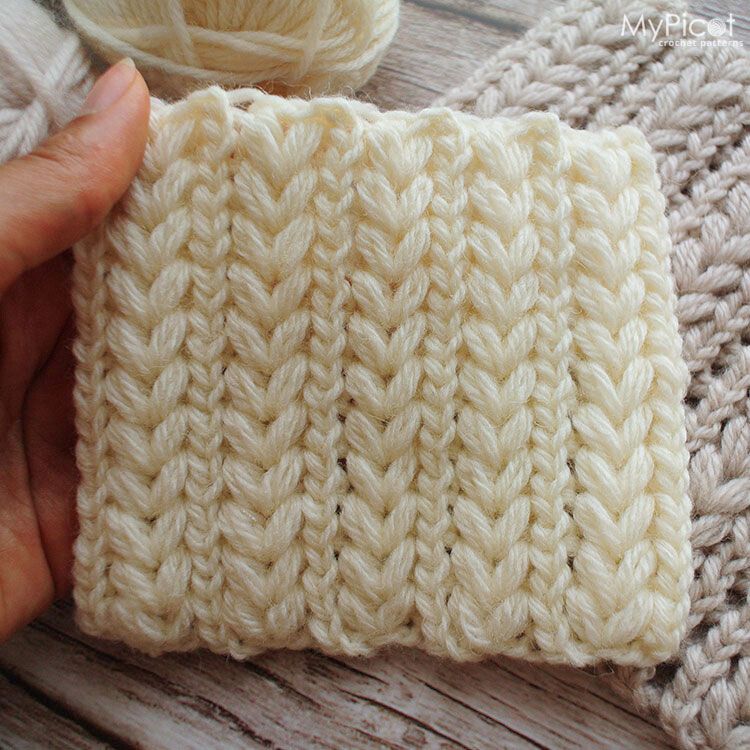
A textured stitch can look beautifully raised in one yarn and almost disappear in another. That doesn’t necessarily mean the pattern was worked incorrectly. The yarn affects how clearly the shape, height, and spacing of the stitches show.
Smooth yarn shows texture more clearly
Smooth, plied yarns generally make detailed stitches easier to see. The individual strands don’t cover the stitch structure, so raised post stitches, bobbles, puffs, and other textured details remain more defined.
This is especially helpful when you’re learning a new stitch because you can see where each stitch belongs and spot mistakes more easily.
Yarns With a Fluffy or Brushed Surface Can Hide Texture
Mohair, brushed yarns, chenille, and other yarns with a fluffy or brushed surface can soften the appearance of detailed stitches. That can be beautiful when you’re aiming for a plush finish, but it may make a complicated texture harder to see.
If the purpose of your project is to show off a waffle, basketweave, Alpine, or other raised pattern, a yarn with good stitch definition will usually display the design more clearly.
Dark Colours Can Make Texture Harder to Read
Very dark yarn isn’t unsuitable for textured crochet, but the shadows between raised and recessed areas can be harder to distinguish. This becomes particularly noticeable with intricate patterns.
If you’re learning a new stitch or making a sample to study the pattern, a lighter or medium shade can make the stitch structure much easier to follow.
Yarn Thickness Changes the Character of the Texture
The same stitch can look completely different when worked in different yarn weights. A thicker yarn can produce larger, more prominent texture, while a finer yarn may create a smaller and more delicate effect.
Thicker yarn can also make an already-dense stitch pattern feel bulky. So don’t choose a chunky yarn simply because you want more visible texture. Consider whether the finished project actually needs that much weight and thickness.
Your hook size matters here too. Changing the hook size changes your tension, which can affect both the appearance of the stitches and the feel of the finished fabric.
Make a Small Swatch Before Starting the Full Project
This is one of the simplest ways to avoid disappointment with textured crochet stitches.
Work enough rows to see the full stitch repeat, then look at the fabric rather than just the pattern on your screen. Check whether:
- the raised sections are easy to see
- the yarn is hiding any important details
- the fabric feels too stiff or bulky
- the texture has enough depth
- the fabric still has the drape your project requires
A small swatch can reveal a problem before you’ve spent hours making a blanket, sweater, scarf, or bag with a texture that doesn’t behave the way you expected.
If you’re interested in crochet beyond traditional projects, Crochet Hairstyles For Black Women shows another way crochet techniques can be used creatively.
How to Choose a Textured Stitch for Your Next Project
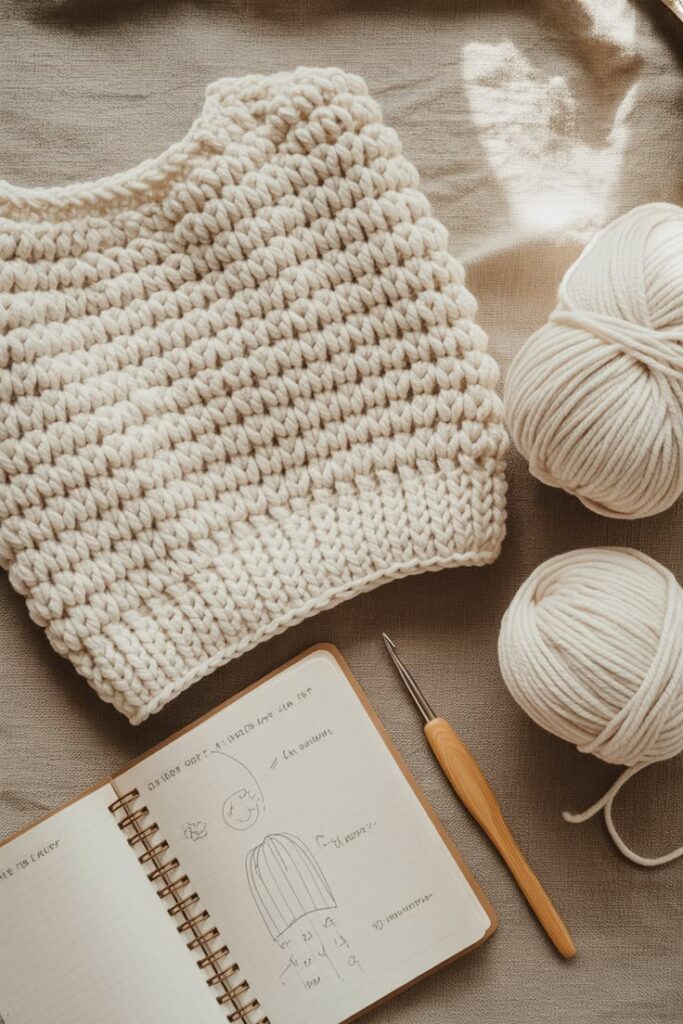
A textured stitch can look beautiful in a close-up photo and still be the wrong choice for your project. Before committing to one, think about what the finished fabric needs to feel like, weigh, and do.
For a blanket, deep textures such as waffle or basketweave can create a warm, substantial fabric. The trade-off is that dense patterns can use more yarn and add considerable weight over a large surface. Swatching lets you judge whether the extra texture is worth it.
With a sweater or other garment, the decision becomes more demanding. You need to consider drape, stretch, thickness, and how the stitch will behave around shaping. A heavily raised pattern can make fabric bulkier or less flexible, so a stitch that looks beautiful on a swatch may not translate well across an entire garment.
For a scarf, think about comfort as much as appearance. Large bobbles and heavily raised patterns can create a bulky surface, particularly when wrapped around the neck. The yarn’s softness matters too, especially when the fabric will sit directly against the skin.
Texture can be especially useful when making a bag, where a denser fabric can provide structure and help the finished piece hold its shape. Just remember that more texture can also mean more yarn and a heavier bag.
A washcloth gives you another reason to consider texture because the surface itself becomes part of how the finished cloth feels. Here, yarn choice and washability matter just as much as the stitch pattern. A textured design is only useful if the yarn can withstand the care the finished cloth will receive.
The easiest mistake to make is choosing a stitch because the pattern looks impressive on Pinterest or in a pattern photo. Instead, ask what your project needs first, then choose from the textured crochet stitches that can give you that result.
The stitch should serve the project, not the other way around.
How to Use Texture Without Making the Whole Project Busy
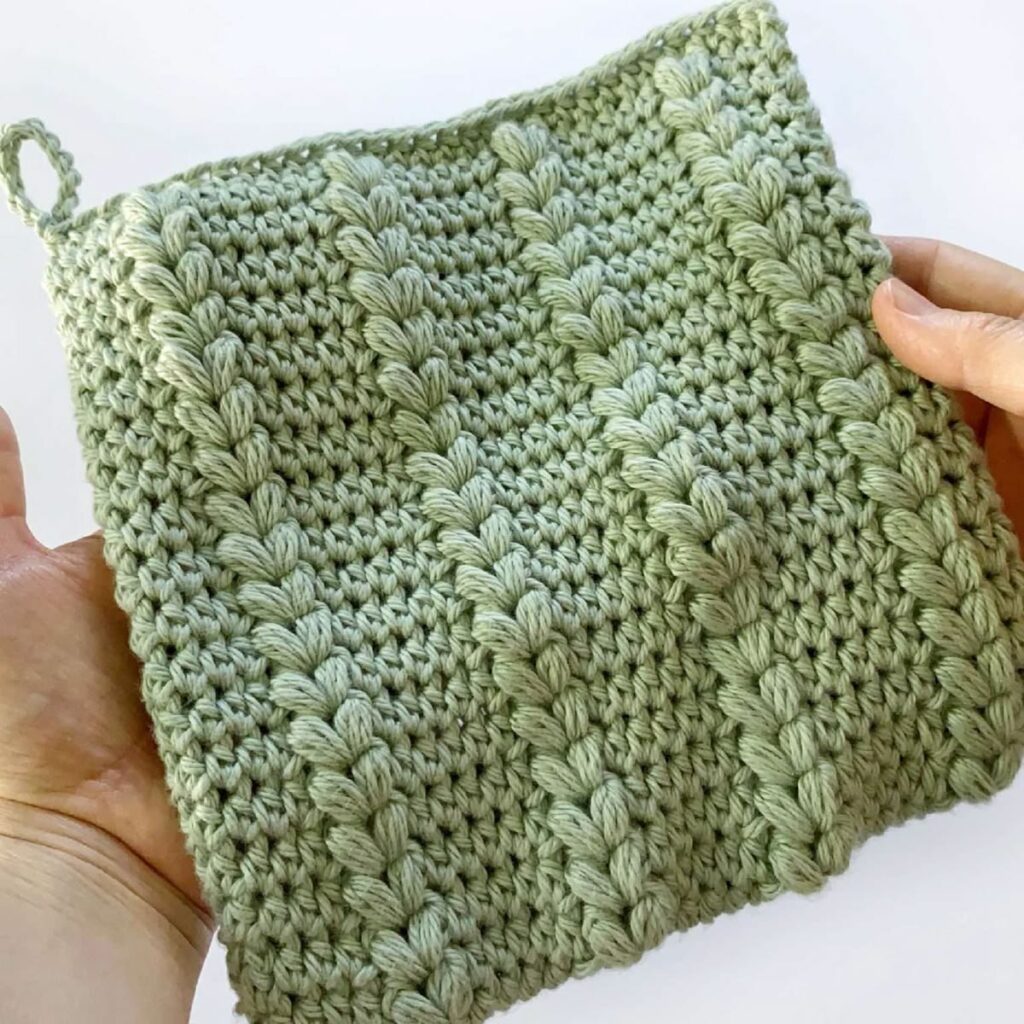
Texture works best when it has somewhere to stand out. Covering every part of a project with a highly raised pattern can make the surface look crowded, hide the shape of the design, and sometimes add more weight than you intended.
The good news is that you don’t need to use textured crochet stitches across the entire project to make them noticeable.
-
Let one section carry the texture
A textured panel can become the focal point of an otherwise simple design. For example, a raised stitch pattern down the centre of a sweater or across the front of a cushion can draw attention without making the entire piece heavily patterned.
-
Give raised stitches some breathing room
Pairing a textured section with plain crochet creates contrast. The smoother area makes the raised stitches easier to see instead of competing with them.
This works particularly well with stitches such as bobbles, popcorns, or strong post-stitch patterns, where repeating the texture everywhere can quickly become visually heavy.
-
Use texture around the edges
A textured border can give a blanket, scarf, bag, or home accessory more character without changing the appearance of the main fabric.
This approach is also useful when you already have a simple stitch pattern you like but want to add a little more detail.
-
Think about the project’s shape
Texture should support the design rather than hide it. If you’re working on a garment with shaping, for example, placing a very busy textured pattern over every section can make the construction harder to see.
A controlled area of texture often gives you more visual impact with less effort.
Before adding another textured section, step back and look at the project as a whole. If your eye can easily find the main design feature, you’ve probably used the texture intentionally.
If every area is competing for attention, simplifying the pattern may actually make the finished piece look better.
Conclusion
Texture can change the whole character of a crochet project, but more texture isn’t always better. The right stitch is the one that gives your fabric the depth, weight, softness, or structure your project actually needs.
Take a small swatch, compare the texture in your yarn, and pay attention to how the fabric feels, not just how it looks on the screen.
Once you understand how different textured crochet stitches behave, choosing between them becomes much easier.
Pick one stitch that caught your eye, make a small swatch, and see how it works with your yarn before committing to the full project.