Learn which designs are worth starting with crochet sweater patterns for beginners that make finishing your first sweater feel achievable.
Somewhere in a drawer or a project bag, half a crochet sweater sits abandoned. Maybe the armhole shaping got confusing halfway through, or the fit came out wrong after weeks of work, or it just felt bigger than a first project should be.
This happens to almost every beginner who tries a garment before a hat or a scarf, not because sweaters are impossible, but because most patterns aren’t built with a first-timer in mind.
Crochet sweater patterns for beginners exist, and the good ones share a few specific traits: simple construction from rectangles or panels instead of fitted shaping, basic stitches like single and half double crochet instead of anything requiring a stitch dictionary, and a forgiving fit that doesn’t hinge on perfect measurements.
A gauge swatch that takes ten minutes at the start can be the difference between a sweater that fits and one that ends up folded at the bottom of a bin.
Smooth, worsted-weight yarn in a lighter color makes stitches easy to see and count, which matters more in a garment than in almost any other project.
This list gathers ten patterns chosen specifically because they avoid the mistakes that stall most first sweaters, not just easy in theory, but realistic to actually finish, start to end.
New to crocheting? How to Crochet for Beginners: What You Need to Know Before Your First Stitch walks you through the essential tools, basic stitches, and beginner tips to help you start with confidence.
One Thing to Do Before You Start Any of These
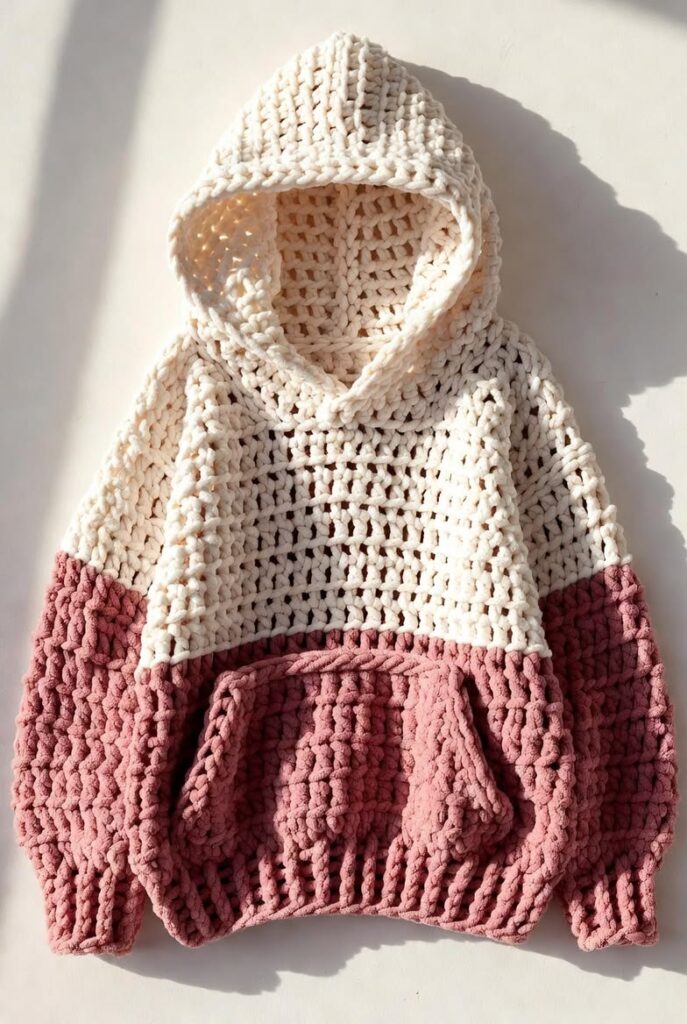
Gauge is simply how many stitches and rows fit into an inch of your fabric. Every crocheter’s tension is slightly different, two people using the same hook and yarn can produce noticeably different-sized fabric.
That’s why patterns list a gauge alongside the hook and yarn: it tells you what tension the designer used to get the finished measurements shown.
For a hat, a blanket, or a dishcloth, being a little off on gauge barely matters. The item still works even if it’s an inch bigger or smaller than planned.
Sweaters work differently. Gauge is what turns a set of stitch counts into an actual body measurement, so a small mismatch compounds across dozens of rows and stitches.
Tension that’s slightly tighter than called for can leave a neckline too small to fit over your head.
Looser tension can leave sleeves too wide or a body that hangs longer than expected. This is the single most common reason a finished sweater gets set aside instead of worn.
Here’s how to actually check it, step by step:
- Make a small test square. Using the exact hook size and yarn the pattern tells you to use, crochet a square about 4 inches wide and 4 inches tall, using the same stitch the pattern uses (for example, if the pattern is all half double crochet, make your test square in half double crochet too).
- Measure it with a ruler. Lay the square flat and place a ruler across it. Count how many stitches fit within 4 inches going sideways, and how many rows fit within 4 inches going up.
- Check that number against the pattern. Every pattern lists a gauge near the top, usually written like “12 stitches and 8 rows = 4 inches.” Compare your count to that number.
- If your numbers are higher (you fit more stitches into 4 inches than the pattern says), your stitches are smaller and tighter than they should be. Fix: switch to a slightly bigger hook and make the test square again.
- If your numbers are lower (you fit fewer stitches into 4 inches than the pattern says), your stitches are bigger and looser than they should be. Fix: switch to a slightly smaller hook and make the test square again.
- Keep adjusting the hook size and re-testing until your stitch and row count matches the pattern’s gauge exactly.
Once it matches, that’s the hook size you’ll use for the whole sweater, and you know going in that the finished size will come out right.
Crochet Sweater Patterns Beginners Can Actually Finish
1. Rectangle-Panel Pullover
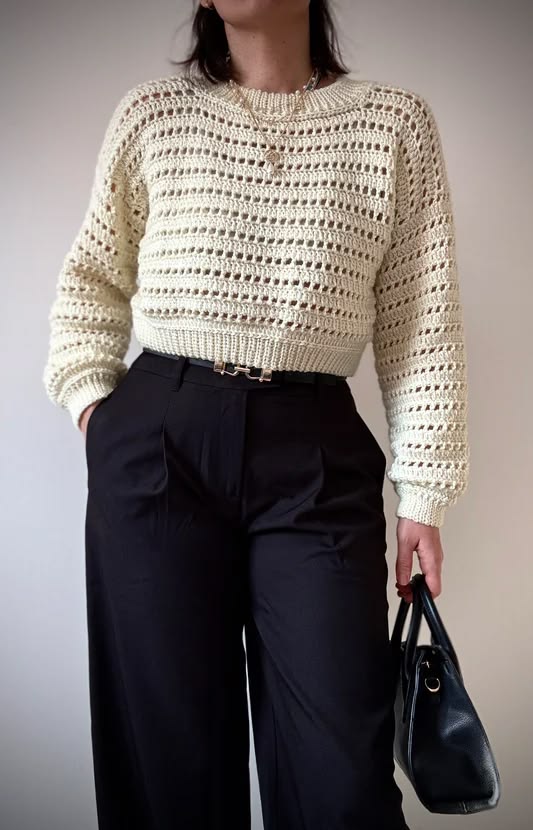
This boxy pullover is made entirely from straight-edged pieces, no curves, fitted shaping, and no darts.
Once seamed together, it looks like a classic loose sweater, and it’s often the very first garment recommended to someone who has never made a piece of clothing before.
Stitch used: Half double crochet, worked flat in rows.
Construction: Made from a front rectangle, a back rectangle, and two smaller sleeve rectangles, crocheted one at a time.
The sleeves are folded lengthwise and seamed into tubes first, then the front and back panels are joined at the shoulders and down the sides, leaving gaps at the top for the neck and armholes. The finished sleeve tubes are attached into those armhole gaps last.
Seaming: Shoulder and side seams typically use whip stitch or mattress stitch, mattress stitch is the better choice if you want the side seams to sit flat and nearly disappear, while whip stitch is faster and still holds securely.
Why it’s low-risk: There’s no increasing or decreasing anywhere in the pattern, which removes the step that trips up most first-timers.
Because every piece is a plain rectangle, a gauge swatch checked early translates directly and reliably into the finished size, with no shaping calculations to complicate the math.
2. Granny Square or Hexagon Cardigan
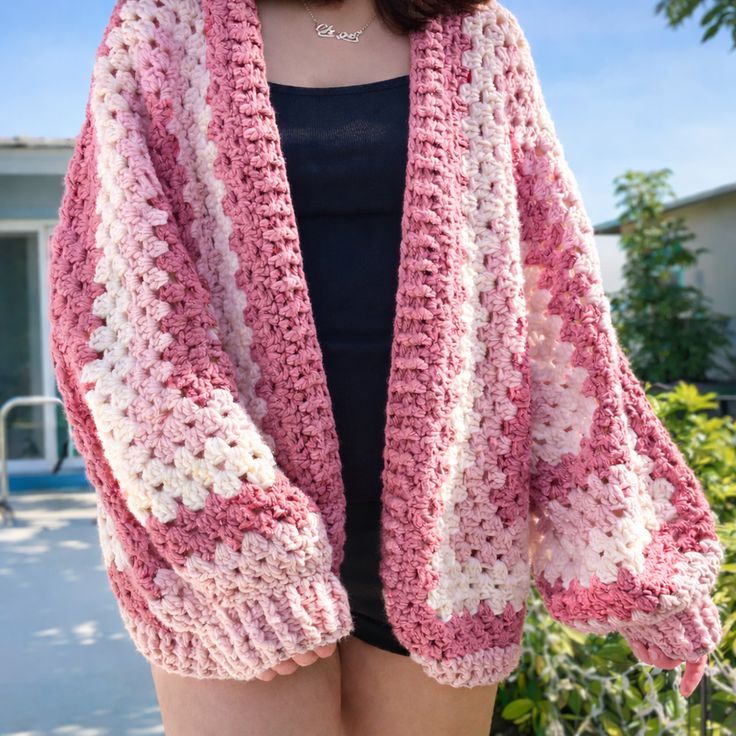
This open-front cardigan is built from the same small, colorful motifs used in blankets, granny squares or hexagons, joined edge to edge into two fronts, a back, and sleeves.
The result has a relaxed, layered look, and it’s one of the most forgiving garment shapes to size for a first attempt.
Stitch used: Traditional granny square or hexagon motifs, joined afterward.
Construction: All motifs are crocheted separately first, usually 16 to 20 of them depending on size, then laid out and arranged into sections, some for the back, some for each front piece, some for each sleeve.
The shoulder squares are joined first, then the side seams, leaving gaps for the neckline and armholes, with sleeves attached into those gaps last.
Seaming: Motifs are typically joined with slip stitch or whip stitch — slip stitch gives a slightly textured, visible join that can double as a design detail, while whip stitch keeps the join nearly flat.
Why it’s low-risk: Sizing is naturally forgiving, a bigger or smaller cardigan just means more or fewer motifs, not recalculated stitch counts across a whole garment.
Each motif is also a small, quick win, which keeps momentum going across a longer project instead of facing one uninterrupted piece of fabric.
3. Top-Down Raglan Pullover
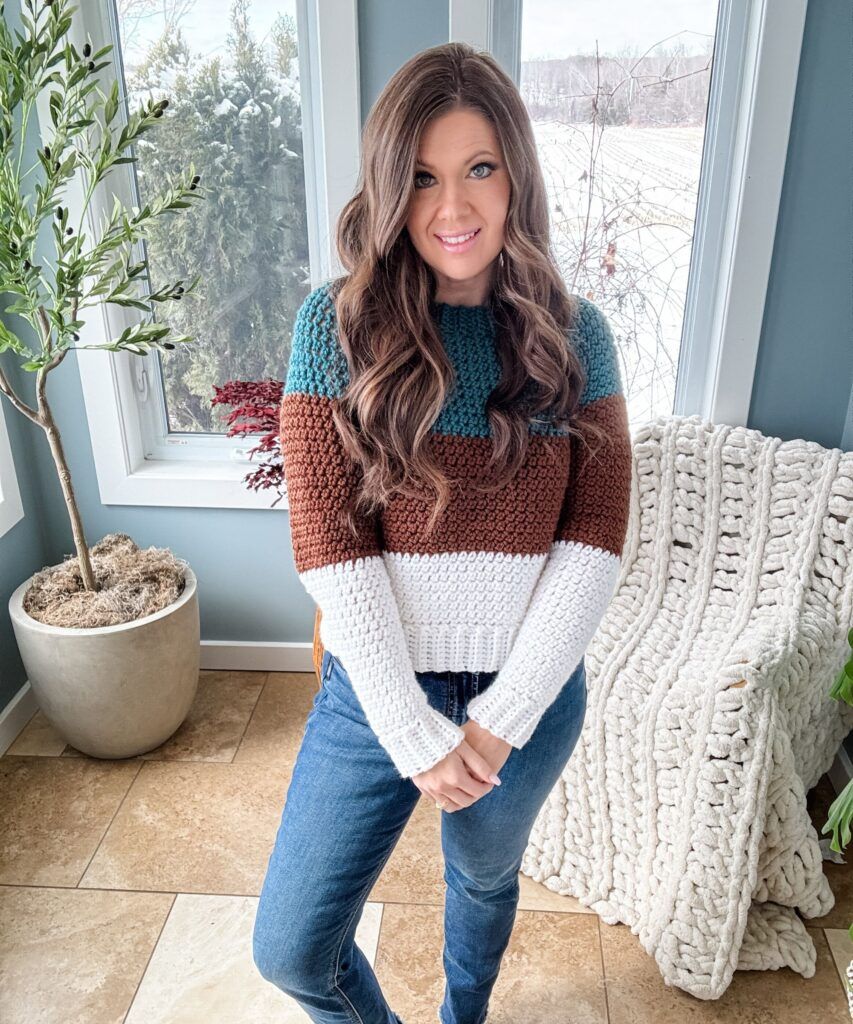
This fitted-but-simple pullover starts as a small circle at the neckline and grows downward into a full sweater, with the sleeves splitting off naturally partway through.
The look is more tailored than a boxy rectangle sweater, without requiring separate pieces or heavy seaming.
Stitch used: Double crochet, worked in the round from the neckline down.
Construction: Begins with a small ring at the neckline, then increases at four evenly spaced points every round to shape the yoke.
Once the yoke is deep enough, the stitches for the sleeves are set aside on hold while the body continues down as one piece; the sleeves are then crocheted separately from those held stitches, in the round, down to the cuff.
Seaming: This is largely a seamless construction, the body and sleeves are worked in one continuous piece rather than assembled from separate parts, so there’s little to no sewing beyond weaving in ends.
Why it’s low-risk: The garment can be tried on at multiple points during the project, after the yoke is shaped, and again before the sleeves are finished, so fit problems surface early, while they’re still easy to adjust, rather than only after the whole sweater is seamed.
4. One-Stitch-Repeat Boxy Pullover
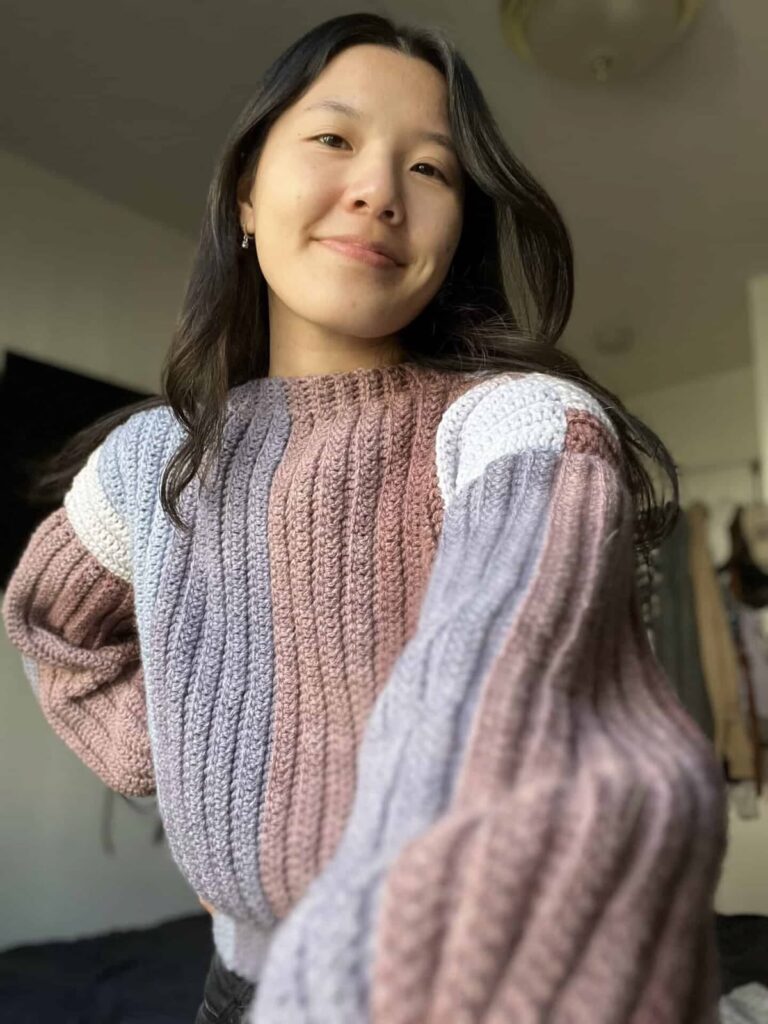
Photo credit: @ VivCrochets
A single repeated stitch pattern, often moss stitch or a simple V-stitch, gives this pullover more visual texture than a plain half double crochet rectangle sweater, without adding any real difficulty.
It’s a popular next step among crochet sweater patterns for beginners once the very basics feel comfortable.
Stitch used: A repeated two-stitch combination (like double crochet paired with a chain space) worked in straight rows.
Construction: Made the same way as a basic rectangle sweater, a front panel, a back panel, and two sleeve panels, worked flat. The only difference from a plain stitch pullover is that every row follows the same repeating stitch pattern instead of a single stitch, so the texture builds automatically without extra counting.
Seaming: Shoulders and sides are typically closed with mattress stitch for a flat, nearly invisible seam, since the textured stitch pattern already draws the eye and a bulky seam would compete with it.
Why it’s low-risk: Because the stitch repeats in a set pattern (for example, “double crochet, chain 1, skip a stitch” across the whole row), a beginner only needs to memorize one short sequence rather than following row-by-row shaping instructions, the texture looks intentional and finished without requiring more skill than a plain rectangle sweater.
5. Corner-to-Corner (C2C) Cardigan
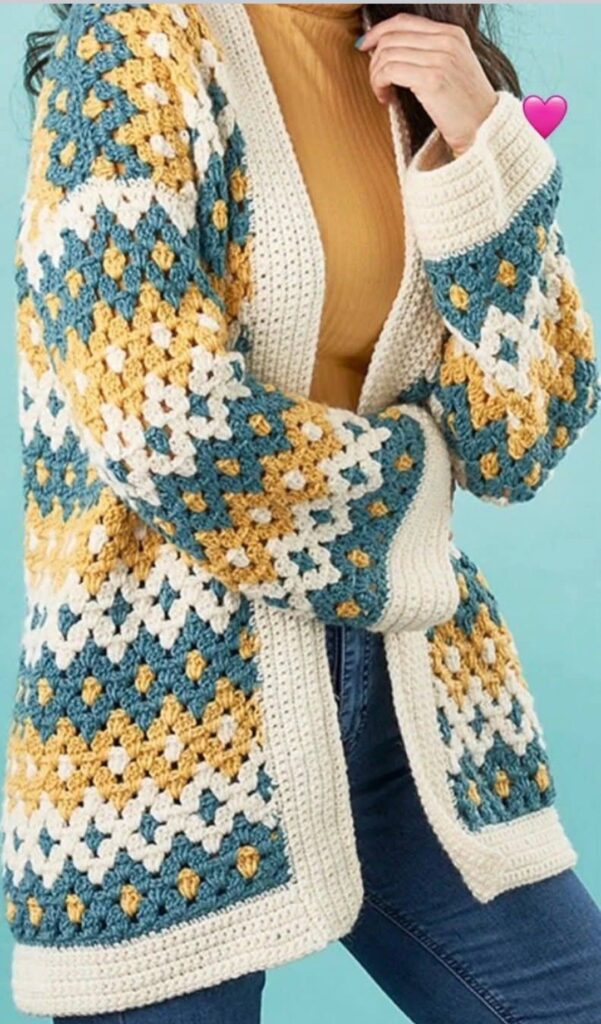
Photo credit: @ Esperanza Almonacid Barriga
Diagonal blocks of stitches, rather than straight horizontal rows, give this cardigan a slightly textured, blanket-like fabric that drapes well as a cardigan.
Stitch used: Double crochet, worked in diagonal blocks (chain, double crochet, chain, repeated across each diagonal row).
Construction: Each panel starts as a single block in one corner and grows by one block per row until it reaches the widest point, then decreases block by block toward the opposite corner, essentially building a rectangle on the diagonal.
Once the panels for the back, two fronts, and sleeves are complete, they’re joined the same way a rectangle-panel sweater is: shoulders first, then sides, with sleeves attached last.
Seaming: Whip stitch is the most common choice here, since the diagonal block texture already has visual movement, and a simple seam blends in without extra effort.
Why it’s low-risk: Although the block-by-block increasing and decreasing sounds technical, it follows one repeating rule for the entire panel, so once a beginner completes the first few rows, the rest is repetition rather than new instructions to learn.
6. Simple Poncho-Style Pullover
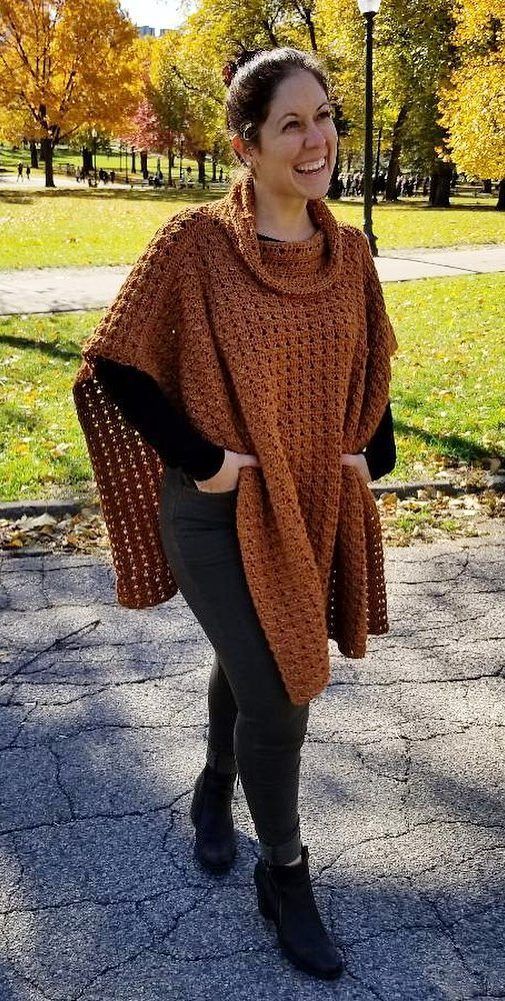
Photo credit: @ Marja
Draping over the shoulders and arms instead of fitting around them, this pullover skips traditional sleeve construction altogether, closer to a poncho than a fitted sweater, but still recognizable as a top rather than a wrap.
Stitch used: Half double crochet or double crochet, usually worked in the round from the neckline outward.
Construction: Begins with a small opening at the neckline and increases evenly outward in the round, growing the fabric like a widening circle or triangle until it reaches the desired length and width, with a gap left or seamed at the underarms depending on the style.
Seaming: Many versions are made in one continuous piece with little to no seaming; where the underarms are closed, whip stitch is the typical, quick choice.
Why it’s low-risk: There are no separate sleeves to construct, attach, or match in size to the body, which removes one of the most error-prone parts of garment-making, this is often recommended as a genuine first-ever garment for someone who hasn’t made any wearable piece before.
Want more creative projects? Creative DIY Crafts for Adults: 20 Fun Crafts for Adults to Try When You’re Bored at Home is filled with relaxing, beginner-friendly ideas that keep your hands busy and your creativity flowing.
7. Cocoon Cardigan (Wrap with Sleeves)
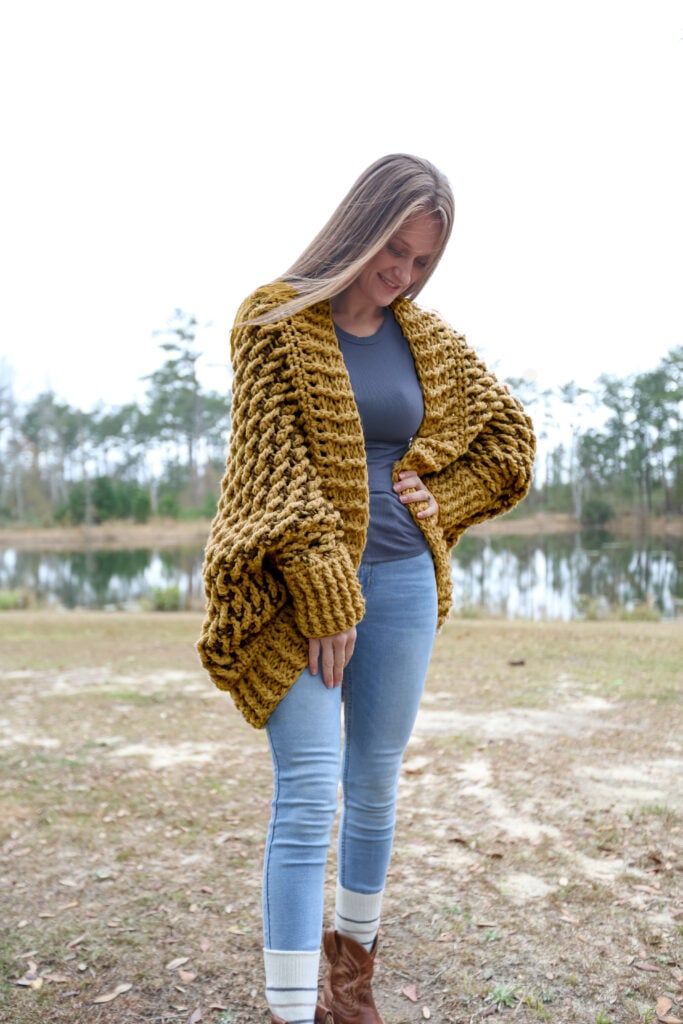
Photo credit: @ Life and Yarn
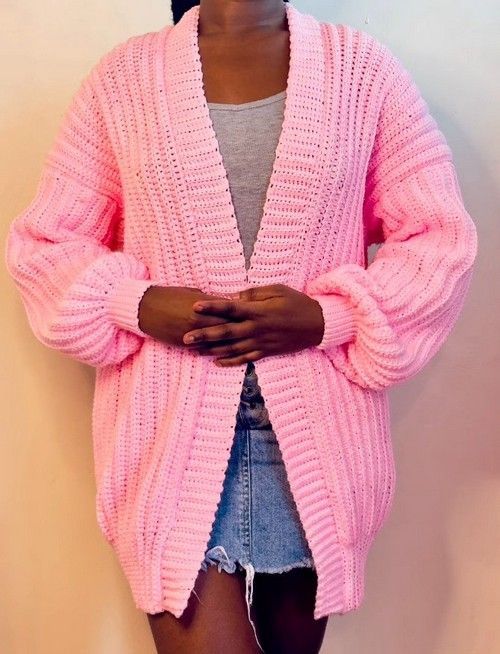
Best described as a wearable blanket, this cardigan drapes loosely over the body with sleeve openings, skipping fitted armholes or waist shaping entirely.
Stitch used: Double crochet or half double crochet, typically worked flat in one or two large panels.
Construction: One or two oversized rectangles are crocheted first, then folded and seamed at specific points to create sleeve openings, leaving the rest of the fabric to hang open at the front like a wrap. There’s no separate sleeve piece to make or match — the “sleeves” are really just gaps left in the main panel.
Seaming: A short whip-stitched seam closes each sleeve opening; everything else stays unseamed and open by design.
Why it’s low-risk: Sizing barely matters here, since the wrap shape is forgiving of a few extra or fewer inches in any direction, gauge still affects drape, but a slightly-off gauge won’t leave the garment unwearable the way it would with a fitted sweater.
8. Ruana (Two-Panel Wrap Cardigan)
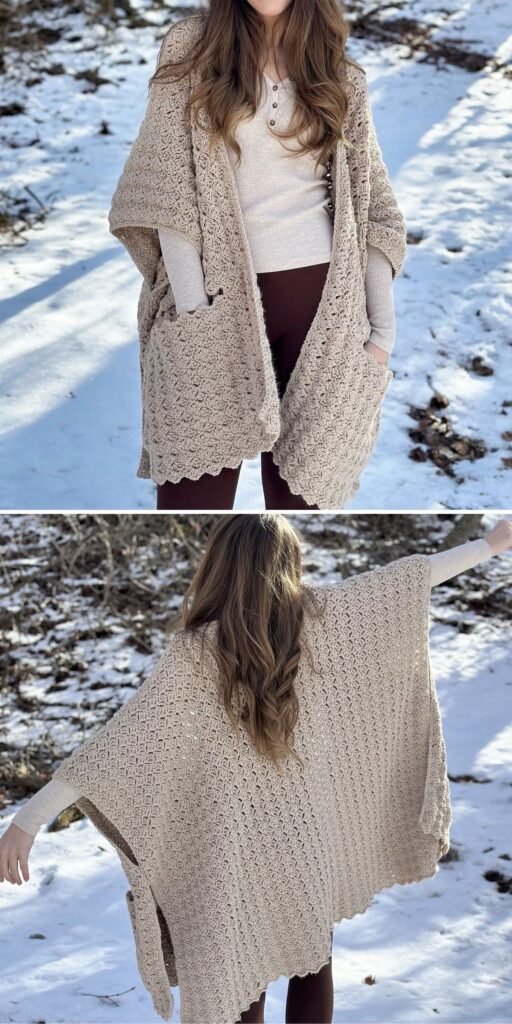
Photo credit: @ WoolPatterns.com
Worn open at the front like a cardigan, a ruana skips sleeves altogether and relies on two long panels joined at the shoulders to create drape rather than fit.
Stitch used: Double crochet or half double crochet, worked flat in rows.
Construction: Two long rectangular panels are crocheted separately, then laid overlapping and seamed together along one edge at the shoulders, leaving the rest open to hang loose over the arms and body.
Seaming: A single crochet or slip-stitch join along the shoulder seam is typical, since it’s the only seam in the entire garment.
Why it’s low-risk: With no sleeves and only one seam total, there’s very little room for construction mistakes, this is often the very first wearable piece recommended to someone who has never seamed a garment before.
9. Bottom-Up Tube Pullover
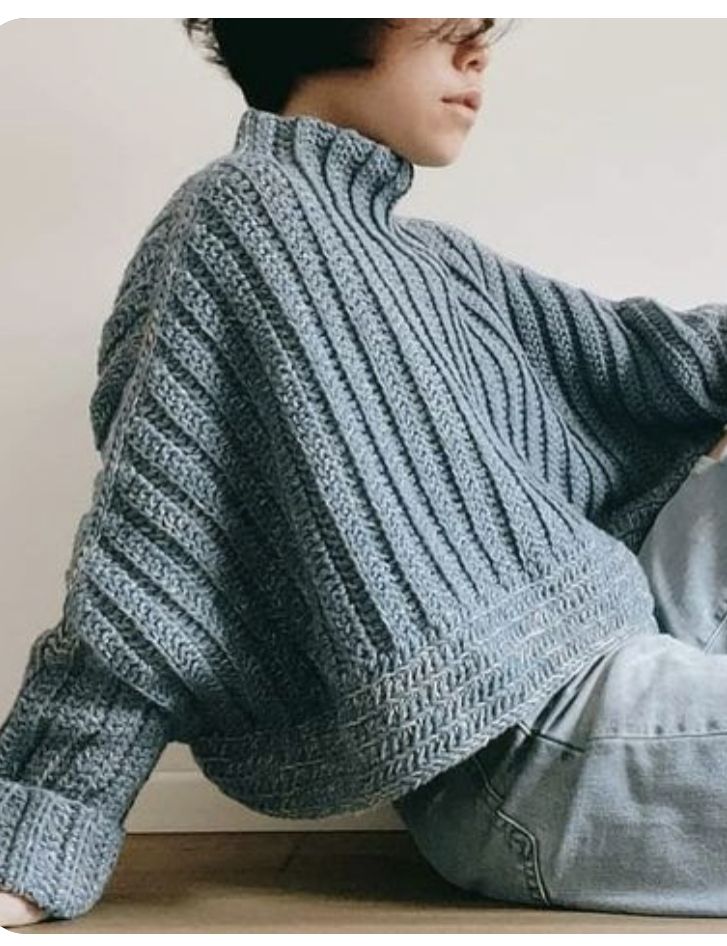
Photo credit: @ Asun
Rather than being worked flat and seamed, this pullover is crocheted in the round from the hem upward, forming a seamless tube for the body before the armholes are created.
Stitch used: Half double crochet or double crochet, worked in continuous rounds.
Construction: The body starts as a tube crocheted from the bottom hem up to the underarms. At that point, stitches are set aside at each side to create armhole openings, and the front and back continue separately (or the work is divided) up to the shoulders. Sleeves are made separately in the round, then joined into the armhole openings.
Seaming: Because the body is worked as one seamless tube, the only seaming needed is attaching the sleeves, typically with whip stitch or by crocheting them on directly.
Why it’s low-risk: Working in the round removes turning and row-counting errors that can throw off flat panels, and it’s a common recommendation among crochet sweater patterns for beginners because there’s no side seam to keep even or match up later.
10. Basic Bottom-Up Yoke Pullover
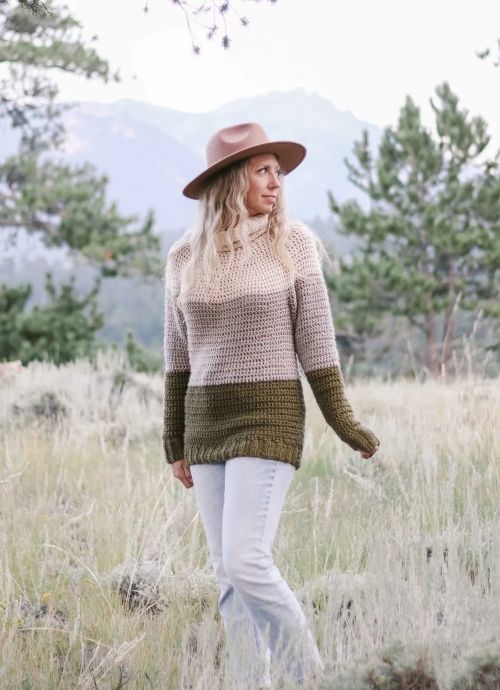
Photo credit: @ Hellolidy
Instead of starting at the neckline like a top-down raglan, this pullover is built from the hem up, with the body and sleeves eventually joined into one round yoke near the shoulders.
Stitch used: Double crochet, worked in the round.
Construction: The body is worked as a tube from the hem to the underarms, and each sleeve is worked separately as its own smaller tube. All three tubes are then joined onto one round, and the yoke above them decreases evenly to shape the neckline.
Seaming: This construction is nearly seamless, since the sleeves are joined directly into the round rather than sewn on afterward, only minimal weaving in of ends is needed at the end.
Why it’s low-risk: Trying the garment on becomes possible right at the point where the tubes join, before the yoke shaping is finished, which makes it easier to catch sizing issues early, one of the clearer examples of crochet sweater patterns for beginners that build in a natural checkpoint before too much time is invested.
Yarn and Hook Choices That Make These Sweaters Easier (or Harder)
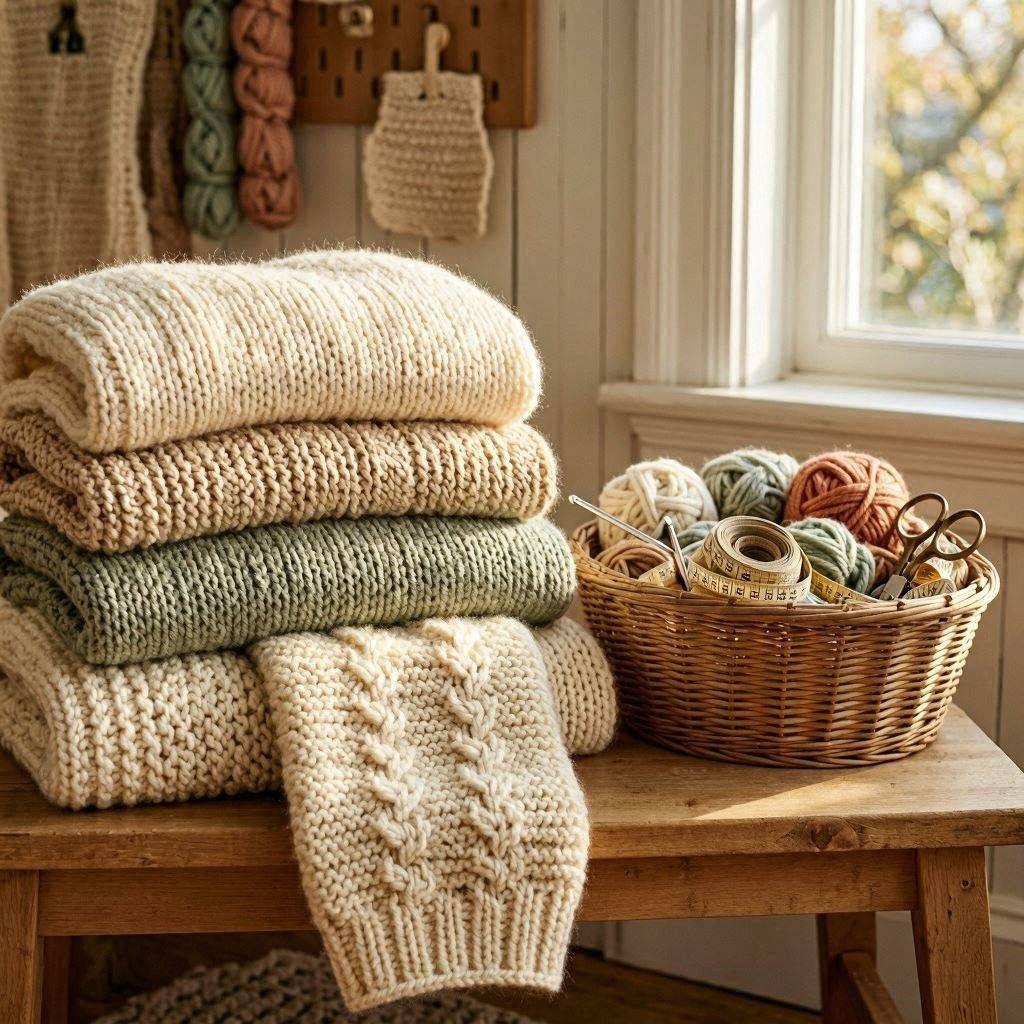
One of the biggest reasons beginners give up on a crochet sweater isn’t the pattern. It’s choosing yarn or a hook that makes every stitch harder than it needs to be.
For your first sweater, choose a worsted-weight yarn. It’s thick enough to make your stitches easy to see without creating a sweater that feels bulky or heavy.
Most beginner crochet sweater patterns also use worsted-weight yarn, making it much easier to achieve the intended size and fit.
The type of yarn matters just as much as its weight. Smooth, light-colored yarn makes crocheting much easier than fuzzy or dark yarn.
With smooth yarn, you can clearly see where to insert your hook, while light colors help each stitch stand out. That makes it easier to count rows, spot mistakes, and fix them before they become bigger problems.
Skip fuzzy, fluffy, or heavily textured yarn for your first sweater. These yarns hide the stitches, making it difficult to see where one stitch ends and the next begins.
Dark-colored yarn can cause similar problems because it reduces stitch definition, especially under indoor lighting or in the evening.
Your crochet hook matters just as much. Rather than guessing, use the hook size recommended on the yarn label unless the pattern says otherwise. Manufacturers match that hook size to the yarn to help create balanced, even stitches.
A hook that’s too small creates tight, stiff fabric and makes it harder to insert your hook into each stitch. A hook that’s too large creates loose stitches that are harder to count and can leave your sweater looking uneven.
Choosing the right yarn and pairing it with the correct hook won’t make every sweater effortless, but it removes many of the common frustrations that discourage beginners.
When you can clearly see your stitches and maintain even tension, you’ll build confidence more quickly, and you’re much more likely to finish the sweater you started.
Looking for your next hairstyle? Crochet Hairstyles for Black Women showcases beautiful, low-maintenance styles that are stylish, protective, and perfect for any occasion.
Quick Fixes for Moments Beginners Usually Quit
- Lost track of your stitches?
Count stitches after every row instead of every few rows. Catching a mistake early saves a lot of unraveling. - Edges looking uneven?
Place a stitch marker in the first or last stitch of each row to avoid accidentally adding or skipping stitches. - Sweater seems too small or too large?
Compare your work with the pattern measurements, not how it looks while it’s still in progress. Crochet fabric changes shape as it’s assembled. - Stitches looking messy?
Keep using the same hook and avoid pulling the yarn too tightly. Even tension improves naturally with practice. - Found a small mistake?
Decide whether it affects the fit. Minor imperfections are rarely noticeable in the finished sweater. - Progress feels slow?
Focus on completing one section at a time, such as a sleeve or a panel, instead of thinking about the entire project. - Hands getting tired?
Take a short break, stretch your fingers and wrists, then continue with fresh hands to maintain neat stitches. - Feeling like giving up?
Crochet just a few more rows before stopping. Small, consistent progress is what turns a half-finished project into a wearable sweater.
Conclusion
Choosing the right crochet sweater patterns for beginners can make the difference between an unfinished project and a sweater you’ll proudly wear.
Start with a simple pattern, use beginner-friendly yarn and the correct hook, and focus on steady progress instead of perfection.
Every completed row builds your confidence and helps you develop skills for more advanced projects.
Ready to pick up your hook? Choose one beginner-friendly pattern from this list, gather your supplies, and start stitching. Your first finished crochet sweater may be closer than you think.