
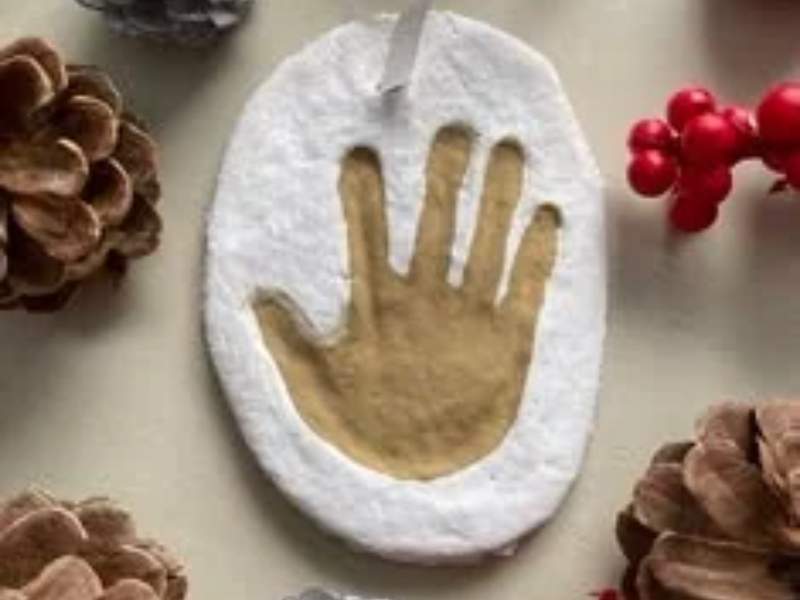
How to Make a Salt Dough Handprint Keepsake for Your Baby to Preserve Precious Memories at Home
Watching your baby grow is one of the most beautiful experiences of parenthood. One day, those tiny fingers curl around yours, and before you know it, your little one is reaching for toys, exploring the world, and taking their first steps. Although every stage brings something special, it can be difficult to believe how quickly those precious moments pass. Fortunately, a salt dough handprint keepsake for your baby offers a simple and affordable way to preserve a little piece of childhood at home.
Unlike expensive gifts and store-bought decorations, a salt dough handprint keepsake for your baby is personal, meaningful, and easy to make with everyday household ingredients. Furthermore, you can customize the keepsake with your baby’s name, birth date, or a heartfelt message. As a result, you will have a beautiful reminder of how small your baby’s hands once were.
Whether you are preparing a special gift for grandparents, celebrating a birthday, or simply creating something memorable, this homemade project is worth trying. Best of all, you do not need professional crafting skills or expensive equipment to get started.
Why Make a Salt Dough Handprint Keepsake for Your Baby?
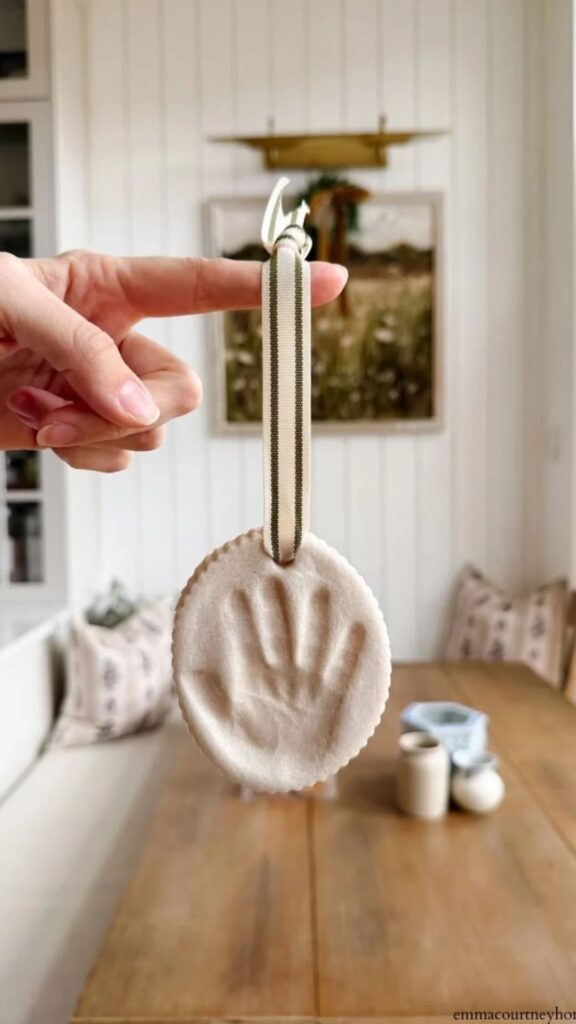
A salt dough handprint keepsake for your baby is more than a simple craft. Instead, it becomes a treasured reminder of a stage you may wish you could revisit years later.
Babies grow incredibly quickly. Consequently, their tiny hands soon become larger, stronger, and more capable. Creating a handprint today allows you to remember those early months long after your baby has grown.
Additionally, this project encourages meaningful family traditions. For example, you could make a new keepsake every birthday and compare the prints as your child grows. Over time, these little decorations can become a beautiful collection of family memories.
Another advantage is affordability. Flour, salt, and water are usually inexpensive and easy to find. Therefore, you can create something meaningful without spending money on expensive personalized gifts.
Moreover, a salt dough handprint keepsake for your baby makes a thoughtful present for grandparents, aunts, uncles, and other loved ones. Because it carries a personal touch, it often means more than something purchased from a shop.
Materials You Need
Before making your salt dough handprint keepsake for your baby, gather everything you need. Preparing your materials beforehand makes the process smoother and helps you work efficiently.
You will need:
– Two cups of plain flour.
– One cup of table salt.
– Approximately three-quarters to one cup of water.
– A mixing bowl.
– A wooden spoon.
– A rolling pin.
– A clean, flat surface.
– A round cutter or a small plate.
– A drinking straw for making a hanging hole.
– Baking paper.
– A baking tray.
– Acrylic paint for decorating.
– A soft paintbrush.
– Clear craft sealant for finishing.
– A ribbon or string, if you want to hang the finished decoration.
Fortunately, most of these materials are common household items. However, if you do not have a rolling pin, a clean, smooth bottle can work as an alternative.
You can also prepare optional decorations, such as letter stamps, small decorative shapes, or a pencil for writing the date.
Remember that your baby’s safety comes first. Salt dough contains a high concentration of salt, so it must never be eaten. Keep unused dough, scraps, paints, and finishing products away from your baby’s mouth and reach.
Step One: Prepare Your Salt Dough
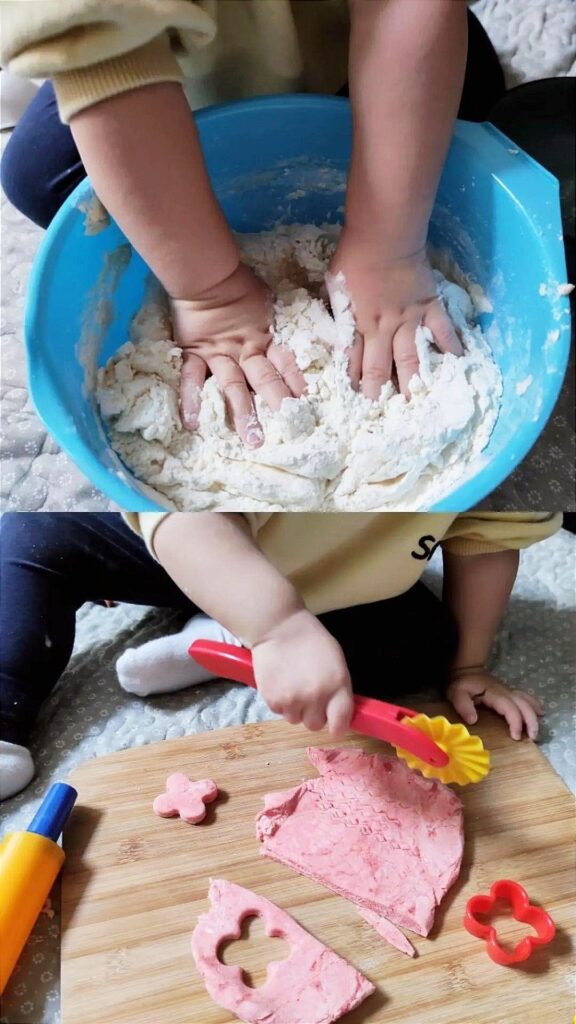
The first step in creating a salt dough handprint keepsake for your baby is preparing the dough.
First, measure two cups of plain flour and one cup of salt. Pour both ingredients into a mixing bowl. Next, stir them together until the salt is distributed evenly throughout the flour.
Gradually add water while mixing with a wooden spoon. Start with approximately three-quarters of a cup, and then add small amounts until the mixture begins to form a dough.
However, avoid pouring in all the water too quickly. Depending on the flour and humidity, your mixture may need slightly more or less water.
Once the ingredients come together, transfer the dough to a clean surface. Knead it gently for several minutes until it becomes smooth and pliable.
If the dough feels too sticky, sprinkle a little additional flour over it. Conversely, if it feels dry and cracks when pressed, add a small amount of water and knead again.
The finished dough should be soft enough to shape but firm enough to hold an impression.
Importantly, prepare the dough before bringing your baby into the crafting area. This reduces the amount of time your little one needs to remain still and helps you concentrate on making a clear print.
Step Two: Roll Out the Dough
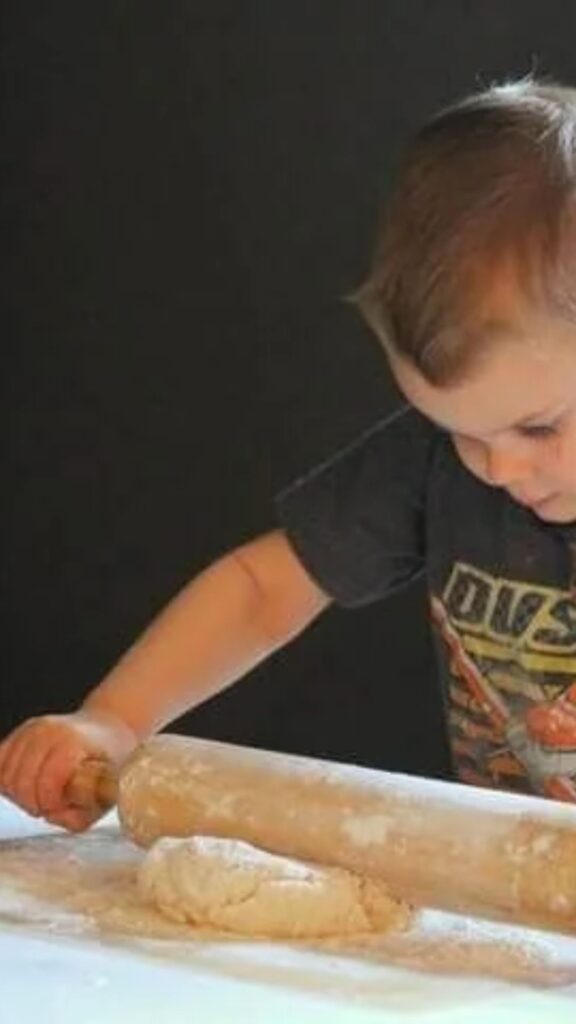
Once your dough is ready, prepare the surface for shaping.
Place a sheet of baking paper on your worktop. Then, position the dough on the paper and roll it gently using a rolling pin.
Aim for a thickness of approximately one to one-and-a-half centimetres. This provides enough depth for the handprint while helping the finished decoration remain sturdy.
Nevertheless, avoid making the dough excessively thick. A very thick keepsake takes longer to dry and may develop cracks during baking.
Likewise, rolling it too thin can make the finished piece fragile.
After rolling, use a round cutter or the edge of a small plate to create your preferred shape. Alternatively, leave the dough in a simple oval or heart shape for a more personalized appearance.
Smooth the edges gently with your fingers.
If you are making a salt dough handprint keepsake for your baby as a gift, consider the space you will need for the baby’s name and date. Leave enough room around the handprint for these details.
Step Three: Make Your Baby’s Handprint
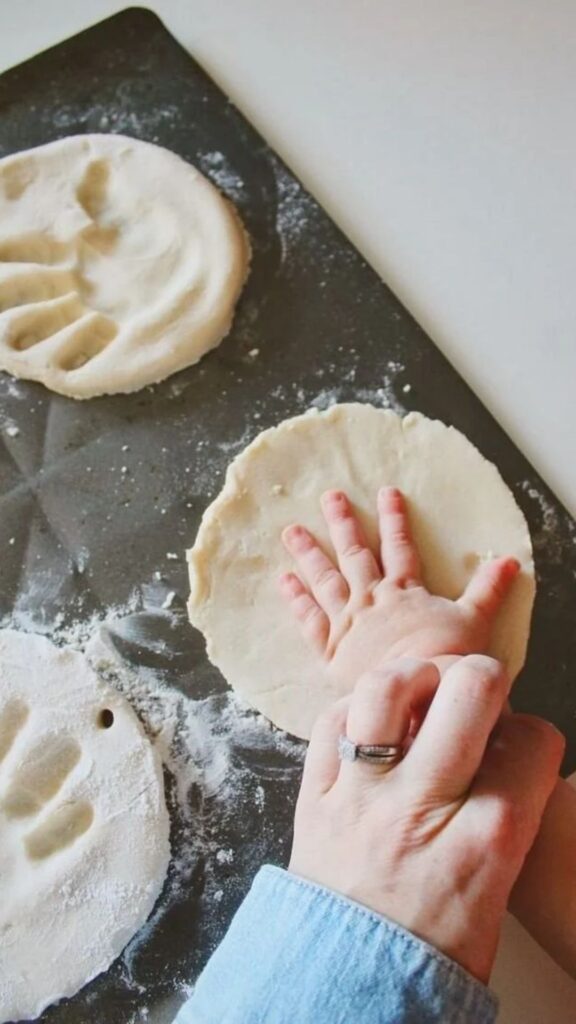
This is the most meaningful part of the entire project. However, it also requires patience because babies cannot always cooperate when we want them to.
Before starting, choose a time when your baby is calm, comfortable, and well rested. Avoid attempting the handprint when your little one is hungry, distressed, or ready for sleep.
Ideally, ask another adult to help. One person can comfort and safely support the baby while the other prepares the dough and makes the impression.
First, make sure the dough is positioned on a stable surface away from the baby’s face. Then, gently support your baby’s hand and spread the fingers only as comfortably as possible.
Press the palm and fingers into the dough with light, even pressure.
Do not force the fingers apart or push the hand down firmly. Instead, aim for a clear impression without causing discomfort.
Carefully lift the hand straight upward to avoid smudging the print.
If the impression is unclear, you can smooth the dough and try again, provided your baby remains comfortable. Nevertheless, do not continue if your baby becomes upset.
Remember, the experience should be calm and enjoyable rather than stressful.
For younger babies, an adult should handle the entire process while another adult safely supports the child. Never leave your baby unattended near the dough or crafting materials.
Step Four: Add a Name, Date, or Personal Message
After making the handprint, personalize your creation while the dough is still soft.
For instance, you could write your baby’s name beneath the impression using a toothpick or another clean, blunt crafting tool. You might also add the birth date, the date you created the keepsake, or a short message.
Popular ideas include:
– “Tiny Hands, Big Love.”
– “My First Handprint.”
– “Loved Beyond Measure.”
– “Our Little Treasure.”
– “Forever Our Baby.”
Alternatively, add a small heart beside the handprint or create a decorative border around the edges.
If you prefer a hanging ornament, make a hole near the top using a drinking straw. Ensure the hole is sufficiently far from the edge to reduce the risk of breakage.
However, avoid making the hole too close to the handprint because it may weaken the design.
For a simple and timeless look, leave the surface uncluttered. After all, the handprint itself is the most important feature.
Step Five: Dry the Keepsake ProperlySource
Now that your salt dough handprint keepsake for your baby is shaped and personalized, it is time to dry it.
You have two main options: air-drying or oven-drying.
Oven-Drying Method
First, preheat your oven to approximately 100–120°C, depending on your oven and the thickness of the dough.
Place the keepsake on a baking tray lined with baking paper. Then, put the tray into the oven.
Allow the dough to dry slowly. Depending on its thickness and moisture content, this can take several hours.
Check the keepsake periodically and turn it carefully if necessary. However, avoid using excessive heat because the outside may harden too quickly while the inside remains damp.
If the keepsake begins to brown, reduce the temperature.
The decoration is ready when it feels firm and has dried throughout. Allow it to cool completely before painting.
Air-Drying Method
Alternatively, leave the keepsake on a flat surface in a dry, well-ventilated area.
Turn it occasionally to encourage even drying. Depending on the thickness and humidity, complete drying may take several days or longer.
Although air-drying requires patience, it avoids using an oven.
Regardless of your chosen method, never assume that the keepsake is completely dry just because its surface feels hard. Moisture trapped inside can encourage deterioration later.
Looking for creative projects that are easy to make at home? Explore Air Dry Clay Crafts for When You Have Clay but No Idea What to Make—For Keeps or Display for fun and inspiring ways to turn simple materials into beautiful handmade creations
Step Six: Decorate Your Salt Dough Handprint Keepsake
Once the keepsake has dried and cooled completely, you can begin decorating.
First, inspect the surface for rough edges or small imperfections. If necessary, smooth them gently with fine sandpaper while keeping the dust away from children.
Next, choose a colour scheme that suits your home or the occasion.
For example, white, cream, and soft beige create a simple, elegant appearance. Meanwhile, pastel pink, blue, yellow, or green can produce a cheerful nursery decoration.
You could also use metallic gold or silver paint to highlight the handprint.
Apply thin coats of paint rather than one thick layer. Allow each coat to dry before adding another.
If you want the handprint to stand out, paint the background in one colour and use a contrasting shade for the fingers and palm.
Alternatively, keep the background neutral and add your baby’s name in a brighter colour.
However, do not worry about making the design perfect. Small variations are part of what makes a handmade keepsake special.
Always use craft products according to their labels. Keep your baby away from paint, sanding dust, and other materials during decorating.
Step Seven: Seal and Protect Your KeepsakeSource
After decorating, allow the paint to dry completely before applying a suitable clear craft sealant.
A sealant can help protect the surface from dust and minor handling. Nevertheless, it cannot make salt dough waterproof or guarantee permanent preservation.
Follow the manufacturer’s instructions carefully, including any ventilation and drying requirements.
Keep your baby away from the work area while applying the sealant and throughout the recommended curing period.
Once the finish has cured, attach a ribbon if you made a hanging hole. Alternatively, place the finished keepsake on a small display stand.
Remember that salt dough is sensitive to moisture. Therefore, display your creation in a dry indoor location rather than a bathroom, kitchen splash area, or outdoor space.
With careful handling, your salt dough handprint keepsake for your baby can remain a meaningful family memento for years.
Creative Ways to Personalize Your Keepsake
One of the best things about making a salt dough handprint keepsake for your baby is the freedom to customize it.
Create a Heart-Shaped Keepsake
Instead of using a circle, shape the dough into a heart. Place the handprint in the centre and write your baby’s name beneath it.
This design works particularly well as a Valentine’s Day gift or a present for grandparents.
Add Your Baby’s Birth Details
Include your baby’s name, birth date, or a short message. You could also create a separate keepsake each year and record the child’s age.
Consequently, the decorations become a collection that tells the story of your child’s growth.
Make a Christmas Ornament
Create a circular or star-shaped design and add a ribbon hole. Once decorated and fully dried, it can become a special addition to your family’s Christmas decorations.
However, keep it out of reach of babies and young children because dried salt dough can break.
Create a Matching Family Display
If you have several children, make a separate handprint for each child. Use matching colours and shapes to create a coordinated display.
Alternatively, place the prints together in a framed arrangement, provided the pieces are securely mounted and kept away from children.
Give a Handmade Gift
A personalized handprint is a thoughtful present for grandparents, godparents, or other family members.
Furthermore, you can wrap it in tissue paper and place it inside a gift box with a handwritten note explaining when the print was made.
Because the gift captures a specific moment in your baby’s life, it can carry lasting sentimental value.
Common Mistakes to Avoid
Although this project is simple, a few mistakes can affect the final result.
Adding too much water: Excess water makes the dough sticky and difficult to shape. Therefore, add water gradually.
Rolling the dough too thin: Thin keepsakes are more likely to crack or break. Aim for a reasonably even thickness.
Pressing the baby’s hand too firmly: Excessive pressure can make the experience uncomfortable. Instead, use gentle, controlled pressure.
Moving the dough too much: Handling the shaped dough repeatedly can distort the impression. Prepare your design first and move it as little as possible.
Drying the keepsake too quickly: High oven temperatures may cause browning and cracking. Use gentle heat and allow enough time.
Painting before the dough dries: Moisture trapped inside can damage the finished decoration. Make sure the piece is completely dry first.
Ignoring moisture during storage: Salt dough can absorb moisture from the air. Store your keepsake somewhere dry and inspect it occasionally.
Leaving the keepsake within a baby’s reach: Even a sealed ornament is not a toy. Keep it away from babies because broken pieces and salt dough can present choking or ingestion hazards.
By avoiding these mistakes, you can improve the quality of your finished keepsake and make the crafting process more enjoyable.
How to Preserve Your Keepsake for Years
Once your salt dough handprint keepsake for your baby is complete, you will naturally want to protect it.
First, choose a dry place for storage or display. Moisture can soften the dough, damage the paint, and encourage deterioration.
Second, avoid direct sunlight and extreme temperature changes. Although the keepsake may look sturdy, it can still become brittle or develop cracks.
Third, handle it gently. Whenever possible, hold it with both hands rather than lifting it by the ribbon or a thin edge.
If you want additional protection, consider displaying it inside a suitable glass-fronted frame or enclosed display case. Make sure the frame is securely mounted and inaccessible to children.
For long-term storage, wrap the completely dry keepsake in acid-free tissue paper and place it inside a sturdy box in a dry location.
You should also consider making a digital photograph of the finished piece. That way, even if the ornament eventually deteriorates, you will still have a record of the handprint.
Nevertheless, remember that salt dough is a homemade craft material rather than an archival preservation method. Cracking, fading, and moisture damage can occur over time.
If long-term durability is especially important, you could consider creating a second impression using a commercially produced, non-toxic keepsake material designed for that purpose.
Frequently Asked Questions
- Is salt dough safe for making a baby handprint?
Salt dough can be used for supervised keepsake crafting, but it is not safe to eat. It contains a high concentration of salt, which can cause serious harm if swallowed in sufficient quantities. Keep the dough away from your baby’s mouth, and have another adult support and supervise your baby throughout the process.
- What is the best age to make a salt dough handprint keepsake for your baby?
You can make one during infancy, provided you can safely and comfortably support your baby. Choose a calm time and never force your baby’s hand into the dough. If your baby becomes distressed, stop and try again another day.
- How long does salt dough take to dry?
Oven-drying may take several hours, depending on the thickness and moisture content. Air-drying can take several days or longer. In either case, allow the keepsake to dry completely before painting or sealing it.
- Why did my salt dough handprint keepsake crack?
Cracking can occur when the dough is too dry, the keepsake is too thick, or the oven temperature is too high. To reduce the risk, knead the dough thoroughly, maintain an even thickness, and dry the piece slowly.
- How can I make my salt dough handprint keepsake last longer?
Allow it to dry completely, decorate it with suitable craft products, and apply a compatible sealant according to the manufacturer’s instructions. Store it in a dry place away from direct sunlight and moisture. Remember that salt dough is not waterproof, and no sealant can guarantee that it will last forever.
Conclusion
Making a salt dough handprint keepsake for your baby is a beautiful way to preserve a fleeting moment of childhood.
With simple ingredients, a little patience, and a few creative touches, you can transform an ordinary afternoon into a meaningful family memory.
Furthermore, you do not need expensive equipment or advanced crafting skills. By following the steps carefully, you can prepare the dough, capture your baby’s tiny handprint, dry the decoration, and personalize it with a name or date.
You can also adapt the design for birthdays, Christmas ornaments, family displays, or thoughtful gifts for grandparents.
Most importantly, remember that the real value lies in the memory rather than the perfection of the finished craft. A slightly uneven finger impression can become a treasured reminder of just how small your baby once was.
Therefore, gather your materials, prepare your workspace, and enjoy creating something meaningful for your family.
Your baby will not remain this little forever. However, a carefully preserved handprint can help you remember these precious early days long after those tiny fingers have grown.