How to Make Beautiful Costume Jewelry at Home, Easy DIY Crafts for Beginners on a Budget
Making your own jewelry at home is a wonderful way to express your creativity, experiment with different styles, and create beautiful accessories without spending a fortune. Whether you love colorful bracelets, elegant necklaces, statement earrings, or delicate rings, there are so many costume jewelry crafts to make at home using affordable materials and simple techniques.
You don’t need to be a professional jewelry designer or own expensive equipment to get started. With a few basic supplies, some creativity, and a little patience, you can transform ordinary beads, old accessories, colorful threads, and inexpensive jewelry findings into attractive pieces that look stylish and unique.
One of the best things about making costume jewelry at home is the freedom to customize every piece. You can choose your favorite colors, experiment with different shapes, combine materials, and create accessories that match your outfits or personal style. You can also reuse old jewelry instead of throwing it away, giving forgotten accessories a completely new appearance.
If you have been searching for easy DIY costume jewelry ideas but don’t know where to begin, this guide will help you get started. From simple beaded bracelets to beautiful statement necklaces, you will discover creative jewelry-making projects, the materials you need, and practical tips for achieving attractive results.
Let’s explore some beautiful costume jewelry crafts you can make at home, even if you are a complete beginner.
Why Make Costume Jewelry at Home?
Before exploring the different projects, it helps to understand why making your own costume jewelry is worth trying.
Costume jewelry is generally made using affordable materials such as glass beads, plastic beads, acrylic stones, metal findings, colorful cords, and decorative charms. Unlike fine jewelry, it doesn’t require expensive gemstones or precious metals.
This makes DIY costume jewelry an accessible hobby for people who enjoy creating fashionable accessories without spending too much.
Here are some reasons to consider making your own jewelry.
It Helps You Save Money
Buying fashionable jewelry regularly can become expensive, especially when you enjoy changing your accessories to match different outfits.
Making costume jewelry at home allows you to create several pieces using one collection of supplies. For example, a packet of colorful beads can become multiple bracelets, earrings, or necklaces.
You can also reuse materials from broken or outdated accessories, reducing the amount you need to spend on new supplies.
You Can Create Your Own Designs
Sometimes, you find beautiful jewelry online or in stores, but the colors, sizes, or designs aren’t exactly what you want.
DIY jewelry gives you the opportunity to create accessories according to your preferences.
You can make oversized earrings, delicate necklaces, colorful bracelets, or minimalist pieces that complement your everyday outfits.
It Is a Creative and Relaxing Hobby
Jewelry making gives you an opportunity to spend time doing something enjoyable and productive.
Choosing beads, arranging colors, connecting decorative pieces, and putting everything together can be a relaxing activity.
It is also a wonderful way to spend time with friends, family members, or children who enjoy creative projects. Just ensure that small beads and jewelry components are kept away from young children who may swallow them.
You Can Turn It Into a Small Business
Another advantage of making costume jewelry at home is the possibility of earning extra income.
Once you become comfortable creating attractive designs, you can make jewelry for friends, family members, or customers.
Handmade bracelets, necklaces, earrings, and personalized accessories can make thoughtful gifts and attractive products for a small handmade jewelry business.
Essential Materials for Making Costume Jewelry at Home
You don’t need to purchase every jewelry-making supply before starting. Begin with a few basic materials and gradually expand your collection as you try different projects.
Here are some useful supplies to have.
Beads: Beads are among the most important materials for DIY costume jewelry. You can use glass beads, acrylic beads, wooden beads, pearl beads, ceramic beads, and colorful plastic beads.
Jewelry wire: Jewelry wire is useful for making earrings, rings, wire-wrapped pendants, and other decorative accessories.
Elastic cord: Stretchy elastic cord is perfect for making simple bracelets that don’t require clasps.
Nylon thread: This is useful for stringing lightweight beads and creating necklaces and bracelets.
Jewelry chains: Chains can be used for necklaces, bracelets, and decorative jewelry designs.
Jump rings: These small metal rings connect different jewelry components.
Earring hooks: These are necessary for making many types of DIY earrings.
Jewelry clasps: Clasps help secure necklaces and bracelets.
Pliers: Round-nose pliers and flat-nose pliers are useful for opening jump rings, bending wire, and attaching jewelry components.
Scissors: A sharp pair of scissors helps cut thread, elastic cord, and other crafting materials.
Decorative charms: Charms add personality to necklaces, bracelets, and earrings.
Glue: Jewelry adhesive can help secure certain decorative components when the design requires it. Choose an adhesive suitable for the materials you are using.
Once you have these supplies, you can experiment with several costume jewelry crafts without purchasing an entirely new collection of materials for every project.
Beautiful Costume Jewelry Crafts to Make at Home
If you are looking for creative ways to make your own accessories, these DIY costume jewelry projects are wonderful places to start.
Each idea offers something different, whether you prefer simple everyday jewelry or bold statement pieces.
Colorful Beaded Bracelets
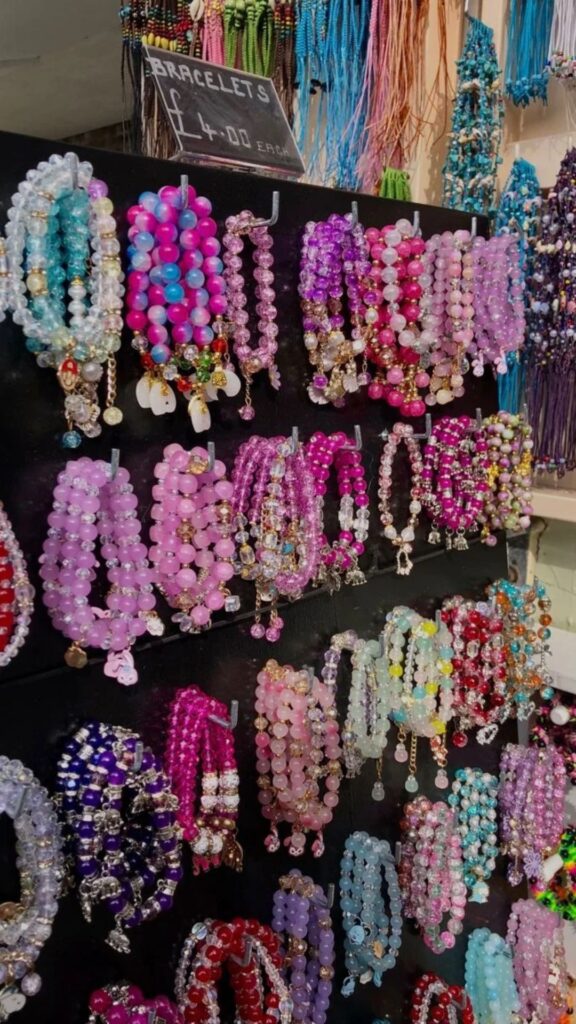
Beaded bracelets are among the easiest costume jewelry crafts to make at home. They are beginner-friendly, affordable, and offer plenty of opportunities to experiment with different colors and patterns.
You can create simple single-color bracelets or combine several shades to make more playful designs.
Materials needed:
- Colorful acrylic or glass beads
- Stretchy jewelry cord
- Scissors
- Measuring tape
- Small decorative charms (optional)
How to make them:
Start by measuring your wrist to determine the appropriate bracelet length. Cut a piece of elastic cord that is slightly longer than your measurement to leave enough room for tying.
Choose the beads you want to use and arrange them on a flat surface. You can create a repeating color pattern, alternate large and small beads, or combine different shapes for a more interesting appearance.
Thread the beads onto the elastic cord until you reach your desired length.
Bring both ends together and tie a secure knot. Gently pull the cord to check that the knot holds before trimming the excess.
For a cleaner finish, tuck the knot inside one of the larger beads if the opening allows it.
You can make several bracelets in complementary colors and wear them together for a fashionable layered look.
DIY Pearl Necklaces
Pearl necklaces are timeless accessories that can make simple outfits look more elegant.
You don’t need expensive natural pearls to create an attractive pearl-inspired necklace. Affordable imitation pearl beads are perfect for costume jewelry projects.
Materials needed:
- Imitation pearl beads
- Nylon jewelry thread
- Necklace clasp
- Jump rings
- Jewelry scissors
How to make them:
Begin by deciding how long you want your necklace to be. A shorter necklace can create a classic appearance, while a longer design offers a more relaxed style.
Cut your jewelry thread, leaving additional length for attaching the clasp.
Start threading the imitation pearl beads onto the thread. You can use pearls of the same size for a traditional design or combine different sizes for a modern appearance.
Continue adding beads until you reach the desired length.
Attach the necklace clasp using jump rings or an appropriate jewelry finishing technique. Secure the thread carefully so the necklace doesn’t come apart during use.
For a more decorative design, add a small pendant or a few colorful accent beads.
Handmade Statement Earrings
Statement earrings are perfect when you want your accessories to become the main attraction of your outfit.
They can feature colorful beads, decorative stones, metal shapes, or combinations of different materials.
Materials needed:
- Earring hooks or posts
- Jump rings
- Decorative beads
- Jewelry wire
- Round-nose pliers
- Flat-nose pliers
How to make them:
Choose a design before assembling your earrings. You can create a simple dangling style, a circular design, or a layered arrangement using different beads.
Arrange the beads in the order you want them to appear.
Cut a small piece of jewelry wire and thread your beads onto it.
Use round-nose pliers to form a small loop at the top of the wire. Attach the loop to an earring hook using a jump ring if necessary.
Repeat the process for the second earring.
Make sure both earrings have similar lengths and bead arrangements so they look like a matching pair.
When selecting materials, consider the weight of the finished earrings. Lightweight components are generally more comfortable for everyday wear.
DIY Charm Bracelets
Charm bracelets are wonderful costume jewelry projects because you can personalize them with small decorative pieces that represent your interests, memories, or personality.
You can use hearts, stars, flowers, butterflies, initials, and other miniature charms.
Materials needed:
- Jewelry chain or bracelet base
- Decorative charms
- Jump rings
- Jewelry clasp
- Flat-nose pliers
How to make them:
Start by measuring your wrist and cutting the bracelet chain to the appropriate length.
Choose several charms that complement one another. You can use a matching collection or combine different shapes for a playful design.
Open a jump ring carefully using two pairs of pliers. Attach one charm to the ring and connect it to a suitable section of the bracelet chain.
Repeat this process until you have attached all your charms.
Add a clasp to the ends of the bracelet to make it easy to wear and remove.
For a personalized touch, use an initial charm or a small decorative pendant.
DIY Beaded Hoop Earrings
Beaded hoop earrings are attractive accessories that can add color and personality to an otherwise simple outfit.
They are also a wonderful way to use leftover beads from other jewelry-making projects.
Materials needed:
- Metal hoop earring bases
- Small beads
- Jewelry wire
- Jewelry pliers
- Wire cutters
How to make them:
Choose small beads in colors that complement each other.
Take a hoop earring base and determine how you want the beads arranged. You can cover the entire hoop with beads or decorate only a section.
Depending on the hoop design, thread the beads directly onto the base or attach them using thin jewelry wire.
Secure the wire ends carefully so the beads remain in place.
Repeat the process for the second hoop.
You can make these earrings in neutral colors for everyday wear or use bright shades for a more playful accessory.
Handmade Layered Necklaces
Layered necklaces are a fashionable way to combine different chain lengths, pendants, and decorative elements.
Instead of purchasing several necklaces separately, you can create your own coordinated set at home.
Materials needed:
- Jewelry chains in different lengths
- Small pendants
- Jump rings
- Necklace clasps
- Jewelry pliers
How to make them:
Choose three chains of different lengths. This will help prevent them from sitting directly on top of one another.
Select pendants that complement each other. For example, you can combine a small heart, a simple circular pendant, and a decorative gemstone-inspired charm.
Attach the pendants to the chains using jump rings.
Add clasps to the chains if they don’t already have them.
Once finished, wear the necklaces together to create a layered appearance.
For a coordinated look, choose chains with similar metal finishes.
DIY Fabric and Ribbon Bracelets
If you enjoy working with fabric, ribbon bracelets are an interesting alternative to traditional beaded jewelry.
They can be made using colorful ribbons, decorative buttons, fabric strips, and small charms.
Materials needed:
- Satin ribbon or fabric strips
- Bracelet clasp
- Decorative buttons
- Jewelry adhesive or sewing supplies
- Scissors
How to make them:
Cut a ribbon to fit comfortably around your wrist, leaving additional length for attaching the closure.
You can braid several ribbon strips together to create a textured bracelet or use one wide ribbon for a simple design.
Decorate the bracelet with small buttons, fabric flowers, or lightweight charms.
Secure the ends using suitable bracelet findings.
Make sure the decorations are firmly attached before wearing the bracelet.
Handmade Wire-Wrapped Rings
Wire-wrapped rings are beautiful costume jewelry pieces that can look complicated but are surprisingly accessible once you understand the basic technique.
You can create simple rings with colorful beads or decorative stones.
Materials needed:
- Jewelry wire
- Round-nose pliers
- Flat-nose pliers
- Wire cutters
- Small decorative beads or stones
- Ring mandrel (optional)
How to make them:
Cut a suitable length of jewelry wire.
Wrap the wire around a ring mandrel or another smooth object that matches the approximate size of your finger.
Leave enough wire at the top to create a decorative feature.
Place a small bead or decorative stone in the center.
Wrap the remaining wire around the bead to hold it in place.
Use your pliers to secure the wire ends and remove any sharp edges.
Try creating several rings using different bead colors and shapes.
DIY Tassel Earrings
Tassel earrings are fun, colorful, and suitable for people who enjoy creating statement accessories.
They can be made using embroidery thread, cotton thread, or decorative jewelry tassels.
Materials needed:
- Embroidery thread
- Earring hooks
- Small jump rings
- Jewelry pliers
- Scissors
- Small beads (optional)
How to make them:
Choose your preferred thread color and wrap it around a small piece of cardboard several times.
Carefully remove the thread and tie another piece around the top to hold the strands together.
Cut through the bottom loops to create the tassel.
Trim the strands until they have an even length.
Attach a jump ring to the top of the tassel and connect it to an earring hook.
You can add a small bead above the tassel to make the design more decorative.
Create matching tassels for the second earring.
Handmade Pendant Necklaces
Pendant necklaces are versatile accessories that work well with casual outfits, dresses, and special occasions.
You can create your own pendant using decorative beads, acrylic stones, resin components, or metal charms.
Materials needed:
- Necklace chain
- Decorative pendant
- Jump ring
- Jewelry pliers
- Necklace clasp
How to make them:
Choose a pendant that matches the style you want to create.
Attach a jump ring to the pendant and connect it to the necklace chain.
If your chain doesn’t already have a clasp, attach one to the ends.
You can make several pendant necklaces using different charms and chain lengths.
For a more personalized design, choose pendants shaped like initials, flowers, hearts, or other meaningful symbols.DIY Recycled Jewelry From Old Accessories
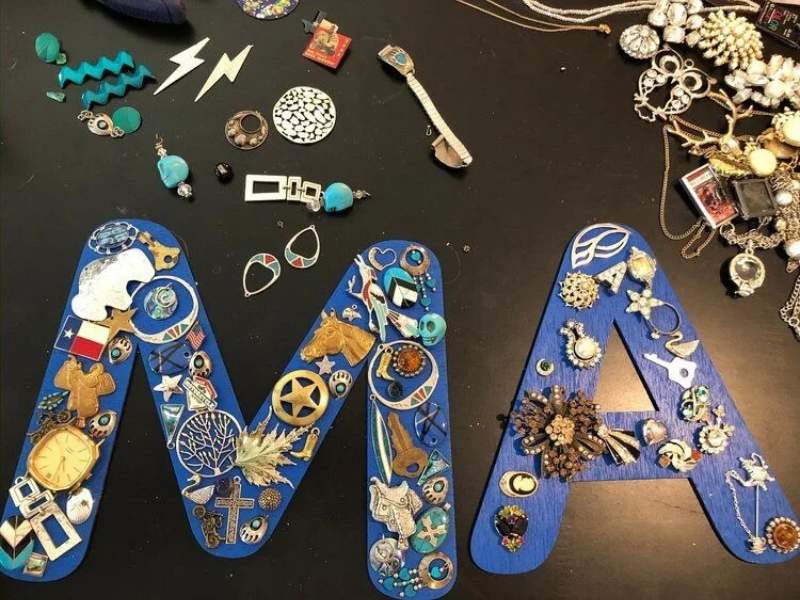
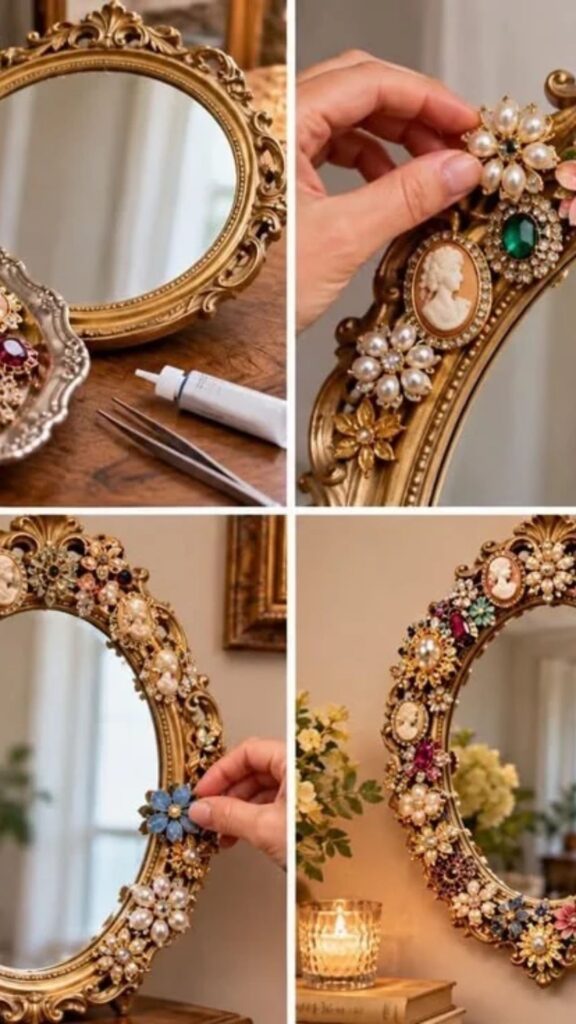
Before throwing away broken or outdated jewelry, consider whether some of its components can be reused.
Old necklaces, bracelets, and earrings often contain beads, charms, chains, and decorative pieces that are still perfectly usable.
DIY Flower Bead Bracelets
Flower bead bracelets are lovely accessories that create a playful and feminine appearance.
They are especially suitable for people who enjoy colorful jewelry.
Materials needed:
- Small round beads
- Flower-shaped beads or seed beads
- Elastic cord
- Scissors
How to make them:
Choose a few bead colors that work well together.
Create small flower patterns by arranging the beads around a central bead.
You can use specially shaped flower beads or create floral patterns using smaller round beads.
Thread the finished patterns onto elastic cord, leaving small spaces between the flowers if desired.
Continue until the bracelet reaches your preferred length.
Tie the ends securely and tuck the knot into a bead.
You can make matching necklaces and bracelets using the same color combination.
Handmade Beaded Anklets
Anklets are attractive accessories, especially when worn with sandals, open shoes, or summer outfits.
Making your own beaded anklet is simple and doesn’t require many materials.
Materials needed:
- Small decorative beads
- Jewelry chain or elastic cord
- Clasp
- Jump rings
- Scissors
- Measuring tape
How to make them:
Measure around your ankle to determine the appropriate length.
Choose beads that are comfortable and lightweight.
Thread the beads onto your chosen cord or attach them to a jewelry chain.
You can create a simple design using one color or combine several colors for a more playful appearance.
Attach a clasp if you are using a chain.
Check that the anklet fits comfortably without being too tight.
DIY Beaded Choker Necklace
Choker necklaces are fashionable accessories that sit closely around the neck.
They can be simple and minimal or decorated with colorful beads and small pendants.
Materials needed:
- Jewelry thread or chain
- Small beads
- Necklace clasp
- Jump rings
- Scissors or wire cutters
How to make them:
Measure around the base of your neck, allowing enough space for comfortable movement.
Choose your beads and arrange them in a pattern.
Thread the beads onto your jewelry thread or attach them to the chain.
Secure the ends using a suitable clasp.
You can add a small pendant to the center for a more decorative finish.
Avoid making the necklace too tight. A comfortable fit is important when creating any neck accessory.
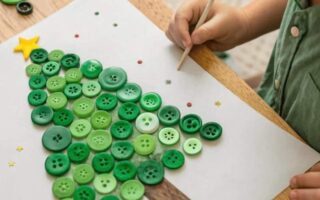
Handmade Button Jewelry
Buttons are not only useful for clothing repairs. They can also become attractive materials for DIY costume jewelry.
You can find buttons in different colors, shapes, and sizes, making them suitable for creative jewelry designs.
Materials needed:
- Decorative buttons
- Earring posts or hooks
- Bracelet base or jewelry chain
- Jewelry adhesive
- Jump rings
How to make them:
Choose buttons that have attractive colors or interesting shapes.
For earrings, select two matching buttons and attach them to suitable earring bases using jewelry adhesive.
Allow the adhesive to cure according to the manufacturer’s instructions.
For bracelets, attach decorative buttons to a suitable bracelet base or incorporate them into a chain design.
You can also use buttons as decorative elements in necklaces.
This project is a great way to reuse spare buttons from old clothing.
DIY Colorful Friendship Bracelets
Friendship bracelets are simple handmade accessories that can be customized with different thread colors and patterns.
They are especially meaningful because you can make matching designs for yourself and your friends.
Materials needed:
- Embroidery floss
- Scissors
- Tape or a clipboard
- Small beads (optional)
How to make them:
Choose three or more embroidery thread colors.
Cut the strands to a suitable length and tie them together at one end.
Secure the tied end to a flat surface using tape or a clipboard.
Use simple knotting techniques to create your desired pattern.
You can make diagonal stripes, chevrons, or other decorative designs.
When the bracelet reaches your desired length, tie the ends securely.
Add small beads if you want a more decorative finish.
Handmade Resin Pendant Jewelry
Resin jewelry allows you to create colorful decorative pendants with unique patterns.
You can experiment with dried flowers, glitter, decorative flakes, and pigments to create interesting designs.
Materials needed:
- Jewelry-grade resin
- Suitable resin molds
- Mixing cups
- Mixing sticks
- Decorative inclusions
- Pendant findings
- Protective gloves
How to make them:
Read the manufacturer’s instructions carefully before mixing your resin.
Prepare your workspace and wear the recommended protective equipment.
Mix the resin components according to the specified ratio.
Pour a small amount into your jewelry mold.
Arrange your chosen decorative materials inside the mold and add more resin if needed.
Allow the resin to cure fully according to the product instructions.
Once completely cured, remove the pendant from the mold.
Attach a pendant finding and connect it to a necklace chain.
Always follow the resin manufacturer’s ventilation and safety instructions. Do not handle uncured resin without the recommended protection.
DIY Wooden Bead Necklaces
Wooden bead necklaces are excellent for creating casual, earthy, and minimalist accessories.
They are also easy to customize with different bead sizes and colors.
Materials needed:
- Wooden beads
- Jewelry cord
- Necklace clasp
- Scissors
- Decorative spacer beads
How to make them:
Select wooden beads in different shapes and sizes.
Arrange them in the order you want before threading.
Cut your cord to the desired necklace length, leaving extra room for attaching the closure.
Thread the beads onto the cord.
You can use one large bead as the center decoration and smaller beads on either side.
Secure the ends using an appropriate jewelry clasp or knotting technique.
For a more colorful design, paint suitable unfinished wooden beads with jewelry-safe or craft paint and allow them to dry completely before assembling.
Handmade Beaded Hair Accessories
Jewelry-making materials can also be used to decorate hair accessories.
You can transform ordinary hair clips, barrettes, and hairpins into attractive decorative pieces.
Materials needed:
- Plain hair clips or barrettes
- Small decorative beads
- Jewelry adhesive
- Flat-backed decorative stones
- Tweezers
How to make them:
Choose a plain hair accessory with a smooth surface.
Arrange your beads and decorative stones before attaching them.
Apply a small amount of suitable adhesive to the accessory.
Carefully position the decorations using tweezers.
Allow the adhesive to dry or cure completely before using the accessory.
You can create matching hair clips to coordinate with your handmade necklaces and bracelets.
DIY Minimalist Chain Bracelets
If you prefer simple accessories, minimalist chain bracelets are excellent projects to try.
They require fewer materials and can be worn with almost any outfit.
Materials needed:
- Jewelry chain
- Bracelet clasp
- Jump rings
- Small decorative charm
- Jewelry pliers
How to make them:
Measure your wrist and cut the chain to your preferred length.
Attach a clasp to one end and a jump ring to the other.
You can leave the bracelet plain or add a small decorative charm.
Make several bracelets using different chain styles or metal finishes.
These simple pieces are perfect for people who enjoy understated jewelry.
How to Make Your Costume Jewelry Look More Expensive
One of the biggest challenges when making costume jewelry at home is achieving a polished appearance.
Even inexpensive materials can produce beautiful results when they are assembled carefully.
Here are some practical tips to help your handmade jewelry look more professional.
Choose Colors That Complement Each Other
Avoid combining too many unrelated colors in one piece.
Instead, select two or three complementary shades and build your design around them.
For example, gold-colored findings can look attractive with cream, white, brown, or green beads.
Silver-colored findings work beautifully with blue, black, white, and purple.
You can also use a monochromatic color scheme by combining different shades of the same color.
Pay Attention to Proportions
The size of your beads, charms, and decorative components can influence the overall appearance of your jewelry.
If you are creating delicate earrings, smaller beads may be more appropriate.
For statement necklaces, larger decorative elements can create a more noticeable design.
Try to maintain a balance between the different components.
Use Quality Jewelry Findings
Clasps, jump rings, earring hooks, and other small components are important because they help hold your jewelry together.
Using suitable, well-finished findings can make your handmade pieces look neater and improve their durability.
For earrings, choose materials suitable for sensitive ears when possible, and clearly disclose the materials used if you intend to sell your creations.
Avoid Overcrowding Your Designs
Sometimes, adding too many beads, charms, or decorative elements can make jewelry look untidy.
A simple design with a few carefully selected details can be more attractive than a piece containing too many unrelated decorations.
Allow your designs to have some breathing room.
Finish Every Piece Carefully
After completing your jewelry, inspect it before wearing or selling it.
Check that:
- All knots are secure.
- Jump rings are properly closed.
- There are no sharp wire ends.
- Beads are firmly attached.
- Clasps open and close correctly.
- Earrings have matching lengths and designs.
These small details can make a significant difference.
Common Mistakes to Avoid When Making Costume Jewelry at Home
Although DIY jewelry making is relatively simple, beginners sometimes make mistakes that affect the appearance and durability of their projects.
Understanding these mistakes can help you avoid unnecessary frustration.
Using weak elastic cord: Low-quality elastic may stretch out or break easily. Choose suitable jewelry elastic and test your knots before wearing the bracelet.
Making necklaces too tight: Always leave enough room for comfortable movement, especially when creating chokers.
Using too many different materials: Combining too many colors, textures, and shapes can make a design look disorganized. Start with a simple color scheme.
Ignoring the weight of earrings: Heavy earrings can become uncomfortable. Choose lightweight materials, particularly for larger designs.
Failing to secure jump rings: Jump rings that are not properly closed can cause charms and pendants to fall off.
Rushing the finishing process: Take time to inspect your finished jewelry and correct loose connections before wearing it.
Using unsuitable adhesives: Not every glue works with every material. Always select an adhesive designed for the components you are joining.
How to Organize Your DIY Jewelry-Making Supplies
Keeping your materials organized makes jewelry making easier and more enjoyable.
You don’t need an expensive storage system. A few inexpensive containers can help you keep everything in order.
Consider using small compartment organizers for beads, charms, jump rings, and other tiny components.
You can separate your materials according to color, size, shape, and type.
Keep your jewelry wires, cords, and threads in separate containers to prevent tangling.
It is also helpful to keep your pliers, scissors, and other tools in one accessible place.
If you enjoy making different types of jewelry, consider keeping a small notebook where you record your favorite designs, measurements, and material combinations.
This can help you recreate successful projects without having to start from scratch.
Can You Sell Costume Jewelry You Make at Home?
Yes. Handmade costume jewelry can become a small business if you enjoy designing accessories and are willing to put time into improving your skills.
You don’t necessarily need a large collection of products to get started.
Begin with a few attractive designs, such as beaded bracelets, pearl-inspired necklaces, charm bracelets, and handmade earrings.
Take clear photographs of your finished pieces and create simple product descriptions explaining their materials, sizes, and design features.
You can start by showing your creations to friends and family members or promoting them through social media.
As you receive feedback, you can improve your designs and introduce new collections.
Here are a few tips if you want to turn your jewelry-making hobby into a business.
Start with affordable projects: Beaded bracelets, simple earrings, and charm necklaces are useful beginner products.
Calculate your costs: Include the price of beads, cords, findings, packaging, and your time when determining your selling price.
Create matching collections: Coordinated bracelets, necklaces, and earrings can make your products more appealing.
Use attractive packaging: Small jewelry boxes, pouches, and cards can give your handmade accessories a more professional appearance.
Focus on quality: Make sure your jewelry is comfortable, properly assembled, and suitable for its intended use.
Listen to customers: Feedback can help you understand which designs people prefer and what improvements you should make.
Frequently Asked Questions About Costume Jewelry Crafts to Make at Home
What is the easiest costume jewelry to make at home?
Beaded bracelets are among the easiest costume jewelry projects for beginners. They require only a few materials, such as beads, elastic cord, and scissors. You can also experiment with simple necklaces and friendship bracelets.
What materials are used to make costume jewelry?
Costume jewelry can be made using acrylic beads, glass beads, imitation pearls, plastic stones, metal chains, jewelry wire, elastic cord, nylon thread, charms, and decorative findings.
Can I make beautiful jewelry without professional tools?
Yes. Many simple DIY jewelry projects require only basic supplies such as scissors, elastic cord, beads, and jewelry pliers. You can start with beginner-friendly projects and purchase additional tools as your skills improve.
How can I make costume jewelry at home without spending too much?
Start with inexpensive materials such as acrylic beads, elastic cord, embroidery thread, and recycled jewelry components. Choose projects that use the same supplies so you can create several accessories without purchasing new materials for every design.
Can I use old jewelry to make new accessories?
Absolutely. Old jewelry can provide useful beads, chains, charms, pendants, and decorative components. Carefully remove the pieces you want to reuse and combine them to create new necklaces, bracelets, and earrings.
What type of jewelry is best for beginners to sell?
Beaded bracelets, friendship bracelets, simple necklaces, charm bracelets, and lightweight earrings are good starting points. They are relatively simple to produce and offer plenty of opportunities for customization.
How do I make my DIY jewelry last longer?
Use suitable jewelry-making materials, secure knots properly, close jump rings completely, and avoid exposing delicate components to water, perfumes, and harsh chemicals. Store finished jewelry in a dry place to reduce tarnishing and damage.
Is costume jewelry making a good hobby?
Yes. Costume jewelry making is a creative hobby that allows you to experiment with colors, materials, and different designs. It can also help you develop practical crafting skills and potentially create products to sell.
What can I make with leftover beads?
You can use leftover beads to create small bracelets, earrings, anklets, phone charms, decorative pendants, and beaded hair accessories. Combining different bead sizes and colors can also help you create unique designs.
How long does it take to make DIY costume jewelry?
The time depends on the design and your experience. A simple elastic bracelet may take only 10 to 20 minutes, while more detailed necklaces, earrings, and resin pendants may require additional time for assembly and finishing.
Conclusion
Making your own accessories doesn’t have to be expensive or complicated. With a few basic supplies and some creativity, you can create beautiful costume jewelry that reflects your personal style.
From colorful beaded bracelets and elegant pearl necklaces to statement earrings and personalized charm bracelets, there are countless costume jewelry crafts to make at home.
The best approach is to start with simple projects, learn the basic techniques, and gradually experiment with more detailed designs. Don’t be afraid to combine different colors, reuse old jewelry, or try materials you haven’t worked with before.
Remember that your first project doesn’t have to look perfect. Every piece you create gives you an opportunity to improve your skills and discover new design ideas.
Whether you want to make affordable accessories for yourself, create thoughtful handmade gifts, or start a small jewelry business, DIY costume jewelry is a wonderful creative activity worth exploring.