
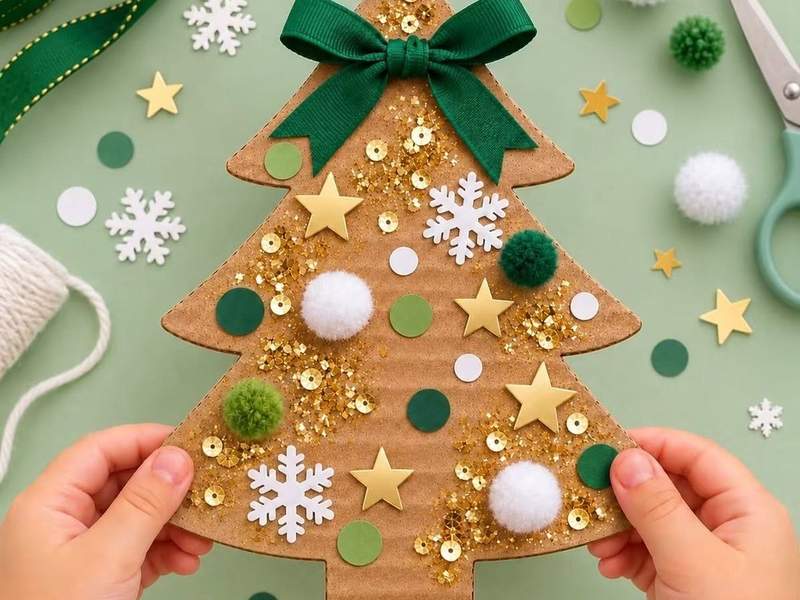
Easy Christmas Crafts to Make at Home for Beautiful Decorations and Thoughtful Gifts
Christmas is one of the most exciting times of the year, but decorating your home and finding thoughtful gifts can sometimes become expensive. The good news is that you don’t have to spend a lot of money to make your home feel festive or surprise your loved ones with something special. With a little creativity and a few affordable supplies, you can create beautiful Christmas decorations, handmade gifts, and fun holiday projects right at home.
If you enjoy making things with your hands, trying easy Christmas crafts to make at home is a wonderful way to prepare for the holiday season. Whether you are looking for simple Christmas decorations, DIY ornaments for your Christmas tree, handmade gifts for family and friends, or fun activities to enjoy with your children, there are plenty of creative projects worth exploring.
The best part about Christmas crafts is that you can use materials you already have around the house. Items such as cardboard, mason jars, ribbons, paper, pinecones, fabric scraps, and empty bottles can be transformed into beautiful festive creations.
In this guide, you will discover 10 easy Christmas crafts to make at home without spending too much money. These ideas are beginner-friendly, require simple materials, and can help you add a personal touch to your Christmas celebrations.
Let’s explore some creative Christmas craft ideas you can try this holiday season.
1. DIY Christmas Mason Jar Lanterns
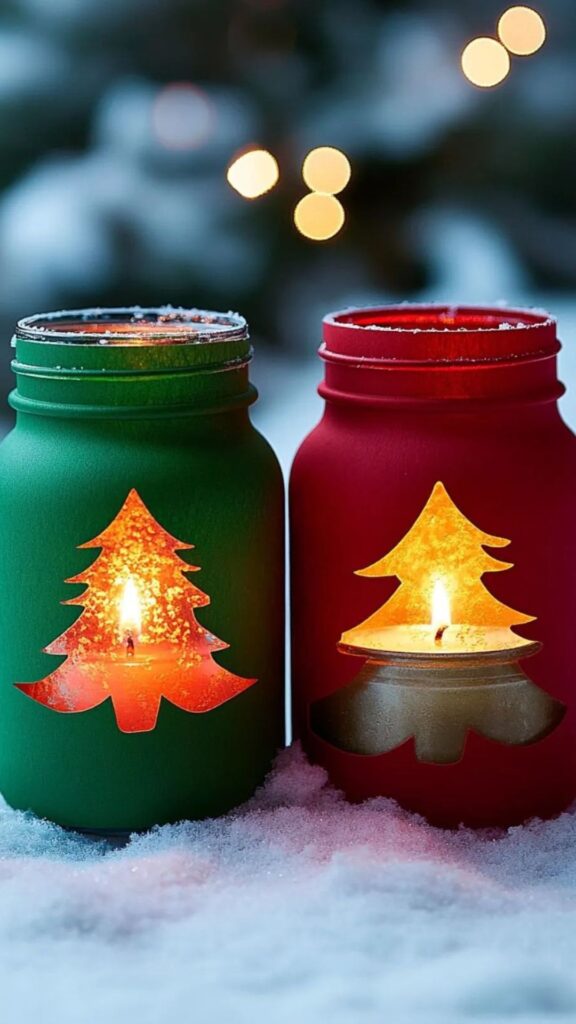
Christmas mason jar lanterns are beautiful handmade decorations that can instantly make your home feel warm and festive. They are perfect for decorating your dining table, living room, fireplace mantel, bedroom, or even your front porch.
What makes this Christmas craft particularly interesting is how easily you can transform ordinary glass jars into attractive holiday decorations. Instead of throwing away empty jam jars, sauce jars, or other glass containers, you can reuse them to create something beautiful.
You can also customize your mason jar lanterns to match your Christmas decorating theme. Whether you prefer traditional red and green decorations, elegant white and gold designs, or a rustic farmhouse look, these handmade lanterns can fit almost any style.
Materials You Will Need
- Clean mason jars or empty glass jars
- Battery-operated fairy lights or LED tea lights
- Christmas ribbons
- Artificial greenery
- Small pinecones
- White paint or frosted glass spray
- Glue
- Decorative twine
- Small Christmas ornaments
How to Make Christmas Mason Jar Lanterns
Start by washing your glass jars thoroughly and allowing them to dry completely. Remove any labels and sticky residue so that the jars have a clean appearance.
Next, decide how you want your Christmas lanterns to look. If you prefer a snowy appearance, apply a light coat of white paint or use a suitable frosted glass spray. Allow the finish to dry according to the product instructions.
For a more natural design, you can leave the glass transparent and decorate the outside with Christmas ribbons, twine, or artificial greenery.
Wrap a piece of decorative ribbon around the neck of the jar and secure it with glue. You can also attach a small pinecone or Christmas ornament to make the decoration more attractive.
Once you have finished decorating the jar, place battery-operated fairy lights or an LED tea light inside. Switch on the lights and watch your homemade Christmas lantern come to life.
Decorating Ideas for Your Mason Jar Lanterns
There are several ways to personalize this Christmas craft.
You can create a snowy winter design by adding artificial snow around the bottom of the jar. Another option is to place small Christmas trees or miniature festive decorations inside the jar.
If you want something more elegant, use gold ribbons, white fairy lights, and small gold ornaments.
For a rustic Christmas decoration, combine brown twine, pinecones, and natural-looking greenery.
You can make several mason jar lanterns in different sizes and arrange them together to create a beautiful Christmas centerpiece.
Helpful Tip: Always use battery-operated lights rather than open flames when decorating glass jars with ribbons, artificial greenery, or other flammable materials.
2. Handmade Christmas Paper Snowflakes
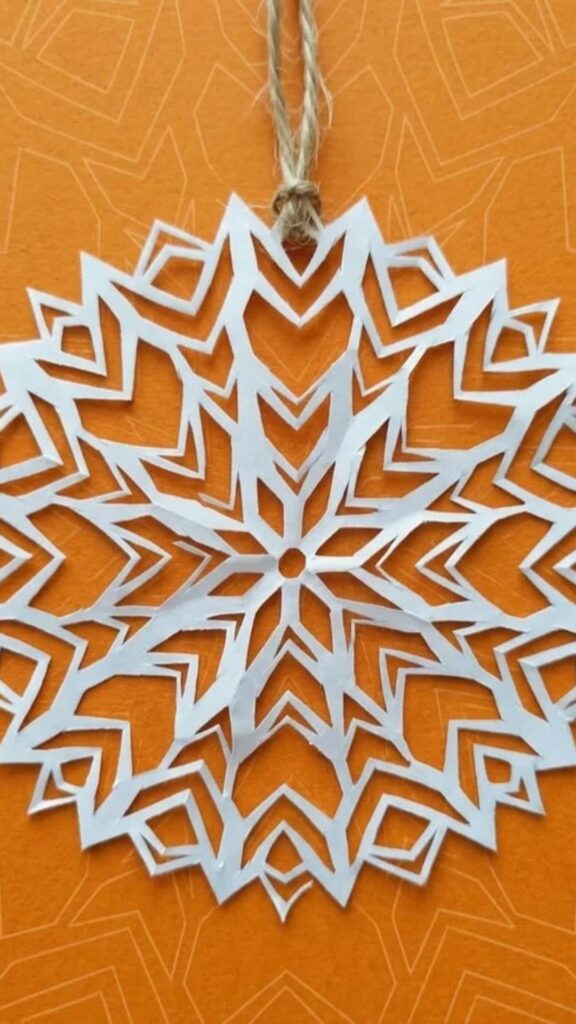
If you are searching for inexpensive Christmas crafts to make at home, handmade paper snowflakes are an excellent option.
They are simple, beautiful, and require very few materials. You probably already have everything you need in your home, making this project ideal when you want to decorate without buying expensive Christmas decorations.
Paper snowflakes are particularly lovely because each design can be different. You can create large snowflakes for your windows, smaller ones for your Christmas tree, or several designs to decorate your walls.
This is also a fun Christmas activity for children because they can experiment with different cutting patterns and create their own unique designs.
Materials You Will Need
- White paper
- Scissors
- Pencil
- Ruler
- Glue
- Glitter
- White or silver thread
- Decorative stickers
How to Make Paper Snowflakes
Begin by choosing a square piece of white paper. If you only have rectangular paper, trim it into a square shape.
Fold the paper diagonally to create a triangle. Fold it again to make a smaller triangle, then continue folding it into smaller sections.
Once you have your folded paper, use a pencil to draw small shapes along the edges. These can include triangles, curves, circles, and other simple patterns.
Carefully cut along the shapes you have drawn. Avoid cutting through every folded edge because doing so may cause the snowflake to fall apart.
When you are satisfied with your cuts, gently unfold the paper to reveal your snowflake design.
You may be surprised by how beautiful the finished decoration looks.
To make your snowflakes more festive, apply a little glue and sprinkle silver or white glitter over the surface. Allow them to dry before using them as decorations.
Creative Ways to Use Paper Snowflakes
One of the best things about handmade paper snowflakes is their versatility.
You can attach them to your windows using removable adhesive. This creates a beautiful winter-inspired appearance, especially when combined with fairy lights.
Another idea is to hang them from the ceiling using white thread. Different sizes and hanging lengths can create a lovely floating snowflake effect.
You can also attach small snowflakes to Christmas gift bags, greeting cards, or homemade gift boxes.
If you want to make your Christmas tree look more interesting, use a combination of large and small paper snowflakes as handmade ornaments.
Helpful Tip: Use thicker paper or lightweight cardstock if you want your snowflakes to maintain their shape for longer.
3. DIY Christmas Pinecone Ornaments
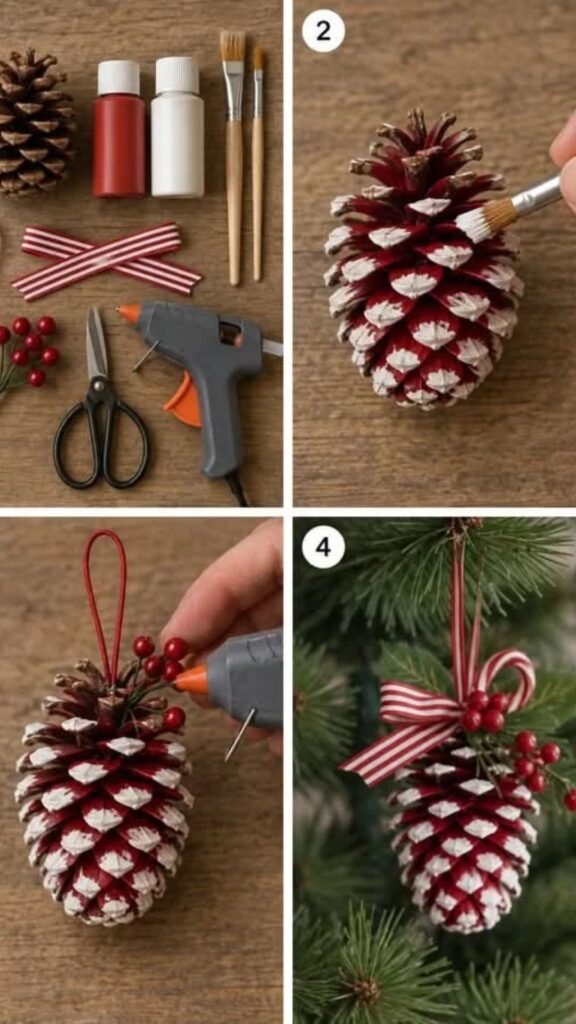
Pinecones are among the most versatile natural materials you can use for Christmas crafts. Their natural shape makes them perfect for creating rustic decorations, handmade Christmas ornaments, and beautiful holiday centerpieces.
If you love farmhouse-style Christmas decorations, this is one of the best Christmas crafts to make at home.
Pinecone ornaments are also affordable because you can collect fallen pinecones where they are available or purchase them from craft stores.
You don’t need advanced crafting skills to make them look beautiful. A little paint, some ribbon, and a few decorative details are enough to transform an ordinary pinecone into a festive Christmas ornament.
Materials You Will Need
- Clean and dry pinecones
- White, gold, silver, or green acrylic paint
- Paintbrush
- Small ribbons
- Twine
- Craft glue
- Glitter
- Small artificial berries
- Ornament hooks or string
How to Make DIY Christmas Pinecone Ornaments
Start by cleaning your pinecones and removing any loose dirt or debris. Make sure they are completely dry before decorating them.
Choose your preferred Christmas color combination. Traditional Christmas colors include red, green, gold, and white, but you can experiment with other shades depending on your decorating style.
Using a small paintbrush, lightly apply white paint to the tips of the pinecone scales. This creates a snowy appearance that looks beautiful during the holiday season.
If you prefer a glamorous design, paint the entire pinecone gold or silver.
Allow the paint to dry completely.
Next, cut a small piece of ribbon or twine and form a loop. Attach it securely to the top of the pinecone using strong craft glue.
You can also add a small decorative bow, artificial berries, or a little glitter to complete the design.
Once everything is dry, your handmade Christmas pinecone ornament is ready.
Ways to Decorate With Pinecone Ornaments
There are several ways to use these handmade Christmas decorations.
Hang them on your Christmas tree to create a natural, rustic appearance.
You can also place several decorated pinecones inside a decorative bowl and use them as a Christmas centerpiece.
Another beautiful idea is to combine pinecones with artificial greenery and fairy lights to decorate your fireplace mantel.
If you enjoy making handmade Christmas gifts, consider creating a small collection of decorated pinecones and arranging them in a gift box.
Helpful Tip: Before using collected pinecones indoors, inspect them carefully and clean them thoroughly. Avoid using pinecones that show signs of mold or insect damage.
4. DIY Christmas Wreath Using Cardboard and Ribbons
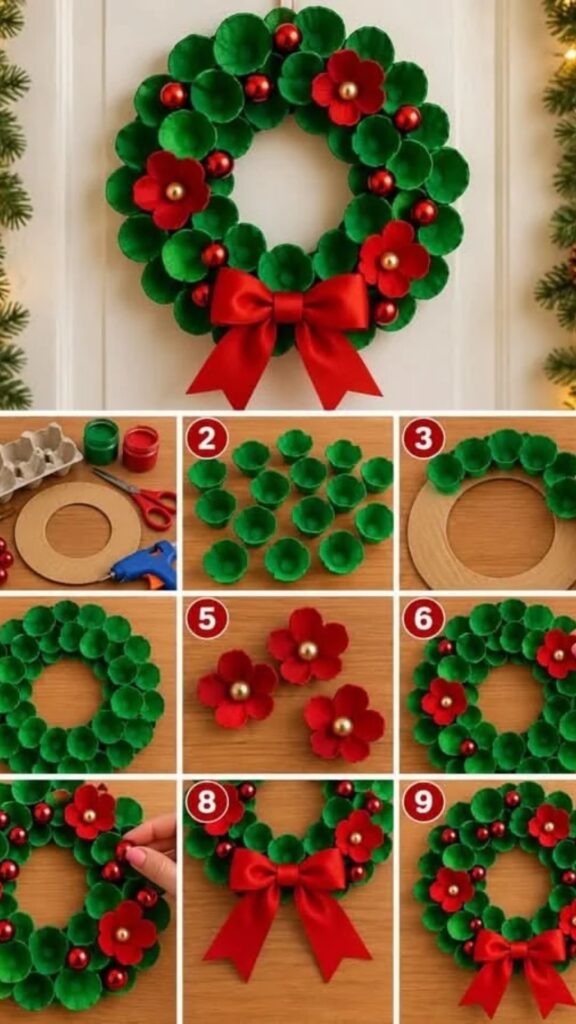
A Christmas wreath is one of the most recognizable holiday decorations. It is commonly displayed on front doors, walls, and entryways to welcome guests and create a festive atmosphere.
However, buying a decorative Christmas wreath can sometimes be expensive. If you want something affordable and personal, making your own wreath at home is a great alternative.
You can create a beautiful DIY Christmas wreath using cardboard, ribbons, artificial greenery, and other inexpensive decorative materials.
This is one of those easy Christmas crafts that allows you to express your creativity while reusing materials you may already have.
Materials You Will Need
- Thick cardboard
- Red and green ribbons
- Artificial Christmas greenery
- Craft glue or hot glue
- Scissors
- Pencil
- Small Christmas ornaments
- Decorative bells
- Twine
How to Make a DIY Christmas Wreath
Begin by drawing a large circle on a piece of thick cardboard. You can use a plate to help you create an even circular shape.
Next, draw a smaller circle inside the larger one. Carefully cut around both circles to create a ring-shaped cardboard base.
This will serve as the foundation of your Christmas wreath.
Once the cardboard base is ready, wrap green ribbon around it. Make sure the cardboard is completely covered so that it does not show through your decorations.
You can also use artificial greenery to cover the base if you prefer a more natural-looking wreath.
After covering the cardboard, begin attaching your Christmas decorations.
Arrange small ornaments, artificial berries, pinecones, and decorative leaves around the wreath. You can use a traditional red bow at the bottom to create a classic Christmas appearance.
Allow the glue to dry completely before handling the wreath.
Finally, attach a piece of twine or ribbon to the back so you can hang your handmade Christmas wreath on your door or wall.
Ways to Personalize Your Christmas Wreath
You don’t have to follow a traditional red and green color scheme.
For a farmhouse Christmas wreath, use natural twine, brown ribbons, pinecones, and neutral-colored ornaments.
For a more elegant appearance, combine gold ribbons with white decorations and artificial greenery.
You can also create a colorful wreath using different Christmas ornaments.
If you have children, allow them to decorate their own small wreaths using paper ornaments, stickers, and lightweight craft materials.
Helpful Tip: Use strong cardboard or double-layered cardboard so that your wreath maintains its shape. If you plan to display it outdoors, use weather-resistant materials and keep the cardboard protected from moisture.
5. Handmade Christmas Greeting Cards
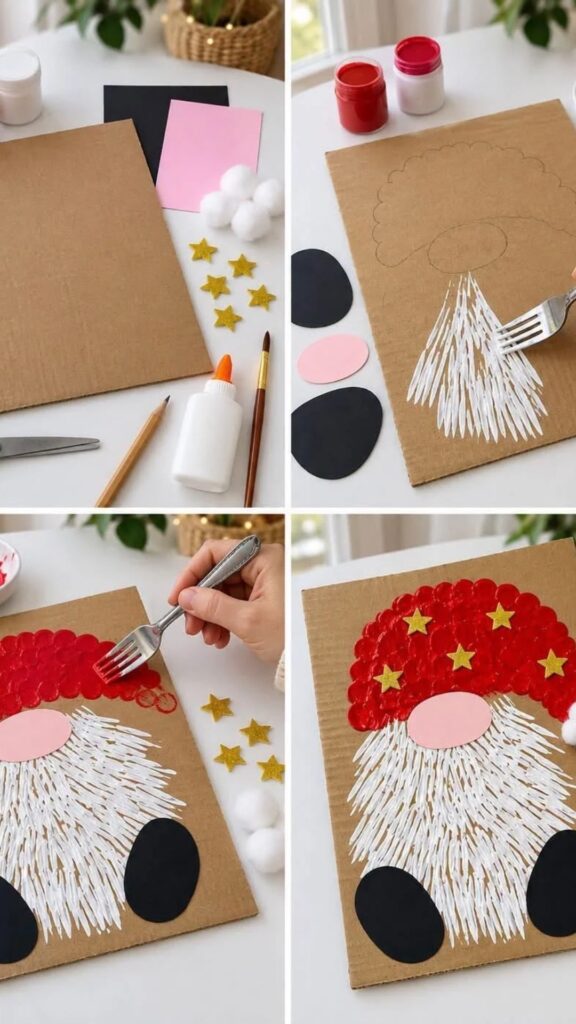
Christmas is a wonderful time to remind family members, friends, and loved ones how much they mean to you. Although digital greetings are convenient, handmade Christmas greeting cards have a personal touch that makes them especially meaningful.
Instead of purchasing expensive greeting cards, you can create beautiful Christmas cards at home using simple craft supplies.
This is also one of the easiest Christmas crafts to make at home because you can customize every card according to the person receiving it.
You can make simple designs for friends, colorful cards for children, or elegant Christmas cards for family members.
Materials You Will Need
- Cardstock or thick paper
- Colored construction paper
- Scissors
- Glue
- Markers
- Christmas stickers
- Glitter
- Ribbons
- Buttons
- Decorative washi tape
How to Make Handmade Christmas Greeting Cards
Start by selecting a piece of cardstock in your preferred color. Red, green, white, cream, and gold are excellent choices for Christmas cards.
Fold the cardstock in half to create the basic greeting card shape.
Next, decide what design you want to create on the front.
For a simple Christmas tree design, cut several small triangles from green construction paper. Arrange them on the front of the card, starting with the largest triangle at the bottom and the smallest at the top.
Glue the triangles into place to create a Christmas tree.
You can use small buttons, glitter, or colorful paper circles to represent Christmas ornaments.
Cut a small brown rectangle and attach it underneath the tree to create the trunk.
For the finishing touch, write a festive message such as “Merry Christmas” or “Wishing You a Wonderful Holiday Season.”
Inside the card, write a personal message for the recipient.
More Christmas Card Designs to Try
If you want to make different greeting cards, here are some creative ideas:
Santa Claus Card: Use red paper, cotton balls, and black paper to create a simple Santa Claus design.
Christmas Wreath Card: Cut a small circular wreath from green paper and decorate it with tiny red paper berries.
Snowman Card: Use white paper circles to create a snowman, then add a small scarf and hat.
Reindeer Card: Draw or cut out a reindeer face and add a small red circle for the nose.
Christmas Lights Card: Draw a curved line across the card and attach small colorful paper shapes to represent Christmas lights.
Helpful Tip: Make several Christmas greeting cards at once and keep them ready for family, friends, teachers, and colleagues.
6. DIY Christmas Gift Bags From Brown Paper
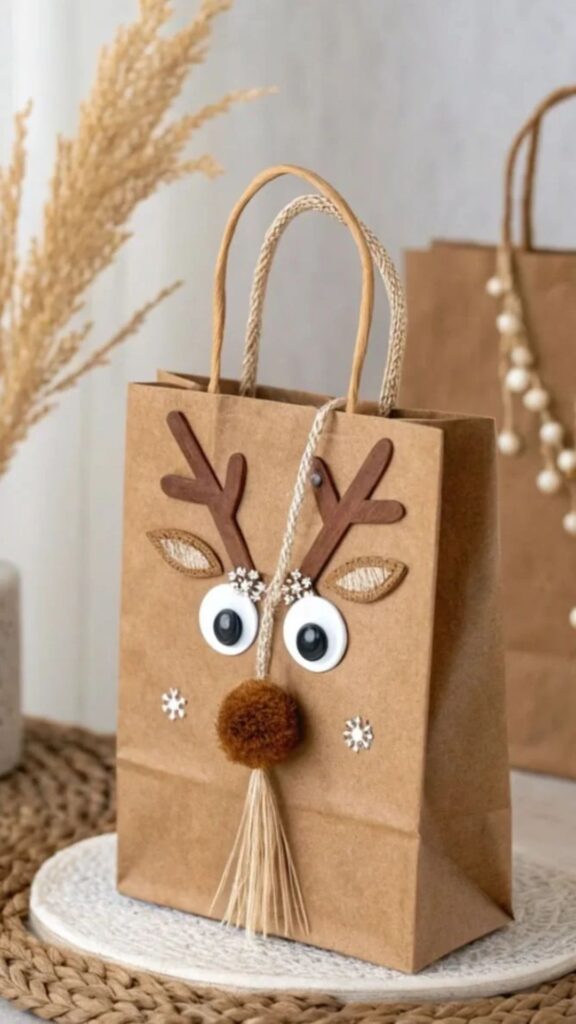
Beautiful gift wrapping can make even a simple present feel special. However, purchasing decorative Christmas gift bags for everyone on your list can become expensive.
A creative alternative is to make your own Christmas gift bags using brown paper.
This is one of the most practical Christmas crafts to make at home because the finished bags can be used for wrapping small gifts, homemade treats, accessories, and other holiday surprises.
Brown paper also provides a beautiful natural background for Christmas decorations.
Materials You Will Need
- Brown kraft paper
- Scissors
- Glue or double-sided tape
- Hole punch
- Decorative ribbons
- Christmas stickers
- Markers
- Twine
- Small gift tags
How to Make DIY Christmas Gift Bags
Start by cutting a rectangular piece of brown kraft paper. The size will depend on how large you want your gift bag to be.
Fold the paper into a tube shape, overlapping the edges slightly.
Secure the overlapping section with strong glue or double-sided tape.
Next, fold the bottom section upward to create the base of the bag. Open the folded section slightly and flatten it to form two triangular sides.
Fold the upper and lower edges toward the middle and secure them with glue.
Allow the glue to dry before opening the bag.
Once your bag has taken shape, fold down the top edge to create a neat opening.
Use a hole punch to make two small holes near the top. Thread a decorative ribbon or twine through the holes to create handles.
Now comes the fun part: decorating your handmade Christmas gift bag.
You can draw Christmas trees, snowflakes, stars, or small ornaments on the front.
Another option is to attach Christmas stickers or a handmade gift tag.
Creative Christmas Gift Bag Designs
For a rustic Christmas appearance, combine brown kraft paper with red ribbon and natural twine.
If you prefer something more colorful, decorate the bags with green, red, and gold paper shapes.
You can also attach small artificial pine branches or miniature bells to make the gift bags more attractive.
For a personalized touch, write the recipient’s name on the front of each bag.
Helpful Tip: Use sturdy kraft paper and reinforce the bottom with an extra layer of cardboard if you intend to place heavier gifts inside. Avoid using these handmade paper bags for items that are too heavy.
7. DIY Christmas Sock Snowmen
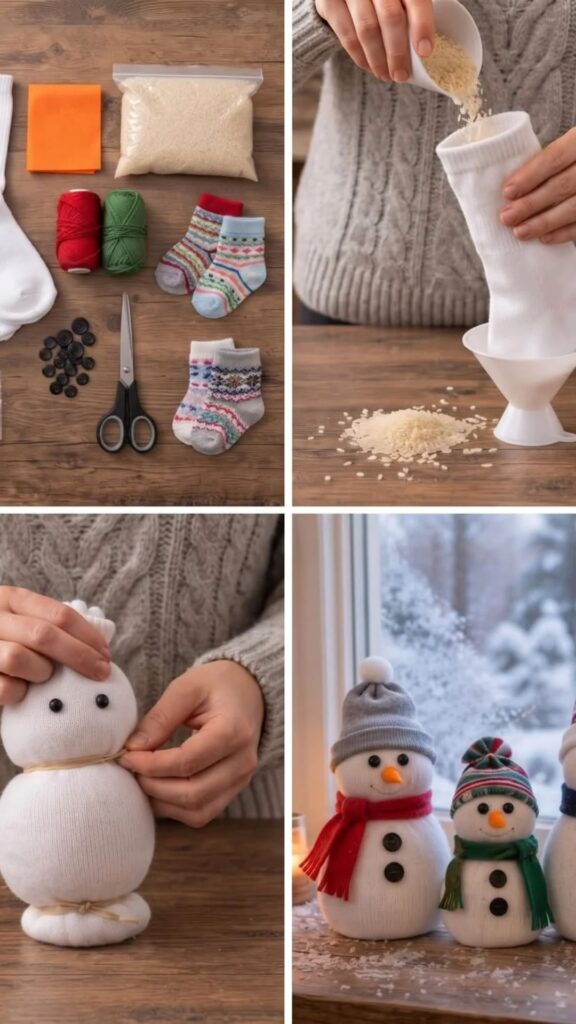
If you have old white socks lying around, don’t throw them away just yet. You can transform them into adorable Christmas sock snowmen.
This is a fun and inexpensive Christmas craft that requires only a few basic supplies.
Sock snowmen are particularly suitable for decorating shelves, bedroom tables, office desks, and Christmas displays.
They also make lovely handmade gifts for friends and family.
You can create different snowman sizes and decorate each one with a unique hat, scarf, and facial expression.
Materials You Will Need
- Clean white socks
- Rice or polyester stuffing
- Rubber bands or strong thread
- Small buttons
- Fabric scraps
- Ribbon
- Glue
- Black beads
- Orange felt or paper
- Scissors
How to Make Christmas Sock Snowmen
Begin by taking a clean white sock and filling it with rice or polyester stuffing.
Continue filling until you have a round, firm shape.
Use a rubber band or strong thread to secure the opening.
Next, create the snowman’s head by tying another section of the sock slightly below the top. This separates the head from the body.
Make sure the snowman has a rounded shape.
Once you are satisfied with the shape, use another piece of fabric or a small sock to create a hat.
You can fold the top of the sock downward to make a simple winter hat.
Now decorate the snowman’s face.
Use small black beads or buttons for the eyes. Cut a tiny orange triangle from felt to create the nose.
Attach small buttons down the front of the body.
For the scarf, cut a narrow strip of colorful fabric and tie it around the snowman’s neck.
You can also add small decorative details such as a ribbon, miniature hat decoration, or fabric arms.
Your handmade Christmas sock snowman is now ready to display.
More Ways to Personalize Sock Snowmen
You can make a family of snowmen using socks in different sizes.
For example, create one large snowman and two smaller ones to represent a family.
Use different scarf colors to give each snowman its own personality.
You can also place the finished snowmen inside a decorative Christmas tray with artificial snow and small Christmas trees.
Helpful Tip: If you are making sock snowmen with young children, supervise the use of scissors and small decorative pieces. Also, avoid rice-filled decorations around pets or small children who might accidentally open them.
8. DIY Christmas Bottle Decorations
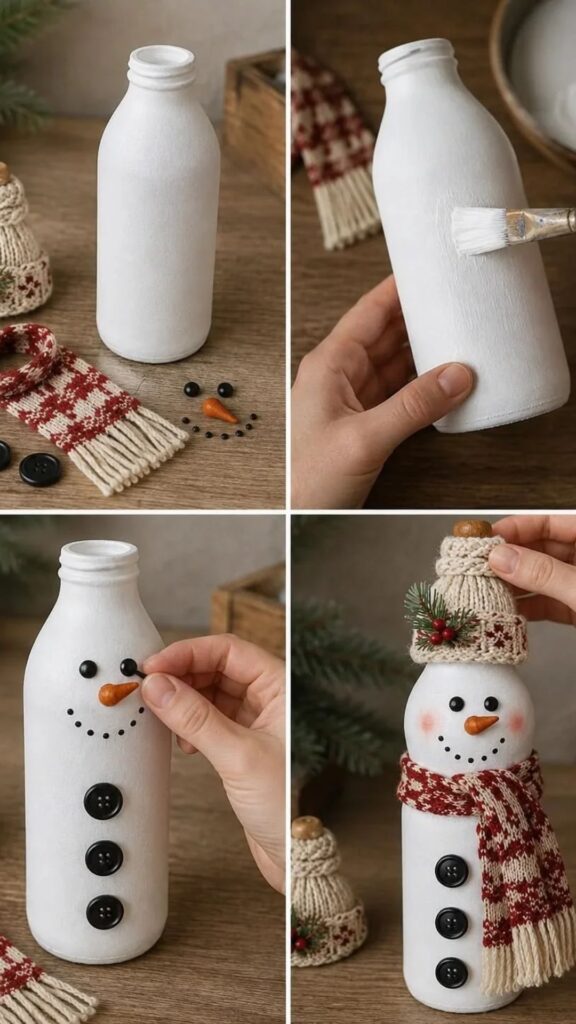
Empty plastic and glass bottles can become beautiful Christmas decorations when you give them a little attention.
Instead of throwing away bottles after use, consider turning them into festive decorative pieces for your home.
This is one of the most creative Christmas crafts to make at home because it encourages recycling while helping you create something unique.
Depending on the bottle you choose, you can make Christmas vases, decorative bottle lights, miniature Christmas trees, or Santa-inspired decorations.
Materials You Will Need
- Empty plastic or glass bottles
- Acrylic paint
- Paintbrushes
- Ribbons
- Fairy lights suitable for bottle decoration
- Craft glue
- Decorative stickers
- Glitter
- Christmas ornaments
- Scissors
How to Make Christmas Bottle Decorations
Start by selecting a clean, empty bottle.
Remove any labels and wash the bottle thoroughly. Allow it to dry completely before decorating.
For a simple Christmas decoration, paint the entire bottle white, green, red, or gold.
You can also create patterns using different colors.
For example, paint a bottle white and add small red and green dots to create a festive design.
Another idea is to paint a bottle green and decorate it with small gold stars to resemble a Christmas tree.
If you prefer a Santa-inspired design, paint the bottle red and add a white section around the middle to represent Santa’s suit.
Once the paint has dried, decorate the bottle with ribbons, stickers, or small Christmas ornaments.
You can also place suitable battery-operated fairy lights inside a bottle with a wide opening to create a beautiful decorative light.
Other Creative Bottle Craft Ideas
Christmas Bottle Vases: Paint empty glass bottles and use them as decorative vases for artificial flowers or Christmas greenery.
Bottle Christmas Trees: Arrange green-painted plastic bottles in a tree-like formation and decorate them with lightweight ornaments.
Snowy Bottle Decorations: Apply a suitable frosted finish to the outside of a glass bottle and decorate it with white ribbons.
Santa Bottle Decorations: Use red paint, white cotton, and black ribbon to create a Santa-inspired design.
These decorations can be displayed on shelves, tables, and other areas of your home.
Helpful Tip: If you are using glass bottles, handle them carefully and avoid cutting or modifying the glass. Use battery-operated lights rather than candles.
9. Handmade Christmas Tree Ornaments From Popsicle Sticks
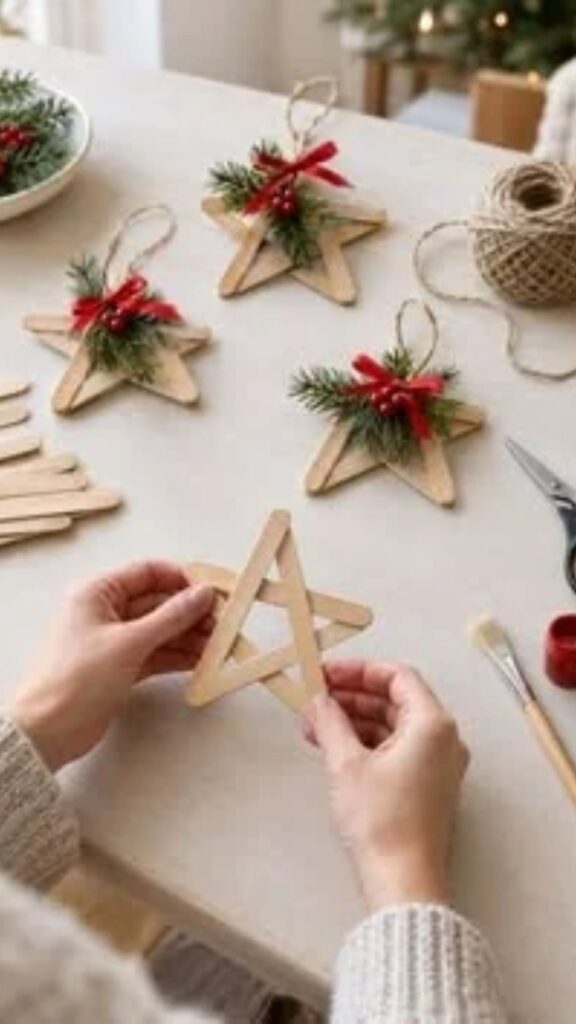
Popsicle sticks are inexpensive craft materials that can be used to create a variety of beautiful Christmas decorations.
If you want a simple project that doesn’t require complicated tools, handmade popsicle stick ornaments are worth trying.
They are particularly suitable for family craft activities because children can participate in decorating the finished ornaments.
You can create miniature Christmas trees, stars, snowflakes, reindeer, and other festive shapes.
Materials You Will Need
- Popsicle sticks
- Green, red, brown, and white paint
- Paintbrush
- Craft glue
- Decorative ribbons
- Glitter
- Small buttons
- Miniature pom-poms
- Twine
- Scissors
How to Make Popsicle Stick Christmas Tree Ornaments
Begin by taking three popsicle sticks and arranging them into a triangle shape.
Apply craft glue to the ends where the sticks meet and allow them to dry.
Once the triangular frame is secure, paint it green.
Allow the paint to dry completely before adding decorations.
Next, attach small buttons, colorful pom-poms, or paper circles to represent Christmas ornaments.
Cut a small piece of brown paper or another popsicle stick to create the tree trunk.
Glue it to the bottom of the triangle.
Finally, attach a small loop of ribbon or twine to the top so you can hang the ornament on your Christmas tree.
Other Popsicle Stick Christmas Crafts
You don’t have to limit yourself to Christmas tree ornaments.
Here are other ideas you can try:
Popsicle Stick Stars: Arrange five popsicle sticks into a star shape, secure the corners with glue, and decorate with glitter.
Miniature Christmas Reindeer: Use popsicle sticks to create a simple reindeer shape, then add small eyes, a red nose, and decorative antlers.
Christmas Snowflakes: Arrange several popsicle sticks into a snowflake pattern and decorate them with white and silver paint.
Miniature Christmas Frames: Use popsicle sticks to create small frames for Christmas photographs.
Helpful Tip: Allow the glue to dry completely before hanging your ornaments. If children are participating, use child-friendly craft glue and supervise the activity.
10. DIY Christmas Centerpiece Using Candles and Greenery
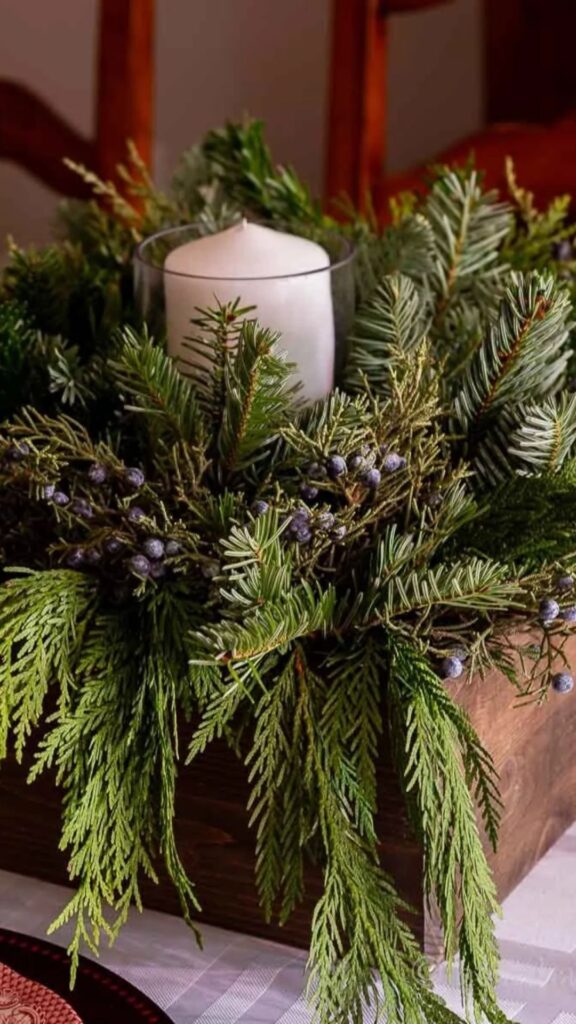
A beautiful Christmas centerpiece can make your dining table look more inviting during the holiday season.
Whether you are hosting Christmas dinner, welcoming guests, or simply decorating your home, a handmade centerpiece is a lovely way to add a festive touch.
The good news is that you don’t need expensive decorations to create an attractive arrangement.
With a few decorative materials, artificial greenery, ornaments, and LED candles, you can make a beautiful Christmas centerpiece at home.
Materials You Will Need
- A decorative tray
- Artificial Christmas greenery
- Battery-operated LED candles
- Small Christmas ornaments
- Pinecones
- Decorative ribbons
- Artificial berries
- Small decorative bells
- Craft glue, if needed
How to Make a Christmas Centerpiece
Start by selecting a decorative tray that will serve as the foundation of your arrangement.
You can use a wooden tray, a round serving tray, or another suitable decorative base.
Next, arrange artificial greenery around the tray.
Try to distribute the greenery evenly so that the arrangement looks balanced.
Place your battery-operated LED candles in the center or slightly toward one side of the tray.
If you are using candles of different heights, arrange them together to create a more interesting display.
Now add your decorative elements.
Place pinecones, Christmas ornaments, and artificial berries around the candles.
You can also add small decorative bells and ribbons to complete the arrangement.
Take a step back and adjust the decorations until everything looks balanced.
Your handmade Christmas centerpiece is ready to display.
Christmas Centerpiece Styles to Try
Traditional Christmas Centerpiece: Combine red and green decorations with gold ornaments and greenery.
Elegant Christmas Centerpiece: Use white, silver, and gold decorations for a simple and sophisticated appearance.
Rustic Christmas Centerpiece: Choose a wooden tray, natural-looking pinecones, brown ribbons, and artificial greenery.
Minimalist Christmas Centerpiece: Use a simple tray, a few green branches, and one or two LED candles.
Helpful Tip: Always use battery-operated candles when arranging decorations with artificial greenery, ribbons, or other flammable materials.
Tips for Making Beautiful Christmas Crafts at Home
Making Christmas crafts at home should be enjoyable, not stressful. You don’t need expensive materials or professional crafting skills to create beautiful holiday decorations.
However, a little preparation can make your crafting experience easier and help your finished projects look more attractive.
Here are some helpful tips to consider before starting your Christmas craft projects.
1. Plan Your Christmas Craft Projects Ahead of Time
Before purchasing supplies, decide which Christmas crafts you want to make.
This will help you avoid buying unnecessary materials and make it easier to organize your projects.
For example, if you want to make Christmas wreaths, paper snowflakes, and handmade greeting cards, you can purchase materials that work for more than one project.
Planning ahead also gives you enough time to complete your decorations before Christmas.
2. Reuse Materials You Already Have
One of the best ways to save money on DIY Christmas crafts is to reuse materials around your home.
Empty jars, cardboard boxes, old socks, brown paper bags, leftover ribbons, and plastic bottles can all be used for creative Christmas projects.
Before throwing something away, consider whether it can be transformed into a holiday decoration.
Recycling materials not only saves money but also makes your Christmas crafting activities more environmentally friendly.
3. Choose a Christmas Color Theme
Using a consistent color theme can make your handmade decorations look more coordinated.
Traditional Christmas colors include red, green, white, and gold.
However, you can also experiment with combinations such as:
- White and silver
- Gold and cream
- Red and white
- Green and gold
- Brown and beige
- Silver and blue
Choose colors that complement your existing Christmas decorations.
This will help your handmade crafts blend beautifully with the rest of your holiday decor.
4. Start With Simple Christmas Crafts
If you are new to crafting, begin with projects that require fewer materials and simple instructions.
Paper snowflakes, handmade Christmas cards, popsicle stick ornaments, and decorated gift bags are excellent starting points.
Once you become more comfortable with basic crafting techniques, you can try more detailed projects.
Remember, the goal is to enjoy the process and create decorations you love.
5. Make Christmas Crafts With Your Family
Christmas crafting can become a fun family tradition.
You can organize a small crafting afternoon where everyone chooses a project to complete.
Children can decorate greeting cards, make paper snowflakes, or paint simple Christmas ornaments.
Adults can work on larger projects such as wreaths, centerpieces, and handmade gift bags.
This gives everyone an opportunity to participate in preparing for Christmas.
6. Don’t Be Afraid to Experiment
Your finished craft doesn’t have to look exactly like someone else’s.
You can change the colors, add different decorations, or use alternative materials to create something that reflects your personal style.
For example, a Christmas wreath doesn’t always have to be red and green. You can create a beautiful wreath using white ribbons, gold ornaments, and natural greenery.
The most important thing is to enjoy creating something unique.
Frequently Asked Questions About Christmas Crafts to Make at Home
What Are the Easiest Christmas Crafts to Make at Home?
Some of the easiest Christmas crafts to make at home include paper snowflakes, handmade Christmas cards, popsicle stick ornaments, decorated mason jars, and DIY Christmas gift bags.
These projects require basic materials and simple crafting techniques, making them suitable for beginners.
What Materials Do I Need for DIY Christmas Crafts?
The materials you need depend on the project you want to create. However, some common Christmas craft supplies include cardboard, colored paper, scissors, glue, ribbons, paint, mason jars, popsicle sticks, pinecones, glitter, and decorative ornaments.
You can also reuse household items such as empty bottles, old socks, and cardboard packaging.
How Can I Make Christmas Decorations at Home on a Budget?
The easiest way to make Christmas decorations on a budget is to reuse materials you already have.
For example, you can turn empty glass jars into Christmas lanterns, cardboard into wreath bases, and leftover ribbons into handmade ornaments.
Choosing simple DIY projects and purchasing only essential supplies can also help you save money.
What Christmas Crafts Can Adults Make at Home?
Adults can enjoy making several beautiful Christmas crafts, including DIY Christmas wreaths, mason jar lanterns, handmade gift bags, decorative bottle lights, Christmas centerpieces, and pinecone ornaments.
These projects can be customized to match different home decorating styles.
What Christmas Crafts Can Children Make?
Children can participate in simple Christmas crafts such as paper snowflakes, handmade greeting cards, popsicle stick ornaments, paper Christmas trees, and decorated gift bags.
These activities allow children to explore their creativity while enjoying the excitement of the holiday season.
Younger children should be supervised when using scissors, glue, or small decorative materials.
How Can I Make Christmas Crafts Look Expensive?
You can make handmade Christmas crafts look more expensive by choosing a consistent color theme, using quality ribbons, arranging decorations neatly, and avoiding too many competing decorative elements.
Gold, silver, white, and neutral colors can create an elegant appearance.
Paying attention to small details, such as neat glue application and well-arranged decorations, can also improve the finished result.
Can I Sell Handmade Christmas Crafts?
Yes! Handmade Christmas crafts can be sold as seasonal products, especially when they are attractive, well-made, and useful.
Some ideas include Christmas wreaths, handmade ornaments, decorative mason jars, personalized greeting cards, and gift bags.
You can sell your creations through social media, local craft markets, or online marketplaces.
How Early Should I Start Making Christmas Crafts?
It is a good idea to start making Christmas crafts several weeks before Christmas.
Starting early gives you enough time to gather materials, complete your projects, correct mistakes, and organize your decorations.
If you plan to make handmade gifts for several people, starting earlier can also reduce last-minute stress.
Conclusion
Christmas is a wonderful opportunity to get creative, decorate your home, and make meaningful memories with the people you love. You don’t need to spend a fortune on expensive decorations when you can create beautiful holiday pieces using simple and affordable materials.
These 10 easy Christmas crafts to make at home offer plenty of inspiration, whether you want to create handmade Christmas ornaments, decorate your living space, prepare thoughtful gifts, or enjoy fun holiday activities with your family.
From DIY mason jar lanterns and handmade paper snowflakes to Christmas wreaths, sock snowmen, and decorative centerpieces, there is something for everyone to try.
The best part is that you can customize each project to match your personal style, available materials, and Christmas decorating theme.
So, gather your craft supplies, choose your favorite projects, and start creating. You might discover that some of your favorite Christmas decorations are the ones you made yourself.
After all, Christmas becomes even more special when you add a little creativity and a personal touch to your celebrations.


