
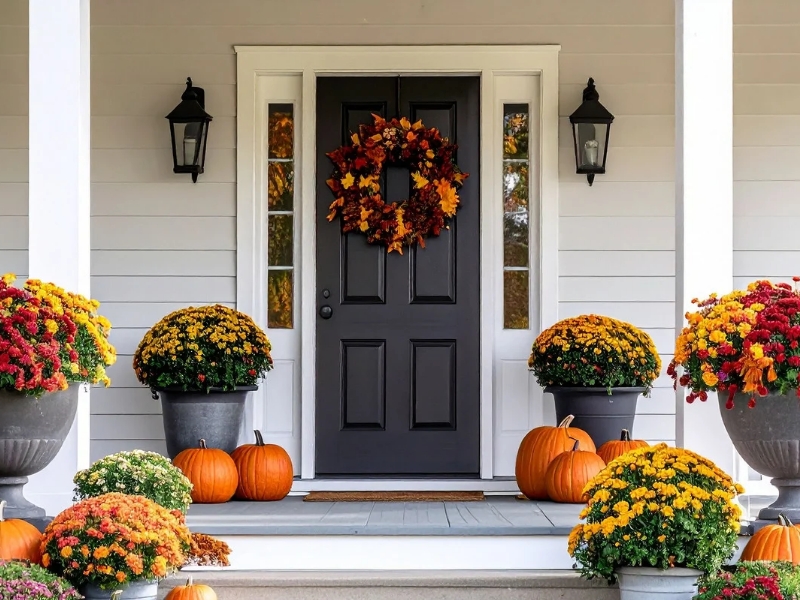
Discover This DIY Fall Wreath Craft for a Bare Front Door: Easy Budget-Friendly Autumn Decor That Looks Expensive.
A DIY fall wreath craft is one of the easiest ways to transform a bare front door into a warm, welcoming autumn statement. With just a handful of affordable materials and a hot glue gun, you can create an autumn wreath that looks like it came from a high-end boutique without the high-end price tag.
The best part about making your own DIY fall wreath craft is the complete creative freedom it gives you. You choose the colors, textures, and elements that actually match your home’s personality. No two handmade wreaths are exactly alike, and that uniqueness is exactly what makes them so special and so sellable.

Even if you are decorating your own home, crafting meaningful gifts, or building a small business, this guide walks you through everything you need to know. Your bare front door is about to get a beautiful autumn upgrade with the perfect DIY fall wreath craft.
Looking for Dollar tree craft for fall? Check out our Dollar Tree Fall Crafts That Look Expensive (Easy DIY Decor Anyone Can Make) and this fall keepsake that kids will always cherish How to Make Easy Fall Handprint Crafts for Kids That Turn Into Meaningful Keepsakes
Why a DIY Fall Wreath Craft Is One of the Best Autumn Projects You Can Make
A DIY fall wreath craft is one of the most rewarding seasonal projects to complete. It takes only a few hours, costs very little, and creates an immediate visual impact the moment someone approaches your front door.
Unlike most seasonal decorations that spend most of the year boxed up in storage, a well-made wreath works hard from the first day of September right through to the end of November. It signals warmth, creativity, and thoughtful style without saying a single word.
A handmade autumn wreath also makes a genuinely thoughtful gift. Neighbors, family members, and friends love receiving a personalized wreath made just for their home.
And if you are thinking about turning your wreath-making skills into extra income, our post on How to Make Crafts: 20 Easy Crafts to Sell and Make Profits From Home If You Need Extra Income shows you exactly how to price and sell your handmade crafts from home.
Essential Materials for Your DIY Fall Wreath Craft
Before you begin your DIY fall wreath craft, gather these basic supplies. You do not need an expensive haul to create something beautiful. Most of these materials are available at Dollar Tree, Walmart, or online craft stores for just a few dollars each.
Materials Needed
- Wreath base — grapevine, wire frame, foam, or straw
- Floral wire and wire cutters
- Hot glue gun and glue sticks
- Faux autumn leaves in red, orange, yellow, and burgundy
- Pinecones or acorn picks
- Ribbon or burlap (wired ribbon holds its shape best)
- Small decorative pumpkins or gourds
- Dried florals — sunflowers, wheat stalks, or cotton stems
- Sharp scissors
- Optional extras: twine, berry picks, feathers, or a small lantern
Safety Tips Before You Start Your DIY Fall Wreath Craft

Hot glue guns reach high temperatures quickly. A few simple precautions keep every crafting session safe and enjoyable.
- Always rest the hot glue gun on its stand between uses.
- Use a silicone mat or parchment paper under your work to catch drips.
- Keep a small bowl of cold water nearby for quick accidental burns.
- Work in a cool, dry area away from flammable materials.
- Allow freshly glued elements to cool fully before handling.
- Use a low-temperature glue gun if you are crafting alongside children.
Bookmark this DIY Gardening Ideas for Small Spaces and Tiny Backyards
Choosing the Right Base for Your DIY Fall Wreath Craft
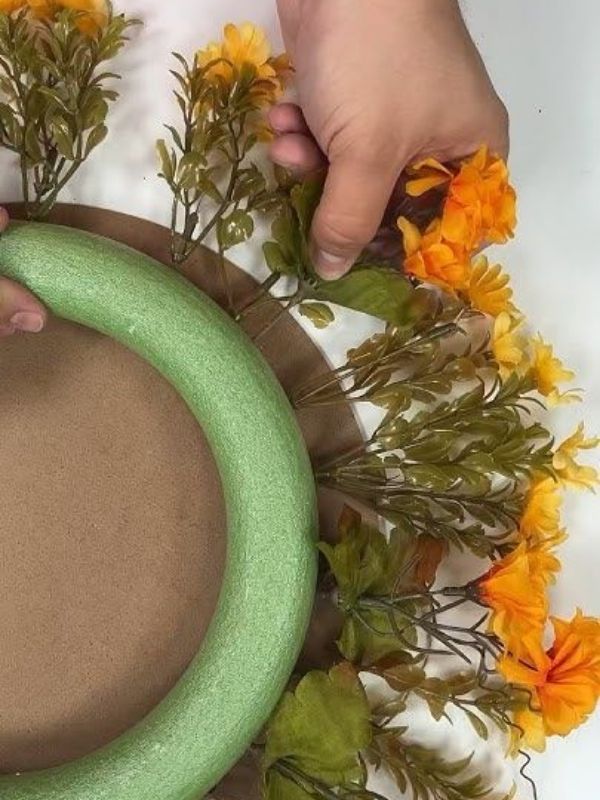
The base you choose sets the foundation for your entire DIY fall wreath craft design. Each option creates a different look and suits different home styles.
Grapevine Wreath Base
A natural grapevine wreath is the most popular base for autumn wreaths. Its rustic texture adds warmth and visual depth even before you attach a single decoration. It pairs beautifully with dried florals, pinecones, and burlap ribbon.
Wire Wreath Frame
A wire frame gives you precise control over the shape and fullness of your wreath. It works especially well for lush, densely packed designs using faux foliage or ribbon loops pulled through the frame.
Save for later DIY Walkways Paths Cheap to Give Your Backyard an Affordable Upgrade
Foam Wreath Base
A foam base is ideal for a DIY fall wreath craft where you want to insert floral stems or decorative pins directly into the frame. It holds decorations firmly without slipping and suits floral pick designs perfectly.
Straw Wreath Base
A straw base is inexpensive and widely available. Wrapping it with burlap or ribbon before decorating creates a clean, polished surface to work on and hides the straw underneath completely.
Step-by-Step: How to Make Your First DIY Fall Wreath Craft
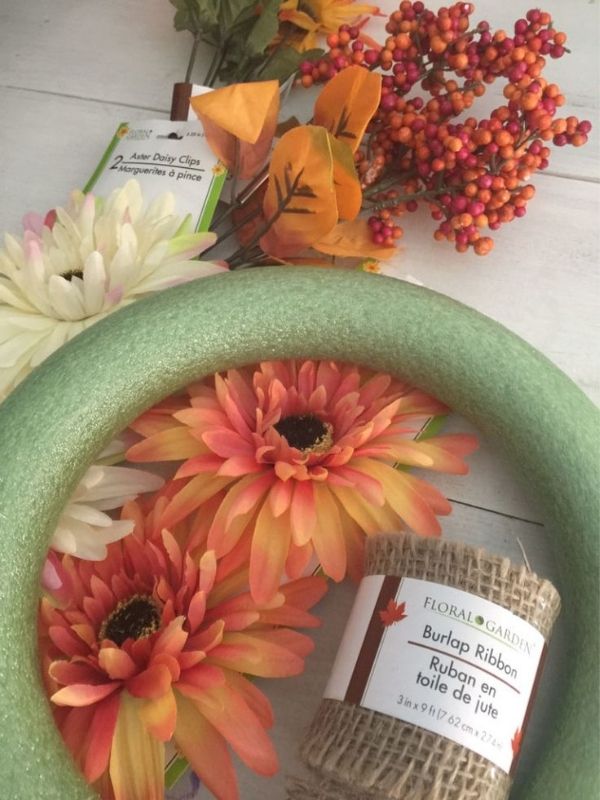
This beginner-friendly DIY fall wreath craft tutorial uses a grapevine base and takes between 60 and 90 minutes to complete. No previous crafting experience is required.
What You Need for This Project
- One natural grapevine wreath (30–35 cm diameter)
- Faux autumn leaves in warm fall colors
- Two to three decorative pumpkin picks
- Faux or dried sunflowers
- Wired ribbon in a complementary autumn color
- Hot glue gun and glue sticks
- Floral wire and scissors
Step 1: Plan Your Layout First
Lay all your materials around the wreath base before gluing anything. This planning step costs nothing and saves you from making mistakes you cannot undo. Decide where your focal pieces, the pumpkins and sunflowers — will sit before anything else gets attached.
Step 2: Attach Your Foliage Base
Use the hot glue gun to attach clusters of faux fall leaves around the wreath. Work in small sections and layer the leaves at slightly different heights and angles. This creates natural depth and prevents the design from looking flat or one-dimensional.
For more creativity check out this DIY Bird Bath Dollar Store Ideas for Cute and Cheap Garden Decor
Step 3: Place Your Focal Pieces
Glue or wire your largest decorative elements, the pumpkins and sunflowers — into place first. Position them slightly off-center for a more organic, professional result. An odd number of focal pieces always looks more visually balanced than an even number.
Step 4: Fill the Gaps
Use smaller filler elements like berry picks, acorn picks, and individual leaves to cover any bare spots on the frame. This step is what separates a sparse-looking wreath from one that looks genuinely full and professionally designed.
Step 5: Add the Ribbon
Cut a generous length of wired ribbon and create loops or flowing tails at the bottom of the wreath. Wired ribbon holds its shape beautifully through wind and changing weather, which keeps your front door looking polished all season.
If you want to lean into the spookier side of autumn after your wreath is done, our post on Halloween Crafts for Teens: 15 Projects for Room Decor, Costumes, and Fun is full of creative Halloween decor ideas that pair perfectly with an autumn wreath on your front door.
Step 6: Secure the Hanging Loop
Attach a sturdy length of floral wire or thick twine to the top of the wreath. Test the weight before hanging your finished DIY fall wreath craft on the door. A secure loop protects both your wreath and your door surface.
15 DIY Fall Wreath Craft Ideas for Every Style and Budget
Once you understand the basics, the design possibilities for a DIY fall wreath craft become truly endless. Here are fifteen creative ideas ranging from quick and simple to more detailed and impressive.
1. Classic Grapevine and Autumn Leaf Wreath
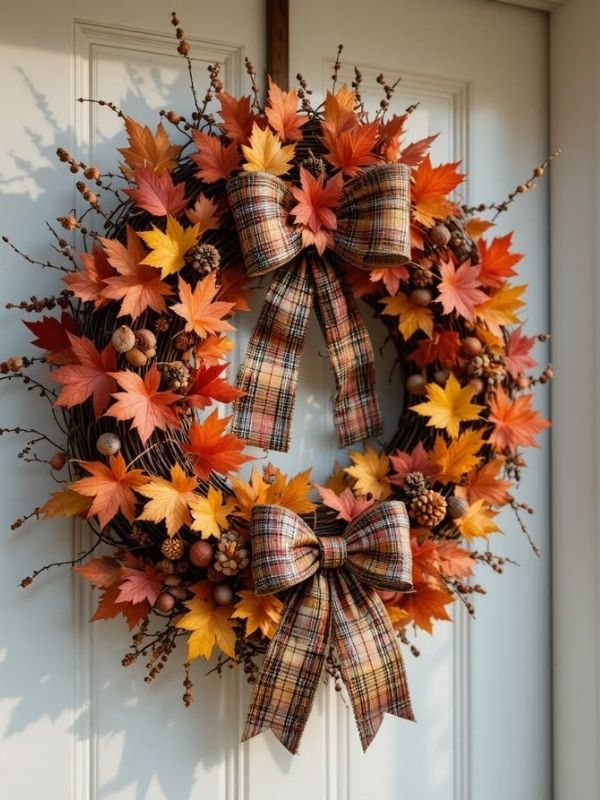
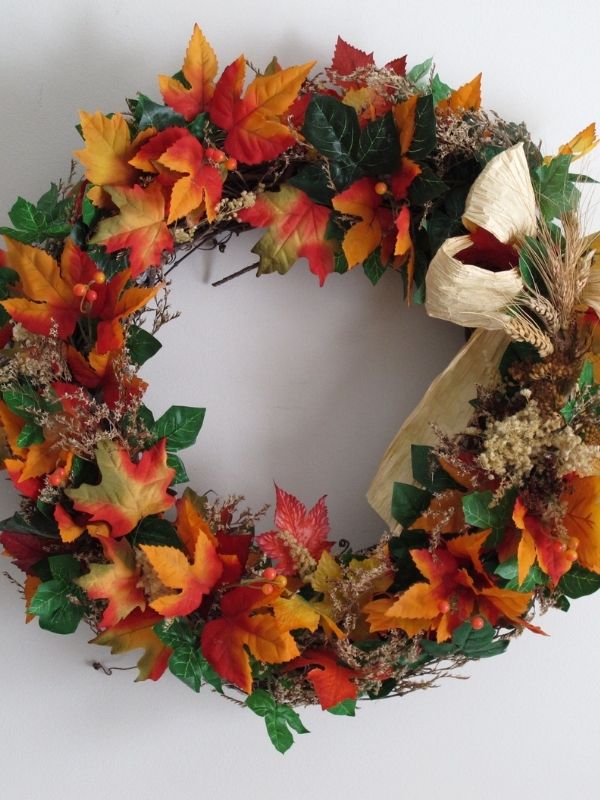
A natural grapevine base layered with faux fall leaves, pinecones, and a burlap bow is the most classic DIY fall wreath craft you can make. It suits farmhouse, modern rustic, and traditional home styles equally well. This is the ideal starting point for any first-time wreath maker.
Don’t Forget to check out this Easy DIY Worm Compost Bin for a Healthier Eco-Friendly Garden
2. Sunflower and Wheat Stalk Harvest Wreath

Faux sunflowers paired with dried wheat stalks create a cheerful, harvest-inspired wreath that captures the spirit of early autumn. Add eucalyptus sprigs for a fresh, modern touch that elevates the whole design.
If you love hands-on DIY home decor projects, our post on Creative DIY Crafts for Adults: 20 Fun Crafts to Try When You’re Bored at Home is packed with more creative ideas to keep your hands busy all season long.
3. Rustic Burlap and Mini Pumpkin Wreath
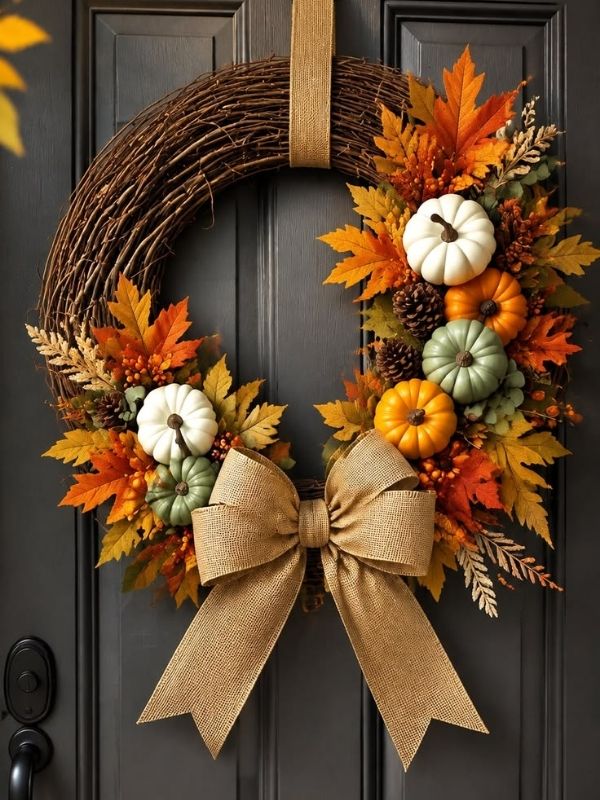
Burlap ribbon wrapped around a foam base and finished with small painted pumpkins creates a timeless farmhouse look. The contrast between rough burlap texture and smooth pumpkin surfaces gives this design a naturally layered, expensive feel.
4. Eucalyptus and Berry Jewel-Tone Wreath

Faux eucalyptus branches layered with deep red berry stems create a rich, sophisticated wreath. Choose a foam or wire base and work the stems in from one direction for a consistent, flowing look. This DIY fall wreath craft looks particularly stunning against dark-painted front doors.
For more insight: Check out this post DIY Water Table for Kids That Creates the Cutest Backyard Playtime
5. Pinecone and Acorn Texture Wreath

A wire frame packed with pinecones and acorn picks in graduated sizes creates one of the most textural DIY fall wreath craft designs you can make. Hot glue pinecones from large in the center to smaller along the outer edges for a naturally layered effect that looks detailed and deliberate.
6. Pampas Grass Boho Wreath

Pampas grass gives a wreath a soft, wispy, bohemian texture that sets it apart from more traditional autumn designs. Pair it with terracotta ribbon and dried florals for a modern, trendy look that photographs beautifully for social media.
You may find helpful this DIY Ponds Backyard Simple Outdoor Water Feature That Makes Any Space Feel Calm and Cozy
7. Cotton Stem Farmhouse Wreath

White cotton stems tucked between fall leaves and finished with a navy or black ribbon create a sophisticated DIY fall wreath craft that bridges the gap between autumn and winter. This design stays relevant far longer than most purely seasonal wreaths, making it a smart investment of your time and materials.
8. Budget Dollar Store Faux Leaf Wreath

You can create a full, beautiful autumn wreath entirely from Dollar Tree supplies for under ten dollars. Layer multiple packs of faux fall leaves around a foam base and finish with a ribbon bow. The result looks far more expensive than the price suggests.
For more DIY ideas: Read DIY Ponds Backyard Simple Outdoor Water Feature That Makes Any Space Feel Calm and Cozy and Mini Terra Cotta Pots Crafts for Cute Budget-Friendly DIY Home Decor
9. Monogram Letter Fall Wreath
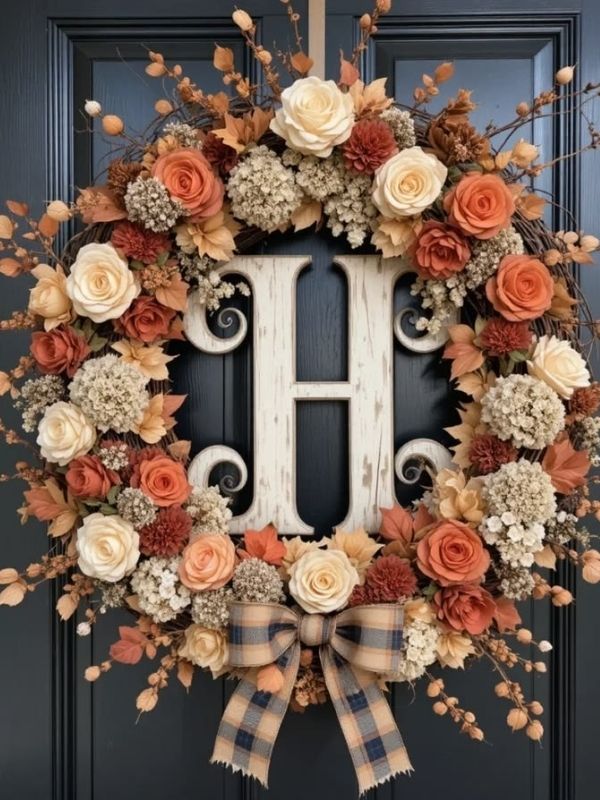
A wooden foam letter decorated with faux fall leaves, berries, and ribbon makes a personalized wreath that feels completely custom. Monogram wreaths sell very well as personalized gifts and on Etsy because buyers love decor that feels made specifically for them.
Pair a monogram wreath with a wood-burned welcome sign or nameplate for a truly cohesive front porch look. Our post on Wood Burning Craft Ideas: How to Make Beginner Friendly Projects You Can Display or Sell gives you everything you need to add beautiful wood-burned pieces to your handmade decor collection.
10. Buffalo Check Ribbon Wreath
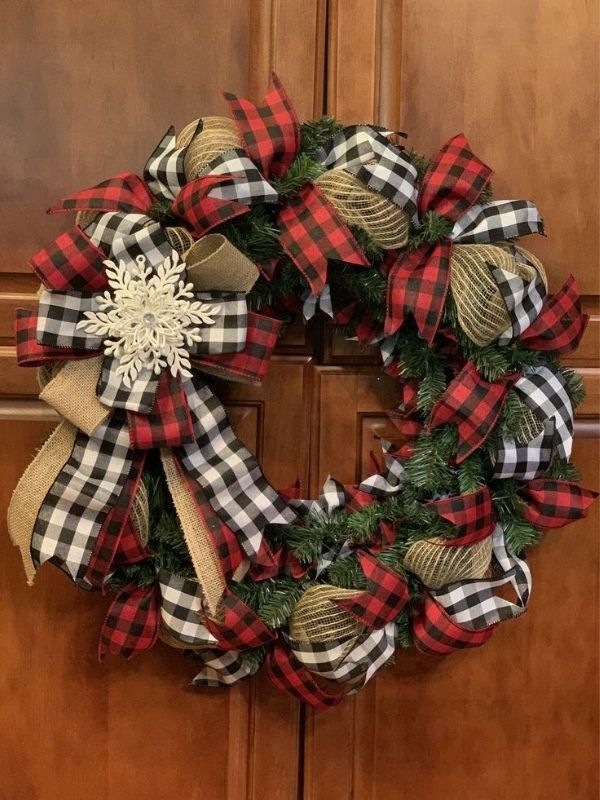
A wire frame filled with loops of black-and-white or red-and-black buffalo check ribbon creates a bold, graphic wreath that suits farmhouse and modern country interiors beautifully. No foliage is needed, the ribbon is the entire design. This is one of the fastest DIY fall wreath craft styles to assemble.
11. Dried Orange Slice and Cinnamon Stick Wreath

Dried orange slices and cinnamon sticks give this DIY fall wreath craft a warm, spiced, sensory quality that feels uniquely autumn. The wreath also fills your entryway with a gentle natural fragrance that guests notice immediately. Dry your own orange slices in a low oven at 90°C for two to three hours, or purchase them pre-dried online.
12. Feather and Leaf Boho Wreath
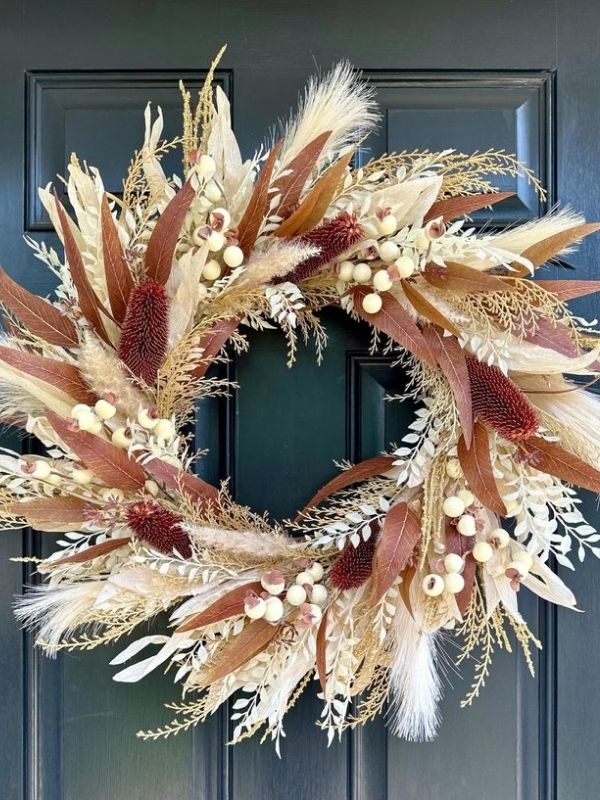
Long pheasant feathers tucked between burgundy leaves and berry stems create a bold, boho-inspired wreath with genuine personality. Choose deep jewel tones like plum, rust, and forest green for maximum impact against a light or neutral front door.
This boho wreath style is especially popular with creative teens who love individual, expressive decor. For more trendy, hands-on craft ideas they’ll genuinely enjoy, see our post on Fun DIY Crafts for Teens: Creative and Trendy Projects That Actually Feel Cool to Make
13. Succulent and Autumn Leaf Wreath

Faux succulents combined with fall foliage create a modern, unexpected wreath that appeals to contemporary and minimalist home styles. Succulents add interesting texture and an unusual shape contrast against flat leaves, making this design stand out from more traditional autumn wreaths.
14. Layered Ribbon Pull Wreath
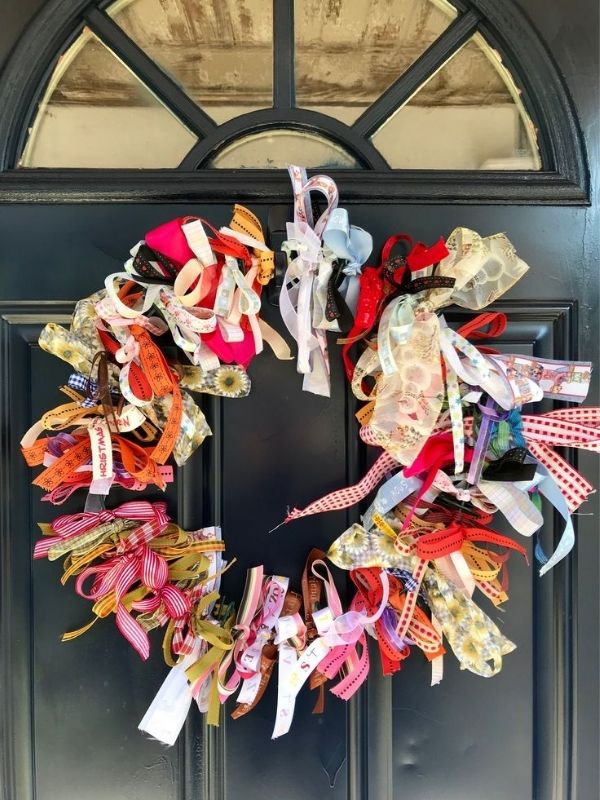
A ribbon pull wreath uses loops of ribbon pulled through a wire frame to create a fluffy, full design with no foliage needed. Choose two to three coordinating autumn ribbon colors — burgundy, mustard, and rust look beautiful together — and work loops systematically across the frame. This DIY fall wreath craft style is one of the fastest and most beginner-friendly you can make.
15. Lantern Accent Wreath
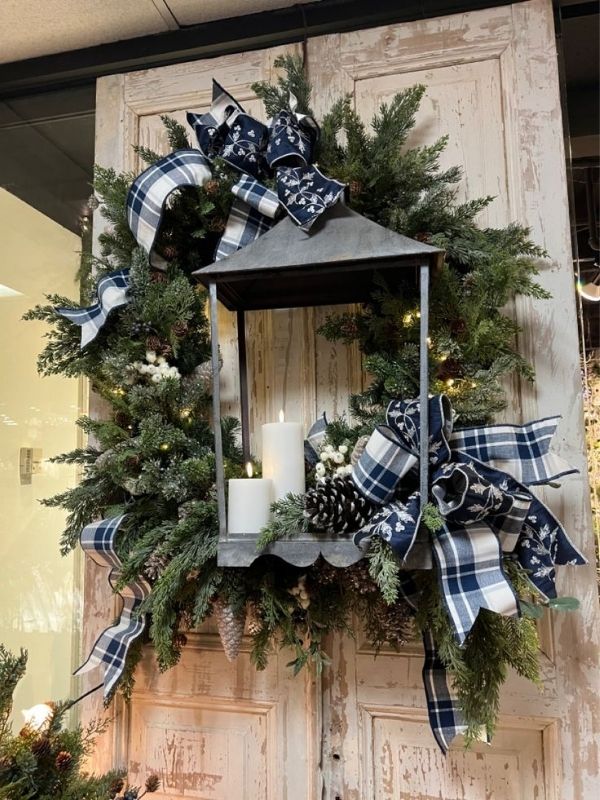
Attaching a small decorative lantern to the center of a leaf-covered grapevine wreath creates a dimensional, eye-catching front door display. Fill the lantern with battery-operated fairy lights for a soft, warm glow on autumn evenings. This is a genuinely show-stopping DIY fall wreath craft that neighbors will notice and compliment every time they walk past.
You may also like this Cute Summer Crafts: Bright and Simple DIY Ideas for Sunny Days You’ll Want to Try
Best Color Palettes for Your DIY Fall Wreath Craft
Choosing a color palette before you shop for materials keeps your design cohesive and intentional. Here are the four most popular autumn palettes for a DIY fall wreath craft, so you can decide which suits your home best before you begin.
- Red, orange, yellow, and warm brown. The traditional palette that evokes peak foliage season and suits almost every home style, Classic Fall.
- Burgundy, forest green, deep rust, and dusty plum. A sophisticated, unexpected take on autumn colors that feels both current and elegant, Modern Moody.
- Cream, warm brown, black, and natural white. Pairs beautifully with burlap, cotton stems, and dried botanicals for a serene, timeless look, Farmhouse Neutral.
- Terracotta, mustard, sage green, and warm caramel. A trending palette that photographs beautifully and suits both bohemian and modern interiors, Earthy Boho.
Stick to a maximum of three coordinating colors in any single DIY fall wreath craft design. Too many colors at once make a wreath look busy and unfocused rather than intentional.
Tips for Better DIY Fall Wreath Craft Results
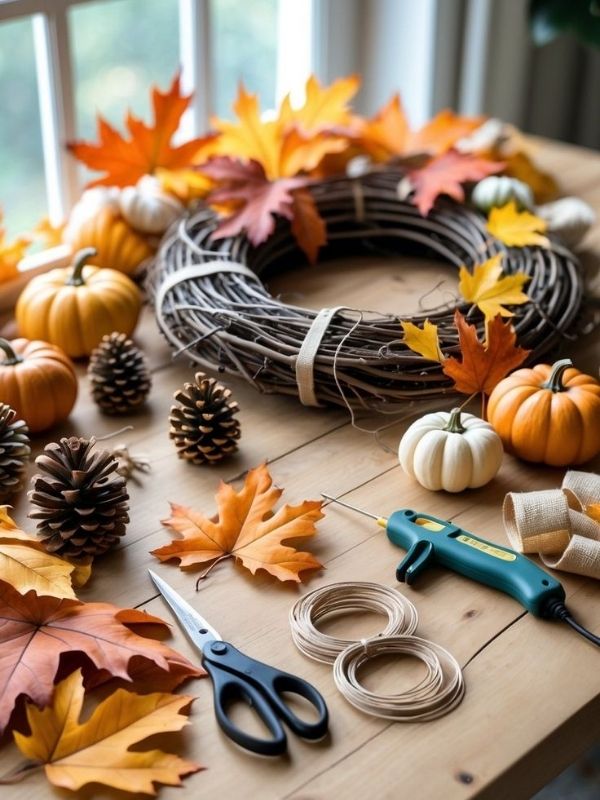
A few simple habits make a significant difference in the overall quality of your finished DIY fall wreath craft. Apply these tips from your very first project and your wreaths will look polished right from the start.
- Combine smooth faux pumpkins, rough burlap, soft ribbon, and natural pinecones in the same design. Texture contrast creates visual richness and depth.Layer your textures.
- Group leaves in bundles of three or four rather than placing individual leaves. Clusters look far more natural and full.Work in clusters, not singles.
- Three pumpkins or five pinecones always look more balanced than even numbers. This simple design rule transforms beginner wreaths into professional-looking ones.Use odd numbers.
- Add your background foliage layers first, then mid-level pieces, and finally your focal elements on top. This layering creates real depth.Work from back to front.
- Wired ribbon holds its shape beautifully and creates full, dimensional bows that stay neat through wind and weather changes.Choose wired ribbon.
- A tidy back surface protects your front door from scratches and shows genuine attention to detail in your craft.Keep the back clean.
- Combining high-quality faux leaves with real dried botanicals like cotton stems or dried orange slices gives your wreath a genuinely luxurious, organic feel.Mix faux with natural elements.
- Always allow freshly glued sections to cool and set fully before moving the wreath or adding the next layer.Let it cool completely.
How to Price Your DIY Fall Wreath Craft to Sell
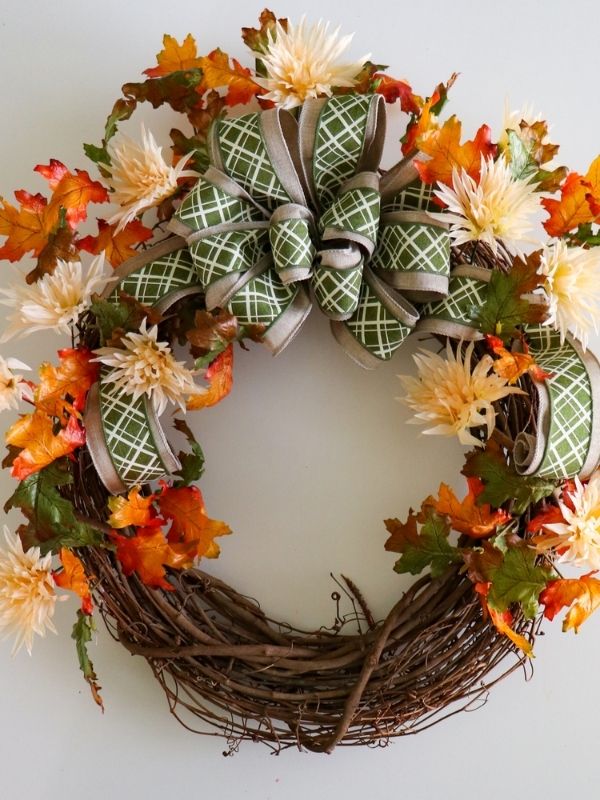
If you enjoy making wreaths, selling them is a natural next step. DIY fall wreath craft designs are consistently among the top-selling handmade autumn products every year, both online and at local craft fairs.
When pricing your work, always account for the full cost of your materials, your time at a fair hourly rate, packaging, shipping, marketplace fees, and your desired profit margin. A common beginner mistake is to charge only for materials and forget the value of your labor.
Simple wreaths using Dollar Tree materials typically sell for $25–$40.
Mid-range designs with quality faux botanicals and wired ribbon sell for $45–$70.
Premium personalized wreaths with monograms, dried botanicals, or lantern accents can sell for $80–$120 or more.
As your skills grow, raise your prices to reflect your craftsmanship.
Fall project that you will like Dollar Tree Fall Crafts That Look Expensive (Easy DIY Decor Anyone Can Make)
How to Display Your DIY Fall Wreath Craft Beyond the Front Door

A DIY fall wreath craft does not have to live only on the front door. Here are more creative ways to use your autumn wreaths throughout your home.
- Hanging a wreath above a hallway mirror doubles its visual impact through reflection and makes a small entry feel more styled. Over a Mirror.
- A wreath hung with a suction cup hook creates a beautiful view from both inside and outside your home simultaneously. On a Window.
- A large wreath above the mantel becomes a stunning living room focal point for the entire autumn season. Above the Fireplace Mantel.
- A small wreath displayed between books or pillar candles adds cozy, seasonal charm to living room shelving without any effort.On a Bookshelf:
- A simple wreath on a cabinet door adds warmth and seasonality without taking up any counter space. In the Kitchen.
For more ideas on refreshing every room in your home with handmade decor, our post on DIY Bedroom Decor Ideas You Can Actually Make, Not Just Shop For a Cozy, Personal Space is a great source of room-by-room DIY inspiration that works beautifully alongside seasonal wreath decor.
How to Store Your DIY Fall Wreath Craft After the Season
Proper storage extends the life of your DIY fall wreath craft and keeps it looking beautiful year after year. A little care at the end of the season makes a huge difference the following autumn.
- Store your wreath in a large wreath storage container or a labeled round cardboard box that preserves its shape during the off-season.
- Stuff delicate decorative areas with tissue paper to prevent crushing.
- Keep stored wreaths away from damp basements or hot attics. Temperature extremes can warp grapevine bases and fade faux foliage.
- If you used any real dried botanicals, check the wreath before bringing it out the following year to make sure it is still in good condition.
- A well-stored, quality wreath easily lasts three to five years — making your initial investment of time and materials extremely worthwhile.
Extending Your Autumn Creativity Beyond the Wreath
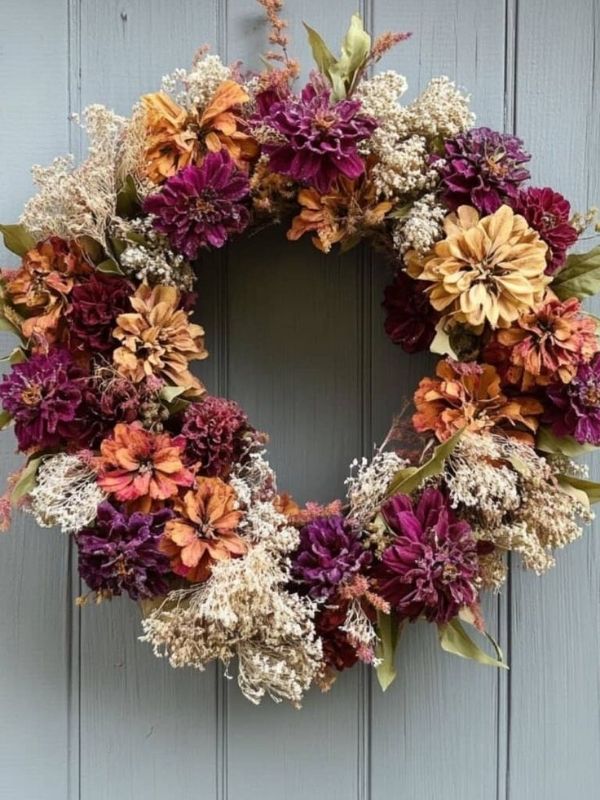
Your DIY fall wreath craft skills open the door to a whole season of handmade decor. Autumn flows naturally into some of the most creative crafting months of the entire year, and your new skills carry over beautifully into every project that follows.
Once the wreath is hanging and your front door looks its best, you can extend the same aesthetic throughout your home with more budget-friendly fall decor.
For even more affordable autumn decor ideas that complement your handmade wreath beautifully, our post on Dollar Tree Fall Crafts That Look Expensive (Easy DIY Decor Anyone Can Make) is packed with budget-friendly ideas using only Dollar Tree supplies.
As the season progresses toward the end of October, the Halloween spirit kicks in. Your wreath-making skills translate directly into spooky seasonal decor that teens and adults love creating together.
And when autumn fades and the holiday season arrives, you can take your wreath-making skills straight into Christmas crafting. The techniques you learned layering, gluing, ribbon work apply to holiday wreaths, garlands, and seasonal centerpieces just as well.
For budget-friendly inspiration when the holiday season begins, our post on 12 Christmas Dollar Tree Crafts You’ll Be Proud to Display in Your Living Room gives you an entire living room’s worth of festive decor for very little money.
Frequently Asked Questions
1. What is the easiest DIY fall wreath craft for a complete beginner?
A simple grapevine wreath decorated with faux fall leaves, a burlap bow, and two or three decorative pumpkin picks is the easiest DIY fall wreath craft to start with. It requires only a hot glue gun and scissors, and most beginners can complete it in under an hour.
2. What materials do I need for a DIY fall wreath craft?
You need a wreath base, a hot glue gun, faux fall leaves, ribbon, and a few decorative focal pieces such as pumpkins or pinecones. Most of these materials are available at Dollar Tree or craft stores for just a few dollars each.
3. How much does a DIY fall wreath craft cost to make?
A basic DIY fall wreath craft costs between $5 and $20 to make, depending on where you source your materials. Using Dollar Tree supplies keeps costs very low. A more elaborate design with premium dried botanicals and wired ribbon may cost $25–$40 in materials.
4. Can I sell the DIY fall wreath crafts I make at home?
Absolutely. Handmade autumn wreaths sell very well on Etsy, at local craft fairs, and through social media platforms. A well-made, personalized DIY fall wreath craft typically sells for $35–$100 depending on size and design complexity.
5. How long does a DIY fall wreath craft last?
A well-made DIY fall wreath craft using quality faux materials can last three to five years with proper storage. Wreaths made with real dried botanicals may need refreshing after one or two seasons, but the base itself can always be redecorated for a fresh autumn look.
Conclusion
A DIY fall wreath craft is one of the most satisfying seasonal projects you can make. It is affordable, quick to complete, and produces a result that genuinely transforms your home’s curb appeal from the very first day of autumn.
Whether you make one for your own front door, create a set as thoughtful gifts, or launch a small wreath-making business, the skills you build with every DIY fall wreath craft carry forward naturally. Each wreath teaches you something new about texture, balance, and color that you bring into your next design.
The best way to get started is simply to begin. Pick your base, choose your color palette, gather your materials, and start layering. Your bare front door is about to look beautifully dressed for the best season of the year.