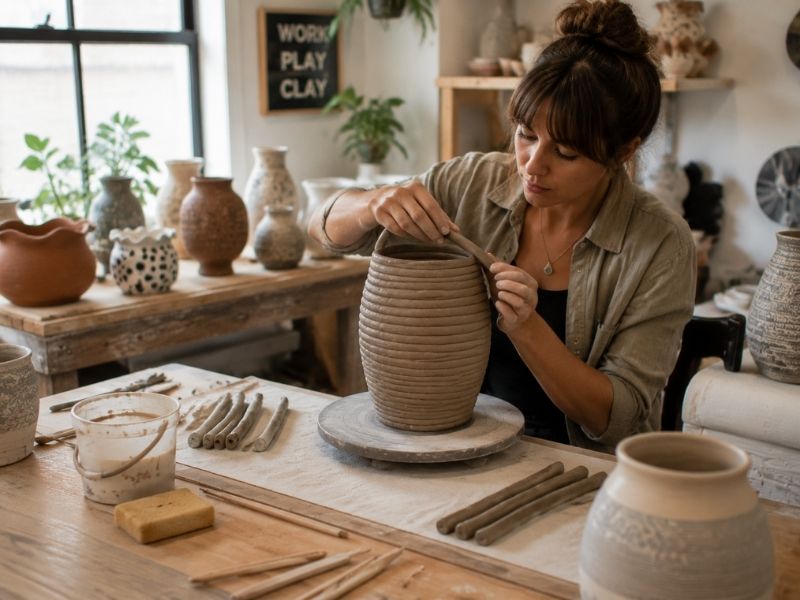

How to Make Crafts: 20 Easy Crafts to Sell and Make Profits From Home If You Need Extra Income
If you’re looking to make some extra money or build up a side hustle, selling handmade crafts can be one of the easiest businesses to start.
You don’t need a storefront, a large investment, or years of experience. With your creative ideas and a few affordable materials, you can start a profitable craft business.
The handmade marketplace has grown significantly in recent times with platforms like Etsy, Facebook Marketplace, and local craft fairs making it easier than ever to reach customers, and guess what?
Products that are personalized, practical, and visually appealing tend to perform especially well because shoppers are often looking for unique gifts and home decor that can’t be found in big-box stores.
Ready to give your home a touch of style? explore our Cute 4th of July Wood Crafts To Make Your Home Feel Completely Handmade for simple and stylish project ideas.
No matter your skill level, grab a cup of coffee and let’s explore 20 easy crafts to sell along with practical tips on pricing, marketing, and turning your handmade creations into a reliable source of extra income.
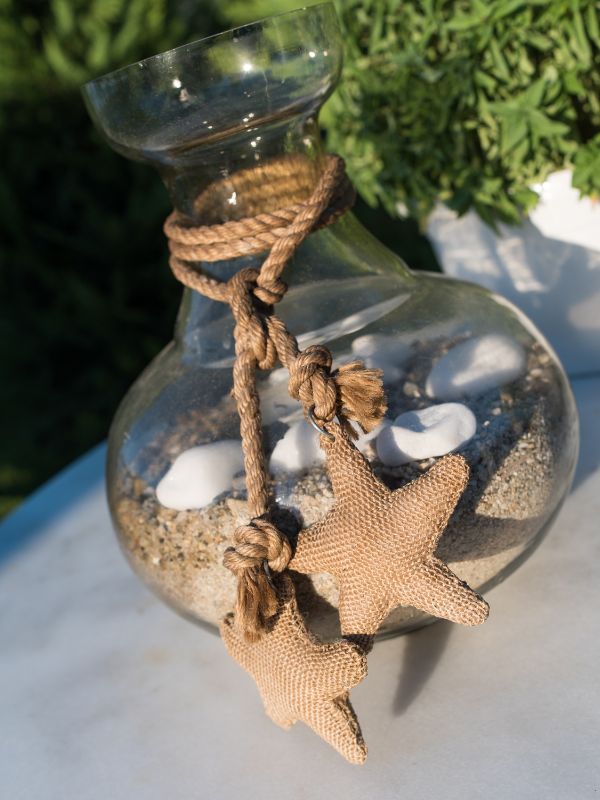
What Makes a Craft Profitable?
Not every craft will generate a strong income. The most profitable handmade products usually share these qualities: low material costs, short production time, easy shipping, whether the product is in demand and the competition level of the craft.
Taking into consideration all these factors (and some others) prevents undue frustration in business.
Thinking of the special gift to make for dad? Fathers Day Crafts That Make Dad Feel Celebrated, Seen, and Genuinely Loved for simple projects he’ll cherish!
The 20 easy craft ideas to sell include personalized products, home decor, wellness products, DIY kits, and seasonal items. From low-cost impulse buys to premium products, your master piece can make you tons of money!
1. Soy Candles

Homemade soy candles remain one of the best-selling crafts online, all-time favorite! They’re relatively inexpensive to make and can be customized with scents, colors, and decorative containers.
How to Make Soy Candles at Home
Soy candles are handmade candles made from soy wax, a natural wax derived from soybean oil. They are easy to customize with different scents, colors, and containers, making them a popular craft to sell.
Materials Needed:
- Soy wax flakes
- Candle wick
- Wick holder or stick
- Candle containers (glass jars, tins, or cups)
- Fragrance oil (optional)
- Candle dye (optional)
- Double boiler or heat-safe bowl
- Thermometer
- Stirring stick
Steps to Make Soy Candles:
- Prepare the Container and Wick
Place the wick in the center of your candle container and secure it with a wick holder or a small amount of melted wax. Make sure the wick stays straight. - Melt the Soy Wax
Melt the soy wax flakes using a double boiler. Heat the wax slowly until it becomes completely liquid. - Add Fragrance and Color
Allow the melted wax to cool slightly, then add your preferred fragrance oil and candle dye. Stir well to combine. - Pour the Wax Into the Container
Carefully pour the scented soy wax into the prepared container while keeping the wick centered. - Let the Candle Harden
Leave the candle undisturbed for several hours until the wax fully solidifies. - Trim the Wick and Finish
Cut the wick to the recommended length, add a label or decoration, and your soy candle is ready to use or sell.
A candle that costs $4–$6 to produce can often sell for $15–$30, making it an excellent option for beginners.
For more easy DIY projects, check out Easy Fourth of July Crafts That Make a Big Statement Without the Stress for simple DIY ideas.
2. Personalized Mugs

Personalized mugs are customized ceramic or enamel drinkware made using permanent vinyl, sublimation, or ceramic paint.
One of the most popular crafts to sell for birthdays, weddings, baby showers, holidays, and corporate gifts.
Explore more July Crafts To Keep Your Hands Busy and Your Home Looking Amazing All Month
Materials You’ll Need:
-
Ceramic mugs
-
Permanent adhesive vinyl (or sublimation paper)
-
Vinyl cutter (Cricut/Silhouette) or heat press
-
Transfer tape & weeding tools
-
Rubbing alcohol & cloth
Steps to Make Personalized Mugs:
-
Clean the Mug Wipe the ceramic surface with rubbing alcohol to remove dust and oils.
-
Design & Cut Create your design in your software and cut it on permanent vinyl.
-
Weed & Prep Remove excess vinyl with a weeding tool and apply transfer tape over the design.
-
Apply Design Align the graphic on the mug, press firmly from the center outward, and peel off the transfer tape.
-
Cure Let permanent vinyl cure for 48 hours before use (or heat press if using sublimation).
Adding names, quotes, zodiac signs, or funny sayings increases the product’s value and makes it easier to charge premium prices.
3. Resin Coasters

Resin coasters are decorative drink mats made by pouring liquid epoxy resin into silicone molds with added accents like flowers or pigments..
Materials Required:
-
Two-part epoxy resin & hardener
-
Silicone coaster molds
-
Inclusions (pressed flowers, gold leaf, mica powder)
-
Mixing cups & stir sticks
-
Heat gun or torch (for bubbles)
-
Safety gear (gloves & mask)
For more fun and creative craft ideas to try out, check out our Creative DIY Crafts for Adults: 20 Fun Crafts for Adults to Try When You’re Bored at Home
Steps to Make Resin Coasters:
-
Prep Workspace Work in a well-ventilated area with gloves and clean silicone molds.
-
Mix Resin Combine equal parts resin and hardener, stirring slowly for 3–5 minutes.
-
Add Decor Mix pigments into the resin or arrange pressed flowers directly in the molds.
-
Pour & De-bubble Pour resin into molds and lightly pass a heat gun over the surface to pop bubbles.
-
Cure & Finish Let cure for 24–48 hours, demold, and sand any sharp edges.
Customers love unique designs featuring:
- Pressed flowers
- Gold flakes
- Marble effects
- Ocean waves
- Glitter
- Personalized initials
4. Macramé Wall Hangings

How to Make Macramé Wall Hangings
Macramé wall hangings are made by tying cords or ropes into decorative knots to create beautiful wall decor.
They are beginner-friendly crafts that require only a few materials and can be customized with different patterns, sizes, and colors.
Materials you need:
- Macramé cord or cotton rope
- Wooden dowel, branch, or metal ring
- Scissors
- Measuring tape
- Comb or brush (for making fringe)
- Optional: beads, wooden rings, or dyed cords for decoration
Steps to make a simple macramé wall hanging:
- Cut your cords
Measure and cut several pieces of macramé cord. The length and number of cords depend on how large you want your wall hanging to be. - Attach the cords to the dowel
Fold each cord in half and attach it to the wooden dowel using a lark’s head knot. Arrange the cords evenly across the dowel. - Create your knot pattern
Use basic macramé knots such as:
- Square knots
- Spiral knots
- Half hitch knots
- Gathering knots
Combine different knots to create patterns and textures.
- Add decorative details
You can add wooden beads, different colored cords, or layered designs to make your wall hanging unique. - Shape and finish the bottom
Trim the cords into a straight, angled, or V-shaped design. Use a comb to separate the fibers and create a soft fringe effect. - Hang your finished piece
Attach a string or cord to both ends of the dowel and display your handmade macramé wall hanging.
Macramé wall hangings are popular handmade items to sell because they add a boho, handmade touch to homes and can be created in different styles and sizes.
Still worried about what to get your mom for mother’s day? Have fun going through our Mother’s Day Gifts catalogue for the perfect gift!
5. Decorative Wreaths

6. Painted Flower Pots

Hand-painted terracotta pots are inexpensive to make and easy to personalize.
Ready to get creative with mini planters? Explore our favorite Mini Terra Cotta Pots Crafts for Cute Budget-Friendly DIY Home Decor for adorable, low-cost DIY ideas that add big charm to tiny spaces.
Popular designs include:
- Botanical patterns
- Minimalist line art
- Inspirational quotes
- Geometric shapes
- Animal illustrations
How to Make Painted Flower Pots
Essentials:
- Terracotta or ceramic flower pot
- Acrylic paint
- Paintbrushes or foam brushes
- Pencil (optional, for sketching designs)
- Painter’s tape (optional, for clean lines)
- Clear acrylic sealer or outdoor varnish
- Small container of water
- Paper towels
Instructions
- Clean the flower pot. Wipe away any dust or dirt. If you’re using a new terracotta pot, let it dry completely after cleaning.
- Apply a base coat (optional). Paint the entire pot with a solid color, such as white or beige, and let it dry.
- Paint your design. Add flowers, leaves, geometric patterns, polka dots, stripes, or other creative designs using acrylic paint. Allow each color to dry before adding another.
- Add details. Use a fine brush to outline flowers, paint stems, or add small decorative accents.
- Let the paint dry completely. This usually takes a few hours, depending on the paint.
- Seal the pot. Apply a clear acrylic sealer or outdoor varnish to protect the paint from moisture and fading. Let it cure according to the product instructions.
- Plant your flowers. Once the sealer is fully dry, fill the pot with potting soil and your favorite flowers or plants.
These painted flower pots make attractive gifts, home decor, and handmade items to sell at craft fairs, online marketplaces, or local markets.
Looking to keep your tiny creators happily occupied? Explore these Easy Summer Crafts for Toddlers That Keep Little Hands Busy All Day for simple, sensory-friendly DIY projects designed to spark curiosity, and unleash big imaginations!
7. Bath Bombs
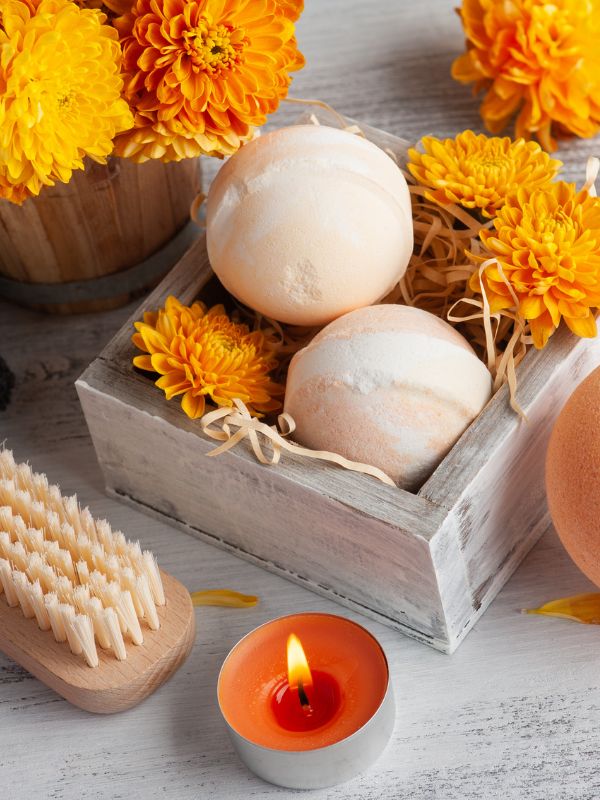
Handmade bath bombs are consistently popular because they’re affordable gifts and self-care products.
Materials You’ll Need:
-
Baking soda & citric acid
-
Epsom salt & cornstarch
-
Essential oil & carrier oil
-
Natural colorant & molds
Steps to Make Bath Bombs:
-
Mix Dry: Whisk baking soda, citric acid, Epsom salt, and cornstarch in a bowl.
-
Mix Wet: Combine carrier oil, essential oil, and colorant in a separate glass.
-
Combine: Slowly add the wet mixture to the dry ingredients until it feels like wet sand.
-
Mold: Pack the mixture tightly into mold halves and press them together.
-
Cure: Let them harden in a dry place for 24 hours before un-molding.
Packaging plays a major role in increasing sales, so attractive labels and gift-ready wrapping can significantly boost profits.
8. Handmade Soap

Natural handmade soap appeals to customers looking for artisan, eco-friendly, and skincare-focused products.
Materials You’ll Need:
-
Melt-and-pour soap base
-
Essential oils & natural colorants
-
Optional add-ins (oats, dried flowers)
-
Silicone molds & heat-safe measuring cup
Steps to Make Handmade Soap:
-
Melt: Cube the soap base and melt it in the microwave or double boiler.
-
Add Extras: Stir in essential oils, colorants, and any exfoliants or botanicals.
-
Pour: Pour the liquid soap into silicone molds.
-
De-bubble: Lightly spray the surface with rubbing alcohol to remove air bubbles.
-
Cool: Allow the soap to cool completely for 2 to 4 hours, then pop out the finished bars.
Looking for more creative inspiration? Check out our Cute Summer Crafts: Bright and Simple DIY Ideas for Sunny Days You’ll Want to Try for easy ways to make the season colorful!
9. Polymer Clay Earrings

Polymer clay earrings are one of the fastest-growing handmade jewelry categories due to low material costs and high profit margins.
Materials You’ll Need:
-
Polymer clay (various colors)
-
Clay cutters or blade
-
Acrylic roller & tile surface
-
Jump rings & earring hooks/posts
-
Jewelry pliers & sandpaper
Steps to Make Polymer Clay Earrings:
-
Condition & Roll: Knead the clay until soft, then roll it to an even thickness.
-
Cut Shapes: Use clay cutters to stamp out your preferred shapes and designs.
-
Punch Holes: Pierce small holes for jump rings before baking.
-
Bake: Bake in a dedicated oven according to the clay package instructions.
-
Assemble: Sand any rough edges, add jump rings, and attach earring hooks with pliers.
Because material costs are low, earrings can generate strong profit margins even at affordable price points.
10. Custom Keychains
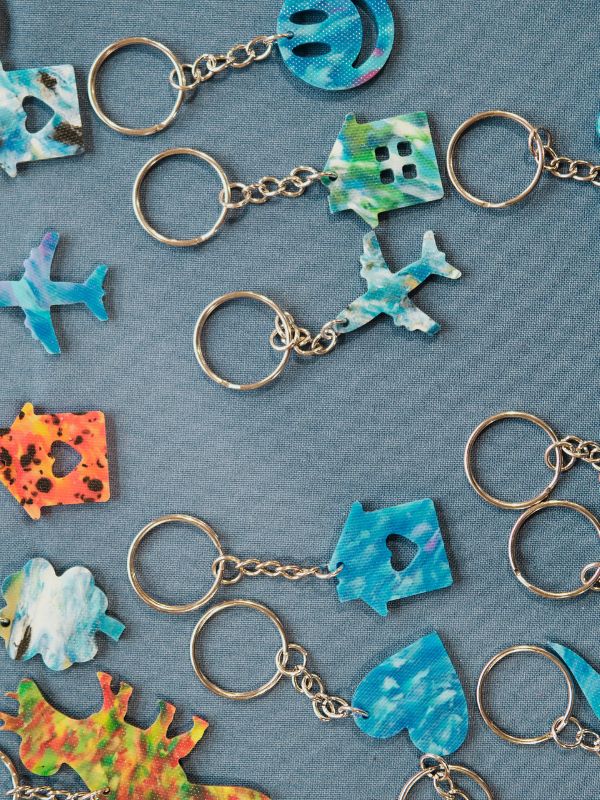
Personalized keychains are inexpensive to make, lightweight and easy to produce in batches.
They are always in demand (popular impulse buys) and a cute gift for birthdays, holidays and parties.
Supplies & Essentials:
-
Keychain blanks (acrylic, wooden, or faux leather)
-
Keyrings & jump rings
-
Permanent vinyl or resin & inclusions
-
Weeding tools & transfer tape
-
Pliers
Steps to Make Custom Keychains:
-
Clean: Wipe down your keychain blank with rubbing alcohol.
-
Design & Cut: Cut your text or graphics onto vinyl using a cutting machine.
-
Weed & Transfer: Remove excess vinyl, apply transfer tape, and smooth the design onto the blank.
-
Seal (Optional): Apply a thin coat of UV resin or sealer for added durability.
-
Attach Hardware: Open a jump ring, attach the keyring, and secure it with pliers.
11. Handmade Tote Bags
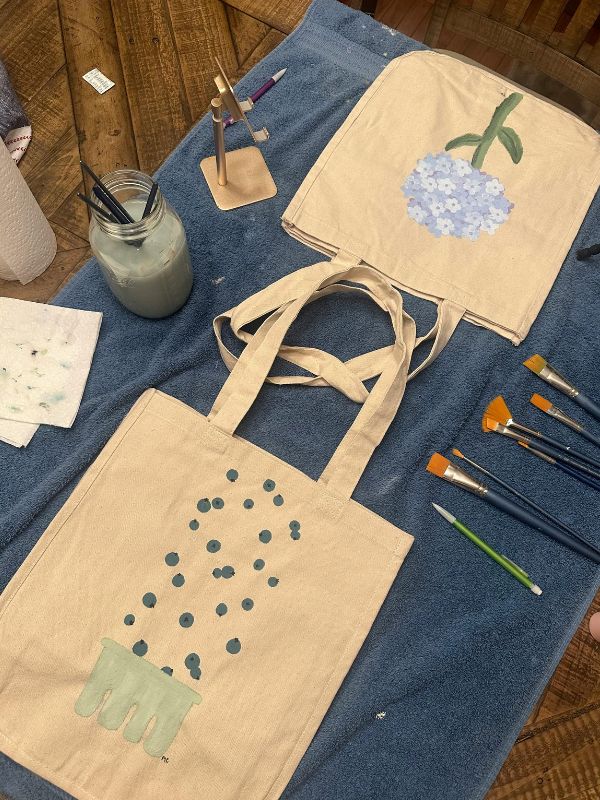
Eco-friendly tote bags have become increasingly popular as more people look for reusable alternatives to plastic shopping bags.
Since tote bags are practical and reusable, they appeal to a wide audience and make excellent gifts. Selling themed collections—such as teacher totes, book lover totes, or bridal party totes can help attract niche buyers and increase sales.
Materials You’ll Need:
-
Canvas tote bag blanks
-
Heat transfer vinyl (HTV) or fabric paint
-
Vinyl cutter (Cricut/Silhouette)
-
Heat press or household iron
-
Weeding tools
Steps to Make Handmade Tote Bags:
-
Prep Fabric: Iron the tote bag flat to remove moisture and wrinkles.
-
Cut & Weed: Mirror your design in the software, cut it on HTV, and weed out the extra vinyl.
-
Position: Align the design on the center of the bag.
-
Press: Apply heat using an iron or heat press with firm pressure for 10–15 seconds.
-
Peel: Let it cool slightly, then peel off the carrier sheet to reveal your design.
12. Rustic Wooden Signs

Rustic wooden signs remain a favorite in farmhouse and modern home décor. Using reclaimed wood or inexpensive pine boards, you can create decorative signs featuring family names, seasonal greetings, inspirational quotes, or holiday messages.
Materials Needed:
- Wooden board
- Sandpaper
- Paint or wood stain
- Paintbrush
- Stencil or vinyl lettering (optional)
- Clear sealer
Steps:
- Sand the wooden board until it’s smooth.
- Apply paint or wood stain and let it dry.
- Add your design using a stencil or freehand lettering.
- Allow the paint to dry completely.
- Seal the sign with a clear protective finish.
- Display or hang your finished rustic wooden sign.
Customers often purchase these signs as housewarming gifts, wedding presents, or holiday decorations, making them a profitable item to sell year-round.
Bring nature to life with Garden Crafts for Preschool: Fun and Easy Nature Projects for Kids! Packed with simple DIY projects your kids we’ll love.
13. Handmade Bookmarks
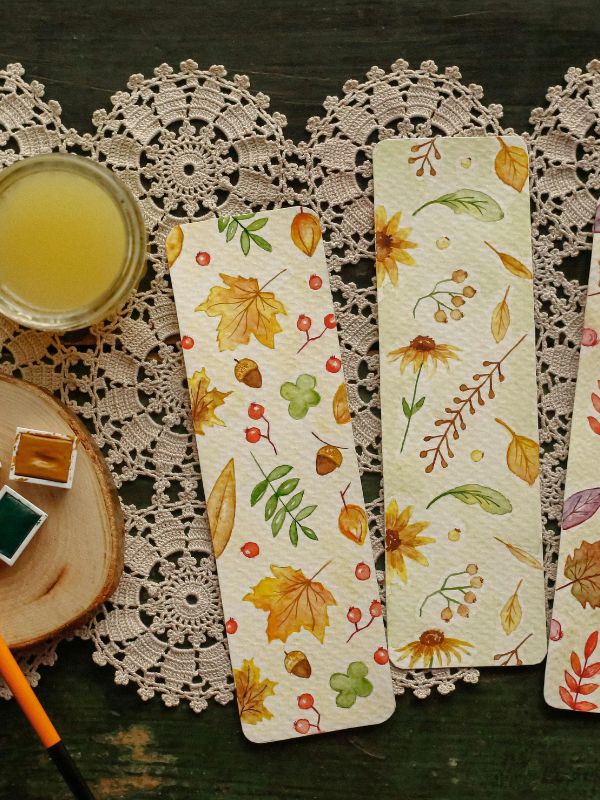
Bookmarks are inexpensive to make and ideal for beginner crafters. Despite their simplicity, they remain popular among students, teachers, and book lovers.
You can personalize them with artwork, quotes, pressed flowers, or tassels to create unique designs that reflect your style.
Materials Needed:
- Cardstock or watercolor paper
- Scissors or a paper cutter
- Hole punch
- Ribbon or tassel
- Markers, watercolor paints, stickers, or washi tape
- Laminating sheets or clear contact paper (optional)
Steps:
- Cut the cardstock into bookmark-sized strips (about 2 x 6 inches).
- Decorate the front with artwork, inspirational quotes, stickers, or pressed flowers.
- Allow any paint or glue to dry completely.
- Laminate the bookmark or cover it with clear contact paper for added durability (optional).
- Punch a hole at the top and thread a ribbon or tassel through it.
14. Greeting Cards

Many people still appreciate the personal touch of a handmade greeting card. Whether for birthdays, weddings, baby showers, or holidays, handcrafted cards stand out from mass-produced alternatives.
Materials You’ll Need:
-
Blank cardstock & matching envelopes
-
Watercolor paints, markers, or ink stamps
-
Craft glue or double-sided tape
-
Decorative paper, dried flowers, or stickers
-
Scissors or paper trimmer
Steps to Make Greeting Cards:
-
Fold & Size: Cut and score your cardstock to your desired card dimensions.
-
Create Artwork: Paint, stamp, or illustrate your primary design on the front cover.
-
Layer Details: Glue decorative paper, pressed flowers, or cutout elements for texture.
-
Write Sentiment: Add a hand-lettered greeting or leave the inside blank.
-
Package: Pair the finished card with a matching envelope for sale.
15. Decorative Throw Pillow Covers

Decorative throw pillow covers are fabric covers designed to fit over throw pillows and can be made with basic sewing skills.
Essentials:
- Fabric (cotton, linen, canvas, velvet, or other home décor fabric)
- Matching thread
- Sewing machine or needle
- Scissors or rotary cutter
- Measuring tape
- Pins or clips
- Zipper, buttons, or envelope-style overlap (optional)
Step by Step Procedure:
- Measure the pillow insert.
For example, if your pillow insert is 18 × 18 inches, cut your fabric accordingly. - Cut the fabric.
- For a zippered cover: Cut two squares slightly larger than the pillow insert to allow for seam allowance.
- For an envelope-style cover: Cut one front piece and two overlapping back pieces.
- Hem the back pieces (for an envelope closure) by folding and sewing the raw edges.
- Place the fabric right sides together.
- Put the front piece face up.
- Lay the back pieces on top with the hemmed edges overlapping.
- Pin and sew around all four sides using about a ½-inch seam allowance.
- Trim the corners to reduce bulk.
- Turn the cover right side out through the envelope opening or unzip the zipper if using one.
- Insert the pillow form and smooth the corners.
Ways to Make Them More Profitable
- Use seasonal fabrics (fall, Christmas, spring, Halloween).
- Add embroidery, tassels, pom-poms, or ruffles.
- Personalize with names or monograms.
- Create matching sets in different sizes.
- Use high-quality fabrics for a premium look.
Decorative throw pillow covers are a popular choice craft to sell because they’re relatively inexpensive to make, customizable, and always in demand for home decor.
16. Pet Bandanas

- Small pets: 14 × 14 inches
- Medium pets: 18 × 18 inches
- Large pets: 22 × 22 inches
- Create the bandana shape.
Fold the square diagonally to form a triangle. - Finish the edges.
Fold each raw edge over about ¼ inch twice, press with an iron if desired, and sew around the edges to prevent fraying. - Tie it on the pet.
Fold the top edge down once or twice if needed, then tie the bandana loosely around the pet’s neck. You should be able to fit two fingers comfortably between the bandana and the pet’s neck.
You can also personalize pet bandanas with embroidered names, seasonal prints, or heat-transfer vinyl designs, making them attractive crafts to sell online or at craft fairs.
17. Decorative Jewelry Trays
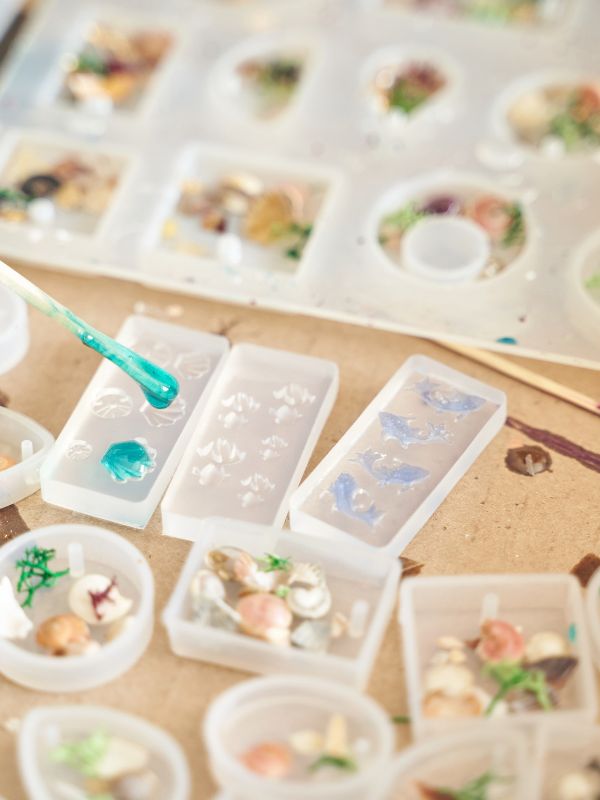
Small jewelry trays made from resin, concrete, or air-dry clay are both practical and decorative craft to sell at local markets and trade fairs.
Materials You’ll Need:
-
Polymer clay or air-dry clay
-
Acrylic paint & paintbrushes
-
Rolling pin & craft knife
-
Clear varnish or gloss sealer
-
Gold leaf paint or foil (optional)
Steps to Make Decorative Jewelry Trays:
-
Roll & Shape: Roll the clay flat and cut out your desired tray shape (oval, leaf, or arch).
-
Form Edges: Gently curve or lip the edges upward to keep jewelry contained.
-
Dry/Bake: Bake or air-dry according to package instructions until completely hardened.
-
Paint & Decorate: Paint your background design and add accents like gold-gilded edges.
-
Seal: Apply a clear sealer to protect the surface and give it a glossy finish.
Adding metallic accents, marbled finishes, or personalized initials creates a luxurious appearance while keeping production costs relatively low.
18. Crochet Plush Toys
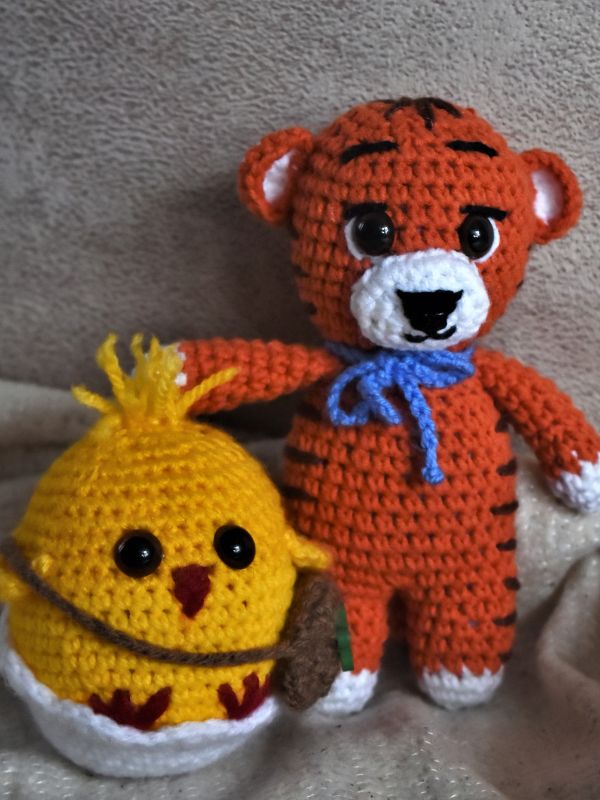
Crochet plush toys (also called amigurumi) are soft stuffed toys made by crocheting yarn into different shapes and then filling them with polyester stuffing. Highly profitable to make as crafts to sell on online marketplaces like Facebook and etsy.
How to make a crochet plush toy
Materials you’ll need:
- Plush or cotton yarn
- Crochet hook (size recommended for your yarn)
- Polyester fiberfill stuffing
- Safety eyes or black embroidery thread
- Yarn needle
- Stitch markers
- Scissors
Basic steps:
- Start with a magic ring. Most plush toys begin with a magic ring to create a tight, hole-free center.
- Crochet in continuous rounds. Use single crochet stitches, increasing each round to form a flat circle.
- Shape the body. Continue crocheting, increasing and then working even rounds. Later, decrease stitches to create a rounded shape.
- Stuff the toy. Fill the body firmly with polyester stuffing before closing the opening.
- Make the parts. Crochet the head, arms, legs, ears, wings, or tail separately, depending on the design.
- Attach the pieces. Sew all the parts together with a yarn needle.
- Add the face. Insert safety eyes before closing the head or embroider the eyes and mouth with thread.
- Finish the toy. Weave in loose ends and adjust the stuffing to give the plush toy a neat shape.
Popular crochet plush toys include teddy bears, bunnies, dinosaurs, cats, dogs, octopuses, bees, and cartoon-inspired characters. They are popular handmade products because they make thoughtful gifts and are in high demand on marketplaces like Etsy and at local craft fairs.
19. Seasonal Christmas Ornaments
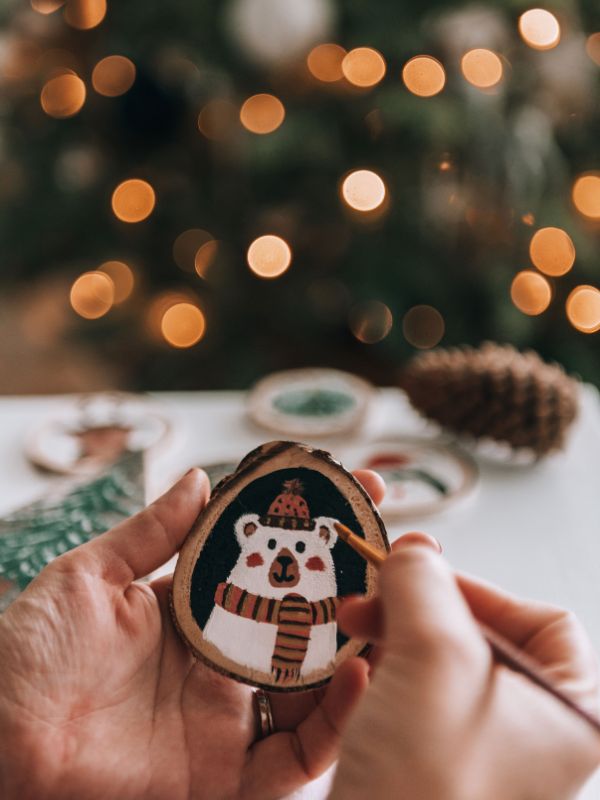
Seasonal Christmas ornaments are decorative items you can make as crafts to sell during the holiday season. Here’s how to make Felt Christmas Ornaments, a popular holiday decoration craft.
Essential Materials You’ll need:
- Felt sheets
- Scissors
- Needle and thread (or hot glue)
- Cotton stuffing
- Ribbon
- Buttons, beads, or embroidery floss
Steps:
- Draw and cut two identical shapes (tree, star, snowman, stocking, gingerbread man, etc.).
- Decorate the front piece with embroidery, buttons, or beads.
- Stitch or glue the two pieces together, leaving a small opening.
- Add a little stuffing.
- Insert a ribbon loop for hanging.
- Close the opening.
20. DIY Craft Kits

Where to Sell Your Handmade Crafts
Creating beautiful products is only half the job. It is important to research the market before you dive into it. Taking into consideration the right marketplace with less competition.
Etsy
Etsy remains one of the world’s largest marketplaces for handmade products. Sellers who use high-quality photos, detailed product descriptions, and relevant keywords are more likely to attract buyers through search.
Facebook Marketplace
Facebook Marketplace is ideal for selling larger items locally without shipping costs. Joining local buy-and-sell groups can also increase visibility.
Craft Fairs and Farmers Markets
Local events allow customers to see your products in person, helping build trust and brand recognition. They’re also an excellent way to gather feedback on new product ideas.
Shopify or Your Own Website
Creating your own online store gives you greater control over branding, pricing, and customer relationships while avoiding reliance on third-party marketplaces.
Social Media
Platforms like Instagram, Pinterest, and TikTok are powerful tools for showcasing your creative process. Short behind-the-scenes videos, packaging clips, and product demonstrations can attract potential buyers and drive traffic to your shop.
Tips for Selling More Crafts
Growing a successful handmade business takes more than creating beautiful products. These strategies can help you increase sales and build loyal customers.
Invest in Professional Photos
Natural lighting and clean backgrounds help showcase your products and make them appear more valuable.
Build a Recognizable Brand
Use consistent colors, logos, packaging, and messaging across all platforms to create a memorable customer experience.
Offer Personalization
Adding names, dates, initials, or custom colors can increase both customer satisfaction and profit margins.
Encourage Reviews
Positive customer reviews build trust and improve visibility on online marketplaces.
Create Seasonal Collections
Release limited-edition products for holidays such as Valentine’s Day, Halloween, Thanksgiving, and Christmas to capitalize on seasonal demand.
Frequently Asked Questions
What are the easiest crafts to sell from home?
Candles, handmade soap, personalized mugs, resin coasters, polymer clay earrings, and tote bags are among the easiest and most profitable crafts for beginners.
Where can I sell handmade crafts?
Popular options include Etsy, Facebook Marketplace, local craft fairs, farmers markets, Shopify, and your own website.
How much money can I make selling crafts?
Income depends on your product, pricing, marketing, and production capacity. Many successful sellers begin with a small side hustle before expanding into a full-time handmade business.
Do I need a business license to sell crafts?
Requirements vary depending on your country, state, or local regulations. Check with your local government to determine whether you need a business license or must collect sales tax.
Turn Crafts Into Profit
Starting a handmade craft business is one of the most rewarding ways to earn extra income while doing something you genuinely enjoy. Whether you’re making soy candles, resin coasters, personalized mugs, crochet plush toys, or decorative wreaths, there’s a market for well-made products that combine creativity with quality.
Successful craft sellers focus on creating products that solve a need, celebrate special occasions, or help customers express their personal style, while paying attention to the competition and market demand.
With patience, smart pricing, and effective marketing, your handmade creations can grow from a new hobby into a profitable business.