This Post Will Show You July Crafts.
There is something about July that makes me want to create things. Maybe it is the long afternoons that stretch out with nowhere urgent to be. Maybe it is the way summer light makes everything look worth celebrating. Whatever it is, I find myself reaching for supplies, gathering ribbons and paint and fabric, and letting my hands do something joyful with them. July crafts are not just decorations. They are the way I mark this season as special.
I have learned over time that the best July crafts are the ones that sit somewhere between effort and ease. They should feel satisfying to make. At the same time, they should not require professional skill or an entire weekend to finish. Furthermore, they should do something real once they are done, whether that means beautifying your home, adding a seasonal detail to a shelf or table, or giving you something handmade to share with people you love.
These July crafts ideas cover a range of styles and spaces, from front door displays to table centrepieces to small creative projects that add warmth to every corner of your home. Some are perfect for an afternoon alone. Others are ideal for doing with children or friends. All of them are genuinely beautiful and completely worth the time. I am so excited to share every single one with you.
Below Are July Crafts:
You may also like our Easy Summer Crafts for Toddlers That Keep Little Hands Busy All Day
July Crafts To Keep Your Hands Busy and Your Home Looking Amazing All Month
Making a Sunflower Wreath for Your Front Door That Brings the Warmth and Brightness of July Right to Your Entrance
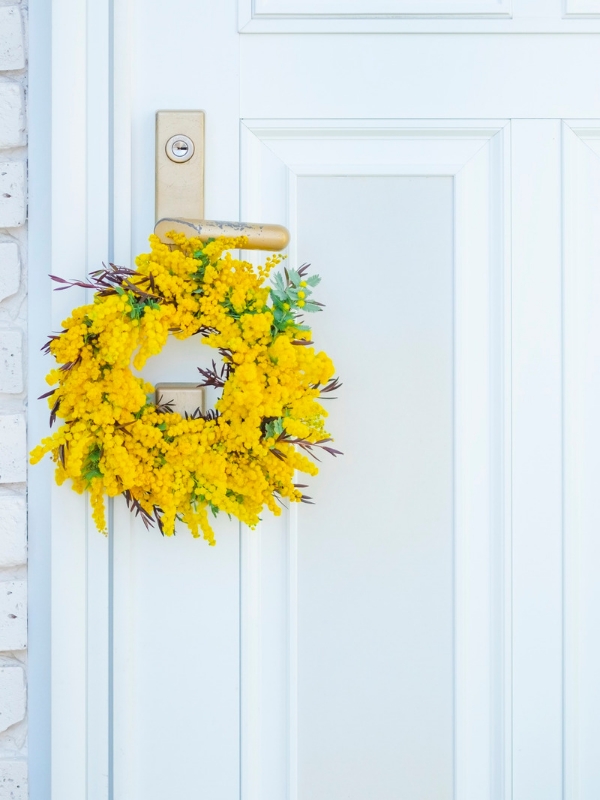
The front door is the first thing anyone sees in July, and a sunflower wreath makes it feel genuinely alive. Sunflowers are the flower of this month more than any other. Their bold yellow petals and dark brown centres carry all the warmth and confidence of a full summer day. A wreath built from faux or dried sunflowers on a grapevine or wire base, layered with greenery and a simple ribbon bow at the bottom, creates an entrance that feels cheerful, seasonal, and completely welcoming every single time someone approaches.
Start with a grapevine wreath base because the natural texture complements sunflowers more beautifully than a plain wire frame. Attach the sunflower stems by weaving them into the vine rather than gluing them flat, which gives the wreath a dimensional, full-bodied look. Furthermore, tucking in sprigs of eucalyptus, fern, or preserved boxwood between the flowers adds the green contrast that makes the yellow petals appear even more vivid. A wide burlap or cotton ribbon tied into a generous bow at the base completes the wreath with a warm, relaxed finishing detail.
This wreath looks beautiful against any door colour, but it is truly stunning against a white, navy, or dark charcoal door where the yellow really sings. Additionally, sunflower wreaths hold up well outdoors across a full July month when the flowers are good quality faux or properly dried. Hanging it with a wreath hanger rather than a nail prevents door scratching and makes it easy to take down and store at the season’s end. This is the July craft that earns compliments every single day it hangs.
Crafting a Summer Citrus Garland From Dried Orange Slices and Greenery That Smells as Good as It Looks
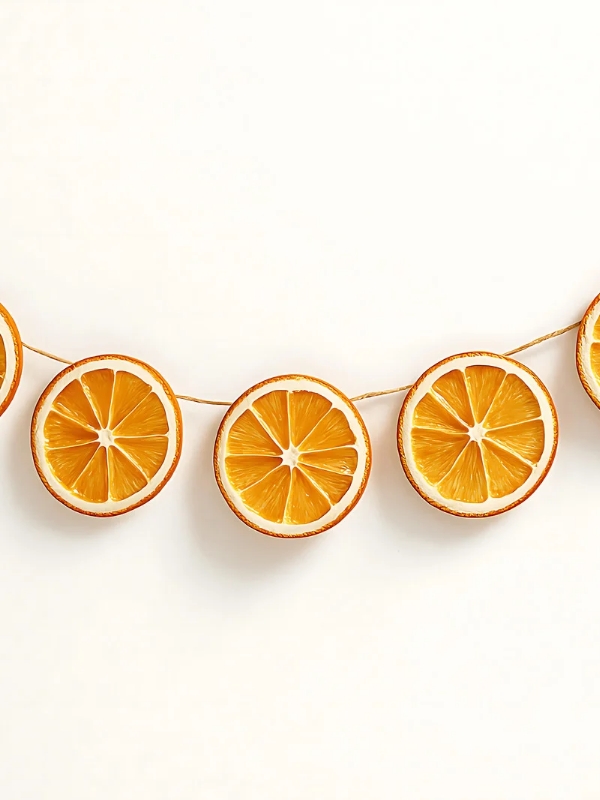
There is something about dried citrus that captures everything July is about. The warmth, the colour, the scent of something bright and alive. A garland made from oven-dried orange or lemon slices, threaded onto natural twine with clusters of dried herbs, cinnamon sticks, and small dried florals, creates one of the most sensory-rich July crafts possible. It looks beautiful hung across a mantel, draped along a staircase railing, or looped around a kitchen window frame. Furthermore, the natural fragrance it releases into the room is one of those quiet luxuries that makes a home feel genuinely cared for.
Drying the citrus slices is straightforward. Slice oranges or lemons to about a quarter-inch thickness and pat them dry before arranging on a wire rack set over a baking sheet. Bake at a very low temperature, around 150 to 170 degrees Fahrenheit, for three to four hours until the slices are completely dry but still retain their colour. Additionally, turning them halfway through the drying time ensures even dehydration on both sides. The finished slices will have a beautiful amber translucency that catches natural light in a way that feels almost luminous when the garland is hung near a window.
To assemble the garland, thread the dried slices onto a length of natural twine using a thick tapestry needle. Tie sprigs of rosemary, lavender, or dried chamomile between each citrus slice to fill the gaps and build the garland’s texture and fragrance. Cinnamon sticks tied in small bundles of two or three and attached with thin jute twine add a warm spice note that complements the citrus beautifully. Consequently, this July craft becomes a multi-sensory decoration that changes how an entire room feels the moment it is hung.
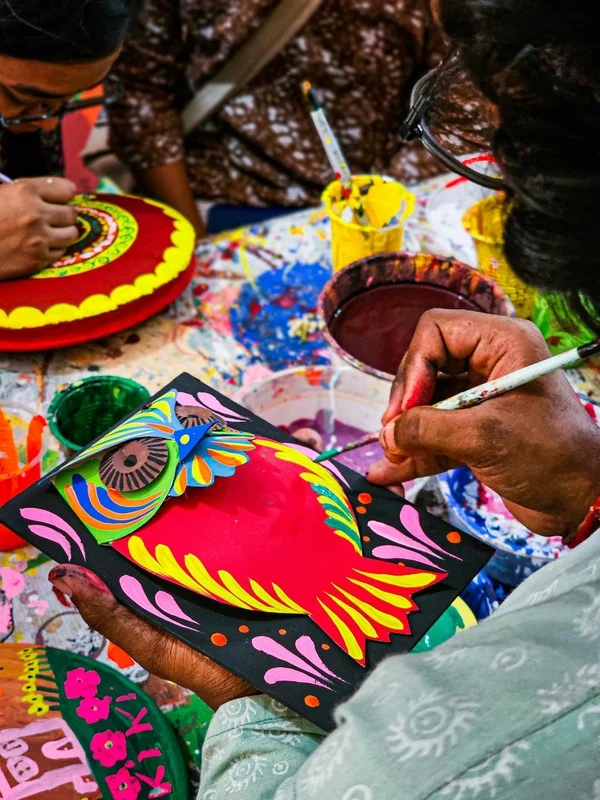
Painting River Stones With Summer Designs to Create Decorative Paperweights, Garden Markers, or a Seasonal Bowl Display
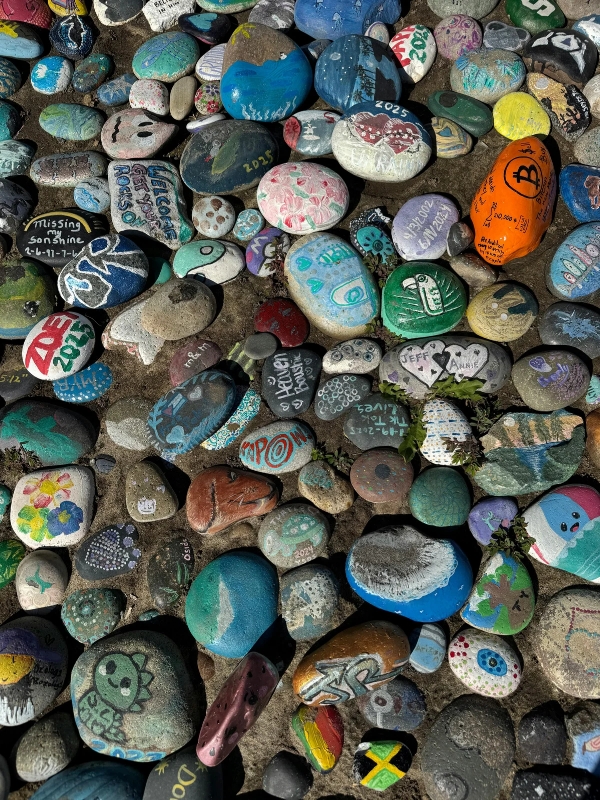
Painted river stones are one of those July crafts that feel surprisingly meditative once you get started. There is something deeply satisfying about picking up a smooth, heavy stone and turning it into something beautiful. Stones painted with sunflowers, bees, simple geometric patterns in summer tones, or short words like joy, bloom, and hello July create decorative objects that work in multiple spaces throughout the home. A shallow bowl of painted stones on a coffee table looks curated and intentional. A painted stone beside each place setting at a summer dinner table becomes a charming personal touch.
Use acrylic craft paint for stone painting because it adheres well to the smooth surface and dries quickly. Start with a base coat in a solid colour, cream, terracotta, sage, or navy, and allow it to dry fully before adding the design on top. Furthermore, a fine detail brush makes the difference between a design that looks confident and one that feels hesitant. For those who do not feel comfortable with freehand painting, simple dot art using the eraser end of a pencil dipped in paint creates beautiful, graphic patterns that require no drawing skill at all.
Seal every finished stone with a clear gloss or matte varnish to protect the paint and give the surface a polished, finished quality. Additionally, sealed stones can be used outdoors in the garden as plant markers without the design washing away. Writing herb or flower names on smaller stones in a contrasting paint colour and placing them beside the relevant garden plants creates a charming kitchen garden detail that is both functional and beautiful. This is one of the most versatile July crafts in this guide because the finished pieces work beautifully in so many different spaces and contexts.
Creating a Mason Jar Summer Lantern Display With Sand, Shells, and Candles for a Table That Glows Beautifully at Night

The mason jar lantern is a July craft that does its most breathtaking work after the sun goes down. Filling the base of a clear glass mason jar with a layer of fine sand or white pebbles, then arranging a few small shells, tumbled sea glass, or smooth stones on top, and placing a pillar candle or a cluster of tea lights inside creates a table display that captures the entire spirit of a summer evening. Furthermore, a handful of these lanterns grouped together on a patio table or a dining table centrepiece creates a warm, flickering glow that transforms the outdoor or indoor evening atmosphere completely.
The materials inside each jar are what make this craft feel personal and curated rather than generic. Using sand collected from a summer beach trip, shells gathered on a coastal walk, or sea glass found at the water’s edge gives each lantern a story that a store purchase cannot replicate. Additionally, tying a length of natural twine or a strip of linen fabric around the neck of the jar, finishing with a simple knot or bow, adds a texture and warmth to the outside of the glass that makes the lantern look even more thoughtfully assembled.
For a more elaborate version, wrap the outside of the jar with strips of burlap or kraft paper and stamp small sun or star shapes across the surface using a craft stamp and ink. The stamped surface creates a diffused, patterned light effect when the candle inside burns. Consequently, every surface around the lantern picks up a soft, patterned glow that makes even a simple backyard dinner feel like a beautifully designed occasion. The LED light replicates real candlelight beautifully and burns without any heat risk.
Sewing or Tying a Simple Fabric Bunting From Linen and Cotton Scraps for a July Celebration That Feels Handmade and Warm
A fabric bunting made from linen and cotton scraps is one of the most charming and most personal July crafts you can make. Unlike paper bunting that softens in humidity or plastic bunting that looks disposable, a fabric version carries a handmade quality that immediately communicates care and creativity. Triangular pennants cut from summer-toned fabric, whether floral cotton, striped linen, chambray, or any combination of prints that speak to the season, and threaded onto a length of cotton twine, create a garland that looks warm and beautiful hung across a porch, a mantel, or above a summer party table.
No-sew versions of this bunting are completely achievable with fabric glue and a steady hand. Cut each pennant triangle approximately five inches wide at the top and seven to eight inches in length. Fold the top edge over the twine and press it flat with fabric glue rather than stitching, holding each fold in place for thirty seconds until the glue sets. Furthermore, using pinking shears rather than straight scissors to cut the edges of each pennant creates a decorative zigzag finish that prevents fraying and adds a deliberate, crafted detail that no-sew bunting particularly benefits from.
The beauty of a fabric bunting is how it improves with time. Unlike paper, a linen and cotton bunting softens slightly with handling and washing, developing a lived-in quality that makes it feel even more personal than it did when first made. Additionally, adding a few pennants with simple hand-stamped letters spelling out JULY, SUMMER, or a name personalises the bunting in a way that makes it genuinely one-of-a-kind. This is a July craft that becomes a recurring decoration, brought out every summer and becoming more beloved with every year.
Pressing Seasonal Flowers and Leaves to Create Framed Botanical Art That Captures July’s Most Beautiful Natural Details
Pressed botanicals are one of those July crafts that reward patience with extraordinary beauty. Collecting flowers and leaves at their peak in July, pressing them flat between the pages of heavy books for one to three weeks, and then arranging them in simple frames creates wall art that is both genuinely beautiful and completely personal. Every pressed piece is a record of a specific moment in the season. A wildflower gathered on a summer walk. A bloom from the garden at its most vibrant. A leaf that caught the light in a particular way. Framed, these pieces become something quietly meaningful.
The pressing process is straightforward but requires clean, completely dry specimens for the best results. Arrange each flower or leaf flat between two sheets of plain paper inside a heavy book and stack additional books on top for weight. Furthermore, replacing the paper layers every two to three days for the first week removes moisture more efficiently and prevents mould developing at the edges of thicker specimens. Flowers with flat faces, pansies, daisies, cosmos, and violas, press most successfully. Thicker blooms like roses work better when their petals are separated and pressed individually before reassembling in the frame.
Arrange the finished pressed pieces on a sheet of cream or white card stock inside a simple frame, using a small dot of clear-drying craft glue to hold each element in position. Additionally, layering pieces at slightly varying angles, with leaves providing a green backdrop behind the flowers, creates a composition with natural depth and visual interest. A cluster of three matching frames hung together on a wall creates a gallery display that looks both botanical and artful. Consequently, this July craft becomes a permanent part of the home long after the season that inspired it has passed.
Making Handmade Beeswax Candles in Summer Scents That Fill Your Home With the Warmth and Fragrance of July

Handmade candles are the July craft that feels most indulgent because the finished product delivers so much pleasure for so little effort. Beeswax in particular is a beautiful candle material for summer. It burns cleanly, holds fragrance well, and has a natural warm honey tone that looks beautiful without any dye. Poured into small terracotta pots, vintage teacups, or simple glass tumblers and scented with essential oils of lemon verbena, jasmine, bergamot, or wild orange, these candles capture the fragrance of July in a way that makes your home feel like a garden every time one is lit.
Melt the beeswax in a double boiler over low heat until fully liquid, then remove from the heat and allow it to cool slightly before adding essential oil at the recommended usage rate for the wax volume. Additionally, pre-warming the vessels in a low oven before pouring prevents the wax from contracting away from the sides too quickly, which can create sinkholes in the finished surface. A pre-waxed cotton wick centred in the vessel and held in place with a skewer or two pencils laid across the top keeps the wick straight as the wax sets.
Allow the poured candles to set undisturbed for a minimum of twenty-four hours before trimming the wick to approximately a quarter inch and lighting. The first burn is the most important one. Allow the wax to melt all the way to the edges of the vessel before extinguishing, which sets the memory ring and ensures clean, even burning in all subsequent uses. Furthermore, gifting handmade July candles in a small cluster, tied together with twine and a handwritten note, makes them one of the most personal and thoughtful things you can share with someone this season.
Decorating Plain Terracotta Pots With Summer Paint Patterns and Herbs for a Windowsill Display That Is Both Beautiful and Useful
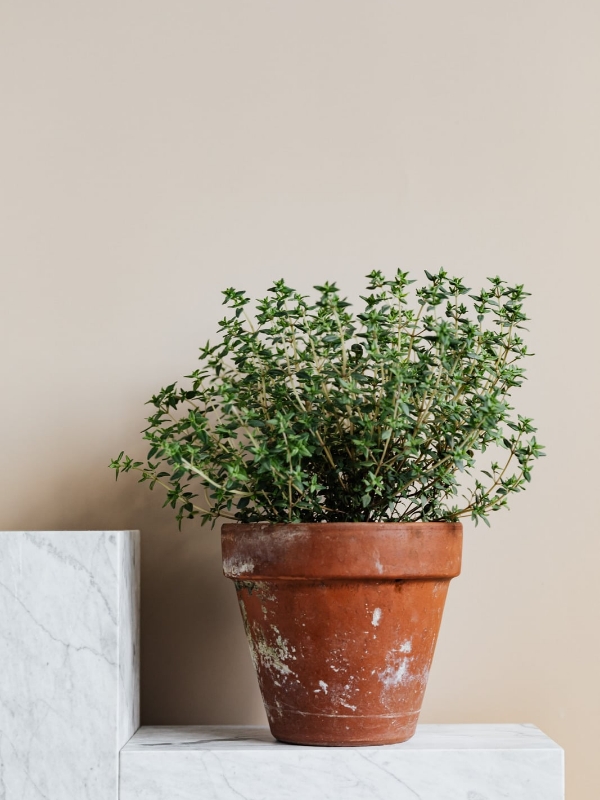
Painted terracotta herb pots are the July craft that keeps giving long after the making is done. Painting simple summer designs on plain terracotta garden pots, stripes, geometric patterns, hand-stamped suns, or brushstroke florals in warm terracotta-complementing tones of cream, sage, rust, and navy, and then planting a fragrant herb in each one creates a windowsill display that is simultaneously decorative and functional. Basil, rosemary, mint, thyme, and lavender all thrive in small terracotta pots placed in a bright summer window.
Begin with clean, dry terracotta pots and seal the interior with a terracotta sealer before painting the exterior. This prevents moisture from the soil inside from affecting the paint on the outside. Use acrylic craft paint for the design and apply it with confidence rather than hesitation. Furthermore, imperfection is part of what makes hand-painted terracotta pots look artisan and handmade rather than mass-produced. A slightly uneven stripe or a brushstroke that does not quite close adds to the charm rather than detracting from it.
Once the design is fully dry, seal the exterior with an outdoor-safe matte varnish and plant each pot with its chosen herb using good-quality potting compost. Additionally, writing the herb name on a small painted stone or a wooden tag placed in the pot creates a charming botanical label that ties the display together visually. A cluster of three to five painted herb pots in varying sizes grouped together on a windowsill creates a display that looks genuinely beautiful from both inside and outside the window. Consequently, this July craft makes the kitchen, living room, or bedroom feel like a productive little garden has taken up residence.
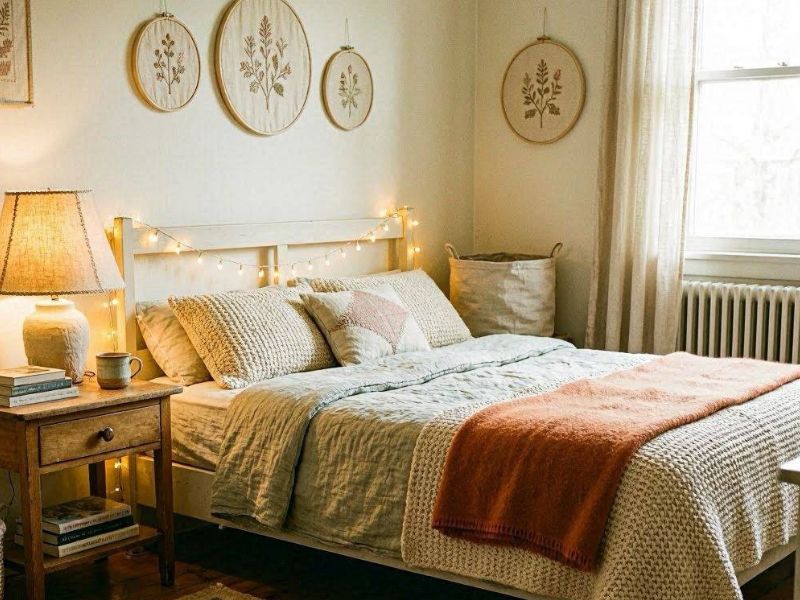
Weaving a Simple Yarn Wall Hanging in Summer Tones That Adds Texture and Warmth to Any Bare Wall in Your Home
A woven yarn wall hanging is the July craft that makes the biggest visual impact with the simplest materials. A small wooden dowel or a fallen branch, lengths of yarn in summer tones, sandy beige, warm terracotta, dusty sage, cream, and burnt orange, and a basic over-under weaving technique create a wall piece with genuine texture and handmade character. The weaving process itself is meditative in the best possible way. There is a rhythm to it that makes a quiet afternoon feel productive and creative simultaneously.
Cut a length of thick cotton string and attach it to both ends of the dowel to create the hanging loop. Then cut individual yarn lengths to roughly twice the desired finished length of the hanging, fold each one in half, and attach it to the dowel using a simple lark’s head knot pulled snug against the wood. Furthermore, alternating between different yarn textures, thick wool, thin cotton, and chunky bouclé, creates a wall hanging with a rich, layered surface that looks far more elaborate than the straightforward process of making it would suggest.
Leave some sections of the hanging unwoven, working only the central area for a more organic, drifting quality rather than a dense, evenly covered result. Trimming the bottom fringe to a gentle curve or a V-shape with sharp scissors creates a clean, professional finish that makes the wall hanging look thoroughly considered. Additionally, attaching a few small dried flowers, beads, or thin strips of leather among the yarn threads adds personal detail that makes the piece feel uniquely yours. This July craft produces a wall decoration that looks like something bought from an artisan market and gets better with every admiring glance.
Assembling a Summer Memory Jar Where You Collect Small Notes About Beautiful July Moments to Read at the Year’s End
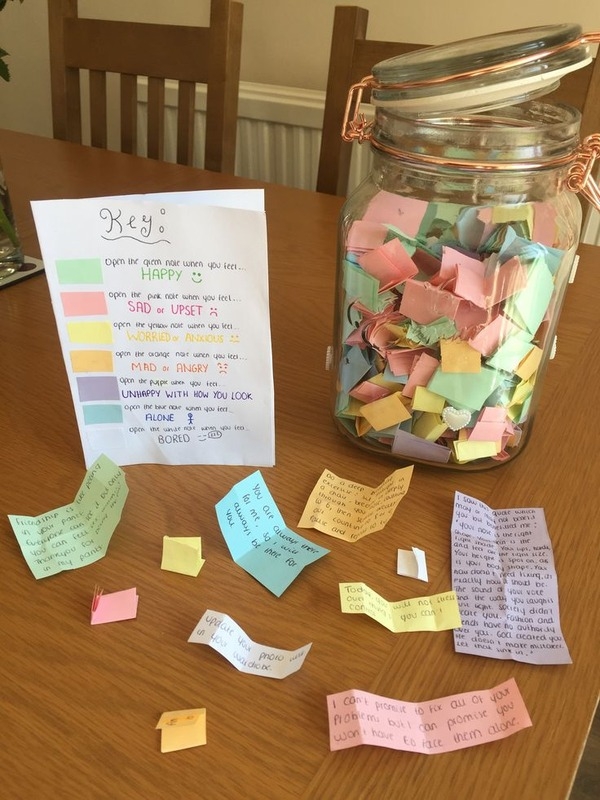
The summer memory jar is the July craft that costs almost nothing to make and becomes one of the most treasured objects in the home by the time December arrives. A large clear glass jar, decorated simply with a strip of twine tied at the neck and a small handwritten label reading July or Summer Memories, placed on a kitchen counter or a side table with a stack of small paper slips and a pen beside it, becomes an invitation for everyone in the household to pause and record a moment worth keeping. A funny thing a child said. A meal that was particularly good. A sunset that made everyone stop.
Decorate the jar with enough intention to make it feel like a deliberate object rather than a repurposed storage container. Additionally, tying a ribbon or a dried flower sprig at the neck, adding a small tag with the year, or painting a simple sun or star on the glass with a paint pen takes no more than five minutes and transforms the jar into something that invites engagement. The slips of paper inside do not need to be elaborate. A single sentence is enough. The practice is simply about noticing beauty while it is happening rather than only remembering it later.
Reading the collected notes aloud on New Year’s Eve, or on the last evening of summer, is one of those experiences that stays with a family or a household for a very long time. Consequently, this July crafts is the one that carries the greatest emotional return for the least material investment. It requires a jar, some paper, a pen, and the willingness to pay attention to your own life during one of its most beautiful months.
In Conclusion: Making July Crafts Feel Like the Season It Deserves to Be
Making things in July has taught me that the season deserves more than passive enjoyment. It deserves intention. It deserves colour on a porch door, fragrance on a mantel, light flickering in a jar at the table, and something handmade sitting on a shelf that you reach past every morning and feel quietly glad about. Furthermore, these crafts are not about perfection. They are about presence, about choosing to mark this particular month as worth celebrating with your own two hands.
I have also learned that the making matters as much as the having. Sitting down with supplies, letting an afternoon become something beautiful, and finishing with an object that did not exist before you started, that process is its own reward. Additionally, involving children, friends, or anyone who loves to create adds a layer of joy to July crafting that no solo project can fully replicate. Some of the best July memories I have come from afternoons spent making something together.
So take what resonates from this list and leave what does not. Start with one craft. Let it lead you to the next. Allow July to feel like the generous, golden, creative month it truly is. You deserve a home that reflects the beauty of this season, and you now have every idea you need to make that happen.
This Post Showed You July Crafts.