
A few thoughtful DIY ideas can completely change your holiday décor, and these Christmas Dollar Tree crafts show where to start.
Some Christmas decorations cost hundreds of dollars. Others cost just a few, but somehow end up looking far more expensive than they really are.
That’s what makes Christmas Dollar Tree crafts so appealing. They give you the chance to decorate your home beautifully without stretching your holiday budget.
The challenge isn’t finding affordable supplies. It’s turning inexpensive materials into decorations that feel polished enough to display proudly in the rooms where everyone gathers.
That’s where many DIY projects fall short. Too much glitter, mismatched colors, or crowded designs can quickly make a craft feel homemade in the wrong way.
Well for this, it doesn’t take advanced crafting skills or expensive materials to create Christmas décor that looks elegant for your home.
It comes down to choosing the right supplies, using a few simple design principles, and knowing which projects naturally lend themselves to a high-end finish.
The Christmas Dollar Tree crafts in this guide were written with that goal in mind.
Each one is designed to help you create decorations that feel warm, timeless, and worthy of a place in your room, proving that a beautiful holiday décor is more about thoughtful design than a big budget.
Give your home a seasonal makeover with these Dollar Tree Fall Crafts That Look Expensive (Easy DIY Decor Anyone Can Make) for more budget-friendly DIY décor inspiration.
Before You Buy Anything: Know Which Dollar Tree Supplies Actually Hold Up

Not every Dollar Tree item is made to last. Some supplies can become beautiful Christmas decorations with very little effort, while others are more likely to peel, bend, or fall apart before the season ends.
Choosing better materials from the start makes a noticeable difference.
As you shop, keep these tips in mind:
- Choose plain items over heavily decorated ones. Unfinished wood shapes, glass candle holders, ceramic ornaments, and clear jars are much easier to customize than glitter-covered signs or pre-designed décor.
- Look for realistic faux greenery. Branches with wired stems and different shades of green are easier to shape and create fuller, more natural-looking wreaths and centerpieces.
- Pick wired ribbon for bows. Wired ribbon holds its shape much better than soft ribbon, making wreaths, garlands, and gift toppers look fuller and more polished.
- Inspect each item before buying. Check for loose pieces, cracks, chipped paint, or weak glue joints. Spending a few extra seconds in the store can save you from repairing a project later.
- Shop early for the best selection. Popular supplies like bottle brush trees, wood blanks, glass containers, wired ribbon, and faux cedar stems often sell out weeks before Christmas.
Starting with strong, easy-to-customize supplies is one of the simplest ways to create Christmas Dollar Tree crafts that look polished enough to display proudly in your living room.
1. High-End Christmas Lantern Display
(Dollar Tree lantern + greenery + LED candle centerpiece)
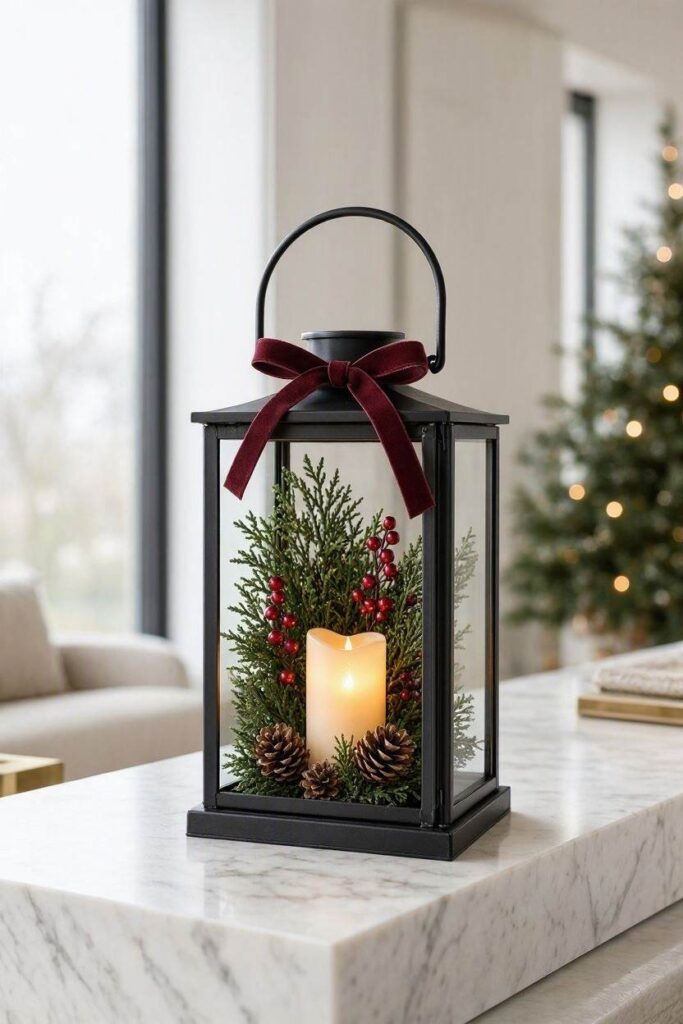
This elegant lantern display proves that some of the best Christmas Dollar Tree crafts don’t require complicated techniques or expensive supplies. With just a few carefully chosen materials, you can create a centerpiece that looks right at home on a fireplace mantel, entryway table, or beside the Christmas tree.
Difficulty: Beginner
Time: 20–30 minutes
Estimated Cost: $8–$15 (depending on the lantern you choose)
What You’ll Need
- Decorative lantern from Dollar Tree (or a similar discount store if your local Dollar Tree doesn’t carry one)
- Battery-operated LED pillar candle
- Faux cedar or pine stems
- Mini pinecones
- Red berry picks
- Wired Christmas ribbon (optional)
- Hot glue gun and glue sticks
- Wire cutters
Tip: If you can’t find a lantern at Dollar Tree, don’t let that stop you. Lanterns often sell out early in the season, but the rest of the supplies are usually available, and you can use an inexpensive lantern from another discount retailer just as easily.
How to Make It
Step 1: Prepare the greenery
Separate the faux pine or cedar stems into smaller sprigs instead of using one large bunch. This gives you more control and helps the arrangement look fuller without using extra supplies.
Step 2: Build the base
Lay a small ring of greenery around the bottom inside the lantern, or wrap it loosely around the base if you’re decorating the outside. Let the branches overlap naturally instead of placing them in a perfect circle. Real greenery rarely grows symmetrically, and copying that makes the arrangement feel more realistic.
Step 3: Add natural accents
Tuck in a few pinecones and berry picks between the greenery. Rather than spacing them evenly, group them in twos or threes. Designers often use odd-number groupings because they create a more balanced and natural display.
Step 4: Place the candle
Position the LED candle in the center of the lantern. A warm white flickering candle usually looks more realistic than bright white or blue-toned lights and creates a cozy glow in the evening.
Step 5: Finish with ribbon (optional)
If you like, tie a simple bow from wired ribbon around the lantern handle. Keep it proportional to the lantern, an oversized bow can overpower the entire display.
Make It Look More Expensive
Instead of mixing several Christmas colors, stick to one decorating style.
For example:
- Warm whites with natural greenery for a modern look.
- Red berries with cedar for a traditional Christmas style.
- Gold accents with eucalyptus for a more elegant finish.
Limiting your color palette creates a cleaner, more designer-inspired display.
Where to Display It
This lantern works beautifully on:
- A fireplace mantel.
- An entryway console table.
- A coffee table tray.
- Beside the Christmas tree.
- Built-in bookshelves.
- A dining room sideboard.
Looking for even more hands-on projects? Browse How to Make Crafts: 20 Easy Crafts to Sell and Make Profits From Home If You Need Extra Income for creative ideas you can enjoy or turn into extra income.
2. Winter Village Glass Cloche

This elegant winter display looks like something you’d find in a home décor boutique, but it comes together with a few affordable Dollar Tree supplies.
The glass cloche creates a cozy scene that works beautifully on a coffee table, bookshelf, or mantel throughout the Christmas season.
Difficulty: Easy
Time: 25–35 minutes
Estimated Cost: $8–$12
What You’ll Need
- Glass cloche or large glass bowl (Dollar Tree or similar discount store)
- Small wooden or plastic base
- Mini bottle brush trees
- Mini sisal trees
- Faux snow blanket or snow powder
- Mini deer or woodland figurines
- Battery-operated LED fairy lights (optional)
- Hot glue gun and glue sticks
How to Make It
Step 1: Create the base
Cover the base with a thin layer of faux snow. You only need enough to hide the surface and create a soft winter landscape.
Step 2: Arrange the trees
Place the tallest tree near the back and shorter trees toward the front. Varying the heights gives the display more depth and helps every piece remain visible.
Step 3: Add the focal point
Position one or two miniature deer between the trees. Leave a little open space around them so they naturally become the centre of the scene.
Step 4: Add lighting (Optional)
Wrap a short strand of battery-operated fairy lights around the trees or tuck them beneath the faux snow for a soft evening glow.
Step 5: Cover the display
Carefully place the glass cloche over the finished arrangement. If you want a permanent display, secure it with a small amount of hot glue. Otherwise, leave it removable so you can change the scene each Christmas.
Display Tip
This craft looks best when paired with candles, stacked books, or a simple garland rather than sitting by itself. Grouping it with a few larger décor pieces creates a balanced holiday display without making the area feel crowded.
3. Faux Ceramic Christmas Village Houses
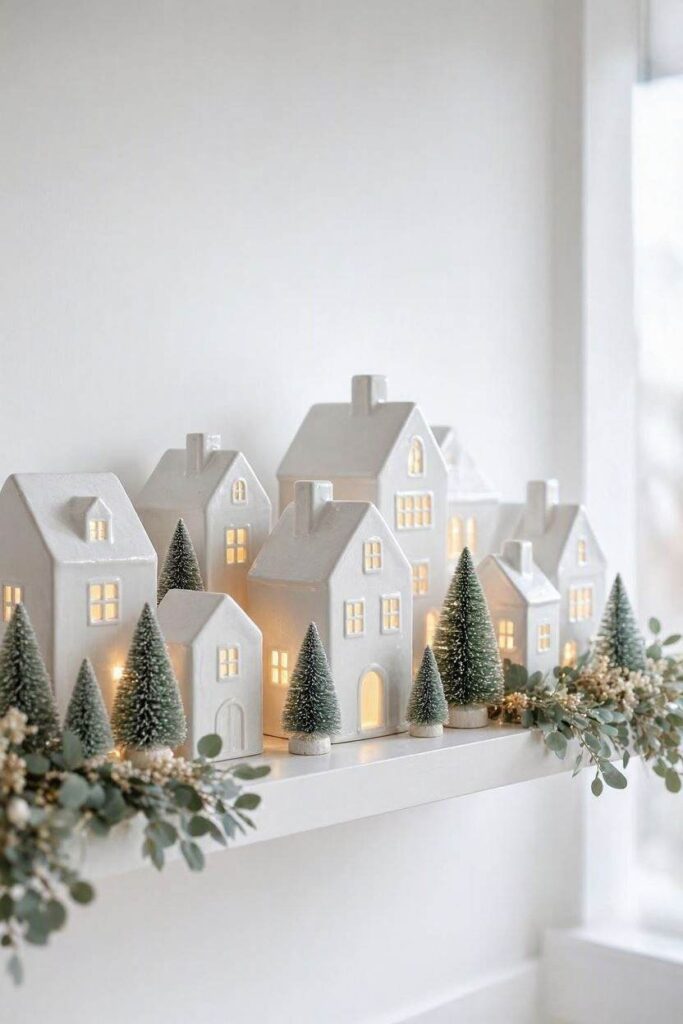
Designer-inspired ceramic Christmas villages can cost hundreds of dollars to collect. This budget-friendly version gives you the same cozy holiday feel using inexpensive Dollar Tree houses that you can easily customize to match your home’s style.
Difficulty: Easy
Time: 30–45 minutes
Estimated Cost: $10–$18
What You’ll Need
- Dollar Tree Christmas village houses
- White or cream chalk paint
- Small paintbrush
- Matte clear sealer (optional)
- Fine-grit sandpaper
- Battery-operated tea lights or fairy lights
How to Make It
Step 1: Lightly sand the houses
If the houses have a glossy finish, lightly sand the surface so the paint adheres more evenly.
Step 2: Apply two thin coats of paint
Paint each house using white, cream, or another neutral colour. Thin coats create a smoother finish than one thick coat.
Step 3: Let them dry completely
Allow each coat to dry before adding another. This helps prevent streaks and peeling.
Step 4: Add soft lighting
Place a battery-operated tea light inside each house or arrange fairy lights behind them to create a warm glow.
Step 5: Arrange the display
Place the houses in groups of different heights on a mantel, floating shelf, or console table. Add a few bottle brush trees around them for a finished winter village.
Display Tip
These Christmas Dollar Tree crafts look especially elegant when grouped together instead of spreading them across different rooms. A single display creates much more visual impact.
4. Frosted Christmas Candle Centrepiece

Candles instantly make a room feel warm during Christmas, and this frosted centrepiece creates that cozy atmosphere without spending boutique-store prices.
Difficulty: Beginner
Time: 20–30 minutes
Estimated Cost: $7–$12
What You’ll Need
- Glass cylinder vase or candle holder
- LED pillar candle
- Artificial frosted pine stems
- Mini pinecones
- Faux snow
- Jute twine or velvet ribbon
- Hot glue gun
How to Make It
Step 1: Prepare the candle holder
Clean the glass thoroughly so fingerprints and dust won’t show once the arrangement is complete.
Step 2: Create the winter base
Place a thin layer of faux snow around the candle, then tuck in small pinecones and frosted greenery.
Step 3: Wrap the outside
Tie a velvet ribbon or simple jute twine around the vase for a finished look. A small sprig of greenery tucked under the knot adds a subtle festive touch.
Step 4: Place the candle
Set the LED candle in the centre, making sure it remains visible above the greenery.
Display Tip
Place two or three candle holders of different heights together on a coffee table tray or dining table. Varying the heights creates a display that feels balanced and professionally styled.
If DIY projects are your favorite way to relax, don’t miss Creative DIY Crafts for Adults: 20 Fun Crafts for Adults to Try When You’re Bored at Home for even more creative inspiration.
5. Christmas Wooden Bead Garland with Tassels
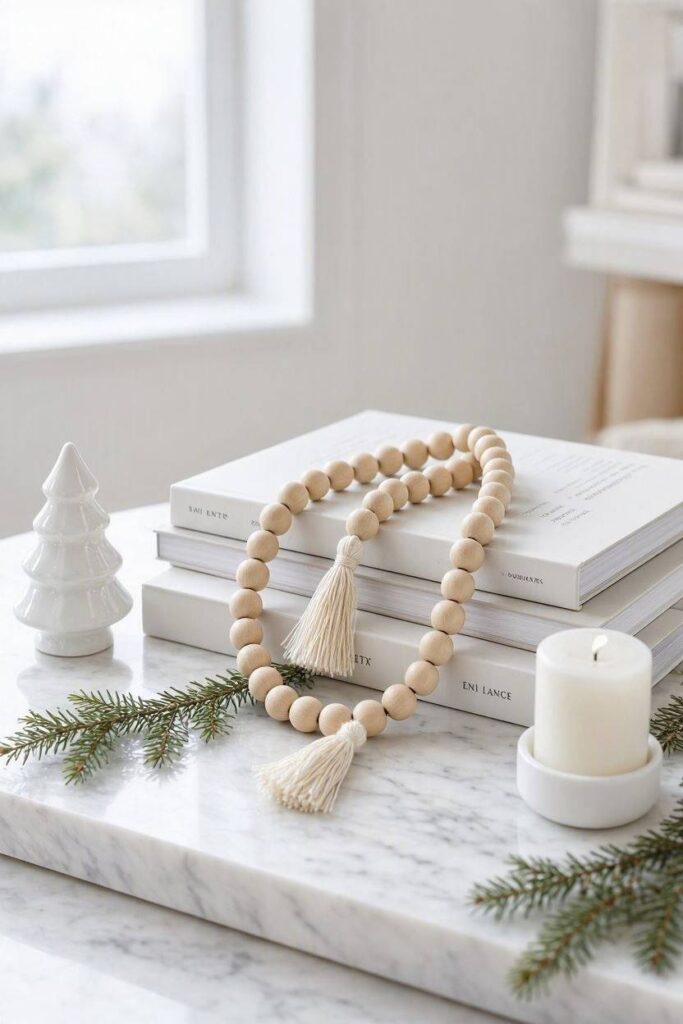
Wood bead garlands have become a holiday decorating favourite because they work with farmhouse, traditional, Scandinavian, and modern Christmas styles. This simple project is one of those Christmas Dollar Tree crafts you’ll find yourself using year after year.
Difficulty: Beginner
Time: 15–20 minutes
Estimated Cost: $5–$8
What You’ll Need
- Wooden beads
- Jute rope or cotton cord
- Twine for tassels
- Small wooden stars or bells (optional)
- Scissors
How to Make It
Step 1: Thread the beads
Slide the wooden beads onto the rope, leaving enough cord at each end for the tassels.
Step 2: Make the tassels
Wrap twine around a small piece of cardboard several times, tie one end securely, then cut the opposite end to create the tassel. Trim until both tassels are even.
Step 3: Attach the tassels
Tie one tassel to each end of the garland using a secure knot. Add a wooden star or small bell if you’d like a little extra detail.
Step 4: Style the garland
Drape it loosely across a stack of coffee table books, weave it through a holiday centrepiece, or wrap it around the base of a decorative Christmas tree.
Display Tip
Instead of pulling the garland tight, let it fall naturally in soft curves. The relaxed drape gives the finished piece a more elegant, high-end appearance than straight, tightly stretched beads.
6. Framed Christmas Bell Wall Art
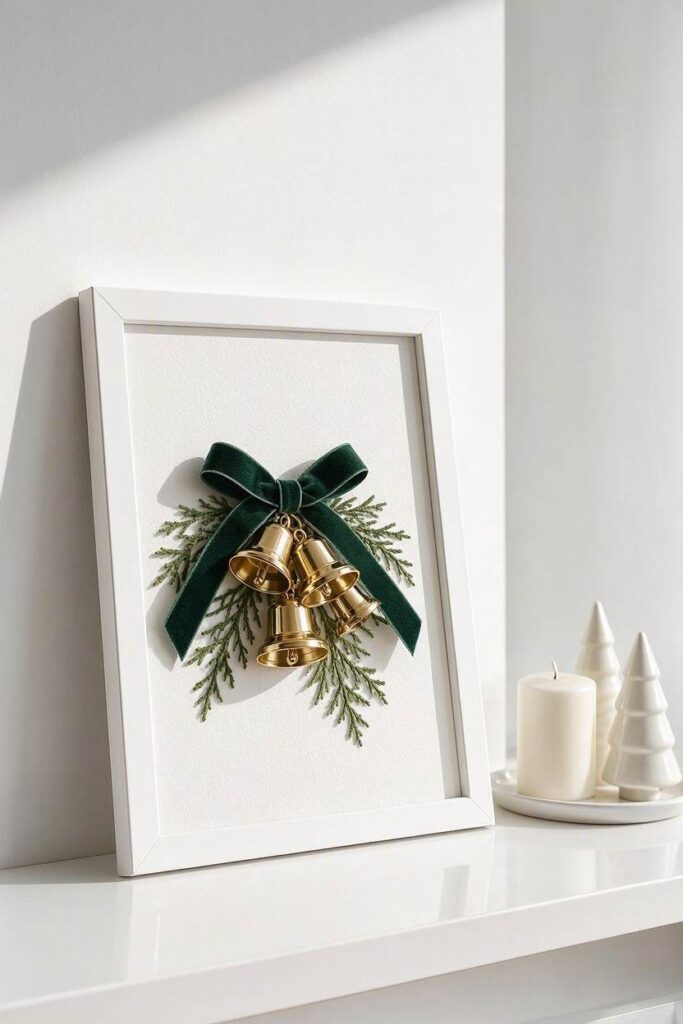
This simple wall décor combines rustic charm with a modern holiday look. Instead of hanging individual bells around the house, you turn them into a framed piece that can be displayed above a mantel, on an entryway table, or layered on a bookshelf.
Difficulty: Beginner
Time: 25–35 minutes
Estimated Cost: $8–$12
What You’ll Need
- Dollar Tree picture frame
- Mini jingle bells
- Faux cedar or pine sprigs
- Velvet ribbon
- Neutral cardstock or scrapbook paper
- Hot glue gun
- Scissors
How to Make It
Step 1: Prepare the background
Remove the frame backing and cover it with neutral cardstock or lightly textured scrapbook paper.
Step 2: Arrange the greenery
Glue a small bundle of cedar or pine sprigs near the top centre of the backing.
Step 3: Attach the bells
Tie two or three bells together with velvet ribbon, then glue them beneath the greenery so they hang naturally.
Step 4: Reassemble the frame
Place the decorated backing into the frame and secure it.
Display Tip
Lean the frame against a wall instead of hanging it. Layer it behind candles or small Christmas trees for a relaxed, designer-inspired display.
7. Wooden Christmas Tree Tabletop Set

Simple wooden Christmas trees never go out of style. This project creates a set of modern tabletop trees that work beautifully with farmhouse, Scandinavian, traditional, or minimalist holiday décor.
Difficulty: Easy
Time: 30 minutes
Estimated Cost: $6–$10
What You’ll Need
- Wooden Christmas tree cutouts
- White, green, or black acrylic paint
- Fine-grit sandpaper
- Paintbrush
- Wooden star embellishments (optional)
- Matte sealer (optional)
How to Make It
Step 1: Smooth the surface
Lightly sand the wooden trees to remove rough edges before painting.
Step 2: Paint the trees
Apply two thin coats of your chosen colour, allowing each coat to dry before adding the next.
Step 3: Add simple details
Glue a small wooden star to the top or leave the trees plain for a clean, modern look.
Step 4: Arrange the display
Group the trees in different heights to create a layered holiday scene.
Display Tip
Mix painted trees with natural wood finishes instead of making every tree the same colour. The contrast gives the arrangement more depth and visual interest.
Handmade decorations aren’t just for the holidays. These Bedroom Decor Ideas You Can Actually Make, Not Just Shop For a Cozy, Personal Space can help you personalize your home all year round.
8. Christmas Ornament Bowl Centrepiece

If you have an empty coffee table or dining table that feels unfinished, this ornament bowl creates an elegant focal point in just a few minutes. It’s one of the easiest holiday decorations to update each year by simply changing the ornament colours.
Difficulty: Beginner
Time: 15–20 minutes
Estimated Cost: $8–$15
What You’ll Need
- Large glass bowl or clear vase
- Shatterproof Christmas ornaments
- Faux pine or cedar sprigs
- Pinecones
- Battery-operated fairy lights (optional)
How to Make It
Step 1: Choose a colour palette
Select ornaments in two or three coordinating colours rather than mixing every colour available.
Step 2: Layer the bowl
Start with a few pine sprigs around the edges, then add ornaments in different sizes to create a balanced arrangement.
Step 3: Fill the gaps
Tuck pinecones or extra greenery into open spaces so the display looks full without feeling overcrowded.
Step 4: Add lighting (Optional)
Thread a short strand of battery-operated fairy lights through the arrangement for a warm evening glow.
Display Tip
Place the bowl on a decorative tray with a candle and a small stack of books. Grouping the pieces together creates a finished look that’s much more inviting than placing the bowl on the table by itself.
9. Christmas Floating Shelf Styling Box

Small shelves often end up looking cluttered during the holidays because too many decorations compete for attention. This simple styling box keeps everything together in one place, making your shelves look intentional without filling every inch.
Difficulty: Beginner
Time: 20–30 minutes
Estimated Cost: $8–$12
What You’ll Need
- Small wooden crate or decorative storage box
- Faux cedar or pine stems
- Mini bottle brush trees
- Pinecones
- Wooden stars
- Battery-operated fairy lights (optional)
- Hot glue gun
How to Make It
Step 1: Prepare the crate
If you’d like a softer look, paint or stain the crate before decorating. Let it dry completely.
Step 2: Build the arrangement
Place the tallest tree near the back, then add greenery around the edges. Tuck in pinecones and wooden stars, leaving a little breathing room between each piece.
Step 3: Add lighting
If using fairy lights, weave them gently through the greenery instead of wrapping them tightly around every decoration.
Step 4: Style the shelf
Place the crate slightly off-centre on the shelf. Add one or two books or a candle beside it rather than surrounding it with lots of small decorations.
Display Tip
Instead of decorating every shelf the same way, leave one shelf mostly empty. The open space helps your Christmas display stand out more and keeps the entire bookcase from feeling crowded.
10. Evergreen Christmas Tray Centrepiece
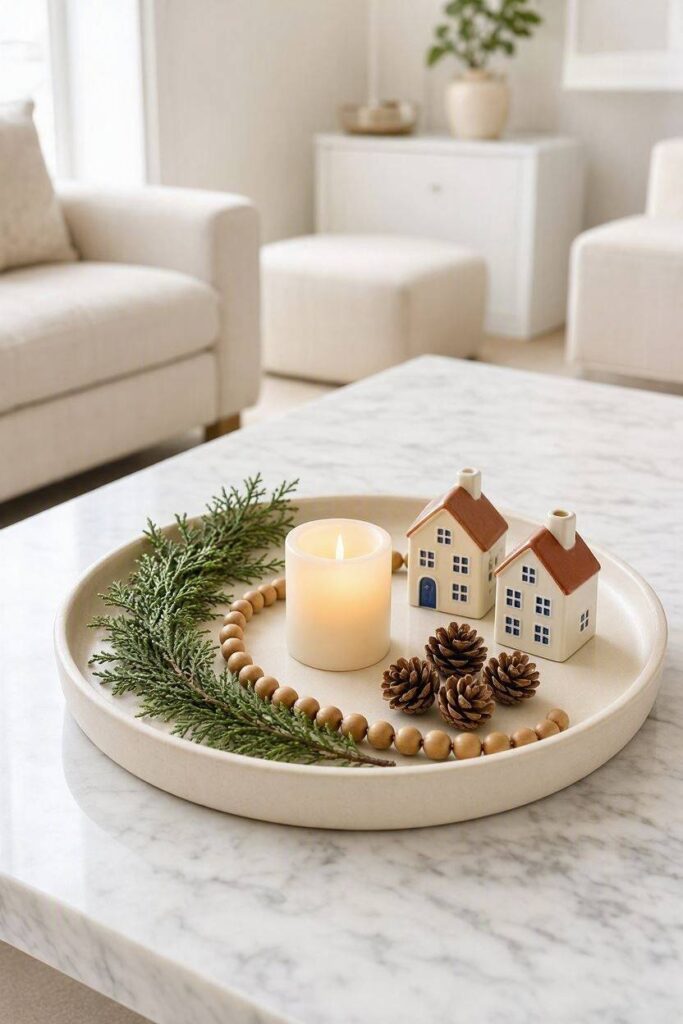
Decorative trays instantly make a coffee table or ottoman feel more organised. This Christmas version brings together simple holiday accents in one place, making it easy to decorate without overwhelming your living room.
Difficulty: Easy
Time: 20–25 minutes
Estimated Cost: $10–$15
What You’ll Need
- Decorative tray
- Faux cedar or pine garland
- LED pillar candle
- Mini pinecones
- Wooden beads or bells
- Small decorative house or tree
- Hot glue gun (optional)
How to Make It
Step 1: Start with greenery
Lay a few sprigs of cedar or pine across one side of the tray rather than covering the entire surface.
Step 2: Add height
Place the candle toward the back of the tray, then position a decorative house or small tree beside it.
Step 3: Fill small gaps
Scatter a few pinecones or wooden beads around the base to soften the arrangement without making it look busy.
Step 4: Adjust before finishing
Step back and look at the tray from across the room. Sometimes moving just one item a few inches creates a more balanced arrangement.
Display Tip
A tray works best when every item serves a purpose. If something doesn’t add height, texture, or colour, consider leaving it out. Simple displays often feel more elegant than crowded ones.
Planning more seasonal projects? You’ll love these Halloween Crafts for Teens: 15 Projects for Room Decor, Costumes, and Fun for creative ideas beyond Christmas.
11. Oversized Christmas Wall Wreath
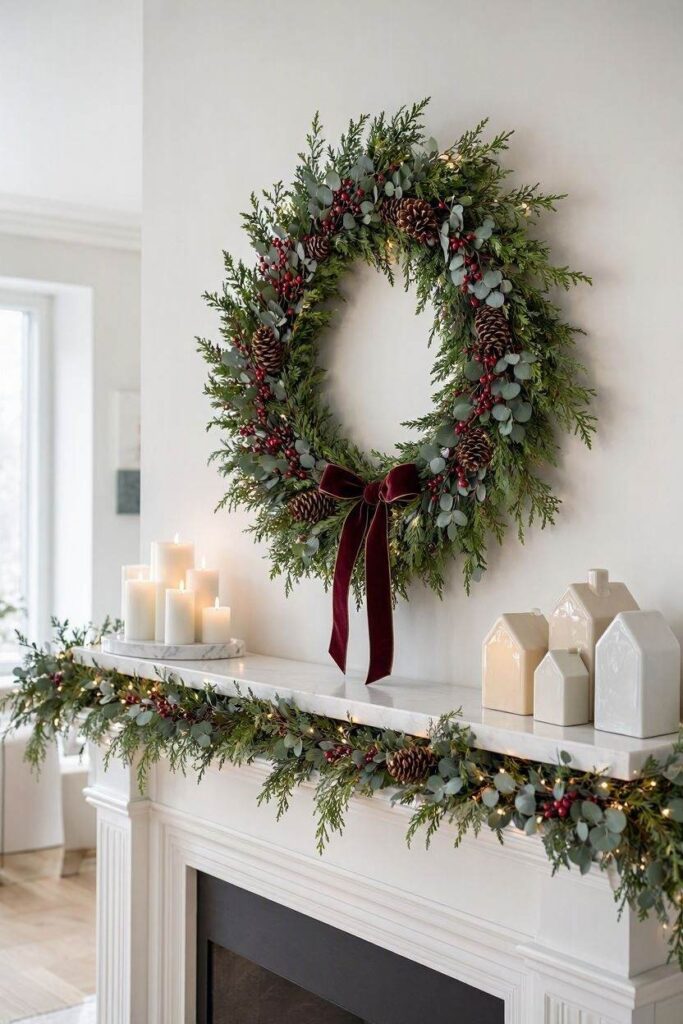
A large wreath naturally draws attention and helps anchor your Christmas décor. Making your own also gives you complete control over the colours and style, so it blends beautifully with the rest of your living room instead of looking out of place.
Difficulty: Intermediate
Time: 45–60 minutes
Estimated Cost: $15–$25
What You’ll Need
- Wire wreath frame
- Faux cedar or pine garland
- Eucalyptus stems
- Pinecones
- Berry picks
- Wired ribbon
- Floral wire
- Wire cutters
- Hot glue gun
How to Make It
Step 1: Cover the frame
Wrap the faux greenery around the wreath frame, securing it with floral wire as you go. Fluff the branches to create a full, natural shape.
Step 2: Add texture
Insert eucalyptus, berry picks, and pinecones in small clusters around the wreath instead of spacing everything evenly. This creates a more natural arrangement.
Step 3: Finish with a ribbon
Tie a wired ribbon into a simple bow and attach it securely near the top or bottom of the wreath, depending on the look you prefer.
Step 4: Hang and adjust
Once the wreath is hanging, gently bend the branches and reposition the decorations until the wreath looks balanced from every angle.
Display Tip
Don’t limit your wreath to the front door. Try hanging it above the fireplace, over a large mirror, or on a blank wall where it can become the focal point of your holiday décor.
An oversized wreath often has a bigger impact than several smaller decorations spread around the room.
12. Decorative Christmas Book Stack

Coffee table books and decorative book stacks have become a timeless part of holiday decorating because they add warmth without creating clutter.
This Christmas version is simple to make, easy to personalize, and works beautifully on a coffee table, bookshelf, mantel, or entryway console.
Difficulty: Beginner
Time: 20–30 minutes
Estimated Cost: $5–$10
What You’ll Need
- 2–3 hardcover books from Dollar Tree or a thrift store
- White, cream, green, or black acrylic paint (optional)
- Sandpaper
- Jute twine or velvet ribbon
- Faux cedar sprig
- Small wooden ornament, bell, or pinecone
- Hot glue gun (optional)
How to Make It
Step 1: Choose books of similar size
Stack books that are close in width and height. A neat stack instantly looks more intentional than books of mixed sizes.
Step 2: Refresh the covers (Optional)
If the covers are bright or heavily patterned, paint them in a neutral colour or wrap them with kraft paper or linen-look paper to create a cleaner, more cohesive appearance.
Step 3: Stack and tie
Arrange the books with the largest on the bottom and the smallest on top. Wrap jute twine or velvet ribbon around the stack and tie a simple knot or bow.
Step 4: Add natural accents
Slip a small cedar sprig beneath the ribbon, then tuck in a pinecone or wooden ornament for a subtle festive touch. Keeping the embellishments minimal helps the stack feel elegant rather than overly decorated.
Step 5: Style your display
Place the finished book stack on a coffee table, bookshelf, or console table. Top it with a small candle, ceramic tree, or decorative house to add height and complete the arrangement.
Display Tip
Book stacks look best when they create layers. Instead of placing them alone, pair them with one taller decorative piece and one smaller accent.
This creates a balanced display that’s visually interesting while still leaving enough open space for the room to feel calm and inviting.
This is a nice final craft because it teaches readers a decorating technique as well as a DIY project. It’s also different from the other 11 ideas, making the post feel more complete and less repetitive.
Preparing Dollar Tree Materials Before Crafting
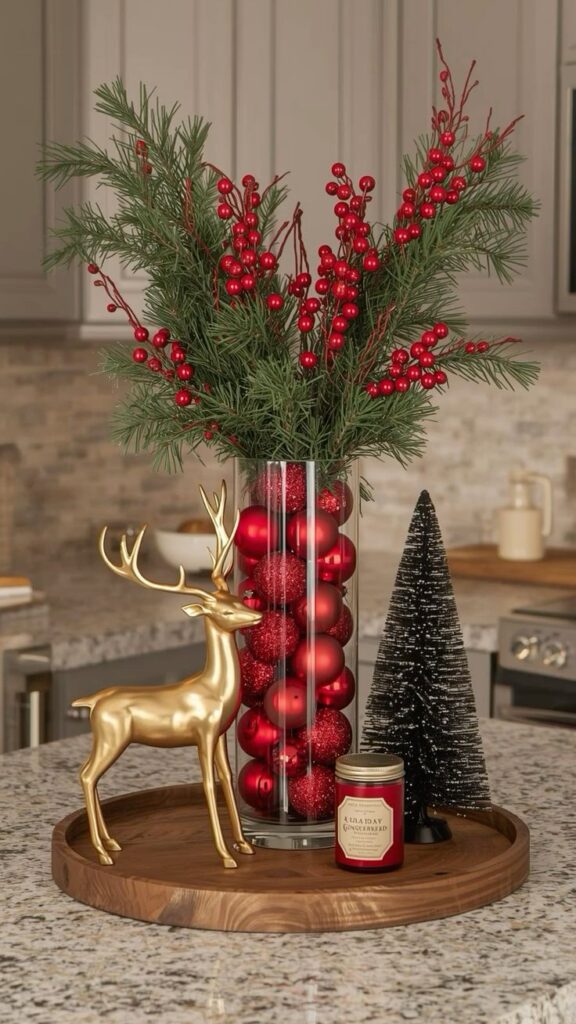
One reason some Christmas Dollar Tree crafts look professionally made while others don’t has nothing to do with crafting skill. It’s the preparation that happens before the first drop of glue or paint.
Taking just a few minutes to prepare your materials helps paint stick better, glue hold longer, and your finished décor look much more polished.
✅ Clean Glass and Plastic Surfaces
Glass jars, candle holders, and plastic ornaments often have dust, fingerprints, or a light manufacturing residue. Wipe them with a damp microfiber cloth or a little rubbing alcohol and let them dry completely before painting or gluing. Clean surfaces help adhesives bond more securely.
✅ Remove Stickers Without Leaving Residue
Price stickers can leave behind a sticky film that attracts dust and prevents paint from going on evenly. Peel labels off slowly, then remove any leftover residue with rubbing alcohol or a small amount of cooking oil before cleaning the surface again.
✅ Fluff Faux Greenery Before Using It
Artificial pine branches, cedar stems, and wreath bases are compressed for shipping. Before adding them to your project, gently separate and bend each wired branch outward. This simple step creates a fuller, more natural look without buying extra greenery.
✅ Lightly Sand Glossy Surfaces
Some plastic ornaments and painted signs have a shiny finish that makes paint more likely to chip or peel. A light sanding with fine-grit sandpaper gives the surface a little texture, helping primer and paint adhere more evenly.
✅ Test Your Glue Before Assembling
Not every Dollar Tree material reacts the same way to hot glue. Before assembling your project, test a small hidden area to make sure the glue bonds well and doesn’t melt thin plastic or leave noticeable marks.
A little preparation may only take a few extra minutes, but it’s one of the easiest ways to make your Christmas Dollar Tree crafts look cleaner, last longer, and feel worthy of displaying in your living room.
Take your DIY skills outdoors with these DIY Walkways Paths Cheap to Give Your Backyard an Affordable Upgrade and create a beautiful outdoor space on a budget.
Common Mistakes That Make Christmas Dollar Tree Crafts Look Cheap
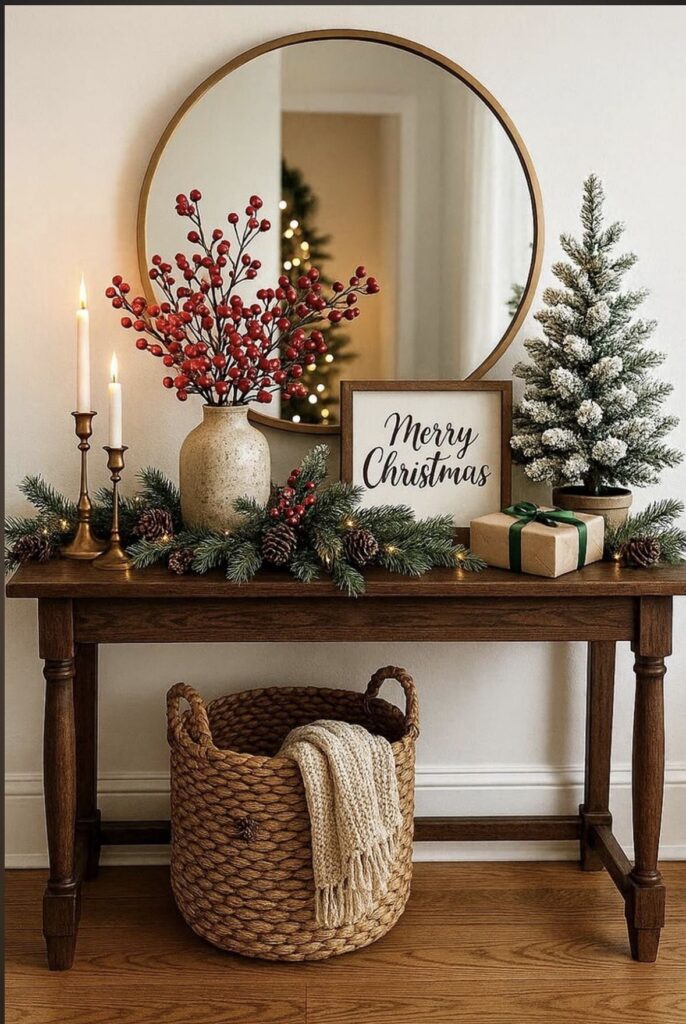
Even beautiful DIY projects can lose their charm because of a few small decorating mistakes. Avoid these common ones to give your crafts a more polished finish.
- Using too much glitter. A little sparkle adds festive charm, but covering every piece in glitter can make the display feel overwhelming.
- Mixing too many metallic finishes. Stick to one or two metallic tones, such as gold and champagne or silver and white, for a more cohesive look.
- Leaving glue strings or visible adhesive. Take a minute to remove glue strands and wipe away excess adhesive before displaying your craft.
- Adding too many embellishments. Pinecones, bows, berries, and ornaments don’t all have to appear in one project. Sometimes, less creates a stronger impact.
- Ignoring proportion. Oversized bows on small decorations or tiny accents on large pieces can make a project feel unbalanced.
- Combining too many decorating styles. Choose one style, whether it’s farmhouse, modern, rustic, or traditional, and let it guide your colour palette and decorations for a more put-together look.
The Five Design Tricks Interior Stylists Use That Also Work for Dollar Tree Crafts

Beautiful Christmas décor isn’t always about buying expensive decorations. Interior stylists often rely on a few simple design principles that make a room feel balanced and thoughtfully decorated. The good news is that these same techniques work just as well when you’re decorating with budget-friendly DIYs.
1. Decorate in Odd Numbers
When displaying ornaments, candle holders, bottle brush trees, or decorative houses, try arranging them in groups of three or five instead of pairs. Odd-number groupings naturally feel more balanced and create a display that’s more interesting to look at.
2. Create Different Heights
If every decoration is the same height, the display can look flat. Instead, combine taller pieces with medium and smaller ones. For example, place a lantern behind a small Christmas tree and a candle in front. This layered arrangement adds depth and helps each piece stand out.
3. Mix Different Textures
One reason high-end Christmas décor feels inviting is the variety of textures. Pair smooth glass with natural wood, soft greenery with metal accents, or velvet ribbon with pinecones. Even if every item comes from Dollar Tree, mixing textures gives the display a richer, more finished look.
4. Repeat One Accent Colour
Rather than using every Christmas colour in one room, choose one accent colour and repeat it throughout your décor. For example, if you decorate with deep red berries on your mantel, carry that same red into your coffee table display or bookshelf. Repeating a colour creates a sense of flow that makes the room feel intentionally styled.
5. Let Your Décor Breathe
You don’t have to fill every shelf, tabletop, or corner with Christmas decorations. Leaving a little empty space around your displays helps each piece stand out and keeps the room from feeling cluttered. Often, removing one decoration improves the overall look more than adding another.
These simple styling techniques can make even the most affordable Christmas decorations feel polished, helping your DIY projects blend naturally into the rest of your holiday décor.
Small details can make a big impact. These Mini Terra Cotta Pots Crafts for Cute Budget-Friendly DIY Home Decor are perfect for adding handmade charm to any room.
Conclusion
Decorating for Christmas doesn’t have to mean choosing between a beautiful home and staying within your budget. Sometimes, a few thoughtfully chosen materials and a little creativity are all it takes to create decorations that feel warm, welcoming, and uniquely yours.
Those personal touches are often the ones people remember long after the season is over.
Which of these Christmas Dollar Tree crafts are you excited to make first? Share your favourite in the comments, and if you know someone looking for beautiful Christmas decorating ideas without the high price tag, send this guide their way, they’ll thank you for it.