How to Make DIY Bag Charms at Home for Beginners
Have you ever looked at a plain handbag and wished you could make it look more stylish without spending money on a new one? Sometimes, all it takes is a small accessory to transform an ordinary bag into something beautiful and unique. That is where DIY bag charms come in.
Bag charms are decorative accessories that you attach to your handbag, backpack, tote bag, or purse to give it a personal touch. They can be made with colorful beads, ribbons, yarn, fabric scraps, pearls, charms, keyrings, and many other materials you may already have at home. Whether you love cute accessories, colorful designs, elegant decorations, or handmade crafts, creating your own bag charms is a fun way to express your personality.
The best part is that you do not need to be an expert crafter to get started. With a few basic supplies and simple instructions, you can make beautiful bag charms even if you have never attempted a DIY project before.
Making your own bag charms can also be an affordable way to refresh your accessories. Instead of purchasing several expensive decorations, you can create different designs to match your outfits, seasons, or personal style. You can even make them as thoughtful handmade gifts for friends and family.
In this guide, you will learn how to make DIY bag charms at home for beginners, including the materials you need, step-by-step instructions, creative design ideas, and helpful tips for making your finished charms look beautiful and last longer.
Whether you prefer beaded bag charms, ribbon bows, fluffy pom-poms, or cute miniature accessories, there is an idea here you can try.
Read our guide on
Entryway Storage Ideas for Small Spaces to Keep Shoes, Bags and Everyday Clutter Organized
What Are DIY Bag Charms?
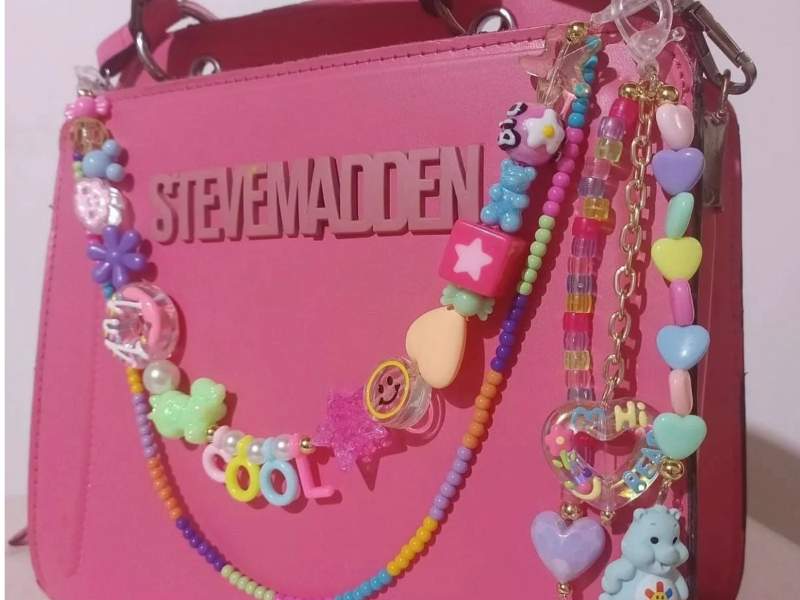
DIY bag charms are decorative accessories that you make yourself and attach to your bags. The letters DIY stand for “do it yourself,” meaning you create the accessory using your own materials, creativity, and preferred design.
Unlike ready-made bag charms, handmade versions allow you to choose the colors, shapes, textures, and decorations that suit your taste. You can make something simple and minimal or create a bold accessory filled with colorful beads and playful details.
Bag charms are often attached to handbags using keyrings, lobster clasps, small chains, ribbons, or decorative cords. These attachments make it easy to move your charm from one bag to another whenever you want a different look.
Some popular types of DIY bag charms include:
- Beaded bag charms: Made with colorful beads, letter beads, pearls, and decorative pendants.
- Ribbon bag charms: Created with satin ribbons, bows, lace, or fabric strips.
- Yarn bag charms: Made with yarn tassels, crochet flowers, knitted decorations, or pom-poms.
- Fabric bag charms: Created using fabric scraps, felt, denim, or small sewn decorations.
- Acrylic bag charms: Made with acrylic shapes, miniature decorations, and colorful accessories.
- Keychain bag charms: Designed with decorative keychains, small pendants, and themed accessories.
- Personalized bag charms: Created with initials, names, favorite colors, or meaningful symbols.
You can make a charm that reflects your personality or design several pieces to suit different occasions.
For example, a pearl bag charm can give a handbag an elegant appearance, while a colorful beaded charm can make a casual tote bag look playful. A fluffy pom-pom charm can add texture, and a handmade ribbon bow can create a soft, feminine look.
The possibilities are almost endless, which makes bag charms an enjoyable project for beginners and experienced crafters alike.
Here are some Amazon Product supplies to consider for your DIY bag charm project:
- Bead Kits: Perfect for creating colorful, personalized bag charms with your favorite colors and patterns.
- Letter Beads: Great for spelling out names, initials, or meaningful words on your handmade bag charms.
- Keychain Rings and Lobster Clasps: Essential for attaching your finished charms securely to handbags, backpacks, and purses.
- Decorative Charms: Add personality to your designs with miniature flowers, hearts, stars, bows, and other cute decorations.
Materials You Need to Make DIY Bag Charms
The materials you need depend on the type of bag charm you want to create. However, most beginner projects require only a few basic supplies.
Here are some useful materials to gather before starting.
1. Beads
Beads are among the most versatile materials for making bag charms.
They come in different sizes, colors, shapes, and finishes, allowing you to create simple or elaborate designs.
You can use:
- Plastic beads for lightweight, colorful designs.
- Glass beads for decorative details.
- Pearl-style beads for an elegant appearance.
- Wooden beads for natural-looking accessories.
- Letter beads for personalized charms.
- Heart-shaped beads for cute designs.
- Star-shaped beads for playful decorations.
- Acrylic beads for lightweight statement pieces.
If you are a beginner, start with medium-sized beads because they are generally easier to handle than very small beads.
Choose beads with holes large enough for your cord or string to pass through comfortably.
2. String, Cord, or Jewelry Wire
You need something to hold your beads together.
The best option depends on the weight and design of your charm.
Common choices include:
Elastic cord: Useful for certain flexible beaded designs, although it may stretch or wear out with repeated pulling.
Nylon cord: Suitable for many lightweight beaded charms and decorative knots.
Waxed cord: Offers a slightly textured finish and works well with casual or bohemian-inspired designs.
Jewelry wire: Helpful for structured designs that need to maintain a particular shape. Choose a suitable thickness and finish the ends securely.
Embroidery floss: Useful for small decorative tassels and wrapped details.
Yarn: Ideal for fluffy pom-poms, tassels, and crochet decorations.
For heavier designs, select a strong cord or wire appropriate for the beads and attachment hardware.
Avoid assuming that every type of string is equally durable. A charm intended for everyday use needs stronger construction than a lightweight decoration used occasionally.
3. Keyrings and Lobster Clasps
A keyring or lobster clasp allows you to attach your finished charm to a bag.
Keyrings are simple circular metal rings that can be opened by separating their coils. They are useful for basic keychain-style charms.
Lobster clasps have a small spring-loaded opening that makes it easy to attach and remove the accessory.
You can also use swivel clasps, decorative chains, or suitable handbag hardware.
Choose an attachment that is strong enough to support the charm’s weight and compatible with the bag’s handle, strap, or hardware.
4. Ribbon
Ribbon is perfect for making bows, loops, and soft decorative accents.
Satin ribbon creates a smooth, shiny finish, while grosgrain ribbon has a ribbed texture. Velvet ribbon offers a soft appearance, and sheer ribbon can give a charm a delicate look.
You can use one ribbon color or combine two complementary shades.
For example, a white satin bow attached to a pink beaded charm creates a soft, coordinated design.
If you want the ribbon to hold its shape, choose a suitable width and fabric. Very thin ribbon may be difficult to tie into a full bow, while very wide ribbon may look bulky on a small bag.
5. Yarn or Wool
Yarn is an excellent material for fluffy and textured bag charms.
You can use it to create pom-poms, tassels, small decorative flowers, or crochet shapes.
Choose yarn in a color that matches your bag or contrasts with it for a more noticeable effect.
A soft cream pom-pom can complement a brown handbag, while a bright pink tassel can add color to a plain black tote.
If you want to make a pom-pom, thicker yarn is often easier to work with than very fine yarn.
6. Fabric Scraps or Felt
Fabric scraps and felt are useful for making handmade shapes such as hearts, flowers, bows, stars, and miniature decorations.
Felt is especially beginner-friendly because it usually does not fray like woven fabric.
You can cut two matching shapes, decorate them, and sew or glue them together if the materials are compatible with your chosen adhesive.
For a fabric charm, consider using denim, cotton, canvas, or other sturdy scraps.
If you want a three-dimensional design, add a small amount of suitable filling before closing the shape.
7. Scissors
A pair of sharp craft scissors will help you cut ribbon, cord, yarn, and fabric neatly.
Use scissors appropriate for the material. Fabric scissors, for example, are best reserved for fabric so that they remain sharp.
Always cut away from your fingers and work on a stable surface.
8. Jewelry Pliers
Small jewelry pliers are useful when working with jump rings, wire, and certain metal findings.
They help you open and close jump rings securely and make small adjustments to the hardware.
Round-nose pliers may also be helpful for shaping wire loops.
If you are making a simple ribbon charm or yarn tassel, you may not need pliers at all.
9. Glue
Craft glue or fabric glue can help secure certain decorative details.
However, not every adhesive works with every material. Some glues do not bond well to smooth plastic, metal, or certain fabrics.
Check the product instructions and allow the adhesive to cure fully before attaching the charm to your bag.
For metal rings and load-bearing attachments, glue alone is usually not a reliable substitute for a secure knot, stitched connection, or properly closed hardware.
10. Decorative Accessories
Optional decorations can make your finished charm more interesting.
Consider collecting:
- Miniature flowers.
- Small pendants.
- Decorative buttons.
- Letter charms.
- Faux pearls.
- Acrylic shapes.
- Tiny bells.
- Fabric bows.
- Small tassels.
- Decorative chains.
Choose decorations that complement the main design rather than adding too many unrelated elements.
A simple charm with a coordinated color palette often looks more polished than one containing every decoration you can find.
Tools You Should Prepare Before Starting
In addition to your materials, a few basic tools can make your crafting process easier.
Depending on the design, you may need:
- A ruler or measuring tape.
- A pencil or fabric marker.
- A bead tray or small container.
- A needle suitable for your cord or yarn.
- Jewelry pliers.
- A small comb for yarn tassels.
- A pom-pom maker or piece of cardboard.
- A hot glue gun for suitable materials.
- A sewing needle and thread.
You do not need to purchase every tool at once.
Start with the supplies required for your first project and add more tools as you explore different designs.
If you use a hot glue gun, handle it carefully and keep it away from children and pets. Hot glue can cause burns, so work on a heat-resistant surface and follow the manufacturer’s instructions.
For beginners, a simple beaded charm or ribbon bow is a good starting point because neither requires a large collection of tools.
How to Choose the Right Bag Charm Design
Before making your first charm, think about where you plan to use it and what you want it to look like.
Choosing a suitable design can help you avoid buying unnecessary materials or creating an accessory that does not work well with your bag.
Consider Your Bag’s Color
Start by looking at the color of your handbag.
If your bag is black, white, beige, brown, or another neutral shade, you can introduce a bright charm to create contrast.
For example:
- A black handbag can look beautiful with pink, white, gold, or red accents.
- A white handbag can complement pastel beads, pearls, or colorful ribbons.
- A brown handbag can pair well with cream, green, tan, or wooden beads.
- A pink handbag can look lovely with white, silver, or darker pink details.
- A denim tote can work well with colorful yarn, fabric flowers, or playful acrylic charms.
You can also use similar colors for a coordinated appearance.
A beige bag with cream beads and a tan ribbon creates a subtle design, while a black bag with bright red beads creates a stronger contrast.
Think About the Bag’s Size
The size of your bag should influence the size of your charm.
A large tote bag can usually accommodate a longer tassel or a more noticeable accessory.
A small purse may look better with a compact charm that does not overwhelm the design.
The attachment point also matters. A heavy charm hanging from a thin fabric loop may stretch or damage the loop over time.
For small handbags, choose lightweight materials and secure hardware.
Decide on Your Personal Style
Your personal style can guide the shape, color, and texture of your bag charm.
If you prefer a cute aesthetic, consider heart beads, pastel colors, miniature flowers, and ribbon bows.
If you enjoy a minimalist look, try a single pendant, neutral beads, or a simple leather-style cord.
For a colorful style, combine bright beads, playful shapes, and contrasting ribbons.
If you like an elegant appearance, consider pearl-style beads, metallic accents, and coordinated colors.
You can also combine styles. For example, a neutral beaded charm with one colorful heart can look both understated and playful.
Consider the Weight
A bag charm should decorate your handbag without making it unnecessarily heavy.
Lightweight plastic beads, ribbon, felt, and yarn are useful for everyday accessories.
Glass beads, metal pendants, and layered chains may weigh more, so use them thoughtfully.
If you intend to attach the charm to a delicate bag, test the weight before wearing it regularly.
The charm should hang comfortably without pulling excessively on the handle or strap.
DIY Bag Charm Idea 1: How to Make a Simple Beaded Bag Charm
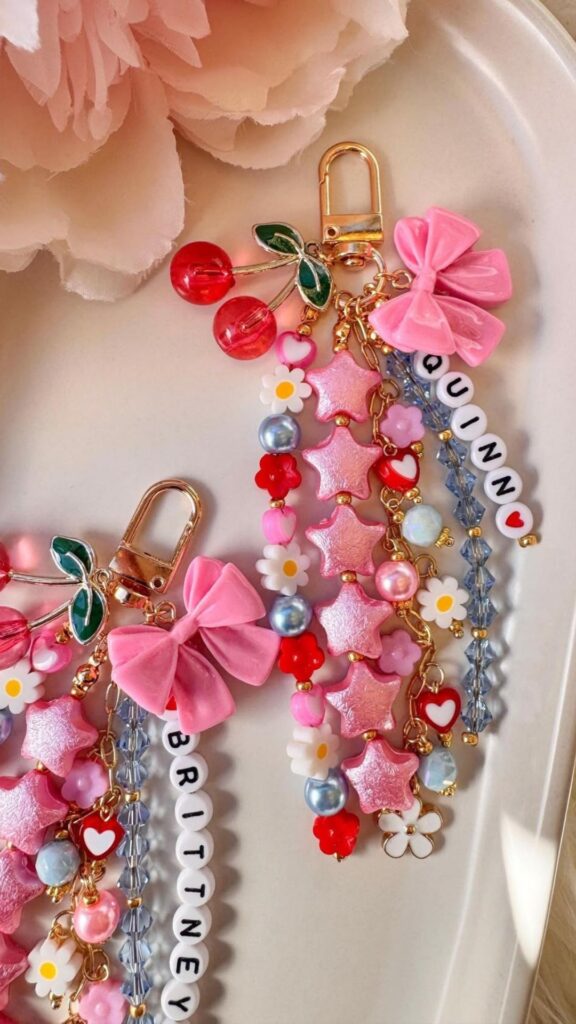
A beaded bag charm is one of the easiest projects for beginners.
It allows you to experiment with colors and patterns while learning how to thread beads and secure an attachment.
You can make it with a few beads and a keyring, or create a more elaborate design using letter beads and decorative pendants.
Materials Needed
For this project, gather:
- A small selection of beads.
- Strong beading cord or suitable jewelry wire.
- One keyring or lobster clasp.
- Scissors.
- Jewelry pliers if your design uses metal findings.
- One decorative pendant, if desired.
Step 1: Choose Your Bead Colors
Begin by selecting two or three colors that work well together.
For example, you could combine white, pink, and gold-tone accents for a soft, feminine design.
Alternatively, choose blue, white, and silver-tone accents for a cool color palette.
If you want a more playful charm, use several bright colors.
Lay the beads on a flat surface before threading them. This helps you visualize the pattern and rearrange the colors until you are happy with the result.
Step 2: Cut Your Cord
Cut a length of cord that allows you to thread the beads and secure both ends.
The exact length depends on the size of your beads and the finished charm you want.
Leave enough extra cord at each end for knotting or attaching the hardware.
It is better to have a little extra material than to discover that the cord is too short after threading all your beads.
Step 3: Arrange the Beads
Place the beads in your preferred order.
You might alternate colors, create a repeating pattern, or place one larger bead in the center.
For example, you could use three pink beads, one white bead, three pink beads, and a small decorative heart.
Another option is to place a letter bead between two groups of matching beads.
Keep the design balanced so that the charm looks attractive from different angles.
Step 4: Thread the Beads
Carefully thread each bead onto the cord.
If a bead has a narrow hole, use a suitable needle or choose a thinner cord.
After threading several beads, check that the arrangement matches your original pattern.
If you are using wire, make sure there are no sharp ends exposed where they could scratch your bag or fingers.
Step 5: Attach the Keyring
Connect the beaded section to your keyring or clasp using the attachment method appropriate for your cord or wire.
For cord-based designs, a secure knot or properly constructed loop may be suitable.
For wire-based designs, use compatible jewelry findings and finish the ends securely.
Avoid relying on a loose knot or a tiny amount of glue to support a charm that will be pulled repeatedly.
Step 6: Check the Finished Charm
Inspect the charm carefully.
Make sure the beads are secure, the cord does not slide out, and the attachment closes properly.
Gently test the connection by pulling with light pressure.
Do not pull so hard that you damage the charm.
Once everything is secure, attach it to your handbag and see how it looks.
Beginner Tip
If you are unsure about color combinations, use one main color, one supporting color, and one small accent.
This simple approach makes it easier to create a coordinated design without overcomplicating the project.
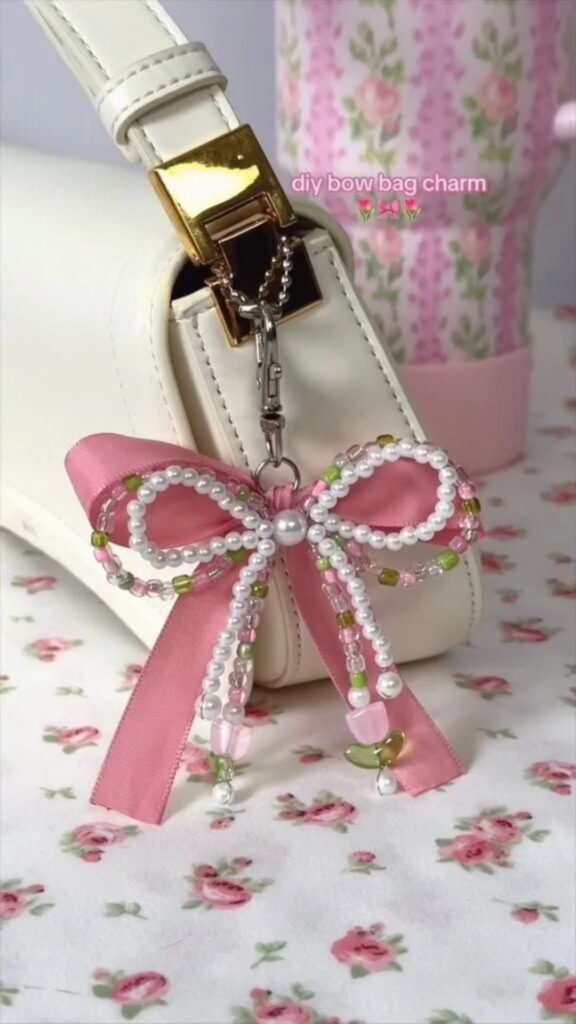
DIY Bag Charm Idea 2: How to Make a Ribbon Bow Bag Charm
Ribbon bow bag charms are perfect if you enjoy soft, decorative accessories.
They can be made using satin, grosgrain, velvet, or other suitable ribbons.
A ribbon bow works well on handbags, backpacks, and tote bags, especially when the ribbon color complements the bag.
Materials Needed
You will need:
- Ribbon in your preferred color.
- Scissors.
- A keyring or suitable clasp.
- Strong thread or thin cord.
- A small piece of ribbon for the center.
- Fabric glue or another suitable adhesive, if needed.
Step 1: Choose Your Ribbon
Select a ribbon that suits the size and style of your bag.
A medium-width ribbon is a good choice for beginners because it is generally easier to shape into a bow than very narrow ribbon.
Satin creates a smooth, shiny finish, while grosgrain provides more texture.
You can use one color or combine two complementary ribbons.
For example, a cream bow with a narrow pink center wrap can create a delicate design.
Step 2: Cut the Ribbon
Cut a length of ribbon long enough to form the bow loops and tails.
The exact measurement depends on the ribbon width and the size of the finished charm.
If you want long tails, leave additional ribbon hanging below the loops.
Before cutting, hold the ribbon against your bag to estimate how large the bow should be.
Step 3: Form the Bow
Fold the ribbon into two loops, bringing the ends toward the center.
Adjust the loops until they are approximately the same size.
Pinch the center of the ribbon together to create the bow shape.
If you prefer a fuller bow, make the loops slightly larger or use a ribbon with more body.
Step 4: Secure the Center
Wrap a small piece of ribbon around the center of the bow.
Secure it using a tight wrap, stitching, or a suitable adhesive.
The center wrap should hide the pinched section and create a neat finish.
If you use glue, follow the manufacturer’s instructions and allow it to dry completely.
Step 5: Attach the Bow to the Hardware
Secure the back of the bow to a keyring, clasp, or short decorative chain.
You can attach the bow using a strong sewn loop, a suitable ribbon loop, or another secure method appropriate for the materials.
If you use a metal attachment, check that its edges cannot cut into the ribbon.
Step 6: Finish the Ribbon Ends
Cut the ribbon tails to your preferred length.
You can leave the ends straight or cut them diagonally.
For a decorative finish, cut a small V shape into each tail.
Some synthetic ribbons can fray, so finish the edges using a method suitable for the ribbon.
If you use heat to seal synthetic ribbon ends, exercise extreme caution, work in a well-ventilated area, and follow appropriate material-safety guidance. Never apply heat to ribbon that may melt unpredictably or release harmful fumes.
Step 7: Inspect the Bow
Check that the loops are balanced and the center wrap is secure.
Give the attachment a gentle test before placing the charm on your bag.
You can also add a small bead or pendant to the center if you want more decoration.
Styling Tip
A ribbon bow looks especially attractive when its color matches another detail on your bag, such as the lining, stitching, or hardware.
However, you can also use a contrasting color to make the bow stand out.
DIY Bag Charm Idea 3: How to Make a Yarn Pom-Pom Bag Charm
A yarn pom-pom charm adds a soft, fluffy texture to your handbag.
It is a good choice if you enjoy colorful accessories and want a project that does not require beads or complicated jewelry techniques.
Pom-poms can be made using one yarn color or several colors combined.
Materials Needed
Gather:
- Yarn in your preferred color.
- A piece of cardboard or a pom-pom maker.
- Scissors.
- A keyring or lobster clasp.
- Strong cord or yarn for attaching the pom-pom.
- A comb, if desired.
Step 1: Choose Your Yarn
Select yarn that is soft enough to create a fluffy pom-pom but strong enough to remain intact during handling.
Medium-weight yarn is often easy for beginners to use.
Choose a color that complements your bag.
For example, a cream pom-pom can suit a brown handbag, while a bright pink pom-pom can create a playful accent on a neutral tote.
Step 2: Wrap the Yarn
If you are using cardboard, cut two matching ring-shaped pieces or use another suitable cardboard pom-pom template.
Wrap the yarn around the template repeatedly.
The more yarn you wrap, the fuller the pom-pom will generally become.
However, avoid wrapping so much yarn that it becomes difficult to cut or tie securely.
Step 3: Secure the Center
Carefully separate the two sides of the wrapped yarn enough to reach the center.
Tie a separate piece of yarn tightly around the middle.
This center tie holds the strands together and prevents the pom-pom from falling apart.
Leave enough length on the tie if you intend to use it to attach the pom-pom to the keyring.
Step 4: Cut the Loops
Cut through the yarn loops around the outer edge of the template.
Keep the center tie secure while cutting.
Once the loops are cut, the yarn strands should spread outward to form a pom-pom.
Be careful not to cut the center tie accidentally.
Step 5: Trim the Pom-Pom
Remove the cardboard template if you used one.
Trim uneven strands until the pom-pom forms a rounded shape.
Turn it as you trim so that you do not remove too much yarn from one side.
If you prefer a slightly messy, fluffy appearance, leave the strands less uniform.
Step 6: Attach the Pom-Pom
Use the remaining yarn or a suitable cord to attach the pom-pom to your keyring or clasp.
Make sure the connection is secure.
If the pom-pom feels too loose, reinforce the center tie before attaching it to the bag.
Step 7: Fluff the Yarn
Gently separate the strands with your fingers.
You can use a suitable comb if the yarn type allows it, but avoid pulling too hard.
The finished pom-pom should look full and rounded.
Creative Variation
For a multicolored pom-pom, alternate yarn colors while wrapping the template.
You can also make two smaller pom-poms in different colors and attach them to the same clasp.
This creates a playful accessory with extra movement.
DIY Bag Charm Idea 4: How to Make a Tassel Bag Charm
Tassel bag charms are simple, attractive, and easy to customize.
They can be made with embroidery floss, yarn, cord, or certain fabric strips.
A tassel is particularly useful when you want a lightweight accessory that adds movement without taking up too much space.
Materials Needed
You will need:
- Embroidery floss, yarn, or suitable cord.
- Scissors.
- A keyring or lobster clasp.
- A small piece of cord for the top loop.
- A ruler or piece of cardboard.
Step 1: Choose Your Tassel Material
Select a material that creates the texture you want.
Embroidery floss creates a fine, neat tassel, while yarn can produce a thicker, softer appearance.
You can use one color or combine several shades.
If you want a coordinated accessory, choose colors that complement the hardware on your handbag.
Step 2: Wrap the Material
Wrap the yarn or floss around a piece of cardboard or another suitable template.
The height of the template determines the approximate length of the tassel strands.
Continue wrapping until the tassel looks thick enough for your design.
Avoid wrapping too tightly if it makes the material difficult to remove.
Step 3: Tie the Top
Carefully slide the wrapped material off the template.
Tie a separate piece of cord around one end of the bundle to create a loop.
Secure the knot firmly.
This loop will be used to connect the tassel to the keyring or clasp.
Step 4: Create the Tassel Head
Wrap a short piece of matching or contrasting thread around the bundle just below the top loop.
This creates the rounded head of the tassel.
Tie the wrapping securely and trim any loose ends.
You can make the wrapped section narrow for a simple design or wider for a more decorative finish.
Step 5: Cut the Bottom Loops
Cut through the loops at the opposite end of the bundle.
The material will separate into individual strands.
Trim the ends evenly to create a neat tassel.
Step 6: Attach the Hardware
Connect the top loop to your keyring or clasp.
Check that the knot and loop can support the tassel without slipping.
If the tassel is long, make sure it will not drag on the ground or become caught in zippers.
Step 7: Add Decorative Details
You can leave the tassel plain or add a bead, small pendant, or ribbon wrap.
For example, a navy tassel with a white bead can look simple and polished.
A bright multicolored tassel can give a casual backpack a more playful appearance.
Beginner Tip
If you are making your first tassel, start with a medium length.
Very long tassels may become tangled during use, while extremely short tassels can be difficult to tie neatly.
DIY Bag Charm Idea 5: How to Make a Pearl Bag Charm
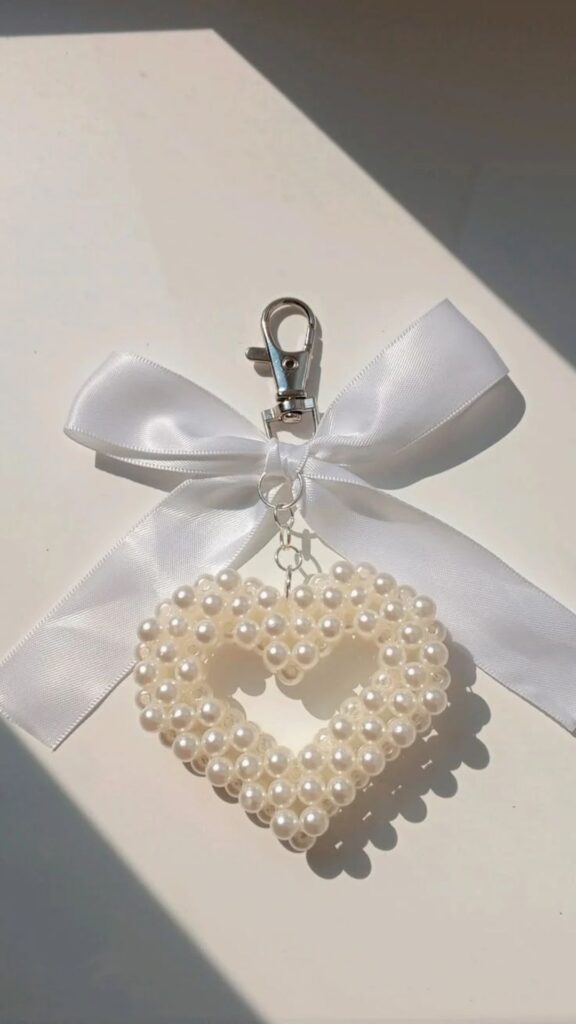
Pearl-style bag charms are a good option if you prefer elegant, delicate accessories.
They can be created using faux pearl beads, small decorative spacers, and simple metal findings.
A pearl charm can complement a handbag for everyday wear, celebrations, or special occasions.
Materials Needed
Gather:
- Faux pearl beads.
- Strong jewelry cord or suitable jewelry wire.
- A keyring or lobster clasp.
- Optional spacer beads.
- Jewelry pliers if needed.
- Appropriate jewelry findings.
Step 1: Select Your Pearl Beads
Choose beads in a size that suits your handbag.
Small pearls create a delicate look, while larger beads produce a bolder design.
You can use all-white pearls or combine them with gold-tone, silver-tone, or pastel accents.
If you are using faux pearls, inspect the holes and surfaces for damage before threading them.
Step 2: Plan the Arrangement
Arrange the beads on a flat surface.
You could create a simple strand of white pearls or alternate pearl beads with decorative spacers.
Another option is to place one larger bead between two smaller groups.
Keep the design balanced and avoid using too many different bead styles.
Step 3: Thread the Beads
Thread the beads onto your selected cord or wire.
If you are using jewelry wire, choose a suitable diameter and compatible finishing components.
Leave enough material at the ends to secure the attachment.
Step 4: Finish the Strand
Secure the ends using the appropriate jewelry-making technique.
Depending on the materials, this may involve a secure knot, crimp beads, wire loops, or compatible jewelry findings.
Follow the instructions for your specific hardware.
The finished strand should not have exposed sharp wire ends.
Step 5: Attach the Clasp
Connect the beaded strand to the keyring or lobster clasp.
If the charm contains heavier beads, use hardware designed to support the additional weight.
Check that all connections are closed securely.
Step 6: Inspect the Design
Make sure the beads sit neatly and the attachment is secure.
A pearl charm often looks best when the arrangement is simple and coordinated.
You can add a small ribbon bow if you want a softer appearance, but keep the decoration balanced.
Styling Tip
Pearl bag charms work well with neutral handbags, structured purses, and simple tote bags.
They can also provide an interesting contrast when attached to denim or canvas bags.
DIY Bag Charm Idea 6: How to Make a Personalized Letter Bead Charm
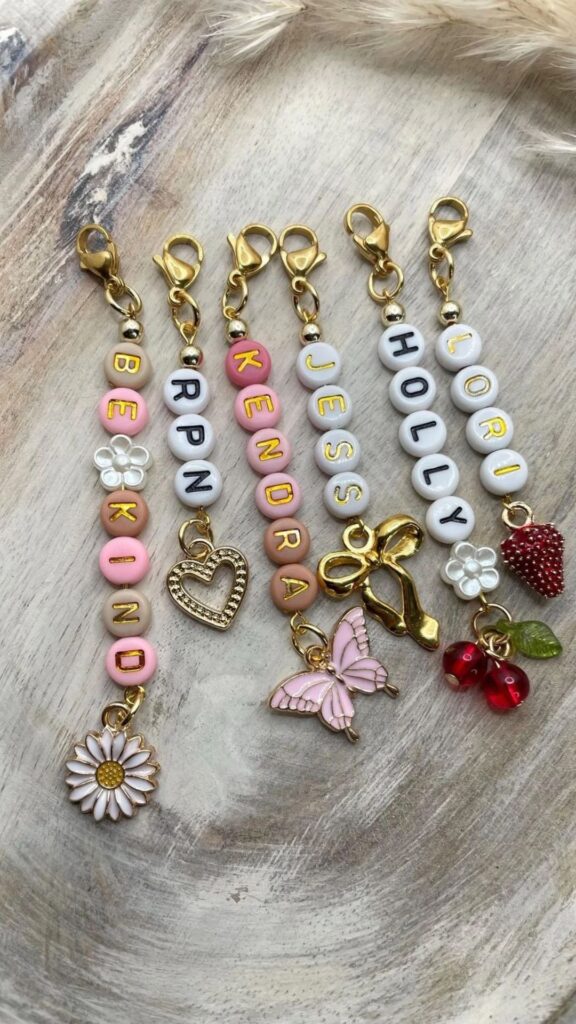
Personalized bag charms allow you to incorporate initials, short words, or meaningful letters into your design.
They can make a bag feel more personal and are useful when creating handmade gifts.
Materials Needed
For this project, prepare:
- Letter beads.
- Decorative beads.
- Strong beading cord.
- A keyring or clasp.
- Scissors.
- A small pendant, if desired.
Step 1: Decide What You Want to Spell
Choose the initials, name, or short word you want to include.
For a beginner project, initials are usually easier because they require fewer beads.
If you want to spell a name, count the letters before arranging your materials.
Make sure your chosen letter beads fit the cord.
Step 2: Choose Supporting Beads
Select beads that complement the letter beads.
You can use plain round beads, hearts, stars, or small spacer beads.
For example, white letter beads with pink and clear decorative beads can create a soft color palette.
If your letter beads are brightly colored, use neutral supporting beads to keep the design balanced.
Step 3: Arrange the Pattern
Place the letter beads in the correct order.
Add decorative beads on either side to frame the letters.
Make sure the word reads in the correct direction when the charm hangs from the bag.
This is especially important if you are making a charm with a short name.
Step 4: Thread the Beads
Thread the beads onto the cord in your chosen order.
Check the spelling before securing the ends.
It is much easier to correct a misplaced letter before you finish the charm.
Step 5: Secure the Ends
Tie or finish the cord using a method appropriate for your materials.
Attach the charm to the keyring or clasp.
Make sure the connection is secure and the letter beads cannot slide off.
Step 6: Add a Decorative Accent
You can finish the charm with a small pendant, ribbon bow, or tassel.
However, avoid adding too much weight to a small beaded design.
The personalized letters should remain the main feature.
Gift Idea
Create matching initials charms for friends or family members.
You can use the same colors for each person or customize the supporting beads to suit their preferences.
DIY Bag Charm Idea 7: How to Make a Fabric Heart Bag Charm
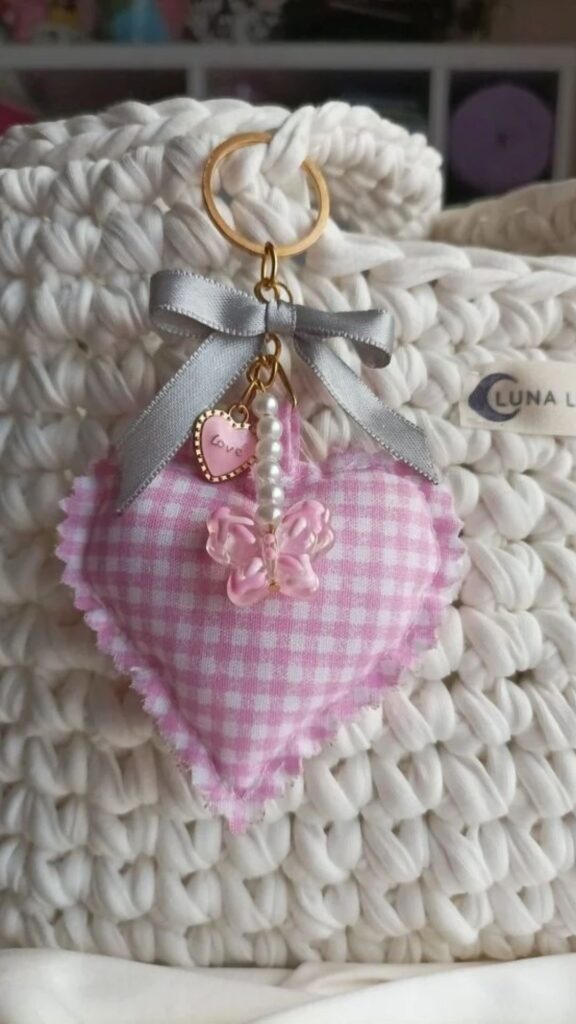
A fabric heart charm is a lovely way to use leftover fabric or felt.
It can be customized with embroidery, beads, buttons, or small decorative stitches.
This project is especially useful if you enjoy sewing and want to make something softer than a traditional beaded charm.
Materials Needed
You will need:
- Felt or suitable fabric.
- Scissors.
- Paper for a heart template.
- Needle and thread.
- A keyring or clasp.
- Optional stuffing.
- Fabric marker or pencil.
- Optional beads or decorative buttons.
Step 1: Draw a Heart Template
Draw a heart shape on paper.
Choose a size that will look appropriate on your bag.
Cut out the template and place it on your fabric.
Trace around it twice to create two matching heart shapes.
If you are using felt, a simple shape with smooth curves is easiest to cut.
Step 2: Cut the Fabric
Carefully cut out both heart shapes.
Try to keep the edges even so that the pieces fit together neatly.
If you are using woven fabric that frays easily, leave an appropriate seam allowance and finish the edges during sewing.
Step 3: Decorate the Front
Before joining the two pieces, decorate the front of the heart.
You could sew on a small initial, add a decorative button, or create simple embroidered lines.
If you prefer a minimalist design, leave the heart plain.
Make sure any decorations are attached securely.
Step 4: Sew the Heart
Place the two heart shapes together with their edges aligned.
Sew around the edge, leaving a small opening if you want to add stuffing.
If you are using felt, a blanket stitch or simple running stitch can create a decorative finish.
Keep the stitches reasonably even and avoid leaving large gaps.
Step 5: Add Filling
If you want a soft, three-dimensional heart, add a small amount of suitable stuffing through the opening.
Do not overfill it, as this may make the seams difficult to close.
You can skip the filling if you prefer a flat fabric charm.
Step 6: Close the Opening
Sew the remaining opening closed.
Check that the stitches are secure and the filling cannot escape.
Step 7: Attach the Heart
Add a strong fabric loop, cord, or suitable attachment at the top of the heart.
Connect it to your keyring or clasp.
If the fabric is delicate, reinforce the attachment point with additional stitching.
Step 8: Add Final Details
You can attach a small ribbon bow, decorative bead, or embroidered pattern.
Choose details that suit the heart’s size and material.
A simple felt heart with neat stitching can look just as attractive as a more elaborate design.
DIY Bag Charm Idea 8: How to Make a Crochet Flower Bag Charm
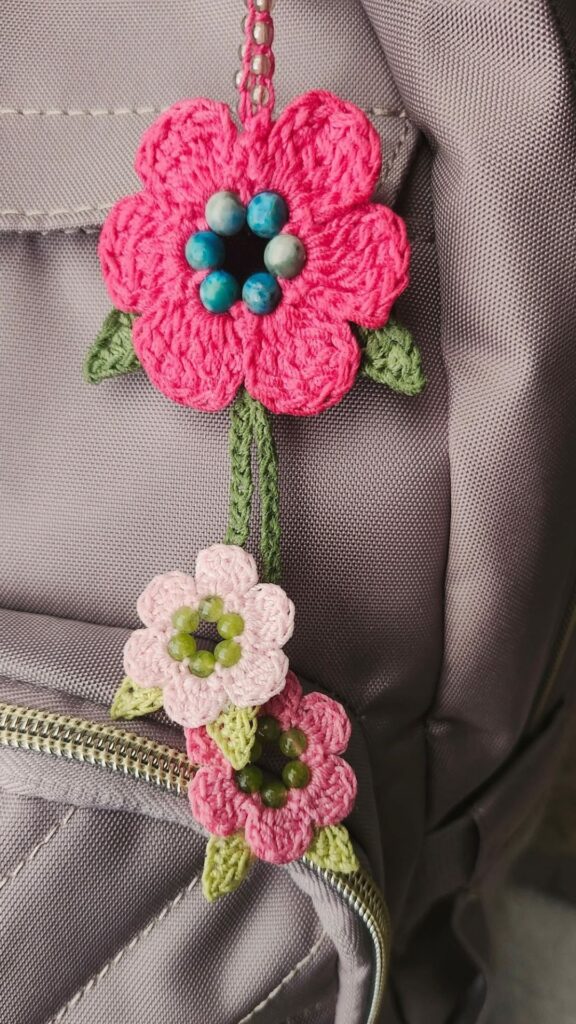
If you enjoy crochet, a small flower can become a charming handmade bag accessory.
Crochet flowers are lightweight, colorful, and easy to customize once you understand the basic stitches.
If you are new to crochet, choose a simple flower pattern rather than a complicated design with many layers.
Materials Needed
Gather:
- Yarn in one or two colors.
- A crochet hook suitable for the yarn.
- Scissors.
- A yarn needle.
- A keyring or clasp.
- Optional button or bead for the center.
Step 1: Choose Your Yarn Colors
Select yarn colors that complement your handbag.
For example, a white flower with a yellow center can look cheerful on a neutral bag.
A pink flower with a cream center can create a softer appearance.
Use yarn that is suitable for small decorative crochet work.
Step 2: Crochet a Simple Flower
Follow a beginner-friendly flower pattern using basic stitches.
A common approach is to make a small center ring and work several petals around it.
The exact stitches and number of petals depend on the pattern you choose.
Keep the flower small enough to hang comfortably from your handbag.
Step 3: Secure the Yarn Ends
Use a yarn needle to weave in the loose ends.
This helps prevent the flower from unraveling during use.
Avoid leaving long loose strands that could catch on zippers or other accessories.
Step 4: Add a Center Decoration
If desired, attach a button or bead to the center of the flower.
Make sure the decoration is firmly secured.
If the charm may be handled by young children, avoid small detachable components that could present a choking hazard.
Step 5: Create an Attachment Loop
Use a short length of yarn, a small chain, or another suitable attachment to connect the flower to the clasp.
Reinforce the connection if the crochet fabric is delicate.
Step 6: Attach the Hardware
Connect the flower to your keyring or clasp.
Check that the charm hangs neatly and does not twist excessively.
Styling Tip
Crochet flowers can look beautiful on canvas totes, backpacks, and casual handbags.
You can also make several small flowers in different colors and attach them to one short chain.
DIY Bag Charm Idea 9: How to Make a Minimalist Charm
Not every bag charm needs to be colorful or elaborate.
If you prefer simple accessories, a minimalist charm may be the best option.
This design focuses on a few carefully selected materials rather than multiple decorations.
Materials Needed
You will need:
- One decorative pendant.
- A keyring or lobster clasp.
- A short chain or suitable cord.
- Optional neutral beads.
- Jewelry pliers if needed.
Step 1: Choose One Main Feature
Select a single pendant, such as a small star, circle, flower, or abstract shape.
Choose a finish that matches your bag hardware.
For example, gold-tone accents can complement warm-colored bags, while silver-tone accents can suit cooler color palettes.
Step 2: Add a Short Chain
Attach a short chain or cord to the pendant.
Keep the length appropriate for your handbag.
A shorter design is often easier to manage and less likely to catch on other objects.
Step 3: Attach the Clasp
Connect the chain or cord to your keyring or lobster clasp.
Use compatible findings and close any jump rings securely.
Step 4: Check the Proportions
Hold the charm beside your handbag.
Make sure the pendant is visible without overwhelming the bag’s design.
If it looks too large or heavy, choose a smaller pendant.
Step 5: Inspect the Connection
Check all the links and attachment points.
Make sure the charm cannot easily slip off the clasp.
This simple project is a good introduction to basic jewelry assembly.
DIY Bag Charm Idea 10: How to Make a Layered Bag Charm
If you already feel comfortable with simple designs, try combining two or three different charm styles.
A layered bag charm can include beads, ribbons, tassels, and pendants.
The key is to create a balanced arrangement rather than attaching every decoration you have available.
Materials Needed
Prepare:
- One keyring or strong clasp.
- Beaded cord or a short beaded strand.
- A ribbon bow or tassel.
- One small pendant.
- Jump rings or suitable connecting hardware.
- Jewelry pliers if needed.
Step 1: Choose a Color Theme
Pick a consistent color palette.
For example, you might combine cream, pink, and gold-tone accents.
Alternatively, use blue, white, and silver-tone details.
A coordinated color palette helps the different components look like one finished accessory.
Step 2: Select Two or Three Components
Choose a main feature and one or two supporting details.
For example, a beaded strand can serve as the main feature, while a ribbon bow and small pendant provide additional interest.
Avoid combining too many large elements because the charm may become heavy.
Step 3: Arrange the Components
Place the pieces beside one another and compare their lengths.
A layered design often looks attractive when the components hang at slightly different heights.
However, the lengths should not be so different that one piece drags on the ground or becomes tangled.
Step 4: Attach the Components
Use suitable jump rings, loops, or clasps to connect each component to the main keyring.
Close metal rings securely.
If you use cord, reinforce the knots and make sure the components cannot slide off.
Step 5: Check the Balance
Hold the charm upright.
Make sure the components hang comfortably and the heavier pieces do not pull the accessory to one side.
You may need to rearrange the connections to improve the balance.
Step 6: Test Before Use
Gently move the charm and check whether any parts become tangled.
Inspect every attachment point.
If the design feels too heavy or awkward, remove one component and try again.
A layered charm should look decorative while remaining practical for everyday use.
How to Make Your DIY Bag Charms Look Professional
Creating a bag charm is relatively simple, but a few finishing techniques can make a noticeable difference.
You do not need expensive materials to achieve a polished result. What matters most is choosing suitable supplies, working carefully, and paying attention to small details.
1. Use a Consistent Color Palette
One of the easiest ways to improve your design is to limit the number of colors.
Choose a main color, a supporting color, and one accent.
For example, a charm made with pink beads, white pearls, and small gold-tone details can look coordinated without becoming visually overwhelming.
You can use more colors for playful designs, but make sure they work together.
2. Pay Attention to Proportions
The size of your beads, ribbons, tassels, and pendants should complement one another.
A tiny bow may disappear beside an oversized pendant, while a very large tassel may overwhelm a small purse.
Before assembling the charm, arrange the components together and check their relative sizes.
Make adjustments until the design looks balanced.
3. Trim Loose Ends
Loose threads, uneven yarn strands, and frayed ribbon edges can make a handmade charm look unfinished.
After completing your design, inspect every part.
Trim excess thread and shape tassels or pom-poms carefully.
For ribbon, use an appropriate edge-finishing method to reduce fraying.
Avoid cutting so close to a knot that the connection may unravel.
4. Secure Every Attachment
A beautiful charm is not useful if it falls apart during everyday use.
Check that the knots are secure, the clasps close properly, and the jump rings are fully closed.
For beaded designs, inspect the cord and finishing components.
For fabric designs, reinforce the area where the attachment connects to the fabric.
If any component feels weak, repair it before using the charm.
5. Avoid Overdecorating
Adding more beads, pendants, and ribbons does not automatically make a charm more attractive.
Sometimes, a simple design looks more refined because each detail has room to stand out.
Choose decorations that support the main design.
If you are using a large ribbon bow, for example, you may only need one small bead or pendant to finish the look.
6. Match the Hardware
The attachment hardware can affect the overall appearance of your charm.
Try to coordinate the metal finish with your bag when possible.
For example, a gold-tone clasp may complement warm-colored hardware, while a silver-tone clasp may suit a bag with cool metallic details.
Matching hardware is not essential, but it can make the finished accessory look more cohesive.
7. Make the Attachment Practical
A charm should be easy to attach and remove.
Choose a keyring or clasp that fits comfortably around the bag’s handle or hardware.
If you plan to move the charm between bags, a lobster clasp may be more convenient than a permanently tied loop.
Make sure the attachment does not scratch the bag or catch on nearby fabric.
8. Inspect the Charm in Natural Light
Before considering your project finished, examine it in good lighting.
Check the bead arrangement, ribbon shape, knot placement, and overall color balance.
Small adjustments can improve the result considerably.
You may notice a loose thread, uneven tassel, or bead that would look better in another position.
Correct these details before attaching the charm to your handbag.
Common Mistakes to Avoid When Making DIY Bag Charms
Beginners sometimes encounter small problems when making their first accessories.
Fortunately, many of these mistakes can be prevented with a little planning.
1. Using Weak String
Thin or unsuitable string may break under the weight of the beads or repeated movement.
Choose cord or wire appropriate for the materials and intended use.
If you are making a heavier charm, avoid using ordinary sewing thread as the only support unless the construction method is specifically designed for it.
2. Choosing Beads With Holes That Are Too Small
Some beads have very narrow openings.
If your cord cannot pass through comfortably, threading becomes frustrating and may damage the material.
Check the bead holes before purchasing supplies or beginning your project.
Choose a compatible cord or select beads with larger holes.
3. Making the Charm Too Heavy
A heavy charm can pull on the bag’s handle, stretch fabric loops, or make the accessory uncomfortable to carry.
Use lightweight materials when possible.
If you want to include a metal pendant or glass beads, balance them with lighter decorative elements.
4. Forgetting to Leave Extra Cord
One common mistake is cutting the cord too short.
After threading the beads, you may discover that there is not enough material to tie a secure knot or attach the clasp.
Leave extra cord at both ends.
You can trim the excess once the connection is complete and secure.
5. Using Too Much Glue
Excess glue can leave visible marks and create a messy finish.
Apply only the amount recommended for the material.
If possible, test the adhesive on a spare piece before using it on your finished charm.
Allow the glue to cure fully before handling the accessory.
Remember that glue is not a substitute for properly securing load-bearing connections.
6. Ignoring the Attachment Hardware
A charm may be beautifully assembled but still fall off if the keyring or clasp is weak.
Check the hardware before use.
Make sure the clasp closes fully and the connecting rings cannot open accidentally.
Replace damaged or poorly fitting components.
7. Skipping the Final Inspection
Do not attach your charm to your handbag immediately after finishing it without checking the construction.
Inspect the knots, seams, clasps, and decorative elements.
Gently test the connection and repair anything that appears loose.
This final step can prevent the charm from breaking or losing components during use.
How to Choose Colors for DIY Bag Charms
Color selection can make a simple bag charm look coordinated and attractive.
You do not need to understand advanced color theory to create a beautiful combination.
Start with colors you already enjoy, then consider how they work with the bag itself.
Pink and White
Pink and white create a soft, playful appearance.
You can combine baby pink beads, white pearls, and a satin bow for a delicate design.
This combination works particularly well with white, beige, grey, or pink handbags.
Black and Gold
Black and gold-tone accents can create a bold, elegant appearance.
Use black beads, a gold-tone clasp, and one decorative pendant.
This combination works well with black handbags and other neutral accessories.
Brown and Cream
Brown and cream create a natural, understated look.
You can use wooden beads, cream cord, or a small neutral tassel.
This palette is particularly suitable for canvas bags, tan handbags, and everyday accessories.
Blue and White
Blue and white create a fresh, coordinated appearance.
Try combining pale blue beads with white accents, or use darker blue beads for a stronger contrast.
This color combination can complement denim, white, grey, and navy bags.
Purple and Silver
Purple and silver-tone accents can create a cool, decorative style.
Use lavender beads, clear accents, and a silver-tone clasp.
For a bolder design, combine darker purple beads with metallic details.
Multicolored Designs
If you love bright accessories, do not be afraid to experiment with several colors.
Rainbow beads, multicolored yarn, and contrasting ribbon can create cheerful designs.
To maintain balance, repeat the colors throughout the charm rather than placing unrelated colors randomly.
How to Style DIY Bag Charms With Different Bags
Once you have created your charms, the next step is deciding how to wear them.
The same charm can look different depending on the bag, attachment point, and other accessories.
1. Styling Charms With Handbags
Handbags often provide a suitable attachment point near the handle or strap hardware.
For a structured handbag, try a pearl charm, minimalist pendant, or neat ribbon bow.
For a casual handbag, colorful beads or a yarn pom-pom can create a playful effect.
If your bag already has prominent decorations, choose a simpler charm to avoid an overcrowded appearance.
2. Styling Charms With Tote Bags
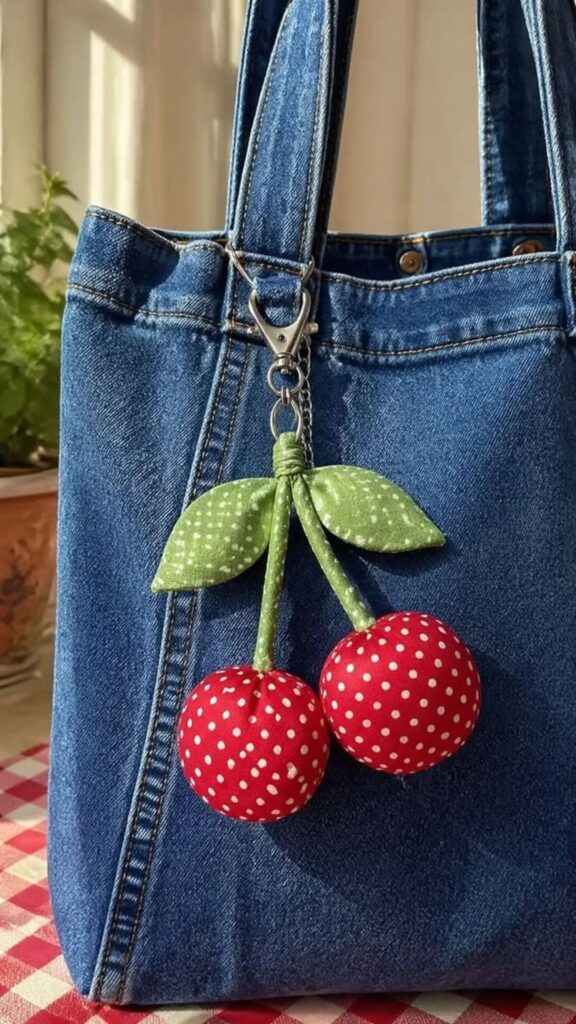
Tote bags are excellent for experimenting with larger accessories.
You can attach a longer tassel, crochet flower, or layered beaded charm to one handle.
Fabric and yarn charms work especially well with canvas totes because their textures complement the bag material.
If the tote bag is used for shopping or carrying heavy items, make sure the charm does not interfere with the handle or become caught on objects.
3. Styling Charms With Backpacks
Backpacks often have loops, zippers, and other convenient attachment points.
A lightweight beaded charm, ribbon bow, or pom-pom can add personality to a plain backpack.
Choose a secure clasp that will not open easily during movement.
If you use the backpack every day, avoid excessively long charms that could get caught in doors, bicycle parts, or crowded spaces.
4. Styling Charms With Small Purses
Small purses usually look best with compact charms.
A miniature pendant, short pearl strand, or small ribbon bow can add decoration without making the purse look crowded.
Choose lightweight materials and check that the attachment does not interfere with opening or closing the purse.
5. Styling Charms With Neutral Bags
Neutral bags provide an excellent background for colorful accessories.
A beige handbag can accommodate bright pink beads, while a black bag can look striking with white pearls or a colorful pom-pom.
You can also maintain a neutral palette by choosing a cream tassel or brown beaded charm.
The choice depends on whether you want the charm to blend in or stand out.
6. Styling Charms With Colorful Bags
If your handbag already has a strong color, consider choosing a charm that complements it.
You can use a similar shade for a coordinated appearance or select a contrasting color for extra visual interest.
For example, a blue bag can work with white or silver-tone accents, while a pink bag can complement white, purple, or darker pink details.
If the bag has a printed pattern, choose one color from the pattern and repeat it in the charm.
This helps create a more intentional look.
Frequently Asked Questions About DIY Bag Charms
1. What Is the Easiest Bag Charm to Make for Beginners?
A simple beaded bag charm is one of the easiest options for beginners.
You only need suitable beads, cord, and a keyring or clasp.
Thread the beads in your preferred pattern, secure the ends, and attach the charm to your bag.
A ribbon bow or yarn tassel is another good option if you prefer working with soft materials.
2. What Materials Do I Need to Make a Bag Charm?
The materials depend on the design.
Common supplies include beads, cord, ribbon, yarn, fabric, felt, keyrings, lobster clasps, and decorative pendants.
You may also need scissors, jewelry pliers, glue, or a needle and thread.
For your first project, choose one design and purchase only the materials required for it.
3. Can I Make Bag Charms Without Buying Special Tools?
Yes. Many simple designs can be made with basic household craft supplies.
For example, you can make a yarn tassel using cardboard, scissors, and yarn.
You can also create a ribbon bow using ribbon, scissors, and a secure attachment.
However, some metal jewelry findings are easier and safer to handle with suitable jewelry pliers.
4. How Long Does It Take to Make a DIY Bag Charm?
The time required depends on the design and your experience.
A simple beaded charm may take only a short time once you have gathered the materials.
A layered charm, sewn fabric heart, or crochet flower may take longer because it involves additional construction or decorative steps.
Beginners should allow extra time to plan the design, learn the technique, and inspect the finished accessory.
5. Can I Use Old Jewelry to Make Bag Charms?
Yes, some old jewelry components can be reused.
Unused beads, suitable pendants, and undamaged chains may be useful for a new charm.
However, inspect each item carefully before using it.
Avoid cracked beads, sharp edges, damaged clasps, and components that show signs of weakness.
Make sure the reused materials are clean and compatible with the new design.
6. How Do I Attach a Bag Charm to My Handbag?
You can attach a bag charm using a keyring, lobster clasp, swivel clasp, or another suitable attachment.
Choose hardware that fits the bag’s handle or attachment point.
Make sure the clasp closes securely and the charm does not pull excessively on the bag.
For delicate handbags, use a lightweight charm and avoid hardware that could scratch the material.
7. How Can I Make My Bag Charm Look Expensive?
You can create a more polished appearance by using coordinated colors, neat finishing, and suitable hardware.
Pearl-style beads, a carefully tied ribbon bow, or a minimalist pendant can look elegant without requiring expensive materials.
Avoid excessive decoration, trim loose ends, and make sure every connection is secure.
A well-balanced design with a clean finish often looks more refined than one containing many unrelated elements.
8. Can I Sell Handmade Bag Charms?
Yes, you can sell handmade bag charms if you enjoy crafting and want to turn your hobby into a small business.
Start by creating a small collection of designs and calculating the cost of your materials, packaging, and labor.
Consider offering different styles, such as beaded charms, ribbon bows, personalized initials, and yarn tassels.
Before setting your prices, research comparable products and consider the time required to make each design.
Take clear photographs, describe the materials accurately, and make sure your finished products are securely constructed.
If you plan to sell regularly, keep track of material costs and customer preferences so you can identify which designs are most practical to produce.
9. Are DIY Bag Charms Suitable for Children to Make?
Some simple bag charm projects can be adapted for children with appropriate adult supervision.
Ribbon bows and large-yarn tassels may be more suitable than projects involving very small beads or metal findings.
Small components can present choking hazards, especially for young children.
Scissors, hot glue guns, needles, and jewelry tools also require age-appropriate supervision.
Choose materials and techniques according to the child’s age and abilities.
10. How Do I Stop My Bag Charm From Breaking?
Use suitable materials and make sure every connection is secure.
Choose strong cord, compatible jewelry findings, and hardware that can support the charm’s weight.
Inspect knots, clasps, and jump rings regularly.
Avoid pulling excessively on the charm and remove it before activities that may snag or damage it.
If you notice frayed cord, loose stitching, or a damaged clasp, repair the charm before using it again.
11. Can I Make Bag Charms for Different Seasons?
Yes. You can create charms that suit different seasons, holidays, or occasions.
For a spring-inspired design, try floral crochet decorations or pastel ribbons.
For a summer look, use bright beads and colorful tassels.
For an autumn-inspired charm, choose brown, cream, orange, or dark green materials.
For winter celebrations, consider pearl-style beads, metallic accents, or coordinated ribbon decorations.
Seasonal charms are also a useful way to refresh the appearance of your handbag without purchasing a new accessory.
12. How Many Bag Charms Should I Put on One Bag?
There is no fixed rule, but the best number depends on the size and style of your handbag.
One charm can create a simple, understated look.
Two or three coordinated charms can add more personality to a larger bag.
If you prefer a layered appearance, combine different lengths and textures while keeping the colors consistent.
Avoid adding so many charms that they become tangled, make the bag uncomfortable to carry, or place too much weight on the handle.
Create Something Beautiful With Your Own Hands
Making DIY bag charms at home for beginners is a fun and rewarding way to express your creativity without spending too much money. With a few simple materials, a little patience, and some imagination, you can transform ordinary beads, ribbons, charms, and keychains into beautiful accessories that reflect your personal style. The best part is that you do not need to be an expert crafter to get started. Every charm you make is an opportunity to learn something new and experiment with different colors, textures, and designs.
Whether you are creating cute bag charms for everyday use, making personalized gifts for friends, or exploring a small handmade business idea, the possibilities are endless. Do not worry if your first design does not turn out exactly as you imagined. Crafting is about enjoying the process, learning from your mistakes, and discovering what works best for you.
So, gather your materials, choose a design that inspires you, and start creating your own DIY bag charms today. You might be surprised by how much personality a small handmade accessory can add to your favorite bag. Who knows? Your new hobby could become a creative passion that brings you joy, helps you save money, or even grows into a business of your own.