
Have you ever looked at a beautiful paper flower and wondered how an ordinary sheet of paper could turn into something that looks so delicate? The secret does not require expensive equipment or advanced crafting skills. With the right cuts, gentle shaping, and a little patience, you can transform simple paper into a flower that adds charm to a gift, bedroom, party table, greeting card, or handmade bouquet with the help of this post How to Make Paper Flowers.
If you have been searching for how to make paper flowers, this tutorial gives you a practical place to begin.
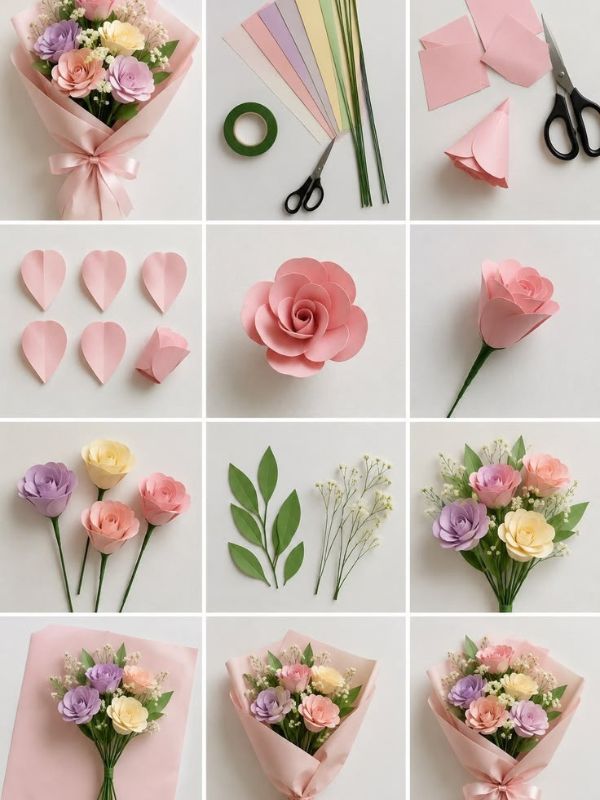
Rather than throwing a pile of random petals together and hoping they form a flower, you will build the bloom carefully from the foundation upward. First, you will prepare the materials. Then, you will create the petal templates, cut the pieces, shape them, and assemble the layers. Afterward, you will add the center, stem, and leaves before giving the finished flower its final adjustments.
The best part? You can change the colors, sizes, petal shapes, and number of layers to create something that feels completely your own. So, gather your supplies, clear a comfortable workspace, and let’s turn a simple piece of paper into something worth displaying for this how to make paper flowers.
Leaf crafts for adding details to your home DIY Paper Leaf Crafts For Beautiful Home Decor You Can Make With Simple Materials
How to Make Paper Flowers Step by Step: A Simple DIY Tutorial
Step One: Gather Your Materials and Prepare Your Workspace
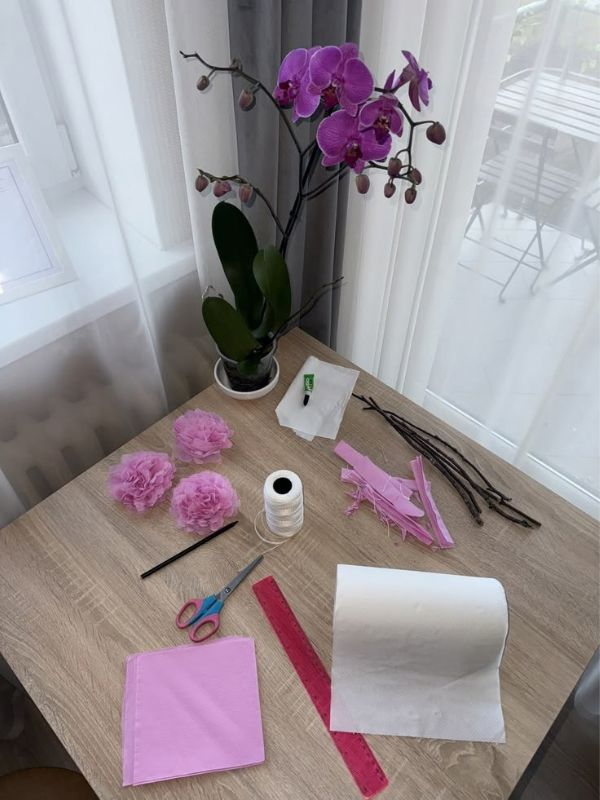
Before learning how to make paper flowers, you need a comfortable setup. A good workspace prevents unnecessary interruptions once you begin cutting and shaping the petals. It also helps you keep different materials organized, especially because this project uses several pieces of paper.
You do not need a professional craft table. A clean desk, dining table, or other flat surface can work perfectly well. What matters most is having enough room to spread your paper without constantly moving your supplies.
For a first attempt, choose a medium-sized flower. A very tiny design can make cutting and shaping difficult. A huge bloom can consume more paper and require stronger support. Starting somewhere in the middle gives you enough space to practice the technique without making the project unnecessarily complicated.
Choose the Paper and Essential Supplies
Begin by selecting paper with enough structure to hold a curved shape. Medium-weight craft paper provides a useful balance because it bends without becoming too floppy. Cardstock works nicely for sturdier flowers, although very thick cardstock may require more effort when you curl the petals.
Choose at least one color for the petals. You can use pink, red, yellow, purple, white, blue, or any shade that matches your decoration. Green paper will work for the leaves. A contrasting color can also create an attractive center.
You will need sharp scissors for clean edges. A pencil helps you trace templates. Keep a ruler nearby if you want consistent measurements. Craft glue or another paper-safe adhesive will secure the layers. A wooden craft stick, floral wire, or green paper can provide the stem.
Keep a small piece of scrap cardboard nearby as well. You can use it to test your cuts, protect the table, or make stronger reusable templates. Having everything within reach means you can concentrate on the flower rather than stopping repeatedly to search for supplies.
Organize the Workspace Before You Begin
Clear unnecessary objects from the table. Place the main paper in one area, the scissors somewhere easy to reach, and the adhesive away from the cutting space. Keep your pencil and ruler together so you can grab them whenever you need to mark another shape.
Good lighting matters more than many beginners realize. Bright natural light can make pencil outlines easier to follow. If your workspace feels dim, add a lamp before you start.
Next, decide approximately how large you want the finished flower. A medium bloom might measure around 15–20 centimeters across. You can increase or reduce that measurement according to your project.
Finally, keep a small container for scraps. Cutting several petals produces leftover pieces that can quickly scatter across the table. A scrap container keeps the workspace cleaner.
Once everything sits within easy reach, you can move confidently into the template stage.
Crafs for kids that are simple How to Make Easy Popsicle Stick Crafts for Kids: 15 Fun DIY Ideas
Step Two: Create Your Petal Templates

The petal determines the personality of the finished flower. A wide rounded shape creates a soft appearance. A narrow pointed design looks more dramatic. Therefore, take a little time with the template instead of immediately cutting into your best paper.
For this tutorial, you will create three petal sizes. The largest pieces will form the outside of the flower. Medium pieces will create the middle layer. Smaller petals will bring the center together.
This layered approach makes how to make paper flowers much easier to understand because you can see exactly how each group contributes to the final shape.
Draw the Main Petal Template
Take a piece of scrap paper and draw a narrow base. From there, widen the shape gradually toward the middle. Finish with a rounded or slightly pointed tip.
Keep the first design simple. You do not need complicated curves to create an attractive flower. A clean outline will actually make cutting easier.
Cut out the test shape. Hold it between your fingers and bend the edges gently. Notice whether the petal feels too wide, too narrow, too short, or too long.
If the tip looks awkward, redraw it. When the base seems too narrow, widen it slightly. Small corrections at this stage can save a considerable amount of paper later.
Place several test petals around an imaginary center. Do they form a reasonably even circle? If large gaps appear, widen the petals. If they overlap excessively, narrow them.
Once the shape looks balanced, trace it onto a piece of thin cardboard. Cut the cardboard version carefully. This stronger template will make repeated tracing much easier.
Make the Different Petal Sizes
Create a medium version by reducing the length and width of the original template. Keep the general shape recognizable so the layers look related.
Then, make a smaller version for the center. It does not need to become extremely tiny. The smallest petals still need enough surface area for you to cut and shape them comfortably.
Place all three templates together. Check the difference between them. The large petal should clearly dominate the group. The medium shape should sit naturally between the large and small versions.
Write the size on the back of each template. This simple label prevents confusion later.
Now test one petal from each size. Curl them gently. Place the small one over the medium piece. Add the large petal underneath. If the proportions look attractive, your templates are ready.
Craft Activities preschoolers can do 20 Easy Flower Activities for Preschoolers to Make and Learn
Step Three: Trace and Cut the Petals
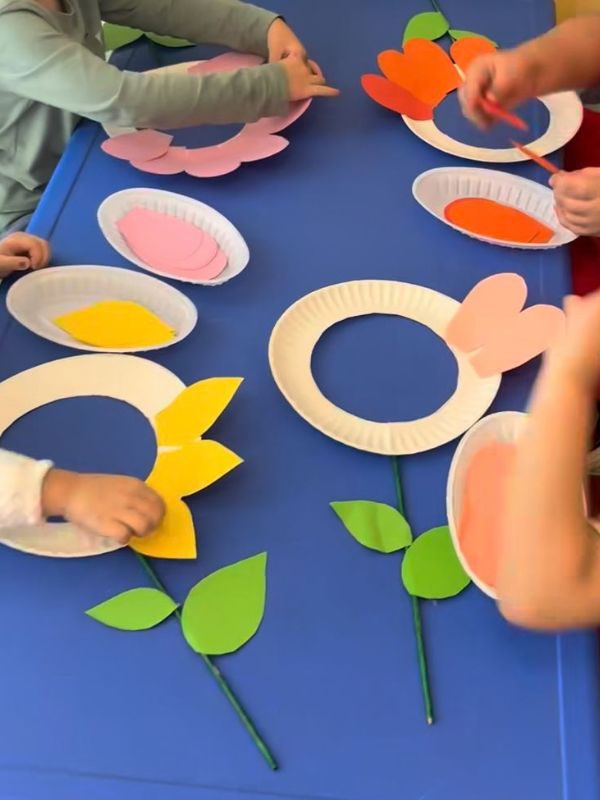
Now the project begins to look like a real flower. You have your templates, your paper, and your workspace. The next challenge involves turning those patterns into clean pieces that can later be shaped.
When you think about how to make paper flowers, cutting may seem like the easiest part. However, uneven edges can affect the finished appearance, especially when several petals sit beside one another.
Take your time here. Clean cuts create better-looking petals.
Trace the Templates Carefully
Place the largest template on the chosen paper. Hold it firmly with one hand so it does not move while you trace around it.
Use a light pencil line. A dark outline can remain visible after cutting, particularly on pale paper. A faint mark gives you enough guidance without creating unnecessary visual clutter.
Rotate the template as you move across the sheet. This helps you use the available paper efficiently. Leave enough space between outlines for your scissors to move comfortably.
Continue until you have enough large petals. Around eight to twelve pieces can work well for a medium flower. You can always create additional petals later if the bloom looks too open.
Repeat the process with the medium template. Finally, trace the small version.
If you plan to use multiple colors, decide where each shade will appear before cutting. For example, one color can form the outer petals while another creates the inner layer.
Cut, Sort, and Inspect the Petals
Begin cutting along the pencil lines. Move the paper rather than forcing the scissors around every curve. This technique usually produces smoother edges.
Pay special attention to the base. Avoid accidentally cutting into this area because you will need it for attaching the petal.
After cutting each piece, place it in the correct group. Large petals should stay together. Medium pieces should form another pile. Keep the small petals separate.
Inspect the edges before moving forward. A slightly uneven handmade edge does not matter. However, deep accidental cuts or large tears can weaken the petal.
Replace badly damaged pieces rather than trying to hide them later.
When everything looks usable, count the petals in each group. Having the pieces organized now will make assembly much easier.
Polymer crafts for beginners with no knowledge of it How to Start with Polymer Clay As a Beginner: A Simple Guide
Step Four: Shape the Petals
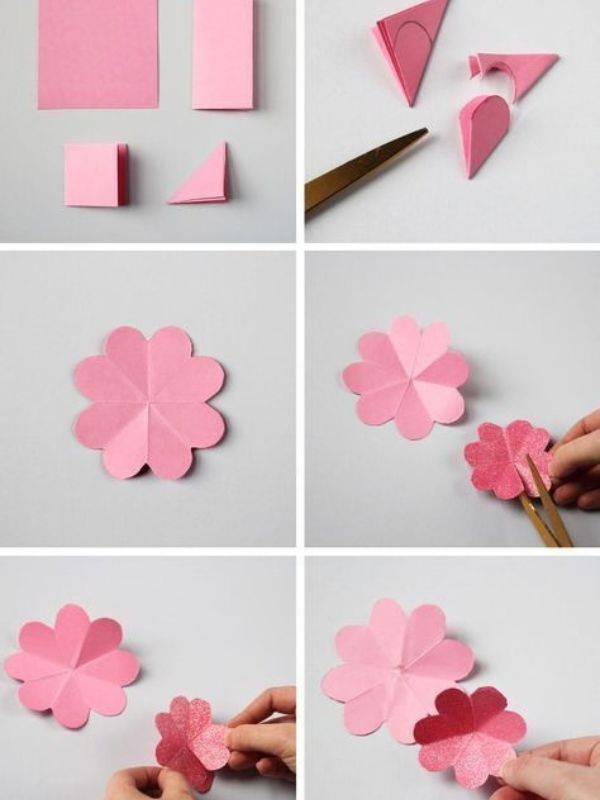
Flat petals rarely create the dimensional appearance people want from handmade flowers. Shaping gives each piece movement. It also allows the layers to rise naturally from the center.
This stage requires patience rather than force. Paper can hold a curve beautifully when you shape it gradually. A sudden crease, however, can leave an obvious fold that becomes difficult to disguise.
Curl the Petal Edges
Take one large petal and place a pencil near one side. Wrap the edge gently around the pencil. Move across the curve until the paper develops a soft curl.
Repeat the process on the other side. Avoid pressing too hard.
Next, cup the center slightly. Hold the petal between your fingertips and push gently around the middle. You want a shallow curve rather than a folded crease.
Release the paper and inspect the result. The edges should rise slightly while the center remains open.
Repeat the technique with the remaining large petals. Keep the curves generally similar, although small variations can make the flower look less artificial.
Shape the Medium and Small Petals
Medium petals can receive a slightly deeper curve because they will sit closer to the center. Curl their sides inward first. Then, gently lift the tips.
Small petals require more delicate handling. Their surface area is limited, so excessive pressure can bend them too sharply.
Create a gentle cup in the center. Allow the tips to point slightly upward.
Arrange one large, one medium, and one small petal together without glue. Examine the relationship between their curves.
If the layers appear too flat, deepen the middle curve. If the pieces look too closed, open the edges slightly.
Continue adjusting until the three sizes create a natural progression from wide outer petals to a compact center.
Simple step by step beginners scrunchies craft for the crafty adults How to Sew Scrunchies For Beginners: A Simple Step-By-Step Tutorial
Step Five: Build the Outer Petal Layer
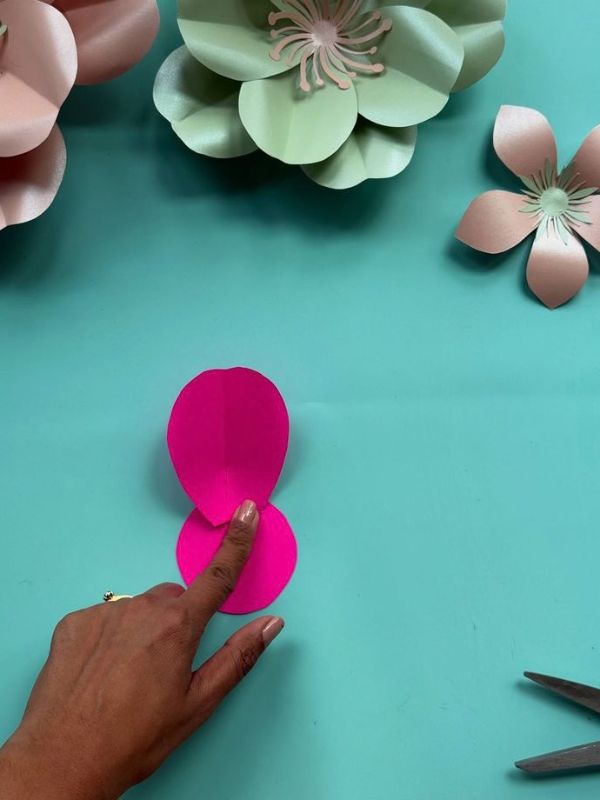
The outer layer creates the foundation for the entire flower. It determines the overall width and gives the smaller layers somewhere to sit.
Before using glue, arrange the pieces completely. This dry arrangement lets you make corrections without fighting adhesive.
As you work, remember that how to make paper flowers involves more than simply attaching pieces. Spacing, direction, overlap, and height all affect the final result.
Arrange the Large Petals
Place one large petal on your workspace. Add another beside it, allowing the lower edges to overlap slightly.
Continue around the imaginary center until all the large petals form a circle.
Look at the arrangement from above. Check for empty spaces.
If one section appears crowded, move the neighboring petals slightly apart. When another area looks too open, bring those pieces closer together.
Rotate the arrangement several times. A balanced flower should look reasonably even from different angles.
Do not worry about perfect symmetry. Handmade flowers often look more interesting when every petal has a slightly different position.
Once the arrangement looks right, keep the pieces in their positions as much as possible.
Glue the First Layer
Apply a small amount of adhesive near the bottom of the first petal. Avoid spreading glue across the entire piece.
Press the petal into position. Hold it until the adhesive begins to grip.
Move to the next petal. Maintain the spacing you established during the dry arrangement.
Continue slowly around the circle.
When you reach the final piece, check the remaining space before gluing it. Adjust the neighboring petals if necessary.
After completing the circle, leave the flower flat until the adhesive sets.
Avoid lifting it too soon. Fresh glue can allow the petals to slide.
Once the first layer feels secure, inspect the back. The bases should remain attached without large amounts of excess adhesive.
Looking for gift you can create for your loved ones on a budget How to Make Handmade Gifts on a Budget: Simple Ideas Anyone Can Make
Step Six: Add the Middle Petal Layer
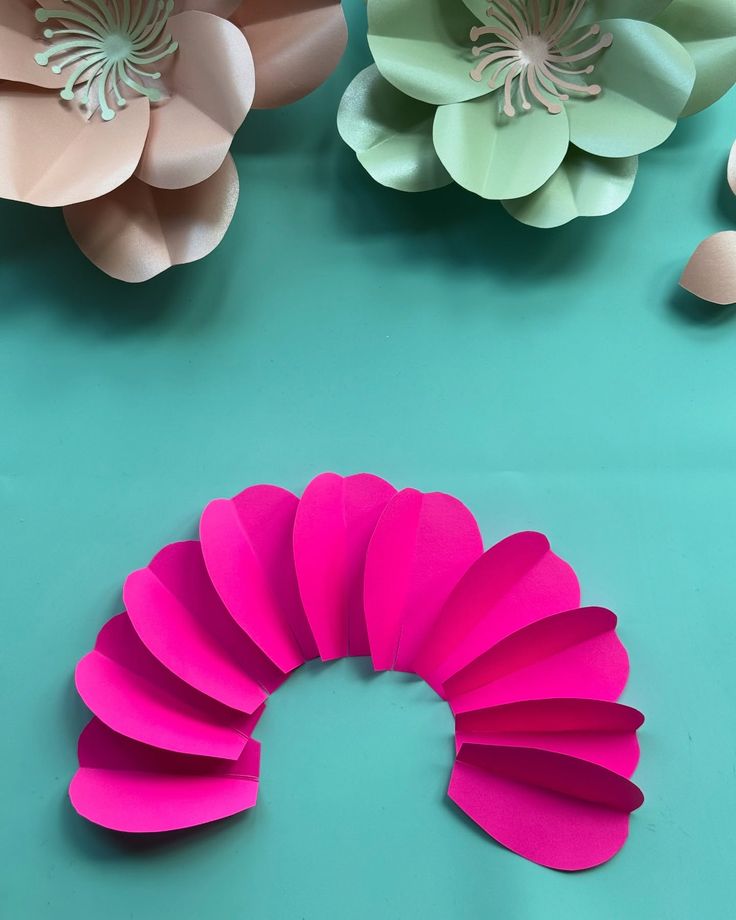
The second layer gives the flower additional fullness. It also begins creating the height that makes the bloom look less like a flat decoration.
At this stage, you can already see the structure forming. The outer petals establish the width. The medium pieces will fill selected spaces while drawing the viewer’s attention toward the center.
Position the Medium Petals
Gather the medium pieces and place them between the larger petals.
Do not glue them immediately. Arrange the complete layer first.
The medium petals should sit closer to the center than the outer pieces. Their tips can point slightly upward.
Check the spacing carefully. Each medium petal should remain visible rather than disappearing behind its neighbors.
If the layer looks too crowded, remove one piece temporarily. If large gaps remain, add another.
Once the arrangement feels balanced, begin attaching the pieces individually.
Apply adhesive near the base. Press each petal firmly into place.
Pause after every few pieces to check the shape. This prevents small spacing errors from accumulating around the circle.
Create More Depth
After attaching the medium layer, shape the petals again while the glue remains workable.
Lift the middle of each piece gently. Curve the tip outward or upward according to your desired style.
Look at the flower from the side. The middle layer should sit slightly higher than the outer layer.
If the flower still looks flat, deepen the curves. If the petals appear too upright, lower them gently.
Leave the flower to dry once you are satisfied.
Afterward, inspect it from above. The second layer should fill the spaces without completely hiding the large petals.
Make small corrections rather than reshaping everything. A few carefully adjusted pieces can improve the entire bloom.
Easy ways to create beautiful craft to decorate your home with these What Can I Make With an Egg Carton? Easy Ideas for Kids
Step Seven: Create the Flower Center
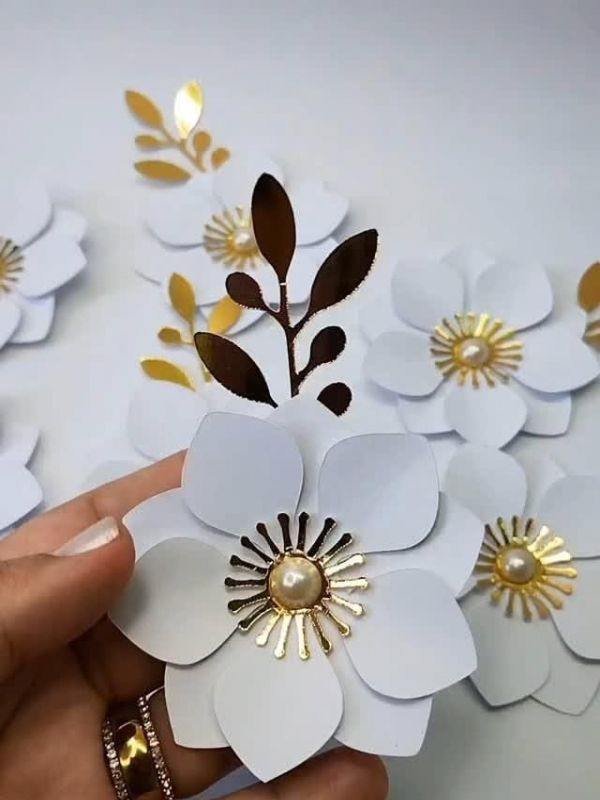
The center provides the final focal point. It also hides many of the petal bases, making the finished flower look more complete.
For a simple design, you can use small petals surrounding a paper circle. A more textured center can include narrow paper strips, curled pieces, or a contrasting color.
Whatever style you choose, keep the center proportional to the flower.
Arrange the Small Inner Petals
Gather the smallest petals. Place them around the center opening without glue.
Keep their bases close together. Let the tips rise slightly.
Check the arrangement from above. The pieces should create a compact ring.
If the center remains too open, add another small petal. If it looks crowded, remove one.
Once the placement works, glue each petal individually.
Press the base firmly. Keep the tip free so it can maintain its curve.
Continue around the opening until the inner layer looks full.
Allow the adhesive to settle before adding the centerpiece.
Make and Attach the Centerpiece
Cut a small paper circle. Choose a color that either matches the petals or creates contrast.
For additional texture, cut narrow slits around the edge of another small circle. Stop before reaching the middle. Curl those narrow sections gently upward.
Place the textured piece over the inner petals.
Apply a small amount of adhesive to the back. Press it into the center.
Hold it carefully.
Once secure, inspect the bloom from above. The center should hide the petal bases while leaving enough of the inner layer visible.
If the center looks too flat, gently lift the surrounding small petals.
If it looks too large, create a smaller replacement rather than covering more of the flower.
Rainbow craft for kids who love colors and creativity How to Make Rainbow Crafts at Home With Kids
Step Eight: Make the Stem
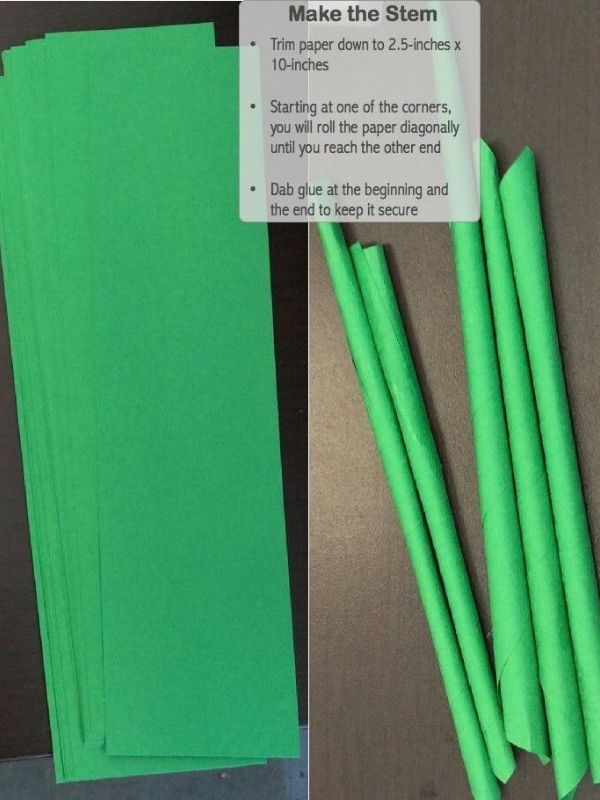
A beautiful bloom still needs a suitable support. The stem gives you a way to hold or display the flower. It also determines how easily you can arrange several flowers together.
For a lightweight bloom, rolled paper can work. Larger flowers may need a craft stick or floral wire for extra strength.
Roll a Paper Stem
Cut a long strip of green paper. Keep the strip narrow enough to create a manageable stem.
Place one edge against a craft stick if you want extra support. Roll the paper around the stick gradually.
Keep the roll firm.
Once you reach the end, apply glue along the final edge. Press the seam closed.
If you want a flexible stem, place floral wire inside before sealing the strip.
Allow the adhesive to dry.
Check the finished tube. It should remain reasonably straight.
If the seam begins opening, add a tiny amount of glue along the loose section.
Attach the Stem Securely
Turn the flower over. Locate the center of the back.
Apply adhesive to the top of the stem. Press it against the flower.
Hold it firmly.
Next, cut a green paper circle. Apply glue to one side. Place it over the connection.
This circle hides the attachment while adding another layer of support.
Allow the flower to remain undisturbed.
After the adhesive sets, hold the stem upright. Check whether the bloom stays securely attached.
For a larger flower, reinforce the connection with another paper circle.
Avoid handling the flower roughly until all adhesive has dried completely.
For animal crafts that kids can build at home 11 Farm Animal Crafts Kids Can Make to Build Their Own Little Barnyard
Step Nine: Add the Leaves
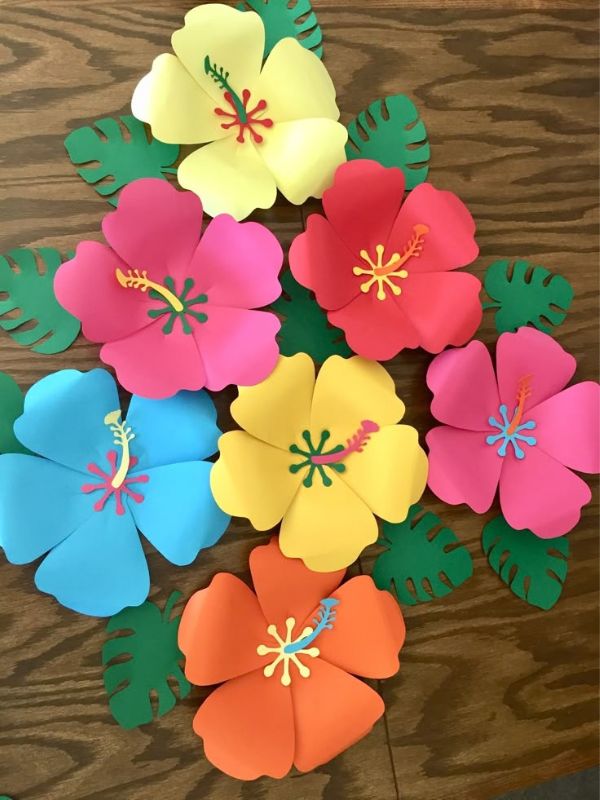
Leaves bring balance to the stem. They also provide another opportunity to add shape, texture, and color.
You do not need many leaves. Two or three well-positioned pieces can look better than several crowded shapes.
Cut and Shape the Leaves
Use green paper for the leaves. Draw a simple pointed oval with a narrow base.
Cut the first piece.
Hold it beside the flower. Check its size.
If it looks too large, reduce the template. If it disappears beside the bloom, make another slightly larger version.
Create two or three leaves.
Fold each leaf gently along the center. Avoid making a hard crease.
Open it slightly.
The raised center creates a simple vein.
Next, curl the edges outward.
You can add thin pencil lines from the center toward the sides for additional detail.
Attach the Leaves to the Stem
Place the leaves against the stem before applying glue.
Try different positions.
One leaf can sit lower. Another can appear slightly higher. Turning them in different directions creates a more natural arrangement.
Once you like the placement, apply glue to the base of the first leaf.
Press it against the stem.
Repeat with the remaining pieces.
Leave enough space between the leaves so they remain visually distinct.
After the adhesive dries, adjust the angles gently.
Lift one leaf outward.
Turn another slightly downward.
Finally, inspect the entire stem.
The leaves should support the flower rather than compete with it.
Learnt how to bedazzle but don’t know what to bedazzle. This http://Rhinestone and Bedazzle Crafts You Can Make at Home for Stylish DIY Decor and Gifts
Step Ten: Refine the Finished Flower
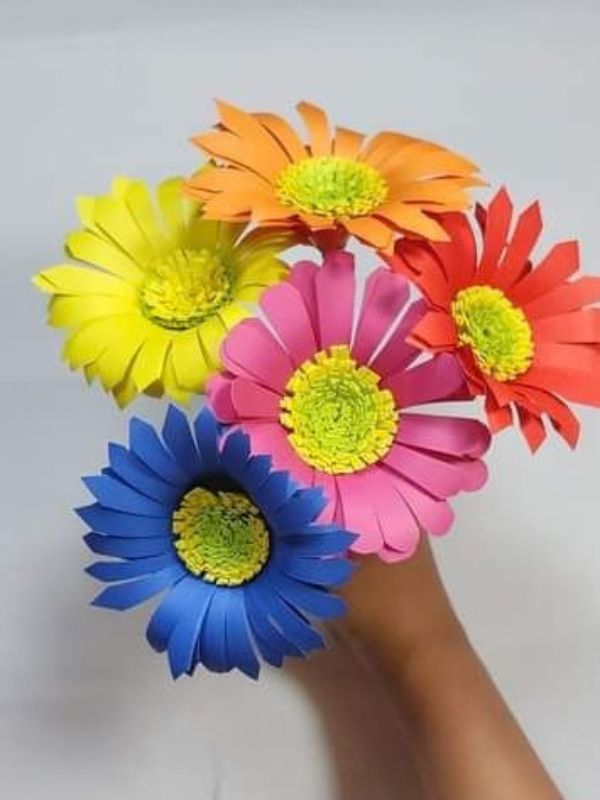
The flower may already look complete, yet this stage can make a noticeable difference. Small adjustments often turn a basic handmade bloom into a polished decoration.
Rather than adding more materials immediately, begin by examining what you already created.
Open and Reshape the Outer Petals
Look at the flower from above.
Check the spacing between the outer petals.
If two pieces sit too close together, separate them gently.
When a petal looks flat, place your finger underneath its middle and curve it upward.
Move slowly.
Paper responds better to gradual pressure than sudden bending.
Next, inspect the tips. Some may point outward too strongly. Curl those tips slightly inward.
Others may point toward the center. Open them gently.
Continue around the bloom.
Do not force every petal into an identical shape.
A little variation creates a handmade appearance.
Adjust the Inner Layers
Move toward the medium petals.
Check whether they remain visible between the larger pieces.
If one has collapsed, reshape its center.
Lift the tip.
Then, examine the small inner petals.
Vary their directions slightly. Some can point upward. Others can lean toward the center.
This creates depth.
Look at the flower from the side as well. The layers should rise gradually rather than forming one flat surface.
If the center looks too low, gently lift the surrounding petals.
If it looks too high, lower the inner pieces.
Make only small corrections.
Once the flower looks balanced from above and from the side, leave it alone.
Check out our Coil Clay Ideas: 13 Projects You Can Make Without a Pottery Wheel
Step Eleven: Add Finishing Details
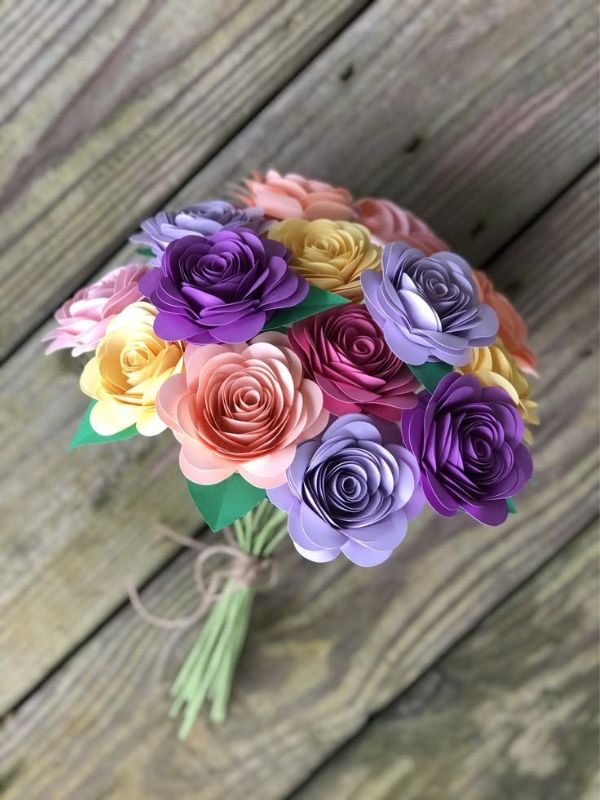
Your flower is nearly finished. Now you can decide whether it needs color, texture, or another decorative touch.
These details remain optional. A simple flower can look beautiful without additional decoration.
Add Subtle Petal Details
Choose a pencil or colored pencil slightly darker than the petal color.
Add a small amount of shading near the base of selected petals.
Move outward gently.
Keep the color light.
You can also draw a few fine lines from the base toward the tip.
Avoid marking every piece heavily.
Instead, add details to several petals throughout the layers.
This creates variation without making the flower appear busy.
For the center, small dots or short lines can create texture.
Use a contrasting shade if you want the center to stand out.
Inspect and Correct Small Problems
Now check every connection.
Look at the center.
Examine the petal bases.
Inspect the stem.
Check the leaves.
If you find a loose section, apply a small amount of adhesive.
Press the piece down carefully.
Allow it to dry.
Next, look for visible glue residue.
Remove any excess carefully once it has dried enough to lift safely.
Do not pull hard on the paper.
Finally, rotate the flower.
View the front.
Check the sides.
Look at the back.
A small adjustment at this stage can improve the overall appearance considerably.
When a store-bought gift feels too impersonal, How to Make Meaningful DIY Gifts for Friends When You Don’t Know What to Give Them That Actually Last offers thoughtful handmade alternatives.
Step Twelve: Display and Care for Your Paper Flower
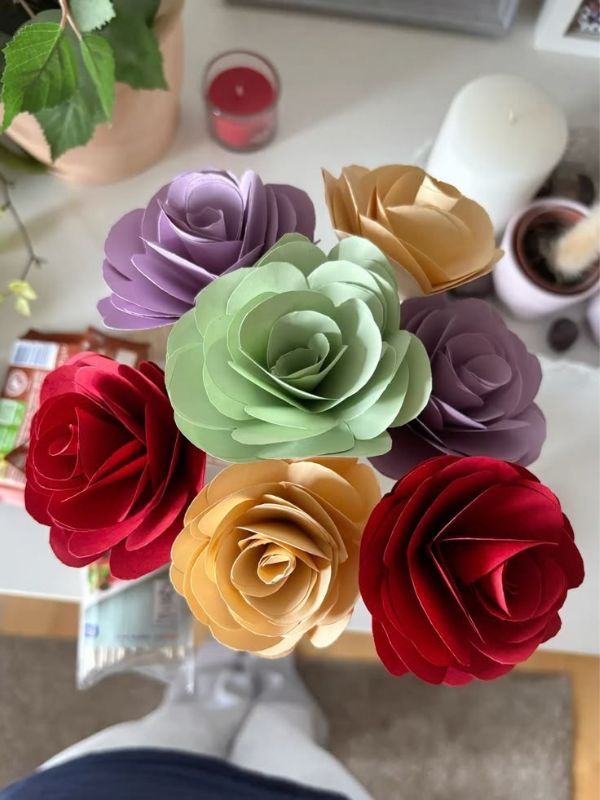
You have reached the final stage. Your flower now has its petals, center, stem, and leaves.
Before placing it somewhere permanent, decide what kind of display will suit the design.
A single bloom can decorate a desk or shelf. Several flowers can create a bouquet. Larger versions can become part of a wall arrangement.
Arrange the Finished Flower
For a vase, choose a container that supports the stem.
Place taller flowers toward the back when working with several blooms.
Add shorter pieces toward the front.
Rotate the arrangement until the flowers look balanced.
If you are making a bouquet, vary the heights.
Avoid placing every bloom at exactly the same level.
For a wall display, begin with the largest pieces.
Add smaller flowers around them.
Leave enough space for the individual shapes to remain visible.
You can also use the flowers for gift wrapping.
Attach one small bloom to ribbon or paper packaging.
The handmade detail can make a simple gift look more thoughtful.
Protect and Store the Flowers
Keep finished paper flowers away from water.
Moisture can weaken the paper and loosen adhesive.
Avoid placing heavy objects over the petals.
If you need to store the flowers, choose a box with enough space.
Large blooms need room around their edges.
Do not squeeze several flowers into a small container.
When a petal becomes slightly flat, reshape it gently.
Start with the outer layer.
Move toward the middle.
Restore the curves gradually.
With proper care, your handmade flowers can remain useful for decorations, gifts, school projects, parties, or future craft arrangements.
Got air-dry clay sitting around with no clear plan? Air Dry Clay Crafts for When You Have Clay but No Idea What to Make—For Keeps or Display gives you plenty of ways to put it to use.
Frequently Asked Questions About How to Make Paper Flowers Step by Step
What type of paper works best for paper flowers?
Medium-weight craft paper provides a good balance between flexibility and strength. Cardstock works well for larger blooms because it creates firmer petals. Tissue paper can produce delicate flowers, although it requires gentler handling.
For beginners, medium-weight paper usually offers the easiest experience because you can cut it comfortably while still shaping the petals without tearing them.
How many petals should one flower have?
The number depends on the size and fullness of your design. Around eight to twelve large petals can create a full outer layer for a medium flower. Smaller layers can use fewer pieces.
Instead of following one fixed number, arrange the petals before gluing. Add another piece when you see a large gap. Remove one when the arrangement looks overcrowded.
Can beginners learn how to make paper flowers without special equipment?
Absolutely. How to make paper flowers does not require a cutting machine. Scissors, paper, a pencil, glue, and a simple template can handle a beginner project.
Special cutting machines can save time when producing many identical flowers. However, manual cutting gives you useful practice with petal proportions and shaping.
How can I make paper flowers look more realistic?
Use several petal sizes rather than making every piece identical. Shape the outer petals more openly. Give the middle layer additional height. Keep the inner petals closer together.
Subtle color variation can also help. Add gentle shading near the petal bases. Avoid making every detail perfectly symmetrical because natural flowers rarely have completely identical shapes.
How do I stop my paper flowers from looking flat?
Shape the petals before attaching them. Curl the edges around a pencil. Cup the middle gently. Then, build the flower in layers.
The outer petals should remain more open. The middle pieces can rise slightly. Inner petals should create a compact center.
Storage also matters. Keep finished flowers away from heavy objects. Give them enough space to maintain their shape.
Conclusion
Once you understand how to make paper flowers, a plain sheet of paper becomes much more versatile. You can turn it into a decorative bloom without expensive equipment or complicated machinery.
The process begins with a simple template. From there, careful cutting creates the petals. Gentle shaping gives those pieces dimension. Layering builds fullness. A textured center completes the bloom. Finally, a stem and leaves turn the individual pieces into a flower you can display.
Do not worry if your first attempt looks slightly different from the picture in your mind. Handmade crafts become easier through practice. Each flower teaches you something about spacing, proportion, paper weight, shaping, and adhesive.
Eventually, you can change the petal design completely. Try pointed petals for a dramatic bloom. Use rounded pieces for a softer appearance. Experiment with different colors. Create tiny flowers for cards. Make oversized versions for parties or room decorations.
Most importantly, take your time with the shaping stage. That small amount of extra care can make a major difference.
Now you know how to make paper flowers from the first template to the final display. Gather your favorite paper, choose a color combination you love, and start with one simple bloom. Once that flower comes together, you can use the same techniques to create an entire handmade bouquet.