Looking for a colorful activity that can keep children busy while giving them something fun to create? Rainbow crafts for kids are a simple way to turn an ordinary afternoon into a creative session. With paper, glue, paint, cardboard, yarn, and a few other basic supplies, children can make bright rainbow projects without needing complicated instructions.
You also do not need a special craft room for these activities. A kitchen table, small desk, or clear space on the floor can become a temporary craft station. Many of the materials can already be found around the house. Even items that would normally go into the recycling bin can become useful parts of a rainbow project.
What makes rainbow crafts for kids even more enjoyable is the freedom they give children. A rainbow can be made with traditional colors, pastel shades, or any combination a child likes. It can become a wall decoration, greeting card, bookmark, paper plate, hanging decoration, or a playful character. There is no single correct way to make one.
These activities can also support learning while children are having fun. Kids can practice naming colors, cutting paper, following steps, sorting materials, and making creative decisions. Younger children can work on simple gluing and coloring tasks, while older kids can handle more detailed designs.
If you are ready to get started, the ideas below are simple enough for home crafting but detailed enough to keep children interested. They are also easy to adapt based on the supplies you have available.
For a homemade squishy ideas, check out DIY Squishy: How to Make a Homemade Squishy You’ll Want to Squeeze
How to make rainbow crafts at home with kids
1. Make a colorful paper plate rainbow
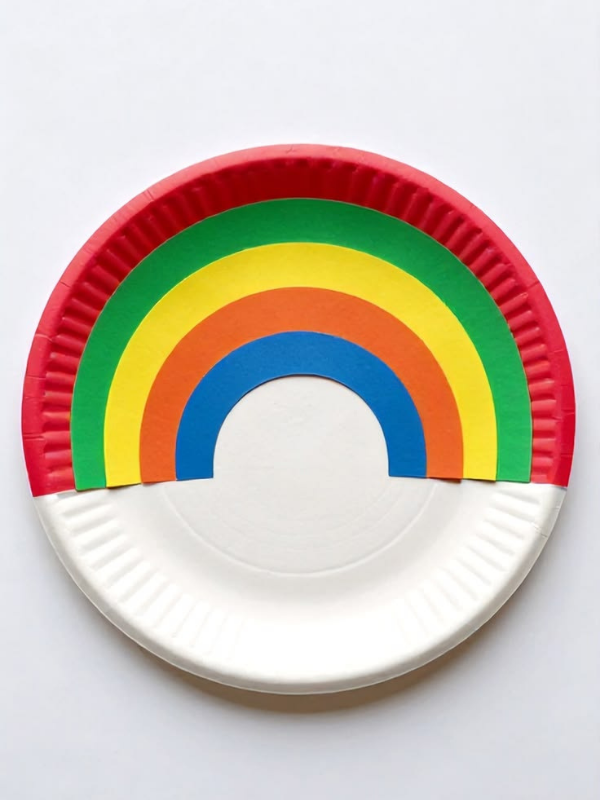
A paper plate is one of the easiest materials to turn into a rainbow. Its round shape already gives you a natural starting point for creating the curved design. This makes it a great choice when you want rainbow crafts for kids that do not require a complicated template.
The project can be as simple or detailed as you want. Younger children can help stick colored paper onto the plate, while older children can cut the pieces and arrange the colors themselves. You can also add cotton-ball clouds to give the rainbow a fluffy finish.
Before starting, cover your work surface with scrap paper or an old newspaper. Glue can become messy, especially when children are excited and want to add plenty of decorations.
Let children take their time with the arrangement. The rainbow does not have to be perfectly symmetrical. In fact, allowing children to make their own choices makes the finished craft more personal.
What you need
- One paper plate
- Colored construction paper
- White paper or cardstock
- Cotton balls
- Child-safe scissors
- Glue
- Pencil
- Crayons or markers
- Ruler, if needed
You can use the traditional rainbow colors, such as red, orange, yellow, green, blue, and purple. However, children can also use pink, turquoise, light blue, or other shades if they want a different look.
If you do not have a paper plate, a piece of cardboard can work just as well. A clean cereal box is also useful because it provides sturdy cardboard for the base.
How to make it
Start by placing the paper plate flat on the table. Draw a curved line across the plate to mark where you want the rainbow to begin. An adult can cut the plate in half if the child is too young to use scissors.
Next, cut several curved strips from colored construction paper. Try to make each strip slightly smaller than the one before it. This helps the colors fit together like the bands of a real rainbow.
Place all the strips on the plate before adding glue. This small step makes it easier to change the arrangement if something does not fit. It also lets children see how the finished rainbow will look.
Once the colors are arranged, begin gluing them to the plate. Work from the outside toward the inside. Apply a thin layer of glue instead of covering the entire plate with a large amount.
Press each strip gently onto the plate. Give it a few seconds to stick before moving to the next section.
When all the rainbow colors are attached, add cotton balls to both ends. These will become the clouds.
Children can then add their own details. They might draw raindrops, sunshine, birds, flowers, butterflies, stars, or even a little house beneath the rainbow.
Allow the finished craft to dry completely before moving it. If the paper feels loose in a few places, add a small amount of glue and press it down again.
Tips for making it with kids
Do not worry if the paper strips are not perfectly curved. Children are still learning how to control scissors and position materials. The uneven edges can make the craft look handmade and cheerful.
For younger children, prepare the strips before the activity begins. They can focus on choosing the colors and gluing them into place.
Older children can draw and cut their own rainbow strips. They can also experiment with different color combinations.
These rainbow crafts for kids can become more than a simple art activity when you let children decorate the background. Ask them what they think should be underneath the rainbow.
Looking for crafts that the preschoolers can also made this post 20 Easy Flower Activities for Preschoolers to Make and Learn got you covered.
2. Create a cotton ball rainbow collage
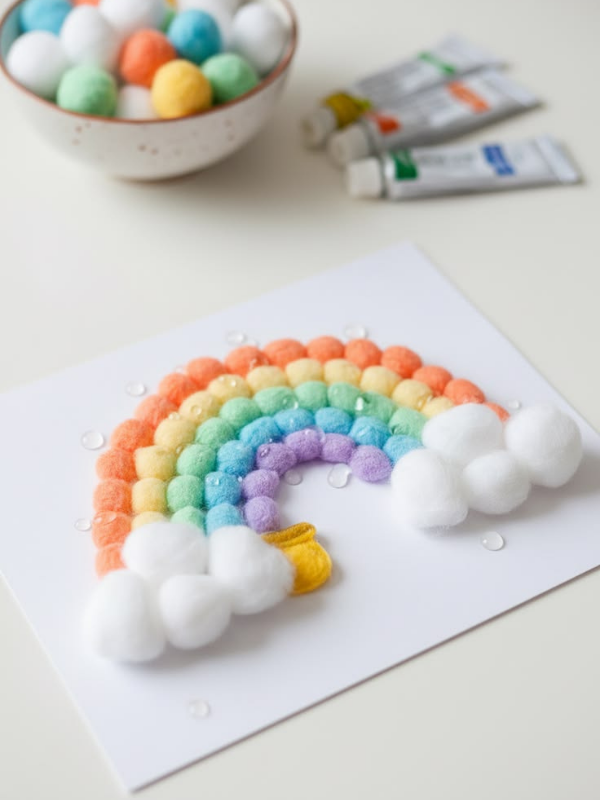
A cotton ball rainbow is soft, fluffy, and easy to customize. It is also one of the rainbow crafts for kids that works well for children who enjoy sticking and arranging materials.
Instead of making the entire rainbow from one material, this activity combines colored paper with soft cotton balls. The contrast gives the finished artwork more texture.
You can make the rainbow large enough to display on a wall or small enough to fit inside a notebook or scrapbook. The choice depends on how much space you have and how long you want the activity to last.
This project is also useful when you want a calm craft that does not involve painting. Children can concentrate on sorting colors and placing pieces without waiting for paint to dry.
What you need
- White cardstock
- Colored construction paper
- Cotton balls
- Glue
- Pencil
- Child-safe scissors
- Crayons or markers
- Optional stickers
Choose a thick piece of paper for the background. Cardstock is ideal because the glue and cotton balls can make ordinary paper curl.
You can use one large sheet for a group activity. Each child can create a section of the rainbow, or everyone can make a separate picture.
How to make it
Begin by drawing a large rainbow outline on the cardstock. Make the bands wide enough for children to decorate without struggling to stay inside the lines.
Cut the colored paper into small pieces. They do not have to be perfect strips. Small squares, rectangles, and uneven pieces can all work.
Sort the paper pieces by color. This gives children another activity before the actual gluing begins.
Ask the child to start with the outermost section of the rainbow. Apply glue to a small area.
Place the matching colored paper pieces onto the glue. Encourage the child to leave very little space between the pieces, but do not worry about covering every tiny gap.
Continue working through the different sections.
Once the colored bands are finished, add glue to the areas at both ends of the rainbow. Press cotton balls onto the glue to create clouds.
You can make the clouds thick and fluffy by layering the cotton balls.
After the glue dries, use markers to add details around the picture. Children might draw a sun, birds, flowers, trees, or raindrops.
Tips for making it with kids
Give younger children larger paper pieces. Tiny pieces can be harder for small hands to pick up and place.
If your child enjoys sensory activities, let them gently touch and separate the cotton balls before using them. This can make the craft more interactive.
You can also turn the activity into a color lesson. Ask children to find all the red pieces before moving to orange. Continue until every section is complete.
These rainbow crafts for kids can also be made with tissue paper if you do not have construction paper.
Bookmark these posts Rhinestone and Bedazzle Crafts You Can Make at Home for Stylish DIY Decor and Gifts and How to Make Easy Popsicle Stick Crafts for Kids: 15 Fun DIY Ideas
3. Make a rainbow handprint keepsake
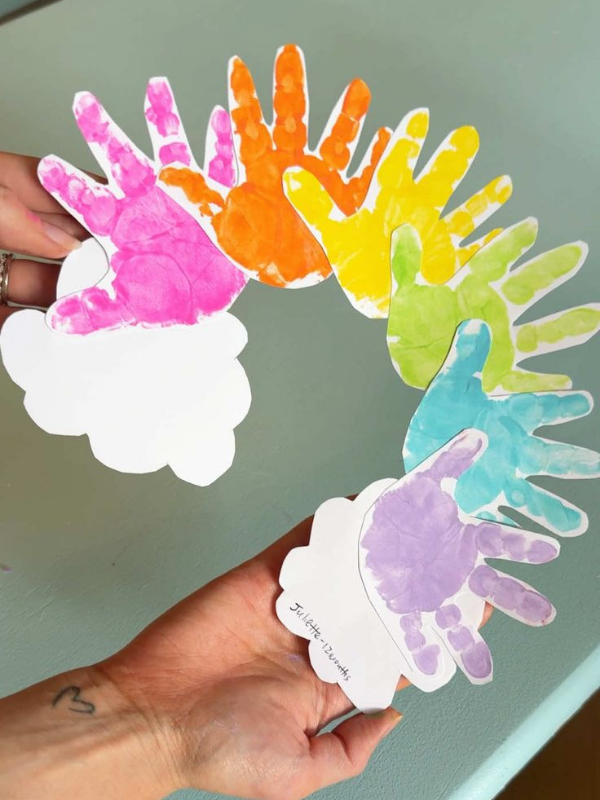
Handprint art is a simple way to turn craft time into a keepsake. A rainbow handprint project allows children to use their hands as part of the artwork while creating something that can be saved.
This idea works especially well for younger children because they can participate without needing advanced cutting skills. They can also enjoy seeing their colorful handprints appear on the page.
Parents can write the child’s name and date on the finished artwork. If the child makes a new one every year, the collection can show how their creativity changes over time.
Among rainbow crafts for kids, handprint projects are also easy to personalize. Children can add a message, drawing, or extra decorations around the handprints.
What you need
- White cardstock
- Washable, child-friendly paint
- Paintbrushes
- Small containers or paper plates
- Water
- Paper towels
- Marker
- Optional stickers
Use washable paint whenever possible. Keep paper towels and water nearby so you can clean hands quickly.
You can choose six rainbow colors or use fewer colors if that is what you have available.
How to make it
Place the cardstock on a protected table.
Choose the first paint color and use a paintbrush to apply a thin layer to the child’s palm and fingers.
Help the child press their hand gently onto the paper. Hold it still for a moment, then lift it straight up.
Clean the hand before moving to the next color.
Repeat the process with the remaining colors.
You can arrange the handprints in an arch to create the appearance of a rainbow. Another option is to place the prints in a row and draw a rainbow above them.
Let the paint dry before adding details.
Once everything is dry, children can use markers to add clouds, sunshine, flowers, hearts, or their names.
If you want to keep the project as a memory, write the date on the back.
Tips for making it with kids
Do not apply too much paint. A thick layer can cause the handprint to become blurry.
You may also want to make a test print on scrap paper first. This helps you see how much paint works best.
Young children may not want paint on their hands at first. If that happens, let them touch the paintbrush or watch a parent make the first print.
Keep the activity relaxed. The goal is to enjoy the process rather than create a perfect print.
These rainbow crafts for kids can become wonderful family keepsakes when you add the child’s age, name, and a short note about the day.
If your child enjoys making crafts that could become useful products, check out How to Make Crafts: 20 Easy Crafts to Sell and Make Profits From Home If You Need Extra Income for more handmade project inspiration.
4. Make a rainbow yarn art project
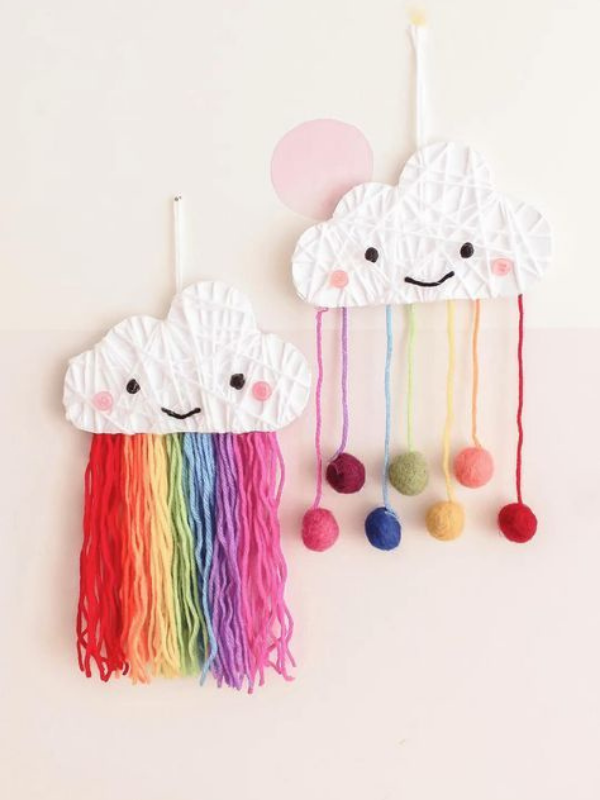
Yarn gives rainbow artwork a different texture from paper or paint. It can create a raised, colorful design that children can touch and explore.
This is one of the rainbow crafts for kids that works especially well for children who enjoy working with different materials. The activity also gives them practice with placing, holding, and arranging yarn.
You can make the rainbow on cardboard, cardstock, or another sturdy surface. Using cardboard is useful because it can support the weight of several layers of yarn.
The finished project can be displayed on a shelf or hung on a wall.
What you need
- Cardboard
- Red yarn
- Orange yarn
- Yellow yarn
- Green yarn
- Blue yarn
- Purple yarn
- Glue
- Scissors
- Pencil
- Cotton balls
If you do not have every rainbow color, use the yarn you have. The project can still look beautiful with three or four colors.
How to make it
Draw a large rainbow shape on a piece of cardboard.
You can make the outline yourself or allow an older child to draw it.
Cut several lengths of yarn in the first color. They should be long enough to cover the first curved section.
Apply glue to a small part of the cardboard.
Lay the yarn across the glue. Try to keep the strands close together so the cardboard does not show through too much.
Continue until the first section is covered.
Move to the next color and repeat the process.
Take your time around the curves. If a piece of yarn is too long, trim it instead of trying to force it into place.
When all the rainbow sections are finished, glue cotton balls onto both ends to create clouds.
Leave the project flat until the glue has dried.
Tips for making it with kids
Young children may find it difficult to cut yarn. An adult can prepare the pieces ahead of time.
Older children can measure and cut their own yarn with supervision.
Use small amounts of glue at a time. Too much glue can make the yarn slippery and messy.
If you want to make the activity more interesting, let children create patterns inside each color band. They could use short yarn pieces instead of long strands.
These rainbow crafts for kids are also a good opportunity to discuss texture. Ask children how yarn feels compared with paper, cotton, or cardboard.
Check out this Coil Clay Ideas: 13 Projects You Can Make Without a Pottery Wheel
5. Make a rainbow popsicle stick decoration
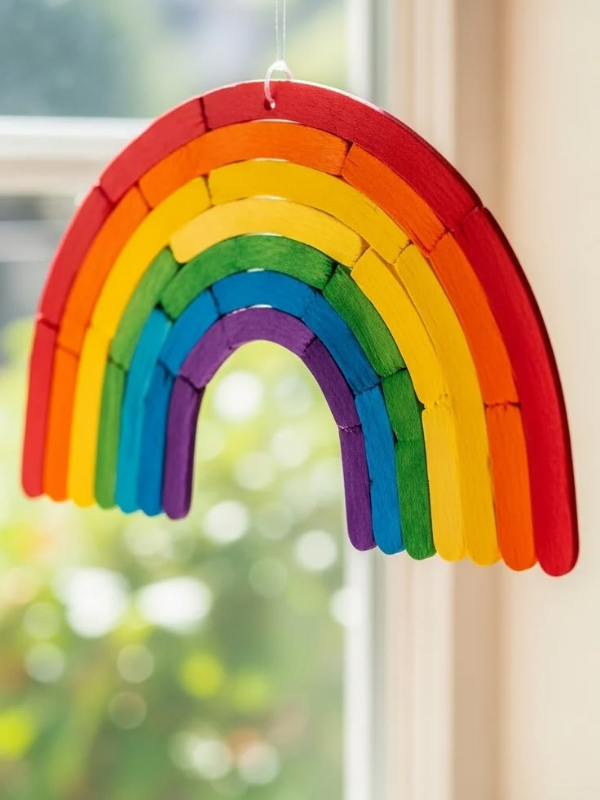
Popsicle sticks are useful for creating sturdy crafts. They can be painted in rainbow colors and arranged into a simple decoration that children can display.
This project is slightly more involved than a basic paper craft, but it is still manageable at home. Older children can do more of the preparation, while younger children can help choose colors and decorate the finished piece.
The sticks can be arranged in a curved pattern or used to create a rainbow fan. You can also add clouds to complete the design.
What you need
- Craft sticks or clean popsicle sticks
- Washable or child-friendly paint
- Paintbrushes
- Cardboard
- Glue
- Cotton balls
- Pencil
- Scissors
- Markers
If you are using recycled popsicle sticks, make sure they are clean and dry.
Cardboard from an empty cereal box can work well as a backing material.
How to make it
Start by painting the craft sticks in different rainbow colors.
You can paint several sticks in each color if you want a wider rainbow.
Place the painted sticks on a protected surface and let them dry.
While they are drying, cut a curved rainbow shape from cardboard.
Arrange the sticks over the cardboard before gluing them. This lets you decide how you want the final rainbow to look.
Once you are happy with the arrangement, glue the sticks onto the cardboard.
Add cotton balls to both ends.
You can then decorate the cardboard background with markers.
Children can add a sun, clouds, birds, flowers, or their favorite characters.
Allow the entire craft to dry completely before displaying it.
Tips for making it with kids
If your child is young, an adult can handle the cutting and glue while the child focuses on painting.
Painting the sticks can become an activity by itself. Give children several colors and let them experiment with light and dark shades.
You can also make pastel rainbow crafts for kids by mixing small amounts of white paint into the main colors.
For a classroom activity, prepare the sticks before the children arrive. This allows them to spend more time creating and less time waiting for paint to dry.
Start with Hand Crafts for Seniors With Limited Mobility That Are Creative, Practical, and Worth Making for gentle project ideas that pair well with a slower, more relaxed crafting pace.
6. Create a rainbow torn-paper collage
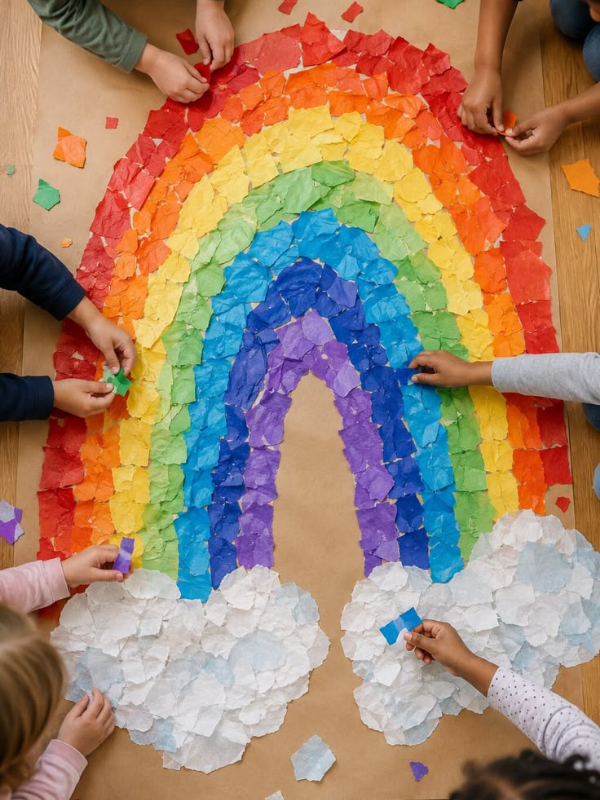
Torn-paper collages are simple, inexpensive, and very flexible. Instead of cutting every piece with scissors, children tear the paper with their hands and use the pieces to fill a rainbow shape.
This makes the project especially suitable for younger children who are still developing their cutting skills.
The finished craft has an uneven texture that makes it look different from a perfectly cut rainbow. Each child’s project will naturally have its own appearance.
It is also one of the rainbow crafts for kids that requires very few supplies.
What you need
- White cardstock
- Colored construction paper
- Glue
- Pencil
- Crayons or markers
- Cotton balls
You can use old colored magazines if you do not have construction paper. Just make sure the paper is clean and safe for children to handle.
How to make it
Draw a large rainbow on the cardstock.
Show the child how to tear the colored paper into small pieces.
The pieces can be different shapes and sizes. There is no need to make them identical.
Sort the pieces by color.
Apply glue to the first rainbow section.
Let the child place pieces onto the glue.
Continue until the first section is covered.
Move to the next color.
As the child works, encourage them to overlap a few pieces if needed. This can help cover gaps.
Once all sections are complete, add cotton balls to create clouds.
Use crayons or markers to decorate the background.
Tips for making it with kids
Tearing paper can be easier for young children than using scissors.
If the child struggles to tear the paper, make a small starting tear and let them continue from there.
Do not insist that every piece stay inside the outline. Small overlaps can make the artwork more interesting.
You can also use this activity to practice color names. Ask the child to find the yellow pieces, then the green pieces, and continue through the rainbow.
These rainbow crafts for kids are also a great way to use leftover paper from previous craft projects.
This Crafts for Seniors in Assisted Living When the Days Feel Long and the Usual Activities Get Old offers more calm, low pressure project ideas worth exploring.
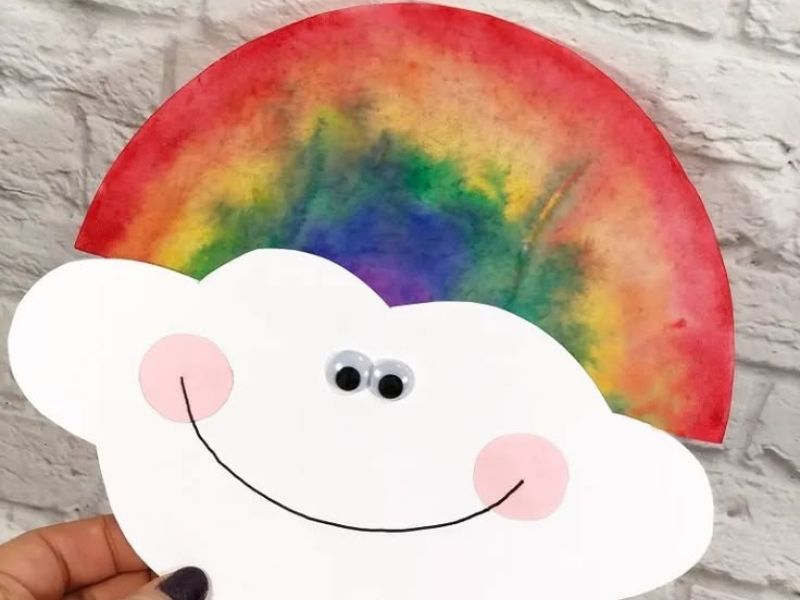
7. Make a rainbow coffee filter craft
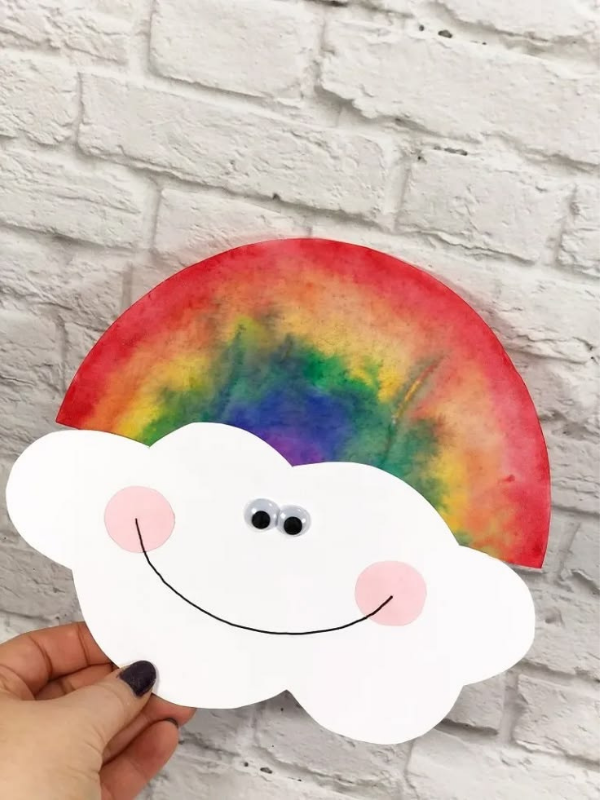
Coffee filters can create soft, blended colors that look beautiful when they dry. This project introduces children to a simple color experiment while keeping the craft easy to complete.
The colors can spread into one another when water is added. This gives children a chance to observe how different colors behave.
Because the filter becomes delicate when wet, children may need help while moving it.
What you need
- White coffee filters
- Washable markers
- Water
- Small paintbrush
- Paper towel
- Cardstock
- Glue
- Scissors
A shallow tray or plate can also help keep the workspace clean.
How to make it
Place a coffee filter on a piece of scrap paper.
Use washable markers to draw lines or patches of different colors across the filter.
Do not worry about making perfect lines. In fact, loose marks often create more interesting results.
Dip a small paintbrush into water.
Touch the wet brush to the marker lines.
Watch as the colors begin to spread.
Continue adding small amounts of water until you like the effect.
Do not soak the filter. Too much water can make it difficult to handle.
Place the filter on a paper towel and allow it to dry completely.
Once dry, shape it into a rainbow or cut it into a curved design.
Glue it onto cardstock.
Add cotton-ball clouds if you like.
Tips for making it with kids
Let children observe the colors as they spread instead of rushing to the next step.
You can ask questions such as, “What happens when the blue touches the yellow?” This turns the activity into a simple science conversation.
Use washable markers rather than permanent markers.
If you are making several rainbow crafts for kids, give each child their own coffee filter so they can experiment with different color combinations.
Younger crafters often enjoy a simplified version of this project, similar in spirit to Clay Crafts for Kindergarten Kids That Are Easy, Fun, and Great for Little Hands.
8. Make a rainbow paper chain
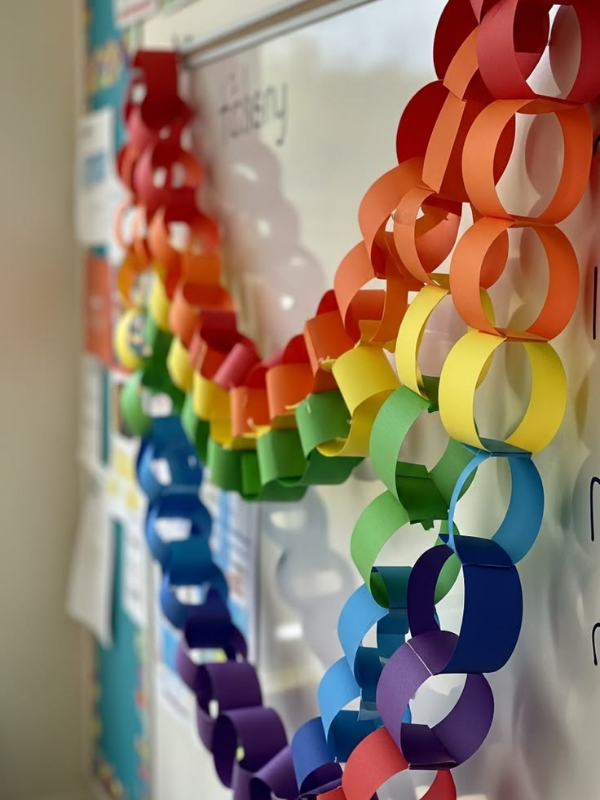
A rainbow paper chain can become both a craft and a decoration. It is especially useful when you want something children can continue making for a longer period.
Each link is simple to create, but connecting many links can keep kids occupied.
You can use the traditional rainbow colors or create repeating patterns. For example, children might make a red, yellow, and blue pattern throughout the chain.
The finished chain can be hung in a bedroom, playroom, classroom, or party area.
What you need
- Colored construction paper
- Ruler
- Pencil
- Child-safe scissors
- Glue or tape
- Markers
- Optional stickers
Try to keep the paper strips similar in width.
They do not need to be exactly the same length, but consistent strips make the chain easier to assemble.
How to make it
Measure and cut several strips of colored paper.
Place the first strip around your fingers or a small object to create a loop.
Secure the ends with glue or tape.
Take the next strip and pass it through the first loop.
Create another loop and secure it.
Continue connecting the strips.
Follow a rainbow color order if you want the chain to look like a rainbow.
Alternatively, let children create their own patterns.
Once the chain is long enough, hang it using removable tape or another suitable method.
Tips for making it with kids
Younger children may need help holding the strips while the glue dries.
Tape can be easier than glue if you want the project to move quickly.
Older children can measure and cut their own strips.
Turn the activity into a counting game by asking children to count the number of links they have made.
You can also challenge them to create a repeating color pattern.
This makes rainbow crafts for kids useful for practicing early math skills as well as creativity.
9. Create a rainbow bookmark
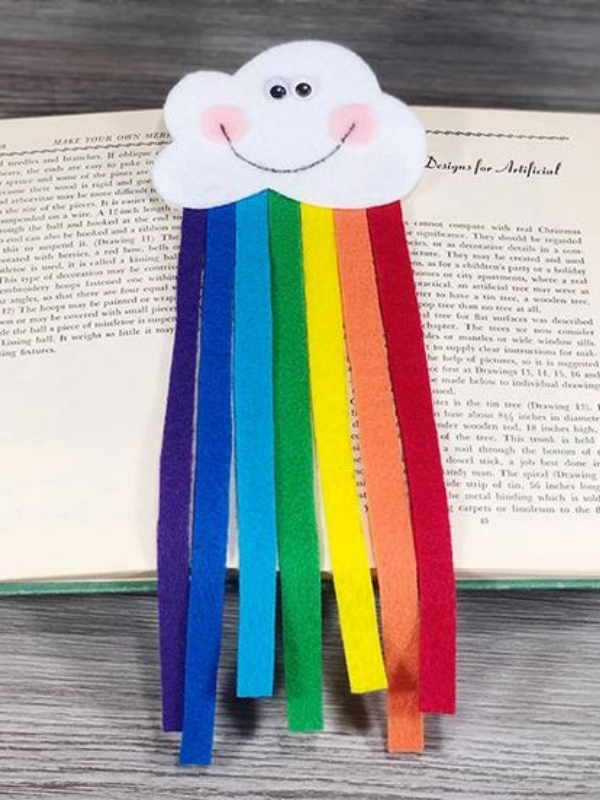
A rainbow bookmark is a practical craft that children can use after finishing the activity. It is small, simple, and easy to personalize.
This makes it a good project for children who enjoy reading or who like making things they can use.
The basic design only requires cardstock and colored paper. Children can then add their own drawings, stickers, names, or encouraging words.
What you need
- Cardstock
- Colored construction paper
- Glue
- Scissors
- Pencil
- Markers
- Stickers
- Ribbon or yarn
Choose sturdy cardstock so the bookmark will not bend easily.
How to make it
Cut a long rectangle from cardstock.
The bookmark can be narrow or wide, depending on what the child prefers.
Cut small strips of colored paper.
Arrange the strips into a curved rainbow shape.
You can glue them directly onto the bookmark or cut a rainbow shape first and attach it to the cardstock.
Add cotton-ball clouds if you want a softer design.
Children can then decorate the rest of the bookmark.
They might write their name, draw stars, or add stickers.
If you want to add ribbon, make a small hole near the top.
Thread a piece of ribbon or yarn through the hole and tie it securely.
Tips for making it with kids
Let children decide whether they want a traditional rainbow or a completely different color combination.
You can also make several bookmarks at once and give them to family members or friends.
For older children, encourage them to write a short quote or message on the bookmark.
These rainbow crafts for kids can be especially rewarding because the finished item becomes part of another activity: reading.
Save for later What Can You Make With a Lump of Clay? 11 Easy Clay Ideas Worth Trying
10. Make a rainbow paper crown
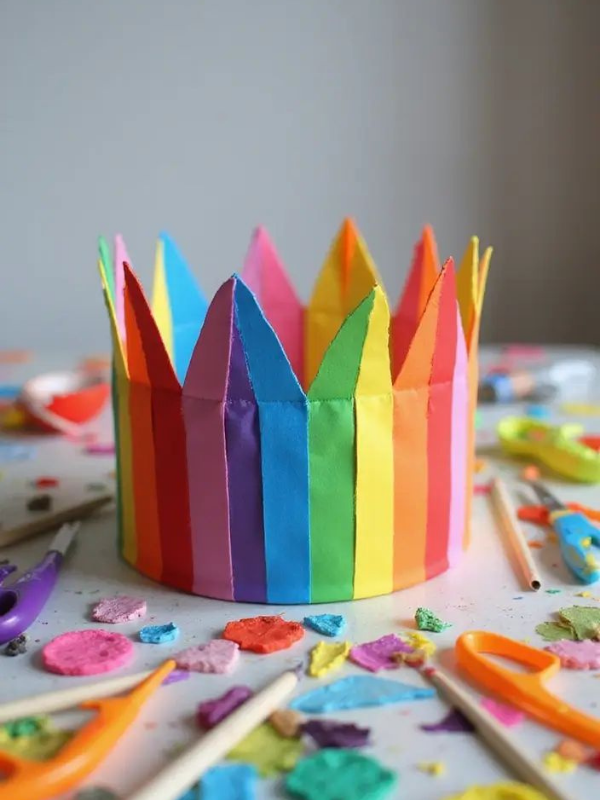
A rainbow paper crown is a fun way to finish a craft session because children can wear the finished project.
It combines coloring, cutting, gluing, and pretend play in one activity. Children can make a simple rainbow crown or turn it into a magical crown filled with stars, clouds, hearts, and other decorations.
Because the crown needs to fit around the child’s head, an adult may need to help with measuring and securing the final piece.
What you need
- Cardstock
- Colored construction paper
- Scissors
- Glue
- Pencil
- Markers
- Stickers
- Tape
- Optional cotton balls
Cardstock is better than thin paper because it makes the crown stronger.
You can also use leftover cardboard if it is flexible enough to fit comfortably.
How to make it
Start by measuring a strip of cardstock around the child’s head.
Do not make it tight. Leave enough space for comfortable movement.
Cut the strip and place it aside.
Next, create several small rainbow shapes from colored paper.
You can cut individual curved strips or make one complete rainbow shape.
Arrange the rainbow pieces across the crown band.
Once the child likes the arrangement, glue them into place.
Add clouds using cotton balls.
You can also add stars, hearts, flowers, or stickers.
Use markers to add the child’s name or a special message.
Allow the glue to dry before wearing the crown.
Finally, wrap the crown around the child’s head and secure the ends with tape.
Check that it is comfortable and not too tight.
Tips for making it with kids
Let children take the lead when decorating the crown.
They might want to use unusual colors or add decorations that do not traditionally belong on a rainbow. That is completely fine.
If younger children are involved, prepare the crown band before starting.
Older children can help measure, cut, and arrange the decorations.
You can turn the finished craft into pretend play. Children can imagine that their rainbow crown belongs to a king, queen, fairy, explorer, or completely new character.
This is one of the rainbow crafts for kids that can continue providing entertainment even after the glue has dried.
Check out how to Air Dry Clay Crafts for When You Have Clay but No Idea What to Make—For Keeps or Display
Easy ways to make rainbow crafts more enjoyable
Let children choose their materials
Children are more likely to become interested when they have some control over the project.
Instead of giving them every instruction, offer a few choices.
Ask whether they want paper, yarn, cotton balls, or paint. Let them choose the background color. Give them the option of adding extra decorations.
The final craft does not have to look exactly like the example.
In fact, rainbow crafts for kids are more meaningful when children can make decisions during the process.
Turn crafting into a learning activity
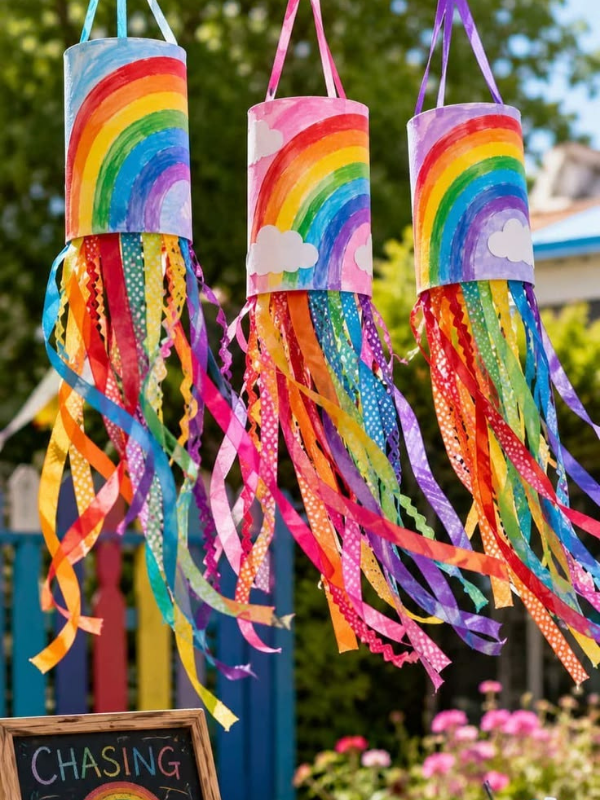
You can introduce learning naturally while the children work.
Ask them to name the colors.
Ask them to count paper pieces.
Let them sort supplies.
Ask them to identify which strip is longer or shorter.
Older children can learn about patterns by arranging colors in repeating sequences.
This makes rainbow crafts for kids useful for both creative play and early learning.
Use recycled materials
You can make many rainbow projects without buying new supplies.
Clean cardboard boxes can become craft bases.
Old magazines can provide colorful paper.
Paper bags can become puppets.
Unused wrapping paper can become part of a collage.
Clean cardboard tubes can also be painted and decorated.
Using recycled materials teaches children that everyday objects can have another purpose.
It can also make craft time cheaper.
Create a rainbow craft station
If you plan to make several projects, organize the materials before the children begin.
Place paper in one area.
Put glue and scissors in another.
Keep paint supplies together.
Place cotton balls and yarn in separate containers.
This makes it easier for children to find what they need.
It also reduces the amount of time spent searching for supplies.
A simple craft station can make rainbow crafts for kids much easier to manage.
Safety tips for rainbow crafts for kids
Always choose materials that match the child’s age.
Young children should be supervised closely, especially when using scissors, glue, paint, or small craft pieces.
Avoid small objects that could become choking hazards for toddlers.
Use child-friendly, washable materials whenever possible.
Protect tables and floors before using paint or glue.
Teach children not to put craft supplies in their mouths.
If an adult needs to cut cardboard or another difficult material, handle that part before giving the project to the child.
It is also helpful to wash hands after crafting, especially after using paint or glue.
The aim is to make rainbow crafts for kids enjoyable and safe from beginning to end.
How to display finished rainbow crafts
Do not put the finished artwork away immediately.
Children often enjoy seeing their creations displayed.
You can create a small art wall using removable tape or clips.
Bookmarks can go into the child’s favorite books.
Paper chains can become temporary room decorations.
Crowns can be used during pretend play.
Handprint artwork can go into a scrapbook.
You can also take a photo of the finished craft before storing it.
Creating a small display gives children a sense of accomplishment. It shows them that their creative work is worth celebrating.
Frequently Asked Questions About Rainbow Crafts For Kids
1. What are the easiest rainbow crafts for kids?
Some of the easiest rainbow crafts for kids include paper plate rainbows, torn-paper collages, cotton ball rainbows, bookmarks, and paper chains. These projects use simple materials and can be adapted for different ages.
2. What supplies do I need for rainbow crafts for kids?
Basic supplies include colored paper, cardstock, glue, scissors, crayons, markers, washable paint, cotton balls, and cardboard. You can also use yarn, craft sticks, tissue paper, coffee filters, stickers, and recycled household materials.
3. Can toddlers make rainbow crafts?
Yes. Toddlers can enjoy simple rainbow crafts for kids when an adult prepares the more difficult parts. Tearing paper, coloring, placing stickers, and gluing larger pieces are good options. Always supervise young children and keep small craft materials away from them.
4. How can I make rainbow crafts educational?
Rainbow crafts for kids can teach colors, counting, sorting, patterns, shapes, and simple science concepts. Ask children to name colors, count materials, create repeating patterns, or observe how colors spread when using a coffee filter and water.
5. Do rainbow crafts have to use traditional rainbow colors?
No. Children can use any colors they like. Traditional rainbow colors can help with color recognition, but allowing children to experiment with different shades encourages creativity and personal expression.
Conclusion
Making colorful projects at home does not have to be complicated. With a few basic supplies and some creativity, children can turn ordinary materials into cheerful artwork.
The ten ideas in this guide give you plenty of ways to enjoy rainbow crafts for kids without needing a long list of complicated projects. From paper plate rainbows and cotton-ball clouds to yarn artwork, bookmarks, paper chains, and wearable crowns, each activity can be adapted to suit different ages and skill levels.
The best part is that children do not need to make perfect crafts. Give them room to choose colors, arrange materials, add decorations, and create something that feels like their own.
You can also use these activities as opportunities for learning. Talk about colors while children work. Practice counting the pieces they use. Create patterns together. Ask questions about what they see. Even a simple craft can become a useful learning experience when children are encouraged to explore.
Remember to keep safety in mind, especially when younger children are using scissors, glue, paint, or small materials. Prepare the difficult parts when necessary and let children focus on the creative steps they can manage.
Most importantly, enjoy the process together. Rainbow crafts for kids are not only about the finished artwork. They are also about giving children time to create, experiment, learn, and make memories at home.