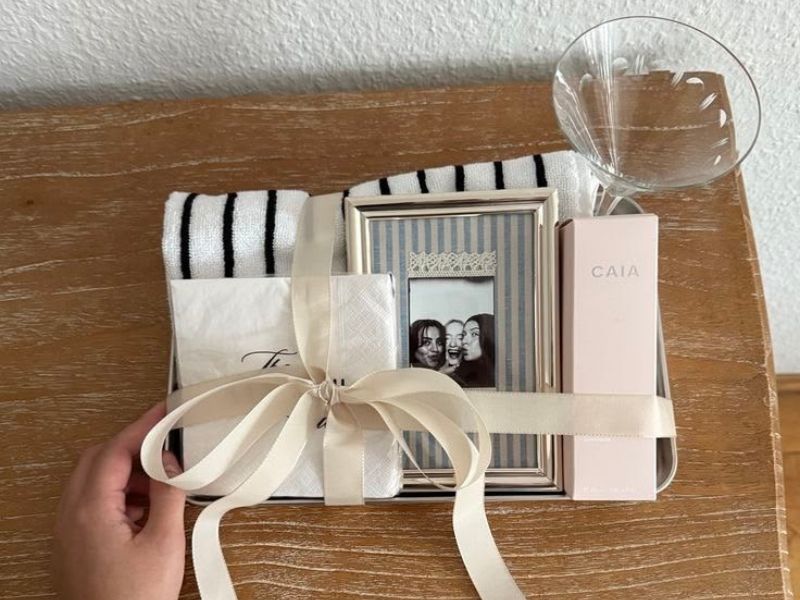
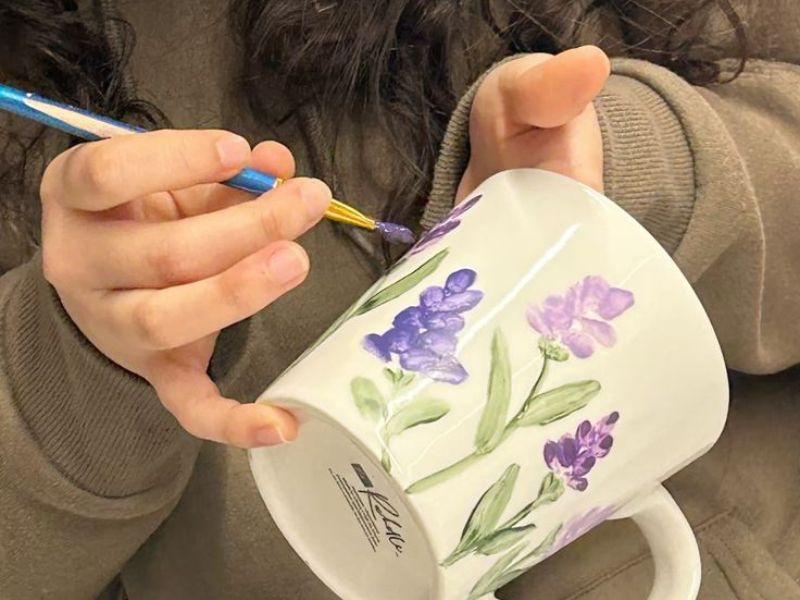
Making meaningful presents does not have to mean spending a lot of money. In fact, handmade gifts on a budget can feel more personal because they give you the chance to choose colors, messages, decorations, and little details that suit the person receiving them.
Even better, many projects can be made with inexpensive craft supplies, recycled materials, or items you already have at home. Therefore, you do not need an expensive craft room or a long shopping list before getting started.
Whether you are preparing a birthday present, Christmas gift, Mother’s Day surprise, teacher appreciation gift, friendship present, or simple thank-you gift, a handmade project can work beautifully. Moreover, these projects can be adjusted for different ages and skill levels. You can keep the design simple if you are a beginner, or add extra decorations when you want something more detailed.
The key is to focus on the process rather than the price. With some creativity, patience, and a few basic supplies, you can create useful and attractive presents without stretching your budget. So, if you want handmade gifts on a budget that still look thoughtful and special, the following step-by-step projects are a great place to begin.
Turn Bible storytelling into hands-on learning with Daniel and the Lion’s Den Craft: An Easy Bible Activity That Helps Kids Remember the Story.
How to Make Handmade Gifts on a Budget: Simple Ideas Anyone Can Make
1. Make a Personalized Photo Frame
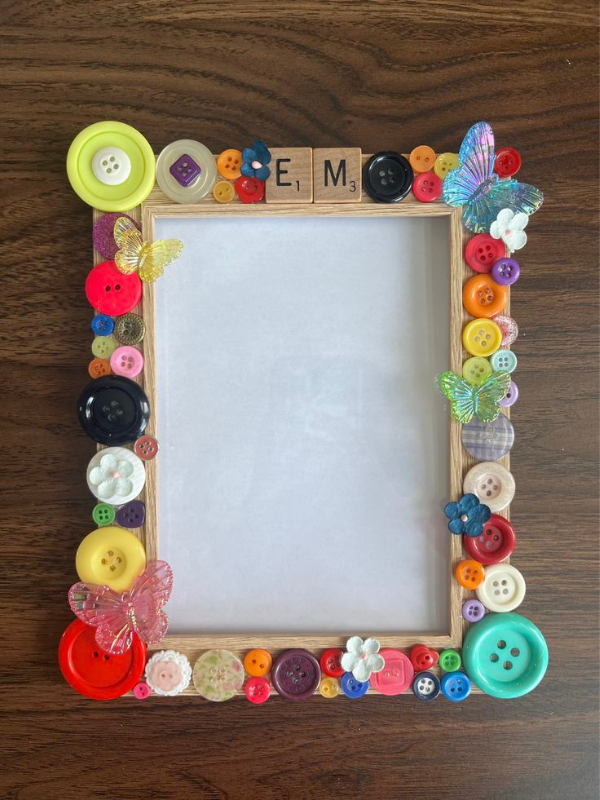
A personalized photo frame is a simple present because you can create it around a favorite photograph, memory, or special occasion. It also gives you plenty of room to use inexpensive decorations while keeping the finished gift meaningful.
Supplies You Will Need
- One plain cardboard sheet or inexpensive wooden frame
- A printed photograph
- Scissors
- Pencil
- Ruler
- Glue
- Colored paper
- Markers or paint
- Small ribbons
- Buttons, beads, or paper decorations
- Clear tape
- Optional stickers
Save for later this
- What Can I Embroider as a Gift? Easy Personalized Embroidery Ideas for Every Occasion
- 13 Polymer Clay Crafts That Are Actually Worth Making for Gifts, Decor, and More
How to Make It
Step 1: Measure the Frame
First, decide how large you want your frame to be. If you are using cardboard, place the photograph in the center and lightly mark around it with a pencil.
Leave an equal border around the photograph. A border of about 3–5 cm works well for a simple design.
Next, draw a larger rectangle around the photograph. This larger shape will become the outer edge of the frame.
Step 2: Cut the Cardboard
Carefully cut out the outer rectangle. Then, cut out the smaller rectangle in the middle where the photograph will sit.
If you are helping a child make the frame, an adult should handle any sharp cutting tools.
Afterward, check the edges. If they look uneven, trim them carefully so the frame has a cleaner appearance.
Step 3: Decorate the Border
Now you can decorate the frame. Cover the cardboard with colored paper, paint it, or draw simple patterns directly onto the surface.
For example, you could create hearts for a friendship gift, flowers for a Mother’s Day present, or stars for a birthday gift.
However, avoid covering the entire frame with bulky decorations because the photograph should remain the main focus.
Step 4: Add the Photograph
Place the photograph behind the opening and secure it with small pieces of tape.
Make sure the picture is straight before attaching it permanently.
If the frame will stand on a table, attach a folded piece of cardboard to the back as a support. Alternatively, add a loop of ribbon if you want it to hang on a wall.
Step 5: Add a Personal Message
Finally, write a short message on the frame.
You could add the person’s name, the date of a special memory, or a simple phrase such as “Best Memories.”
This small detail can make inexpensive materials feel much more personal.
Finishing Tips
Keep the decorations balanced rather than adding too many pieces. Also, choose colors that complement the photograph. As a result, the frame will look intentional instead of crowded.
This is one of the easiest handmade gifts on a budget because you can change the size, colors, and decorations without needing expensive materials.
Turn little handprints into a playful Halloween keepsake with How to Make Easy Spider Handprint Crafts for Kids Using Simple Supplies.
2. Create a Homemade Memory Jar
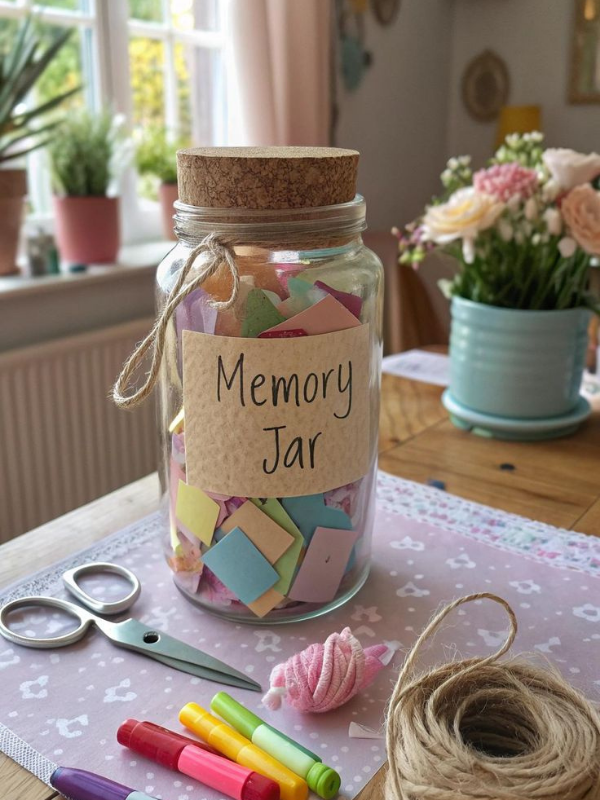
A memory jar is a thoughtful gift that allows someone to collect positive messages, memories, compliments, or reasons why they are appreciated.
Supplies You Will Need
- One clean glass jar or plastic container
- Small pieces of paper
- Pen or marker
- Ribbon
- Glue
- Colored paper
- Scissors
- Stickers
- Optional beads or small decorations
How to Make It
Step 1: Clean the Jar
Wash the jar thoroughly and remove any old labels.
Dry the inside and outside completely before decorating it.
If you are using a food jar, check that there are no sharp edges around the opening.
Step 2: Prepare the Notes
Cut several pieces of paper into small rectangles.
You can use one color for all the notes or choose several colors. For a birthday gift, bright colors can work well, while softer colors may suit a more sentimental present.
Step 3: Write the Messages
Write one message on each paper.
These messages could include favorite memories, kind compliments, encouraging words, funny moments, or simple reasons you appreciate the person.
Try to make every note different. That way, opening the jar becomes more interesting.
Step 4: Fold the Notes
Fold each message once or twice so that the writing cannot immediately be seen.
Place all the folded notes inside the jar.
If you are making a larger gift, you can prepare 30, 50, or even 100 notes.
Step 5: Decorate the Jar
Wrap ribbon around the lid or neck of the jar.
Next, create a small paper label. Write something like “Open When You Need a Smile” or “Our Favorite Memories.”
Attach the label with glue or ribbon.
Step 6: Add a Final Detail
Place a few paper hearts, stars, or other lightweight decorations around the outside.
Do not put loose decorations inside the jar if they might cover the messages.
Finishing Tips
The strongest part of this present is the writing, so spend time making each message genuine.
You can also create themed versions. For example, one jar could contain encouragement messages, while another could contain funny memories.
Because the main supplies are inexpensive, this project is especially useful when you want handmade gifts on a budget that feel highly personal.
Check out this 11 Farm Animal Crafts Kids Can Make to Build Their Own Little Barnyard
3. Make a Decorated Bookmark Set
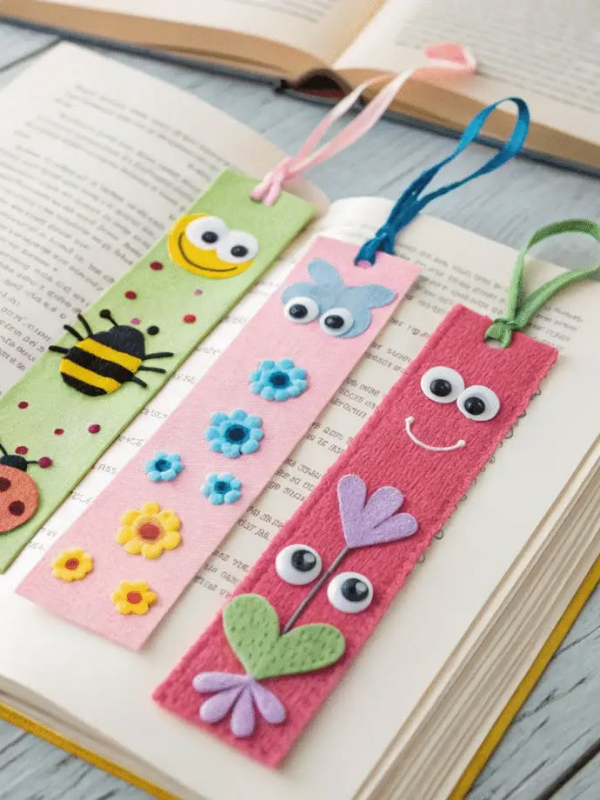
Bookmarks are useful, quick to make, and easy to personalize for someone who enjoys reading.
Supplies You Will Need
- Thick paper or thin cardboard
- Ruler
- Pencil
- Scissors
- Colored markers
- Colored paper
- Glue
- Hole punch
- Ribbon or yarn
- Optional stickers
How to Make It
Step 1: Cut the Bookmark
Measure a rectangle about 5 cm wide and 15–20 cm long.
Mark the measurements on your cardstock and cut along the lines.
You can make the bookmark shorter or longer depending on the size of the books the recipient usually reads.
Step 2: Create the Background
Cover the bookmark with colored paper or decorate the surface with markers.
For a cleaner look, choose one main color and add one or two complementary colors.
You could also create a simple pattern using dots, stripes, flowers, stars, or geometric shapes.
Step 3: Add a Message
Write a short quote, name, encouragement, or personal message on the bookmark.
Keep the lettering large enough to read easily.
If you prefer a minimalist design, write the recipient’s name in the center and add a small border.
Step 4: Strengthen the Bookmark
If the paper feels thin, glue another piece of cardstock to the back.
Press the two layers together and allow them to dry completely.
This makes the bookmark stronger and less likely to bend.
Step 5: Add a Tassel
Punch one hole near the top.
Thread a small piece of ribbon or yarn through the hole and tie it securely.
You can use several strands if you want a fuller tassel.
Step 6: Make a Small Set
Instead of making only one bookmark, create three or four with different designs.
Place them together with a ribbon.
This makes a small handmade present feel more complete.
Finishing Tips
Avoid adding thick decorations that could damage book pages.
Instead, focus on flat designs and durable paper.
A bookmark set is another practical example of handmade gifts on a budget, especially when you already have cardstock, markers, and ribbon at home.
Bring some seasonal fun to craft time with 20 Easy Apple Crafts for Kids to Make at Home.
4. Make a Personalized Coupon Book

A homemade coupon book lets you give someone small promises, helpful favors, or fun activities instead of a traditional store-bought gift.
Supplies You Will Need
- Cardstock or thick paper
- Colored paper
- Scissors
- Ruler
- Pencil
- Hole punch
- Ribbon or string
- Markers
- Glue
- Optional stickers
How to Make It
Step 1: Cut the Pages
Cut several pieces of cardstock into equal rectangles.
About 10 × 15 cm is a comfortable size, but you can choose any size that works for you.
Try to keep every page the same size so the finished book looks neat.
Step 2: Design the Cover
Choose one page for the cover.
Write a title such as “Special Coupons,” “Friendship Coupons,” or “Little Favors.”
Decorate the cover with simple drawings, paper shapes, or stickers.
Step 3: Create the Coupons
Give each page a different purpose.
For example, a coupon could offer:
- One movie night
- One homemade snack
- One room-cleaning favor
- One game night
- One handwritten note
- One study break
- One special breakfast
- One afternoon of helping with chores
Keep the coupons realistic and appropriate for the recipient.
Step 4: Add Expiration Information
If necessary, write a small note explaining when the coupon can be used.
You can also write “No expiration date” if the coupon is intended to be flexible.
Step 5: Assemble the Book
Punch two holes along the side of every page.
Stack the pages together and thread ribbon through the holes.
Tie the ribbon firmly but leave enough room for the pages to turn.
Step 6: Decorate the Inside
Add small borders or symbols to each coupon.
However, leave enough white space so the instructions remain easy to read.
Finishing Tips
Think about the recipient when choosing the coupons.
A younger sibling may enjoy game-night coupons, while a parent may appreciate helpful-task coupons.
Since you can make this project almost entirely from paper, it works particularly well when creating handmade gifts on a budget.
Keeping supplies organized in one spot makes returning to a project easier, an idea explored further in Easy Pipe Cleaner Crafts: Fun Projects That Spark Kids’ Creativity and Encourage Sensory Learning.
5. Make a Homemade Scented Sachet
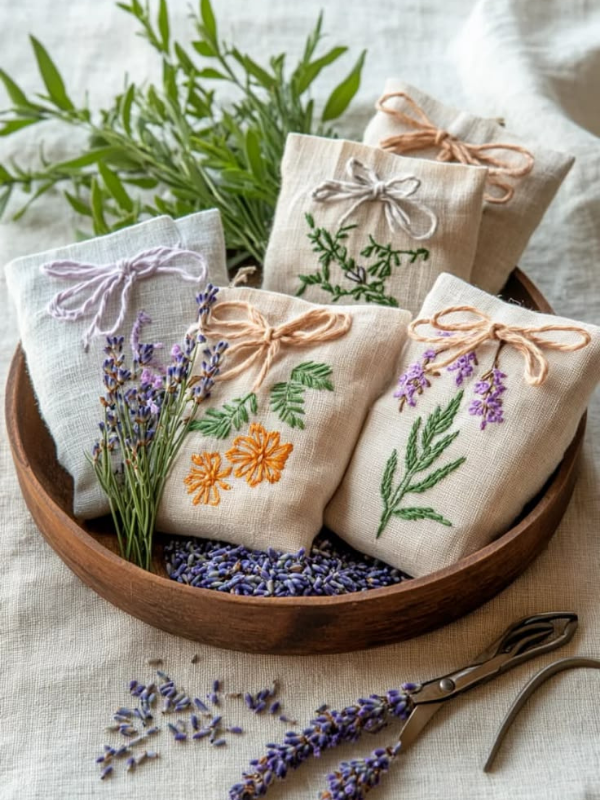
A small scented sachet can be made with fabric scraps and simple filling materials. It can be placed in a drawer, wardrobe, or storage area.
Supplies You Will Need
- Small fabric scraps
- Scissors
- Needle and thread
- Dried lavender or another suitable dried fragrance material
- Ribbon
- Pencil
- Ruler
- Optional fabric glue
How to Make It
Step 1: Choose the Fabric
Select a clean fabric scrap.
Cotton works well because it is easy to cut and sew.
Choose a pattern that matches the recipient’s taste.
Step 2: Cut Two Pieces
Cut two equal squares or rectangles.
A small size, such as 10 × 10 cm, is enough for a simple sachet.
Place the pieces on top of each other with the patterned sides facing inward.
Step 3: Sew the Edges
Sew around three sides.
Leave one side open so that you can add the filling.
If you are not comfortable sewing, fabric glue can be used for a simple version, provided it is suitable for the fabric.
Step 4: Add the Filling
Turn the fabric right-side out.
Place a small amount of dried lavender or another safe dried fragrance material inside.
Do not overfill the sachet because you still need room to close it.
Step 5: Close the Opening
Fold the raw edges inward and sew the opening closed.
Check the stitches carefully so the filling does not escape.
Step 6: Add Ribbon
Tie a small ribbon around the sachet.
You can also add a tiny paper tag with the recipient’s name.
Finishing Tips
Use a light amount of fragrance rather than filling the sachet excessively.
Also, make sure the materials are suitable for the recipient and their intended storage area.
This project is a good way to turn small fabric leftovers into useful handmade gifts on a budget.
If building dimensional shapes by hand appeals to you, Coil Clay Ideas: 13 Projects You Can Make Without a Pottery Wheel explores a similar rolling technique using clay instead of paper.
6. Create a Hand-Decorated Mug
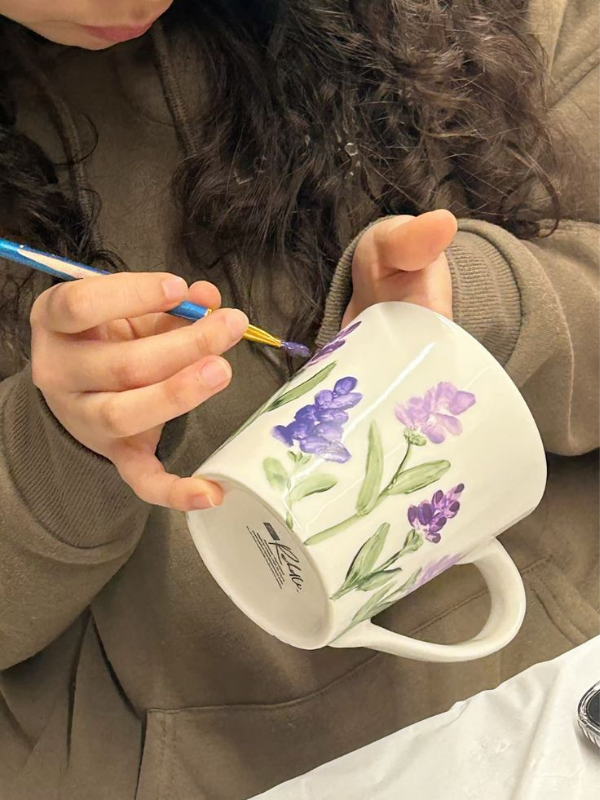
A plain mug can become a personalized present with the right type of decorating materials.
Supplies You Will Need
- Plain ceramic mug
- Ceramic-safe decorating pens or markers
- Pencil
- Paper
- Rubbing alcohol
- Cotton pad
- Oven if required by the marker instructions
How to Make It
Step 1: Clean the Mug
Wash the mug and dry it completely.
Wipe the outside with a small amount of rubbing alcohol to remove grease.
Allow the surface to dry before drawing.
Step 2: Plan the Design
Before drawing directly on the mug, sketch your design on paper.
You could create flowers, stars, hearts, simple lettering, or the recipient’s name.
Keep the design fairly simple because curved surfaces can be difficult to decorate.
Step 3: Transfer the Design
Lightly sketch the main shapes onto the mug if your decorating pen allows it.
Then trace over them with the ceramic-safe marker.
Work slowly rather than trying to complete the entire design quickly.
Step 4: Allow It to Dry
Follow the exact drying and curing instructions provided with your ceramic marker.
Some products require air drying, while others require heat-setting.
Do not assume every marker works the same way.
Step 5: Finish the Gift
Once the decoration is fully set, wrap the mug in tissue paper or place it in a simple gift bag.
You can add a handwritten card for an extra personal touch.
Finishing Tips
Keep the design away from areas where the recipient will place their mouth unless the decorating product specifically states that it is safe for that use.
Always follow the manufacturer’s instructions for washing and curing.
A personalized mug can become one of the most useful handmade gifts on a budget because the recipient can use it regularly.
7. Make a No-Sew Fabric Bookmark

If you like the idea of a fabric gift but do not know how to sew, a no-sew bookmark is a useful alternative.
Supplies You Will Need
- Fabric scrap
- Ruler
- Pencil or fabric marker
- Scissors
- Fabric glue
- Ribbon
- Optional buttons or flat decorations
How to Make It
Step 1: Measure the Fabric
Cut a long rectangle around 5 × 18 cm.
If the fabric is very thin, cut two identical pieces.
Step 2: Strengthen the Fabric
Glue the two pieces together if necessary.
Press them flat and allow the glue to dry according to its instructions.
This creates a stronger bookmark.
Step 3: Finish the Edges
Apply a thin amount of fabric glue along the edges.
Fold the edges inward to prevent fraying.
Press them gently until secure.
Step 4: Add the Ribbon
Make a small hole near the top.
If the fabric is too difficult to punch, glue the ribbon to the back instead.
Tie a knot or small bow.
Step 5: Add Personal Details
Write or attach a small fabric-safe decoration.
You can use the recipient’s initials, a favorite symbol, or a simple pattern.
Finishing Tips
Do not use too much glue because it can make the bookmark stiff.
Instead, use a thin layer and allow enough drying time.
This project is especially useful when you have leftover fabric from another sewing project and want handmade gifts on a budget.
Younger crafters often enjoy a simplified version of this project, similar in spirit to Clay Crafts for Kindergarten Kids That Are Easy, Fun, and Great for Little Hands.
8. Make a Personalized Keychain
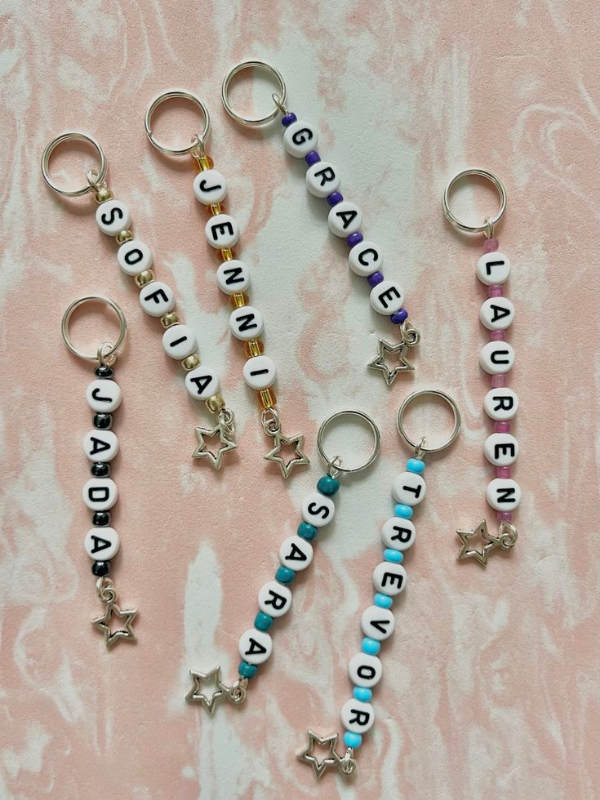
A handmade keychain is small, useful, and easy to customize.
Supplies You Will Need
- Shrink plastic, thick craft foam, felt, or sturdy cardboard
- Scissors
- Pencil
- Markers
- Hole punch
- Keyring
- Ribbon or cord
- Glue
- Optional beads
How to Make It
Step 1: Choose a Shape
Decide what shape you want.
Simple options include hearts, stars, circles, flowers, initials, or animals.
Draw the shape on your chosen material.
Step 2: Cut the Shape
Carefully cut around the outline.
If you are using a material that requires heating, follow its specific instructions and use adult supervision where necessary.
Step 3: Decorate It
Add the person’s initial, name, favorite color, or a small symbol.
Keep the decorations secure because the keychain will be handled frequently.
Step 4: Make the Hole
Punch one hole near the top.
Do not place the hole too close to the edge because the material could tear.
Step 5: Attach the Keyring
Thread a small loop of ribbon or cord through the hole.
Attach it securely to the keyring.
If you are adding beads, make sure they are firmly secured.
Step 6: Check the Strength
Pull gently on the keyring.
If anything moves or feels loose, reinforce it before giving the gift.
Finishing Tips
A simple design often looks better than one overloaded with decorations.
You can also make matching keychains for two friends or family members.
Because the materials can be purchased cheaply or reused from existing craft supplies, this is a practical handmade gifts on a budget project.
If you enjoy working with natural, organic shapes like this, What Can You Make With a Lump of Clay? 11 Easy Clay Ideas Worth Trying explores a similar leaf inspired project made from clay instead of paper.
9. Create a Handwritten Recipe Book
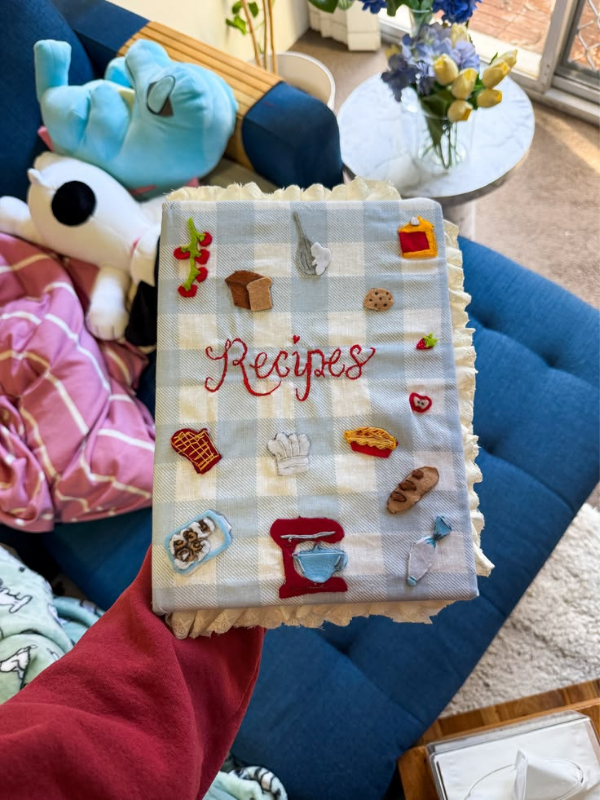
A handwritten recipe book is a useful gift for someone who enjoys cooking or baking.
Supplies You Will Need
- Blank notebook or several sheets of cardstock
- Colored paper
- Pen
- Ruler
- Glue
- Scissors
- Ribbon
- Optional stickers
- Optional printed recipe cards
How to Make It
Step 1: Choose the Notebook
Start with a plain notebook.
If you do not have one, bind several pieces of paper together with ribbon.
Choose a size that is easy to write in and store.
Step 2: Design the Cover
Write a simple title on the front.
For example, you could write “Family Recipes” or “Favorite Recipes.”
Decorate the cover with paper shapes, drawings, or a simple border.
Step 3: Create Recipe Sections
Divide the book into categories.
For example:
- Breakfast
- Lunch
- Dinner
- Snacks
- Desserts
- Drinks
Use colored paper tabs to separate the sections.
Step 4: Write the Recipes
Add recipes that are meaningful to the recipient.
Include the ingredients and clear preparation instructions.
If possible, add small notes about why the recipe is special.
Step 5: Add Blank Pages
Leave several pages blank at the back.
The recipient can use these pages to add their own recipes later.
Step 6: Personalize the Book
Add a short message inside the front cover.
You could explain why you chose the recipes or write a simple wish for the recipient.
Finishing Tips
Write clearly and leave enough space between recipes.
If you make mistakes, rewrite the page instead of covering it with too many decorations.
This gift becomes especially meaningful when it includes family recipes and memories.
It also shows how handmade gifts on a budget can be both attractive and practical.
Once you are ready to move to Crafts for Seniors in Assisted Living When the Days Feel Long and the Usual Activities Get Old offers more calm, low pressure project ideas worth exploring.
10. Make a Simple Friendship Bracelet
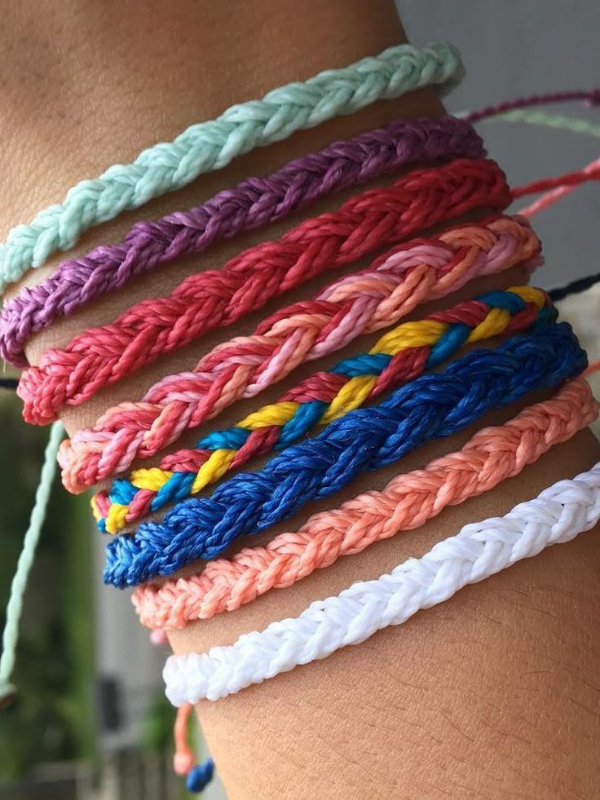
Friendship bracelets are inexpensive because they require very few supplies, yet they can be highly personal.
Supplies You Will Need
- Embroidery thread or yarn
- Scissors
- Tape
- Ruler
- Optional beads
How to Make It
Step 1: Choose Your Colors
Select two or more colors that work well together.
You can use the recipient’s favorite colors or choose a combination that represents friendship.
Step 2: Cut the Threads
Cut several strands of thread to a similar length.
For a basic bracelet, use enough thread to create a comfortable width without making the bracelet too bulky.
Step 3: Secure the Threads
Tie a knot near one end.
Tape the knotted end to a flat surface.
This keeps the bracelet steady while you work.
Step 4: Start Knotting
Separate the threads.
Take the first strand and tie it around the next strand.
Continue working across the group.
Repeat the pattern according to the bracelet style you are making.
Step 5: Continue the Pattern
Work slowly and keep the tension reasonably even.
As the bracelet grows, check its length against the recipient’s wrist if possible.
Step 6: Finish the Bracelet
Once it reaches the desired length, tie a strong knot.
Trim excess thread while leaving enough length to secure the bracelet.
You can add a bead if the design allows it.
Finishing Tips
Practice the knotting pattern with spare thread before starting the final bracelet.
That way, you can become comfortable with the technique before making the gift.
A bracelet is one of the simplest handmade gifts on a budget because thread is inexpensive and the project can be completed with basic skills.
Start with Hand Crafts for Seniors With Limited Mobility That Are Creative, Practical, and Worth Making for gentle project ideas that pair well with a slower, more relaxed crafting pace.
11. Make a Homemade Greeting Card
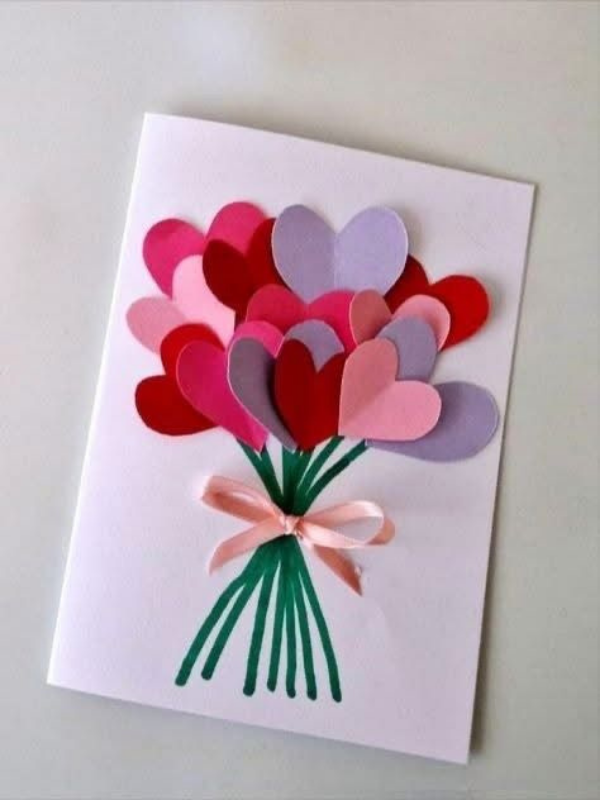
A handmade greeting card can accompany another present or work as a small gift by itself.
Supplies You Will Need
- Cardstock
- Colored paper
- Scissors
- Glue
- Markers
- Ruler
- Pencil
- Ribbon
- Stickers
- Optional photographs
How to Make It
Step 1: Fold the Card
Take a sheet of cardstock and fold it in half.
Press along the fold to create a clean edge.
Step 2: Plan the Front
Before gluing anything, arrange your decorations on the card.
Choose one main feature for the front.
For example, you could create a large paper flower, heart, star, or initial.
Step 3: Add Layers
Cut smaller shapes from colored paper.
Layer them to create dimension.
However, keep the layers relatively flat so the card can still fit into an envelope.
Step 4: Write the Message
Inside the card, write a personal message.
Mention the occasion and something specific you appreciate about the recipient.
A thoughtful message often matters more than complicated decorations.
Step 5: Decorate the Envelope
If you have an envelope, add a small matching detail.
You could draw a tiny pattern or attach a small paper shape.
Step 6: Allow Everything to Dry
Leave the card flat until the glue is completely dry.
Then check that no decorations are loose.
Finishing Tips
Use a ruler when cutting borders and straight shapes.
Also, avoid using too many colors because a simple color palette usually looks cleaner.
A handmade card can easily turn an ordinary present into a collection of handmade gifts on a budget with a much more personal feel.
If you are decorating on a tight budget during the season, Dollar Tree Fall Crafts That Look Expensive (Easy DIY Decor Anyone Can Make) shares more affordable options worth exploring.
12. Create a Painted Plant Pot
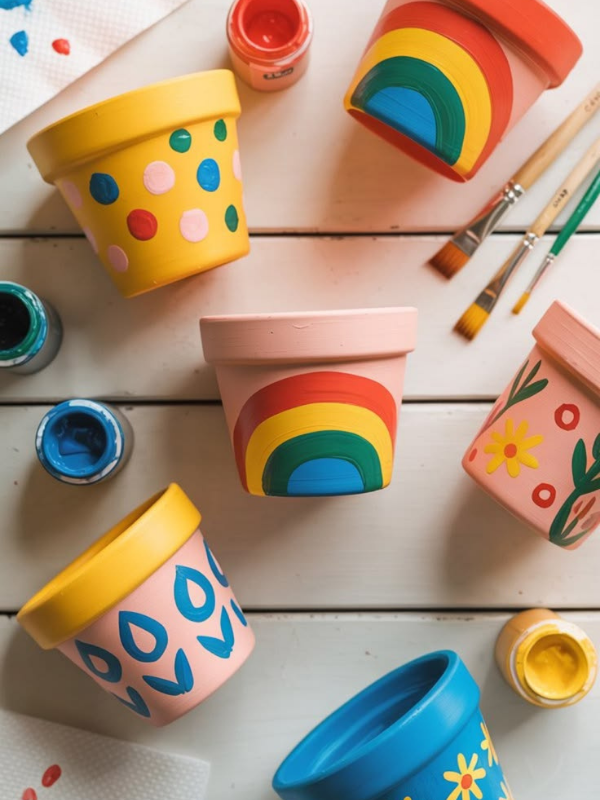
A plain plant pot can become a cheerful decorative gift with a little paint.
Supplies You Will Need
- Small terracotta or plain plant pot
- Acrylic paint
- Paintbrushes
- Pencil
- Water container
- Newspaper or scrap paper
- Clear protective finish if appropriate
- Small plant
How to Make It
Step 1: Clean the Pot
Wipe the pot to remove dust.
If it has been used before, wash it and allow it to dry fully.
Step 2: Plan the Design
Sketch a simple design with a pencil.
You could make dots, stripes, flowers, leaves, geometric shapes, or a name.
Step 3: Paint the Base
Apply a thin layer of paint over the areas you want to cover.
Allow the first layer to dry before adding another.
Thin coats usually create a cleaner finish than one thick coat.
Step 4: Add Details
Once the base is dry, paint the smaller details.
Use a smaller brush for lettering and fine lines.
Step 5: Allow It to Dry
Leave the pot undisturbed until the paint has dried completely.
If you are using a protective coating, apply it according to its instructions.
Step 6: Add the Plant
Choose a small plant that suits the pot.
Place it inside carefully and make sure the pot has suitable drainage.
Finishing Tips
Keep the design simple if you are new to painting.
A few clean dots or lines can look more polished than an overcrowded pattern.
This project can become one of the most attractive handmade gifts on a budget when paired with a small plant.
13. Make a Paper Flower Bouquet

A paper flower bouquet lasts much longer than fresh flowers and can be customized for any occasion.
Supplies You Will Need
- Colored paper
- Green paper
- Scissors
- Pencil
- Glue
- Wooden sticks or paper straws
- Ribbon
- Optional markers
How to Make It
Step 1: Draw the Petals
Draw a simple flower shape on colored paper.
You can make several petal styles, such as rounded petals or pointed petals.
Step 2: Cut the Flowers
Cut out the flower shapes carefully.
For fuller flowers, make two or three sizes.
Stacking different sizes creates more dimension.
Step 3: Shape the Petals
Gently bend the petals upward.
Do not crease them too sharply.
A small curve makes the paper flower look more natural.
Step 4: Build the Center
Cut a small circle from contrasting paper.
Glue it into the center of the flower.
You can also draw small dots around the center.
Step 5: Attach the Stem
Glue the flower to a wooden stick or paper straw.
Wrap the stem with green paper.
Make sure the flower is secure before moving it.
Step 6: Make Several Flowers
Repeat the process with different colors.
Arrange the flowers together to create a small bouquet.
Step 7: Tie the Bouquet
Wrap the stems together with ribbon.
Trim the stems to similar lengths if necessary.
Finishing Tips
Choose two or three main colors instead of using every color available.
You can also add a small handwritten tag to the bouquet.
Paper flowers are excellent handmade gifts on a budget because they are inexpensive, lightweight, and easy to customize.
14. Make a Decorated Storage Box
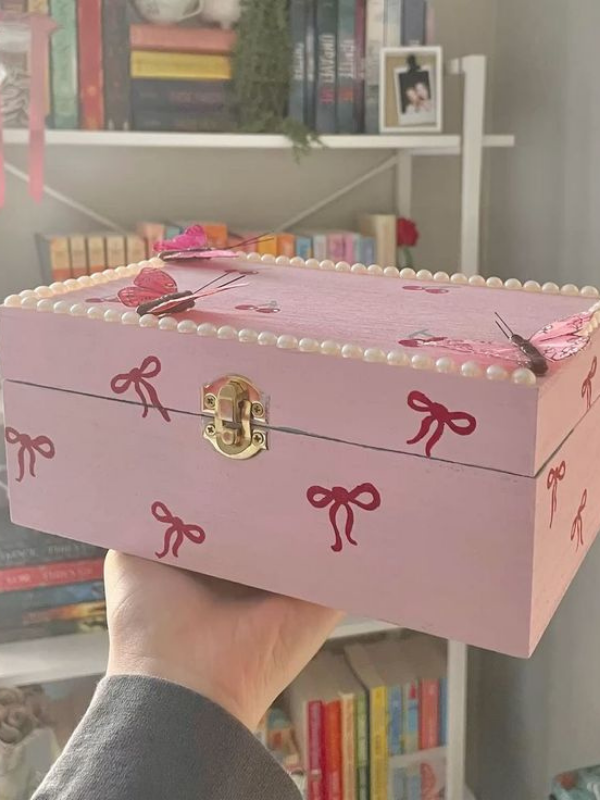
A small decorated box can become a useful place for jewelry, stationery, keepsakes, or other small items.
Supplies You Will Need
- Small cardboard box
- Colored paper
- Scissors
- Ruler
- Pencil
- Glue
- Ribbon
- Markers
- Optional stickers
How to Make It
Step 1: Prepare the Box
Remove old labels and clean the box.
If the box has damaged edges, reinforce them with tape before decorating.
Step 2: Measure the Surfaces
Measure each side of the box.
Write down the measurements so you can cut the covering paper accurately.
Step 3: Cut the Paper
Cut pieces of colored paper slightly larger than each surface.
The extra paper can be folded around the edges.
Step 4: Cover the Box
Apply glue to the cardboard.
Place the paper over the surface and smooth it gently.
Fold the extra paper around the edges.
Repeat the process on the remaining sides.
Step 5: Decorate the Lid
Use a contrasting color on the lid.
Add a name, initial, pattern, or simple paper decoration.
Step 6: Add Ribbon
Wrap a ribbon around the box if you want a more finished appearance.
Secure it carefully so the lid can still open.
Finishing Tips
Do not use very wet glue because it can make thin paper wrinkle.
Instead, apply a light, even layer.
You can make the project even more affordable by recycling a sturdy box from packaging.
That makes this an especially useful option for handmade gifts on a budget.
15. Create a Personalized Mini Journal
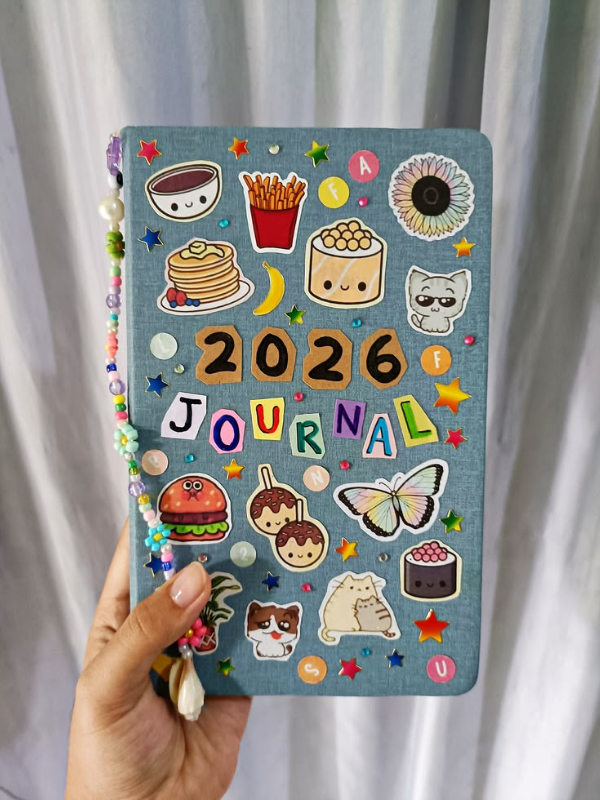
A handmade mini journal is useful for writing, drawing, planning, or recording memories.
Supplies You Will Need
- Several sheets of paper
- Cardstock
- Ruler
- Pencil
- Scissors
- Hole punch
- Ribbon or string
- Colored paper
- Glue
- Markers
How to Make It
Step 1: Choose the Size
Fold several sheets of paper in half.
Decide how large you want the journal to be.
A smaller journal is easier to bind and can also use fewer materials.
Step 2: Prepare the Cover
Cut two pieces of cardstock slightly larger than the folded paper.
These will become the front and back covers.
Decorate the front cover with colored paper, drawings, lettering, or a simple pattern.
Step 3: Arrange the Pages
Place the folded sheets between the two covers.
Make sure the folded edges line up.
Tap the stack gently against a flat surface to straighten it.
Step 4: Punch the Holes
Punch two or three holes along the folded edge.
Try to keep the holes aligned across all pages.
Step 5: Bind the Journal
Thread ribbon or string through the holes.
Tie it securely at the back or inside of the journal.
Do not tie it so tightly that the pages cannot open.
Step 6: Add Personal Pages
Create a few special pages inside.
You could add a “Things I Love” page, a simple habit tracker, a memory page, or blank drawing pages.
Finishing Tips
Leave plenty of blank space.
The recipient should be able to use the journal rather than simply look at it.
You can also create several smaller journals and tie them together as a set.
This makes a personalized notebook a practical example of handmade gifts on a budget.
How to Make Your Handmade Gifts Look More Expensive
The cost of a handmade present is not always what determines how polished it looks. Instead, small finishing details can make a major difference.
Keep the Color Palette Simple
First, choose two or three main colors.
When too many colors compete for attention, the project can look unfinished. On the other hand, a limited palette creates consistency.
For example, use pink, white, and gold for a soft birthday gift. Alternatively, use blue, white, and green for a fresh design.
Keep Edges Clean
Next, pay attention to cutting.
Use a ruler when making straight lines and replace dull scissors when possible.
Even inexpensive materials can look polished when the edges are neat.
Avoid Too Much Decoration
More decorations do not automatically make a craft better.
Instead, choose one main decorative feature and a few smaller details.
This gives the finished gift a clear focal point.
Add a Personal Message
A handwritten message can make a simple present much more meaningful.
Write something specific instead of using a generic sentence.
Mention a shared memory, a quality you appreciate, or a reason the person is important to you.
Wrap the Gift Carefully
Finally, presentation matters.
Use plain wrapping paper, tissue paper, newspaper with a neat design, or a simple gift bag.
Tie it with ribbon or string and add a small handwritten tag.
With these details, even inexpensive handmade gifts on a budget can have a thoughtful and polished appearance.
How to Save More Money While Making Handmade Gifts
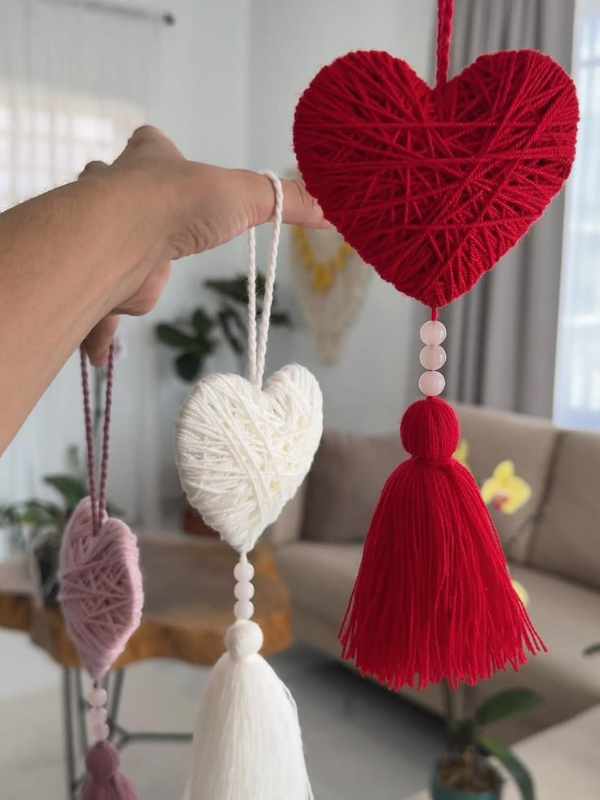
You can reduce the cost even further by planning your supplies before starting.
Use Materials You Already Have
Before buying anything, check your home.
You may already have:
- Cardboard
- Paper
- Fabric scraps
- Ribbon
- Old notebooks
- Buttons
- Glass jars
- Markers
- Paint
- Yarn
- Packaging boxes
Using these materials can reduce your shopping list significantly.
Reuse Clean Packaging
Boxes, jars, containers, and cardboard packaging can often become useful craft bases.
However, only reuse materials that are clean, safe, and strong enough for the project.
Buy Basic Supplies in Multipacks
If you make crafts regularly, buying basic materials in larger packs can sometimes reduce the cost per project.
Useful supplies include cardstock, glue, ribbon, yarn, and colored paper.
Plan Several Gifts Together
Instead of buying completely different supplies for every recipient, choose projects that share materials.
For example, you could make bookmarks, cards, and mini journals using the same cardstock, markers, and ribbon.
That approach makes handmade gifts on a budget even more affordable.
Keep a Craft Scrap Box
Save useful leftovers from previous projects.
Small pieces of paper, ribbon, fabric, yarn, and cardboard can become decorations later.
As your collection grows, you may find that you need to buy fewer supplies.
Common Mistakes to Avoid When Making Handmade Gifts
Even simple crafts can look untidy if a few basic steps are skipped.
Starting Without Measuring
Do not cut materials immediately.
First, measure the surface and mark the dimensions.
This prevents wasted paper and cardboard.
Using Too Much Glue
Excess glue can cause paper to wrinkle and can make a project messy.
Instead, apply a thin layer and spread it evenly.
Rushing the Drying Process
Do not handle a project before the glue or paint has dried.
Otherwise, decorations can move, fingerprints can appear, and surfaces can become uneven.
Choosing a Project That Is Too Difficult
If you are a beginner, start with a project that matches your current skill level.
Once you understand the basic techniques, you can move to more complicated designs.
Ignoring the Recipient
A handmade gift should suit the person receiving it.
Think about their interests, favorite colors, hobbies, and practical needs.
A simple useful gift can be more successful than an elaborate project the recipient will never use.
Adding Too Many Details
Finally, remember that decoration should support the design.
If every surface has a different pattern, the project may look crowded.
Simple, balanced details usually create a more polished result.
How to Choose the Right Handmade Gift
Choosing the right project becomes easier when you consider the recipient first.
For a Parent
Consider a memory jar, personalized photo frame, recipe book, or decorated plant pot.
These gifts allow you to include personal memories and messages.
For a Friend
A friendship bracelet, mini journal, bookmark set, or personalized keychain can work well.
Choose colors and messages that remind you of your friendship.
For a Teacher
A decorated notebook, bookmark set, greeting card, or small storage box can be practical choices.
Add a short thank-you message to make the present more personal.
For a Reader
Bookmarks, journals, and personalized book-related gifts are natural choices.
You can also create a small reading-themed gift set by combining two simple projects.
For a Younger Child
Choose projects that are colorful, simple, and age-appropriate.
A decorated frame, paper flowers, or simple greeting card can work well.
Adult supervision may be needed for scissors, hot tools, or other equipment.
Frequently Asked Questions
1. What is the cheapest handmade gift to make?
A handmade greeting card, bookmark, memory jar, or paper flower can be very inexpensive because many versions require only paper, markers, glue, and recycled materials.
The cheapest option depends on what you already have at home. Therefore, check your craft supplies before buying anything.
2. How can I make handmade gifts look professional?
Focus on clean edges, balanced colors, secure decorations, and neat handwriting.
Also, avoid adding too many unnecessary details.
Good presentation matters as well. A simple gift wrapped neatly can look much more polished than a complicated craft wrapped carelessly.
3. Can I make handmade gifts without buying craft supplies?
Yes. Many projects can be made with recycled cardboard, old jars, packaging boxes, leftover fabric, paper scraps, string, and other materials already available at home.
However, make sure recycled materials are clean and safe before using them.
4. How long does it take to make a handmade gift?
The time depends on the project and your experience.
A greeting card or bookmark may take less than an hour, while a recipe book, memory jar, or decorated box may take several hours.
Therefore, give yourself enough time rather than rushing the final stages.
5. What should I put inside a handmade gift?
Think about the recipient.
You could include photographs, handwritten notes, recipes, encouraging messages, small drawings, useful coupons, or personal memories.
The contents do not need to be expensive. In many cases, thoughtful details are what make handmade gifts on a budget memorable.
Conclusion
Creating thoughtful presents does not require a large budget or advanced crafting skills. With ordinary materials, a little planning, and some patience, you can turn simple supplies into useful and personal presents.
The best part is that these projects can be adapted to suit different people and occasions. A bookmark can become a birthday present, a photo frame can celebrate a special memory, and a simple journal can become a meaningful keepsake. Likewise, a decorated box can become useful storage, while a memory jar can hold messages that someone can enjoy long after receiving the gift.
Most importantly, do not focus only on making the craft look perfect. Instead, think about why you are making it and who will receive it. A carefully chosen color, handwritten message, favorite photograph, or shared memory can make an inexpensive present feel much more special.
So, before buying an expensive present, look around your home and consider what you already have. You may be surprised by how many beautiful projects you can create from basic supplies.
With the right approach, handmade gifts on a budget can be affordable, useful, creative, and deeply personal. Start with one simple project, follow the steps carefully, and then experiment with your own colors, materials, and designs as your confidence grows.