

Christmas decorating does not have to leave your wallet looking as empty as the gift boxes under the tree. With a little creativity, Christmas DIY decorations on a budget can make your home feel warm, festive, and beautifully put together without requiring expensive store-bought pieces.
The secret is not buying more decorations. Instead, it is choosing simple materials, working with what you already own, and giving ordinary items a thoughtful Christmas makeover.
A festive home can start with materials that are already sitting in cupboards, drawers, storage boxes, or recycling bins. Cardboard, glass jars, paper, fabric scraps, old ribbons, pinecones, wooden sticks, empty boxes, and leftover wrapping paper can all become useful decorating supplies.
You also do not need advanced crafting skills. Many beautiful Christmas projects rely on basic techniques such as cutting, gluing, painting, tying ribbons, arranging greenery, and layering simple decorative pieces. Once you understand a few styling tricks, inexpensive materials can look surprisingly polished.
This guide focuses on practical projects that you can actually finish during the holiday season. You will find ideas for tables, walls, shelves, doors, windows, the Christmas tree, and other small spaces around your home. Each project includes affordable materials, simple instructions, and styling suggestions.
For even more budget-friendly seasonal inspiration, take a look at ChiomaCreates’ 12 Christmas Dollar Tree Crafts You’ll Be Proud to Display in Your Living Room. The post focuses on affordable supplies, thoughtful arrangements, different heights, mixed textures, and simple styling tricks that help inexpensive decorations look more polished.
Whether you are decorating a small apartment, family home, bedroom, living room, or first Christmas space, these ideas can help you create a festive atmosphere without overspending.
Before You Start Decorating Your Home
Check What You Already Own

Before heading to a shop, open your storage boxes and look through your existing Christmas decorations. You may already have pieces that can be reused in completely different ways.
An old wreath can become part of a table arrangement. Extra ornaments can fill a glass bowl. A leftover ribbon can become a bow for a wreath, chair, gift box, or vase. Even decorations that look slightly outdated can receive a fresh coat of paint or a simple makeover.
This first step matters because buying supplies before checking what you already have can quickly turn an inexpensive project into an expensive one.
Create three small groups.
Keep the first group for decorations you still love. Put pieces that need a makeover in the second group. Place damaged or unusable items in the final group.
Once you know what you have, choose a simple colour palette. Red and gold can create a traditional look. White and green can feel fresh. Neutral tones with natural wood can create a softer appearance.
A limited palette also makes your DIY decorations look more coordinated.
Personalized Embroidery Ideas can also inspire personalised Christmas decorations when you want to add names or meaningful details to your holiday setup.
Choose Affordable Materials
The best Christmas DIY decorations on a budget often begin with supplies that are inexpensive, reusable, or already available at home.
Start with basics such as:
- Cardboard
- Paper
- Glass jars
- Mason jars
- Twine
- Ribbon
- Pinecones
- Wooden sticks
- Scrap fabric
- Empty boxes
- Old ornaments
- Artificial greenery
- Battery-operated lights
- Paint
- Glue
Do not buy every material for every project. Instead, choose supplies that can work across several decorations.
For example, one roll of ribbon can decorate a wreath, create bows for jars, finish a garland, and add detail to wrapped boxes.
That approach keeps your shopping list short.
It also makes your craft collection more useful after Christmas because many of the materials can be reused for birthdays, parties, gifts, or future seasonal projects.
If you want to balance indoor Christmas crafting with outdoor creativity, Outdoor Crafts for Kids provides additional project inspiration.
Christmas DIY Decorations on a Budget
Create Rustic Pinecone Arrangements
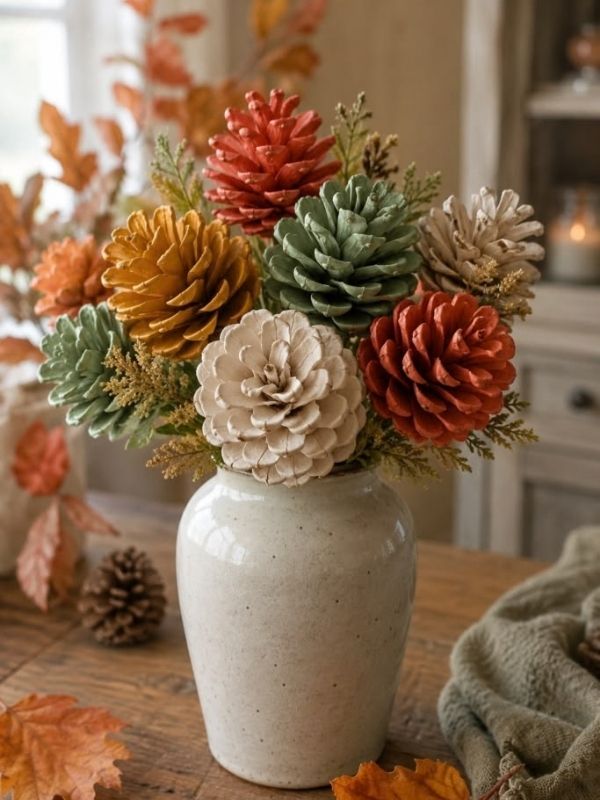
Gather simple supplies
Pinecones are one of the easiest natural materials to turn into Christmas décor. If you already have access to clean fallen pinecones, this project can cost almost nothing.
You will need pinecones, a shallow bowl or tray, ribbon, artificial greenery, and optional paint.
Choose pinecones that are dry and free from dirt or insects. Brush away loose debris before using them.
You can leave them completely natural for a rustic appearance. Alternatively, lightly paint the edges white to create a frosted effect.
Avoid covering every surface with paint. A small amount can look more natural and elegant.
Style the finished arrangement
Place several pinecones inside a bowl.
Add a few greenery stems around the edges. Then tuck in a small ribbon bow.
If you have spare ornaments, place two or three among the pinecones.
The arrangement will look fuller when you vary the sizes and positions rather than lining everything up evenly.
A small LED candle can also sit in the centre if the container is suitable and the candle is designed for safe indoor use.
For another handmade Christmas direction, explore ChiomaCreates’ Christmas Crochet Projects You Can Actually Finish Before the Holidays for Gifts, Decor, and More. It includes small handmade decorations, ornaments, garlands, and other festive projects.
Turn Glass Jars Into Lanterns

Prepare the jars
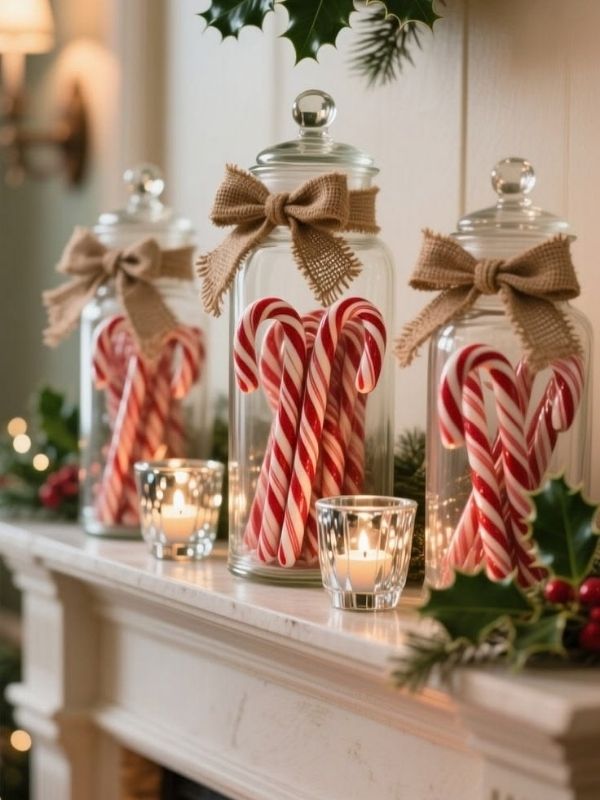
Empty glass jars can become attractive Christmas lanterns with very little effort.
Clean the jars thoroughly and remove labels. Dry them completely before decorating.
Wrap a narrow ribbon around the outside and secure it with a simple knot or a small amount of suitable adhesive.
You can also tie twine around the neck for a rustic finish.
If you want a frosted appearance, use a suitable decorative glass product rather than applying unsafe household substances.
Keep the design simple.
A single ribbon and a small greenery sprig can look more sophisticated than several layers of decorations.
How to Make Easy Spider Handprint Crafts for Kids Using Simple Supplies includes a useful seasonal adaptation section explaining how handprints can become Christmas trees, snowflakes, or poinsettias.
Add safe lighting
Place a battery-operated LED light inside the jar.
Avoid placing real flames inside homemade decorations, particularly around fabric, paper, ribbon, children, or pets.
Arrange three jars together in different sizes if possible.
Odd-number groupings can create a more balanced display.
Place them on a tray, mantel, shelf, or dining table.
These simple lanterns work particularly well in the evening because the soft light adds warmth without requiring a large amount of décor.
The result shows why Christmas DIY decorations on a budget can still create a cosy atmosphere when the arrangement is carefully planned.
DIY Water Table for Kids is another example of how inexpensive materials can become practical DIY projects.
Make Paper Star Garlands

Cut and decorate stars
Paper stars are inexpensive, lightweight, and easy to customise.
Use cardstock or thicker paper so the finished stars do not bend easily.
Draw a simple star template on cardboard first.
Trace around it several times.
Cut out the stars and decorate them with crayons, paint, metallic pens, or small stickers.
You can also use old wrapping paper to cover some of the shapes.
Mixing plain and patterned stars creates visual variety.
If you prefer a neutral style, use white, cream, beige, or kraft paper.
For a traditional Christmas palette, choose red, green, gold, and white.
Garden Crafts for Preschool offers more accessible craft inspiration for children and families who enjoy making things together.
Assemble the garland
Make a small hole near the top of each star.
Thread them onto twine or string.
Leave a little space between each shape.
Do not make every gap identical. A slightly relaxed arrangement often looks more natural.
Hang the garland across a wall, window, shelf, mantel, or doorway.
You can also make several short garlands instead of one very long piece.
This allows you to decorate several areas without using lots of materials.
For another seasonal paper-and-craft idea, browse ChiomaCreates’ Garden Crafts for Preschool: Fun and Easy Nature Projects for Kids, which demonstrates the site’s practical approach to simple handmade projects and accessible materials.
Build A Budget Christmas Wreath
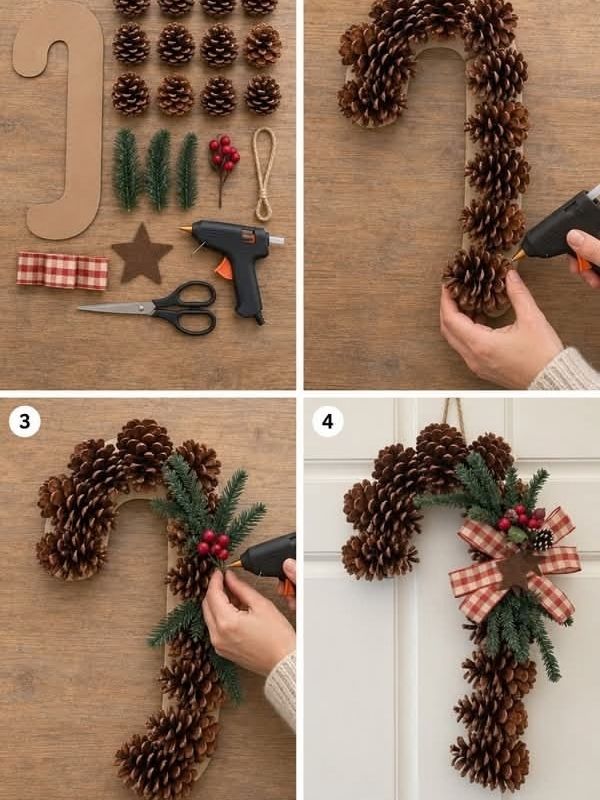
Create the wreath base
You do not need an expensive wreath form.
A sturdy cardboard circle can work as a simple base.
Cut a large circle from cardboard, then cut another circle inside it to create a ring.
Wrap the ring with green paper, fabric, twine, or leftover ribbon.
If you have artificial greenery from an older decoration, attach small sections around the base.
Spread the greenery unevenly so the wreath does not look too rigid.
You can also make a minimalist wreath by leaving part of the cardboard visible.
Paint the exposed section white, cream, or green.
Add a simple focal point
Choose one main decorative detail.
A large bow can become the focal point.
Alternatively, use several pinecones, a wooden star, or a small cluster of red berries.
Avoid adding too many different objects.
A wreath often looks more expensive when it has a clear focal point rather than decorations covering every available space.
Hang it on an interior door, bedroom door, wall, mirror, or entryway.
You can also place it flat on a table and use it as part of a centrepiece.
For more affordable seasonal decorating inspiration, ChiomaCreates’ DIY Fall Wreath Craft for a Bare Front Door is another useful wreath-making reference that can be adapted for Christmas colours and materials.
Style A Christmas Ornament Bowl

Choose a simple container
A clear glass bowl, vase, ceramic bowl, or even a clean decorative container can become the foundation for this project.
Choose one that you already own.
That is the easiest way to keep the project inexpensive.
Select several Christmas ornaments in two or three coordinating colours.
Using fewer colours usually creates a more organised appearance.
If your ornaments are different sizes, even better.
Varying sizes will make the finished display more interesting.
Layer the decorations
Place a few greenery stems around the edges.
Add the largest ornaments first.
Then fill the spaces with smaller ones.
Do not pack everything tightly.
Leaving a little breathing room allows each colour and shape to remain visible.
Add pinecones, wooden stars, ribbon pieces, or battery-operated lights if desired.
Place the bowl on a dining table, coffee table, console, or shelf.
For an elegant look, keep the surrounding decorations simple.
One attractive centrepiece can often make a bigger impact than several small objects scattered across the room.
This is one of the easiest Christmas DIY decorations on a budget because you can reuse ornaments you already own.
How to Make Pumpkin Footprint Art shows how simple footprint artwork can become a memorable seasonal project.
Transform Cardboard Into Trees
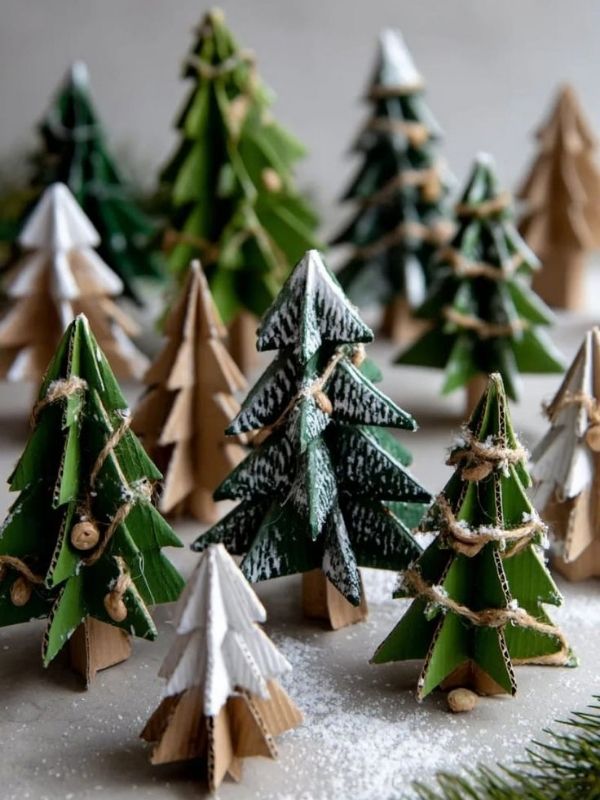
Build the cardboard shapes
Save sturdy cardboard from delivery boxes or household packaging.
Draw simple Christmas tree shapes on the cardboard.
Cut them out carefully.
You can make several sizes.
Paint the trees white, green, cream, gold, or another colour that matches your décor.
If you prefer a rustic look, cover them with kraft paper.
You can also wrap some of the trees with leftover fabric.
Allow each layer to dry before adding another.
Create a tabletop display
Stand the finished trees against books, inside a tray, or on a shelf.
Place the tallest tree at the back.
Add smaller trees in front.
This creates depth without requiring lots of decorations.
You can add tiny bows, stars, beads, or paper ornaments.
However, keep the details limited.
A simple collection of three cardboard trees can look more intentional than ten heavily decorated ones.
If you enjoy turning basic craft supplies into useful handmade pieces, ChiomaCreates’ How to Make Crafts: 20 Easy Crafts to Sell and Make Profits From Home offers more ideas for working creatively with accessible materials.
Decorate A Christmas Tray

Pick a simple tray
A tray can instantly make several small decorations look like one intentional display.
Use a tray you already have.
Wooden, metal, ceramic, or woven trays can all work.
Start with one larger item.
This might be an LED candle, small vase, Christmas tree, or decorative jar.
Then add greenery around it.
Use two or three smaller accents to finish the arrangement.
Keep the arrangement balanced
Do not cover the entire tray.
Leave some empty space.
This prevents the display from feeling crowded.
Try combining different textures.
For example, pair smooth glass with rough pinecones and soft greenery.
You can also add a short wooden bead garland.
The contrast makes simple objects more interesting.
Place the finished tray on a coffee table, dining table, entryway console, or bedroom dresser.
If you change the central item, you can reuse the same tray throughout the year.
That makes this project particularly useful when creating Christmas DIY decorations on a budget.
Creative DIY Crafts for Adults is another useful resource when you want projects that extend beyond seasonal decorating.
Make A Ribbon Christmas Tree
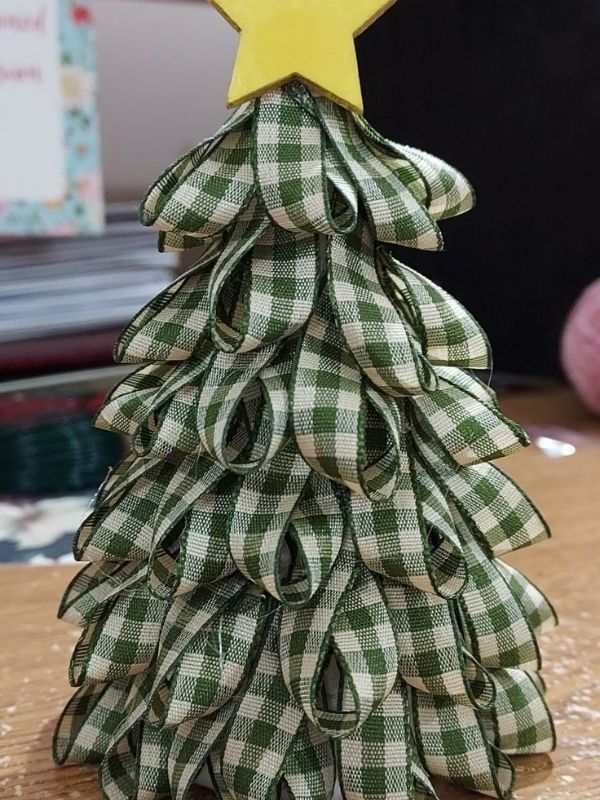
Build the cone
Use cardstock or recycled cardboard to make a cone.
Roll the material into a cone shape and secure the edge.
Trim the bottom so the cone stands evenly.
You can make several cones in different sizes.
This gives you a small Christmas tree collection without purchasing miniature trees.
Wrap and decorate
Choose one or two ribbons.
Start at the bottom of the cone.
Wrap the ribbon upward.
Keep the layers close together without overlapping too heavily.
Secure the end at the top.
Add a small paper star, bow, or wooden decoration.
You can also leave one tree plain while decorating another.
Place the finished trees together on a shelf or tray.
A group of three different heights usually creates more visual interest than a row of identical pieces.
If you have leftover fabric instead of ribbon, use narrow strips.
The different texture can make the display feel softer and more handmade.
For Christian families who want Christmas crafts connected with Bible learning, Daniel and the Lion’s Den Craft demonstrates the site’s simple story-and-craft approach.
Create A Festive Window Display
Make lightweight decorations
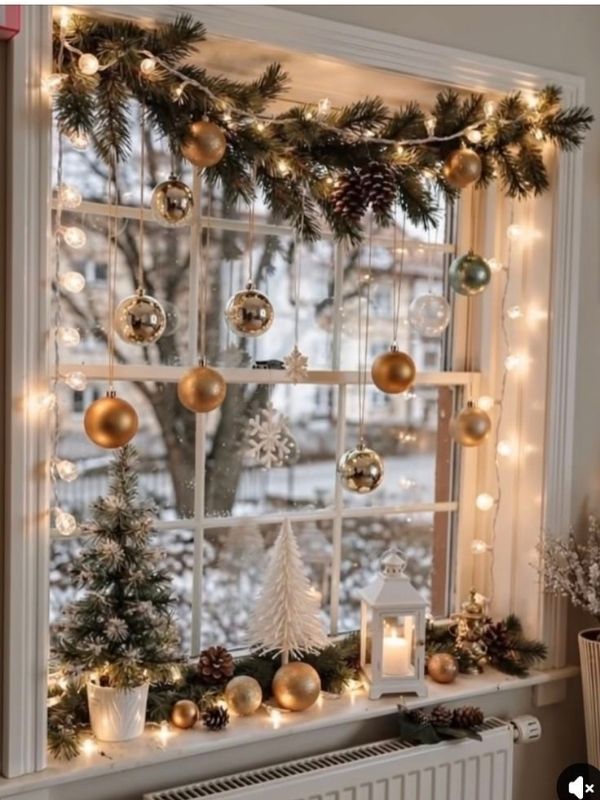
Windows do not need expensive ornaments.
Cut stars, snowflakes, Christmas trees, or circles from white paper.
You can also use leftover wrapping paper to create colourful shapes.
Keep the decorations lightweight.
That makes them easier to attach and remove after the holiday season.
For a simple look, choose one shape and repeat it.
For example, use only white stars.
A repeated design can make an inexpensive display feel coordinated.
A handmade Christmas decoration becomes even more special when it can be saved for future years. ChiomaCreates’ DIY Memory Box for Kids can help you create a dedicated place for seasonal artwork, cards, and small keepsakes.
Arrange the window
Use removable methods suitable for the window surface.
Place larger shapes near the bottom and smaller ones toward the top.
Alternatively, create several hanging strands.
Tie paper shapes to pieces of string and attach them securely.
Leave enough space between the strands so the window does not look overcrowded.
If you have battery-operated lights designed for safe indoor use, place them around the frame.
The result can make a plain window feel festive without purchasing a large collection of decorations.
This is another practical example of Christmas DIY decorations on a budget because paper is inexpensive and easy to customise.
Teens looking for crafts that feel a little less childish can browse Fun DIY Crafts for Teens: Creative and Trendy Projects That Actually Feel Cool to Make.
Upcycle Old Christmas Ornaments
Give old pieces a makeover
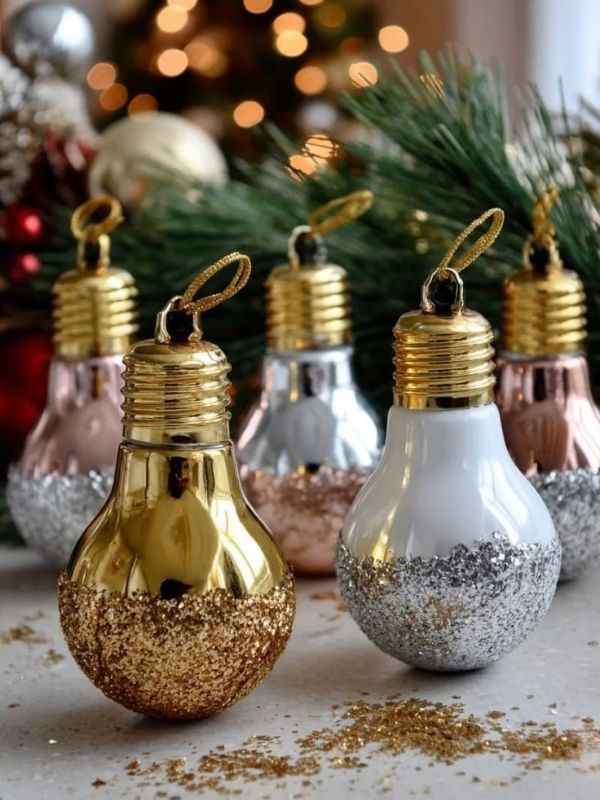
Before buying new ornaments, look at the ones you already have.
Some may only need a little updating.
Remove loose decorations carefully.
Clean dusty surfaces.
Then repaint suitable ornaments in a new colour.
Neutral shades such as white, cream, gold, or natural wood can help older pieces feel more modern.
You can also wrap certain ornaments with twine or fabric.
Create a coordinated collection
Choose one design direction.
For example, transform several mismatched ornaments into a neutral collection.
Use the same paint colour across different shapes.
You do not have to make them identical.
Instead, aim for visual connection.
Place the updated ornaments on your Christmas tree, inside a bowl, or along a garland.
This approach saves money because you are refreshing something you already own.
Hand Crafts for Seniors With Limited Mobility That Are Creative, Practical, and Worth Making for gentle, low pressure project ideas that pair nicely with a slower crafting pace.
Design A Christmas Book Stack
Choose books carefully
Decorative book stacks can create height on a table, shelf, or console.
Use books you already own.
Choose two or three with similar sizes.
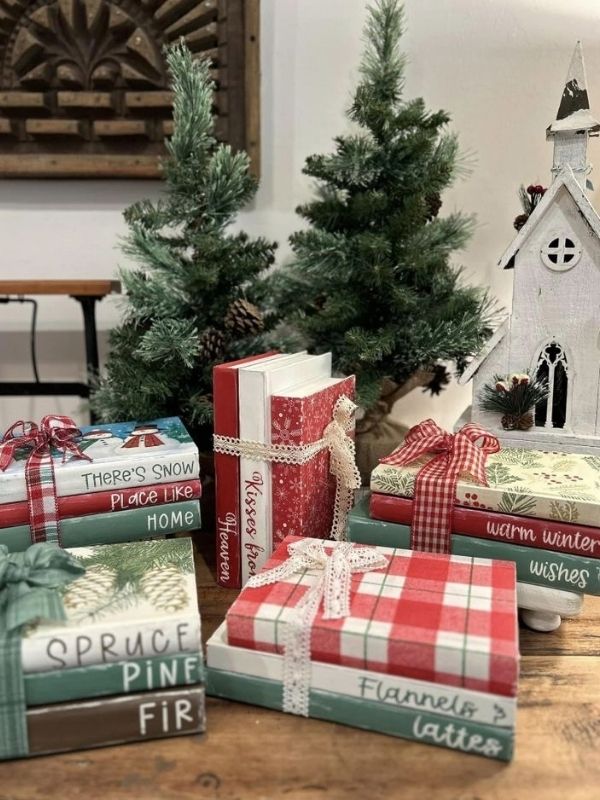
If the covers are very colourful, turn them so the pages face outward if the books allow it.
Alternatively, wrap the covers temporarily with neutral paper.
This gives you a blank canvas.
Add Christmas details
Tie the stack with ribbon or twine.
Place a small greenery sprig underneath the ribbon.
Add a pinecone or wooden star.
You can also write a simple festive word on a paper cover.
Keep the details restrained.
The stack should still look like a decorative object rather than a pile of unrelated items.
Place it beside a candle, vase, miniature tree, or ornament bowl.
The different heights will make the area feel more layered.
This technique works especially well in small homes because it uses vertical space instead of requiring another large decoration.
Make A Simple Table Runner
Reuse fabric creatively
You do not need to buy a specialised Christmas table runner.
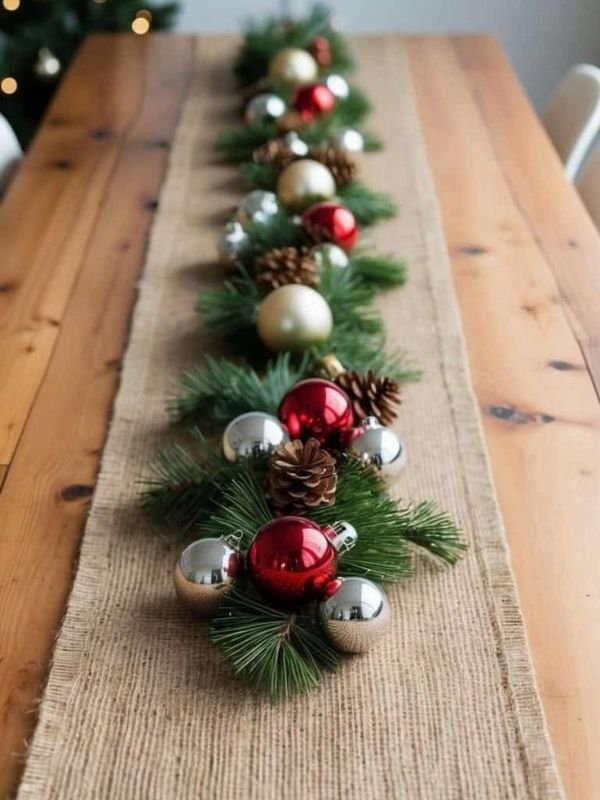
Look for leftover fabric, an old scarf, plain burlap, or another suitable textile.
Measure the table first.
The runner should hang neatly without becoming a tripping hazard.
Choose a fabric that works with your existing décor.
Neutral material can be decorated with small Christmas accents.
Red fabric can create a traditional look.
Green fabric works well with natural decorations.
Add inexpensive details
Place greenery down the centre.
Add pinecones at intervals.
Use a few ornaments for colour.
You can also create small ribbon bows.
Keep the centre arrangement low enough that people can still see across the table.
If the table will be used for meals, avoid placing unstable objects where they could easily fall.
For a softer appearance, combine fabric with wood and greenery.
The mixture of textures helps inexpensive materials look more considered.
A simple table runner can therefore become one of the most useful Christmas DIY decorations on a budget because it changes the entire table without requiring a large amount of decor.
Once you are ready to move past simple flat stones, check out this: Crafts for Seniors in Assisted Living When the Days Feel Long and the Usual Activities Get Old offers more calm, low pressure project ideas worth trying.
Create A Recycled Gift Display
Save empty boxes
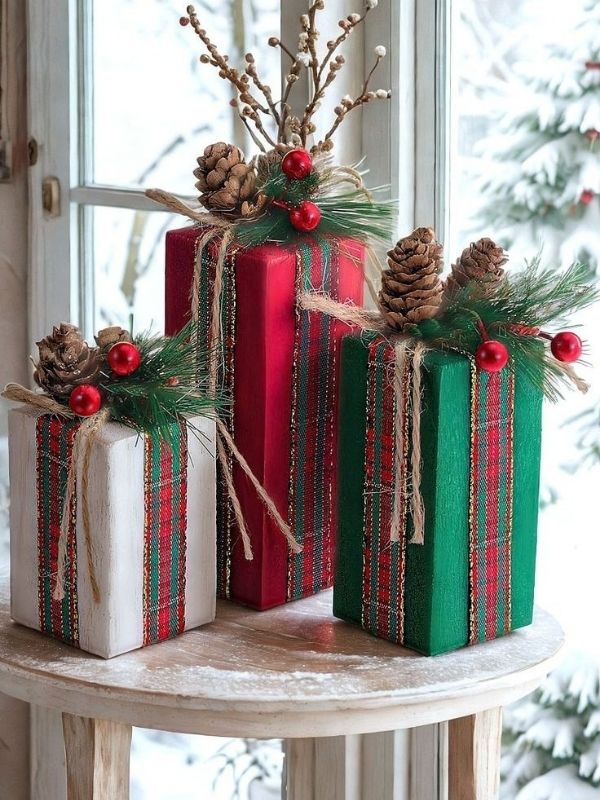
Empty cardboard boxes can become part of the Christmas décor instead of immediately going into the recycling bin.
Wrap them with leftover wrapping paper.
If you do not have enough wrapping paper, use brown kraft paper or plain paper.
Add ribbon scraps.
Create several different sizes.
You can even stack the boxes into a small decorative arrangement.
Style them safely
Place the largest box at the bottom.
Add smaller boxes above it.
Do not stack them where they could fall onto children or pets.
A safer option is to arrange them underneath the Christmas tree.
You can also place a few beside a fireplace or against a wall.
Use different wrapping papers that share one colour.
For example, combine kraft paper with red ribbon.
The consistent accent keeps the display from looking chaotic.
You can also reuse the boxes for actual gifts later.
That makes the project practical as well as decorative.
This same idea of starting small before scaling up applies well to gift crafting in general, similar to the approach shown in What Can I Embroider as a Gift? Easy Personalized Embroidery Ideas for Every Occasion.
Make Budget Decor Look More Expensive
Use Fewer Colours
One of the simplest ways to make inexpensive decorations look coordinated is to limit the colour palette.
Choose two main colours.
Then add one neutral shade.
For example:
- Red, green, and cream
- Gold, white, and green
- Silver, white, and blue
- Brown, cream, and green
You do not need to follow a traditional Christmas palette.
The important part is consistency.
When similar colours appear throughout the room, separate DIY projects begin to feel like part of one decorating plan.
Mix Different Textures
Texture adds depth.
Pair smooth glass with rough pinecones.
Combine soft fabric with wooden decorations.
Place greenery beside metallic ornaments.
Use ribbon alongside twine.
This works because the eye notices the difference between materials.
You can create visual interest without buying more objects.
Vary The Heights
If everything sits at exactly the same level, a display can feel flat.
Use different heights.
Place a tall vase behind a small ornament bowl.
Put a miniature tree beside a candle.
Stack books underneath a decoration.
Use a tray to raise one group.
This simple technique can dramatically improve the appearance of Christmas DIY decorations on a budget.
A similar mindful use of light and heat is worth considering in How Farm Animal Craft Ideas for Preschoolers: 15 Easy Crafts That Make Learning About Farm Animals Fun, where safe materials matter just as much for younger crafters.
Leave Some Empty Space
More decorations do not always mean a better Christmas display.
In fact, too many small items can make a room feel crowded.
Leave areas of empty space.
Allow one larger decoration to become the focal point.
Then add only a few supporting pieces.
The room will feel calmer.
It will also be easier to clean.
Repeat One Accent
Choose one detail and repeat it.
- Maybe you use red ribbon.
- Maybe you choose wooden stars.
- Maybe pinecones become your natural accent.
Repeat that feature on the wreath, table, shelves, and tree.
This creates a connection between different areas of the room.
It also makes separate DIY projects feel like part of the same collection.
ChiomaCreates’ recent Christmas Dollar Tree guide uses similar principles, including odd-number groupings, varied heights, mixed textures, repeated accent colours, and leaving breathing room around decorations.
Smart Ways To Save Money
Shop Your Home First
Before spending anything, look through storage areas.
Check old decorations.
Look at spare fabric.
Find leftover wrapping paper.
Check whether you have unused jars, trays, baskets, frames, or vases.
The cheapest supply is often something you already own.
Buy Materials With Multiple Uses
If you must shop, prioritise supplies that can work across several projects.
Ribbon is a good example.
A single roll can decorate:
- Wreaths
- Jars
- Gift boxes
- Garlands
- Trees
- Table arrangements
Artificial greenery can also work across multiple displays.
This approach makes each purchase more useful.
Avoid Buying Too Early
Before buying a decorative item, ask yourself where it will go.
If you cannot identify a place for it, you probably do not need it.
A small shopping list can prevent impulse purchases.
Write down the projects you actually want to make.
Then purchase only the materials those projects require.
Reuse After Christmas
Good Christmas DIY decorations on a budget should not necessarily be disposable.
Store suitable decorations carefully.
Flatten paper pieces.
Wrap fragile ornaments.
Keep ribbons in a box.
Store artificial greenery without crushing it.
Label your storage containers.
Next Christmas, you can start with the decorations you already made instead of buying everything again.
The 12 Christmas Dollar Tree Crafts article is particularly relevant for affordable seasonal decorating. It includes lantern displays, glass cloches, wooden trees, ornament bowls, trays, wreaths, and other projects.
How To Create A Festive Home With Less
Start With The Main Room
You do not have to decorate every room.
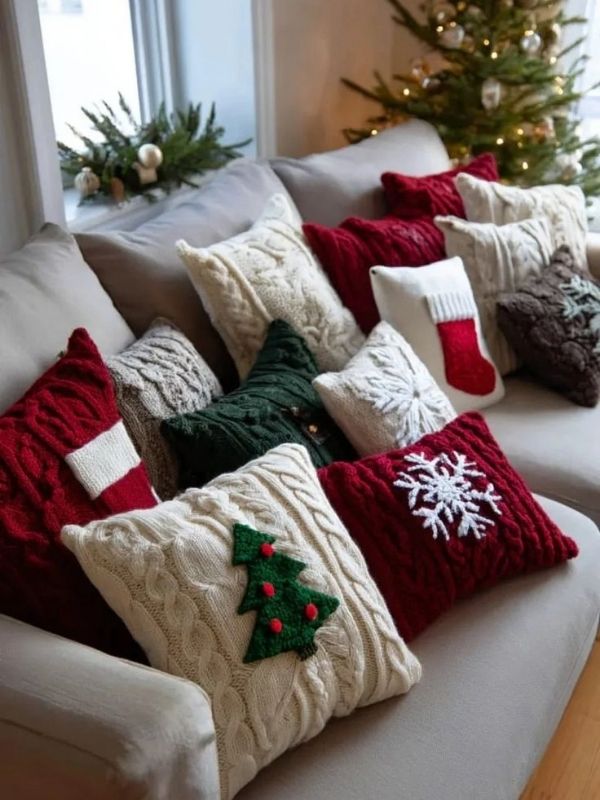
Choose the space where your family spends the most time.
That might be the living room.
Begin there.
Add one focal point.
Then build around it.
A Christmas tree can become the main feature.
A wreath can anchor the wall.
A tray can style the coffee table.
A few small details can complete the room.
Add Small Details Gradually
Do not decorate everything in one afternoon.
Start with your larger pieces.
Then add smaller details.
Step back after each change.
Look at the room from the doorway.
Ask yourself whether the area feels balanced.
Sometimes removing an item creates a better result than adding another.
Decorate Vertical Spaces
Walls, windows, doors, and shelves can create festive impact without taking up much floor space.
Use paper garlands.
Hang wreaths.
Create lightweight hanging decorations.
Style shelves with small trees.
This is especially helpful in smaller homes.
Make The Entryway Festive
The entrance gives guests their first impression.
You do not need a huge display.
A small wreath can be enough.
Add a ribbon.
Place one basket or lantern nearby.
Keep the area clear so people can move comfortably.
Simple details can make the entrance feel welcoming.
.
Frequently Asked Questions
What are the easiest Christmas DIY decorations on a budget?
Some of the simplest options include paper garlands, pinecone arrangements, decorated glass jars, cardboard Christmas trees, ornament bowls, ribbon trees, recycled gift boxes, and simple wreaths. Most require only a few supplies and basic techniques such as cutting, painting, gluing, tying, or arranging.
How can I decorate my home for Christmas without spending much money?
Start by checking the decorations and craft supplies you already own. Reuse old ornaments, leftover wrapping paper, ribbons, cardboard boxes, glass jars, fabric scraps, and artificial greenery. Choose a small colour palette and focus on a few key areas rather than trying to decorate every room.
What can I use instead of expensive Christmas decorations?
Everyday materials can become festive décor with a little creativity. Cardboard can become trees or stars. Glass jars can become lanterns. Pinecones can become centrepieces. Paper can become garlands. Empty boxes can become decorative gifts. Old ornaments can also receive a fresh coat of paint.
How do I make cheap Christmas decorations look expensive?
Use a limited colour palette, combine different textures, vary the heights of your decorations, group pieces in odd numbers, and leave some empty space. These simple styling techniques can make inexpensive materials appear more coordinated and intentional.
What colours work well for budget Christmas decorating?
Classic combinations include red and green, white and gold, silver and white, and green with natural wood. Neutral combinations such as cream, brown, white, and green can also create a calm and elegant appearance.
Can I make Christmas decorations from recycled materials?
Absolutely. Clean cardboard, glass jars, paper packaging, old gift boxes, fabric scraps, leftover wrapping paper, and other suitable materials can become useful decorations. Recycling also reduces the amount of new material you need to purchase.
What should I decorate first?
Start with the room or area that matters most to you. Add the main focal point first, such as a Christmas tree or large wreath. Then build smaller arrangements around it. This prevents you from buying decorations simply because you feel like the room needs more.
Conclusion
Creating a festive home does not require a huge decorating budget. In fact, some of the most charming holiday displays begin with materials that might otherwise be overlooked.
A glass jar can become a glowing lantern. A cardboard box can become a decorative gift. Pinecones can become part of a table arrangement. A leftover ribbon can turn a plain wreath into a festive focal point. Even a few pieces of paper can transform an empty wall when they are arranged thoughtfully.
That is the real appeal of Christmas DIY decorations on a budget. You get to decide what your home should look like instead of simply copying what you see in a shop.
Start with what you already have.
Choose a small colour palette.
Reuse materials whenever possible.
Make decorations that suit the space you actually live in.
Most importantly, avoid the temptation to fill every surface.
A beautiful Christmas home does not need decorations in every corner. A few carefully arranged pieces can create just as much festive atmosphere.
If you are decorating on a particularly tight budget, choose projects that can serve more than one purpose. A ribbon can decorate a wreath and later become gift wrapping. A glass jar can work as Christmas décor and return to everyday storage after the season. A wooden tray can hold holiday decorations in December and serve as a coffee-table organiser throughout the year.
That makes your decorating budget work harder.
You can also involve your family in the process. Children can decorate paper stars, paint cardboard trees, arrange safe ornaments, or make simple garlands. Older family members can help with more detailed projects.
The result is more than a decorated room.
It becomes something you created together.
So before you rush out to buy another box of Christmas decorations, look around your home first. You may already have everything you need to create a warm, beautiful, and personal holiday atmosphere.
With a little imagination, Christmas DIY decorations on a budget can look thoughtful, stylish, and completely unique to your home.