Most nail designs don’t show up well on deeper skin tones. These summer nail designs for dark skin reveal what actually works (and what doesn’t).
I used to think it was just me.
I’d pick a nail color that looked nice, take my time to apply it properly… and somehow it still didn’t look right.
Not bad, just not it. The color would come out looking a bit dull, or even too shouty.
After a while, I realized the problem wasn’t really my skills. It was the kind of colors and designs I was choosing.
A lot of nail ideas out there don’t really consider how shades show up on darker skin, or how realistic it is to do them at home without special tools. So you end up trying things that were never going to give you that clean, flattering result in the first place.
That’s why this is different.
This post is for when you want something simple, something you can actually do yourself, and more importantly, something that will actually show up well on your skin that is easy summer nail designs for dark skin you can actually do at home.
If you prefer simple, low-effort styles that still look fresh and put together, check out ideas for easy summer nails you’ll love.
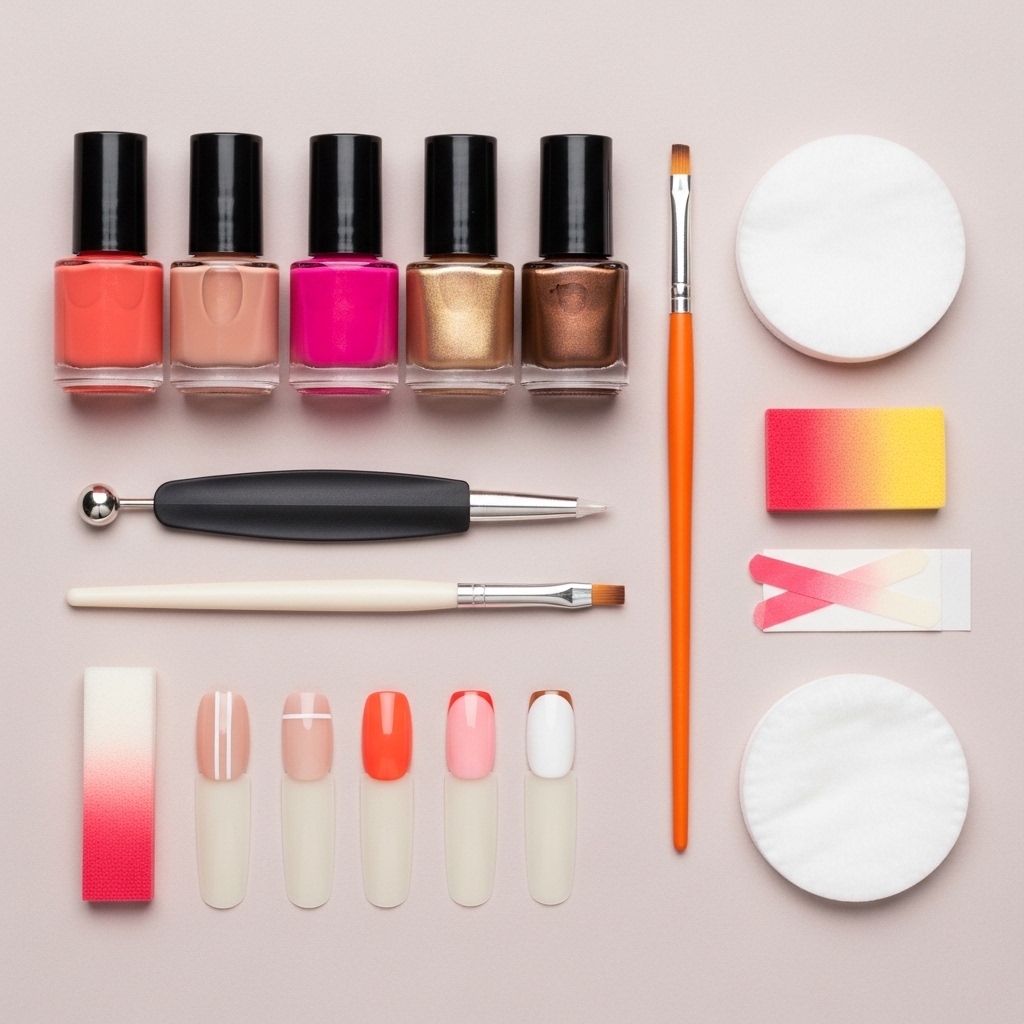
Tools You Actually Need for Summer Nail Designs for Dark Skin
One thing that stops a lot of people from even trying nail designs is the thought that you need a full salon setup. You really don’t.
For summer nail designs for dark skin, the goal is to keep things simple, practical, and realistic with tools you either already have or can easily improvise.
1. Dotting Tool (Or Toothpick Hack) A dotting tool is helpful for creating clean dots and simple patterns, but if you don’t have one, a regular toothpick works just fine. It might not look fancy, but it gets the job done, especially for beginner-friendly designs.
2. Striping Brush (Or Thin Brush Alternative) A striping brush helps with thin lines and small details, but you don’t need to go out of your way to buy one. A very thin nail brush or even a trimmed makeup brush can give you similar results once you get a steady hand.
3. Tape For Clean Lines Tape is one of the easiest hacks for getting clean, sharp lines without stress. You can use regular tape to section off parts of your nail when doing color blocks or simple geometric designs, and it instantly makes your nails look more polished.
4. Sponge For Ombré For soft blends like ombré, a small sponge is all you need. Even a piece of a regular kitchen sponge can help you achieve that smooth fade effect without needing any special technique.
5. Clear Top Coat (For A Polished Finish) This is what brings everything together. A clear top coat gives your nails that smooth, finished look and helps your design last longer without chipping too quickly.
That’s really it. No complicated tools, no pressure. Just simple things that make summer nail designs for dark skin feel doable and actually enjoyable.
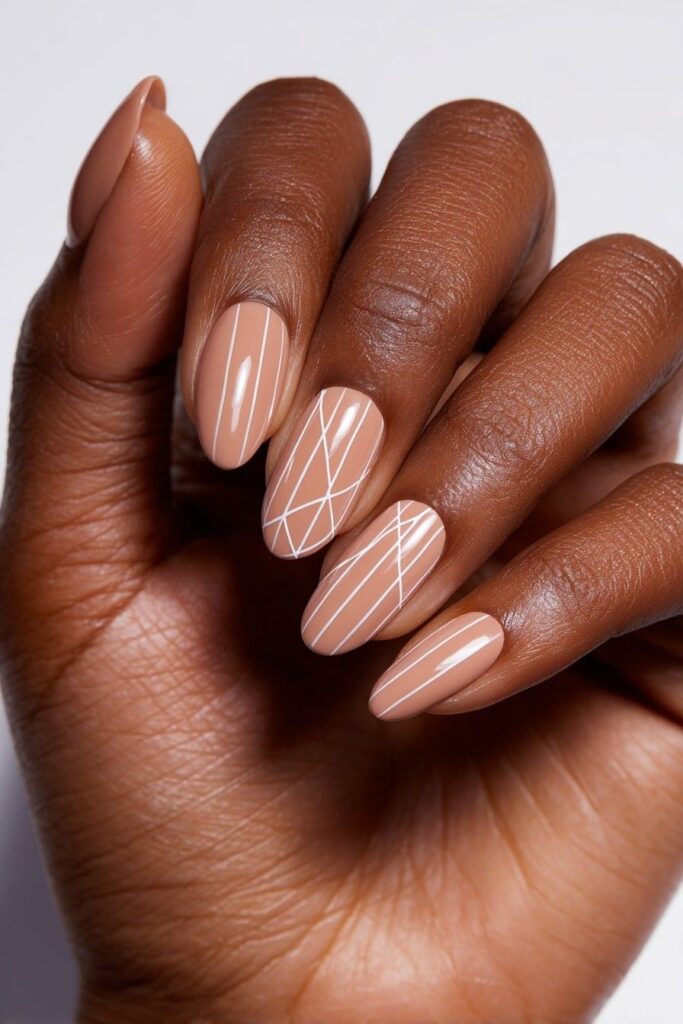
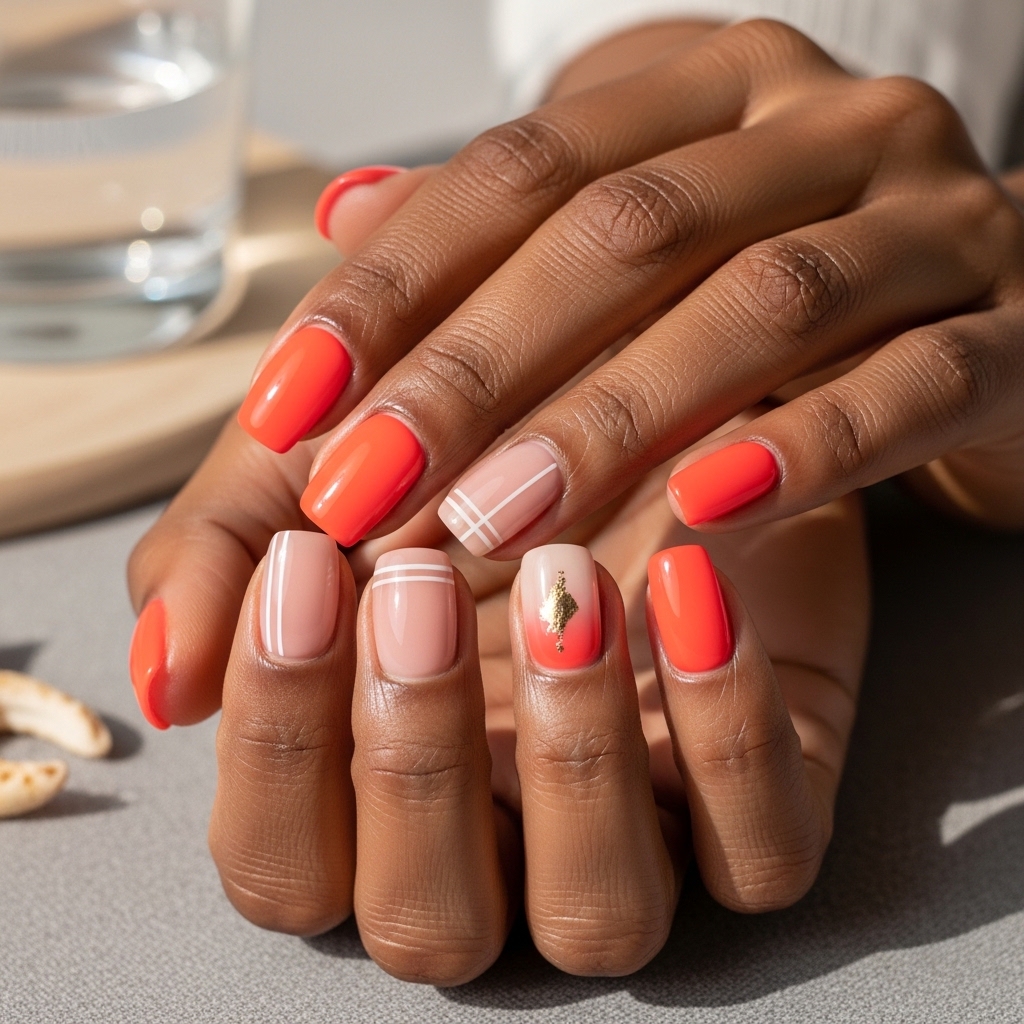
A soft nude base with thin white lines placed across the nails, either straight down, slightly diagonal, or as light accent strokes. It’s a very minimal design that still feels intentional, clean, and modern without being loud or complicated.
What Makes it Visually Appealing
This design works because it doesn’t fight your skin tone, it complements it. The nude base blends naturally with deeper skin tones, while the white lines create a soft contrast that’s visible but not harsh.
Instead of looking washed out or too bright, the combination feels balanced, giving your nails a neat and elevated finish even with very little effort.
How To Do It
Start with clean, shaped nails and apply a nude polish that suits your undertone (warm or caramel nudes work best)
Let it dry completely so the design stays crisp
Use a thin brush, toothpick, or striping tool dipped in white polish to draw simple lines on each nail
Keep the lines light and minimal, straight, diagonal, or slightly varied for a natural look
Once dry, apply a clear top coat to seal and smooth the finish
Tip
Don’t go too pale with your nude base. A slightly warm or deeper nude shade makes the white lines stand out better and keeps the whole look from feeling flat. The goal is soft contrast, not harsh separation.
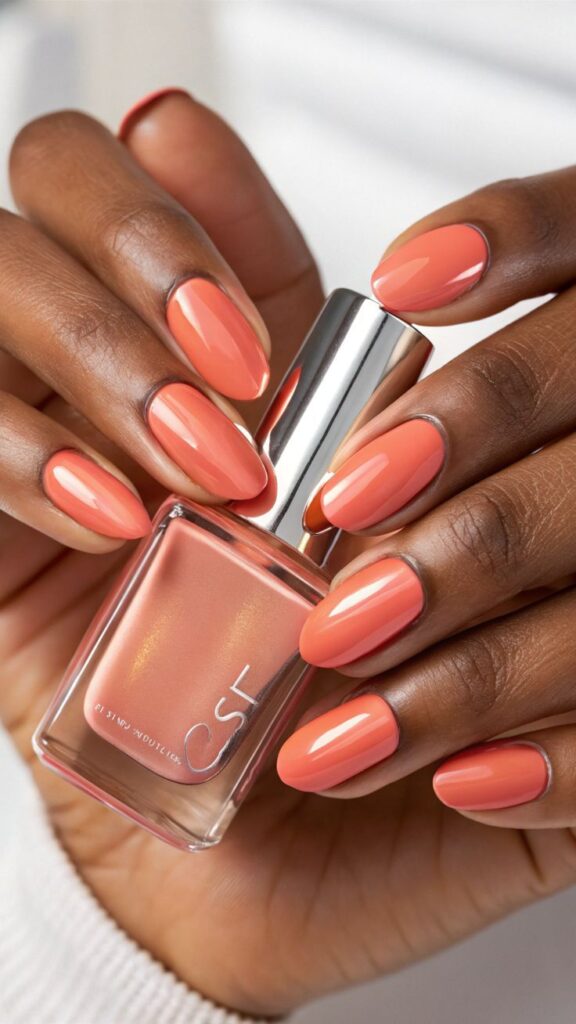
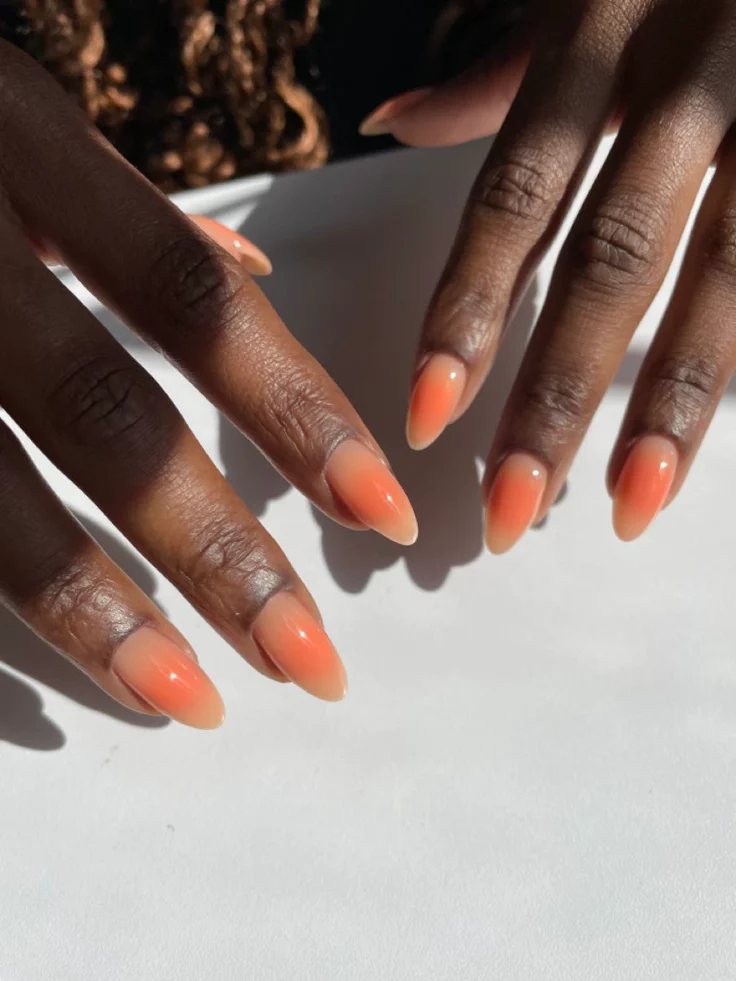
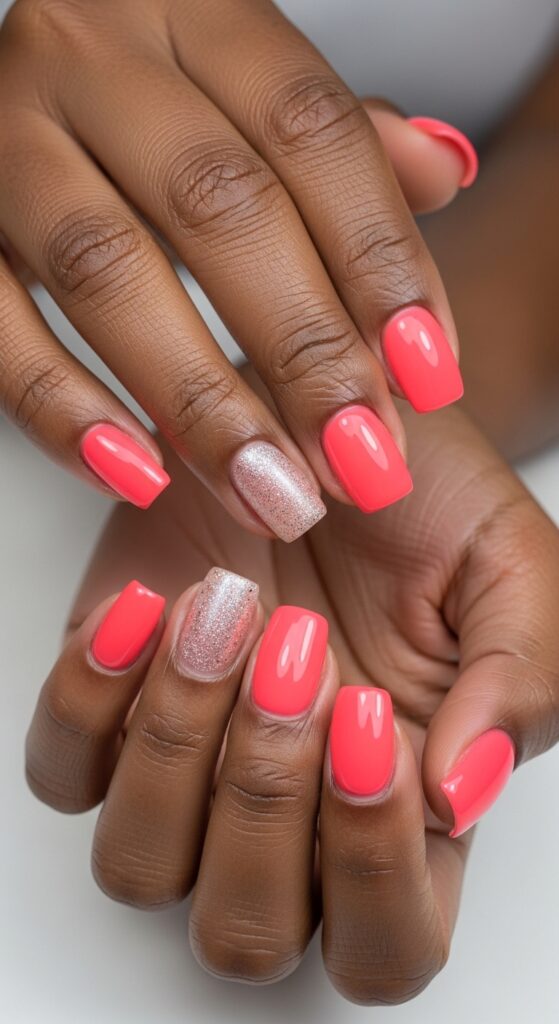
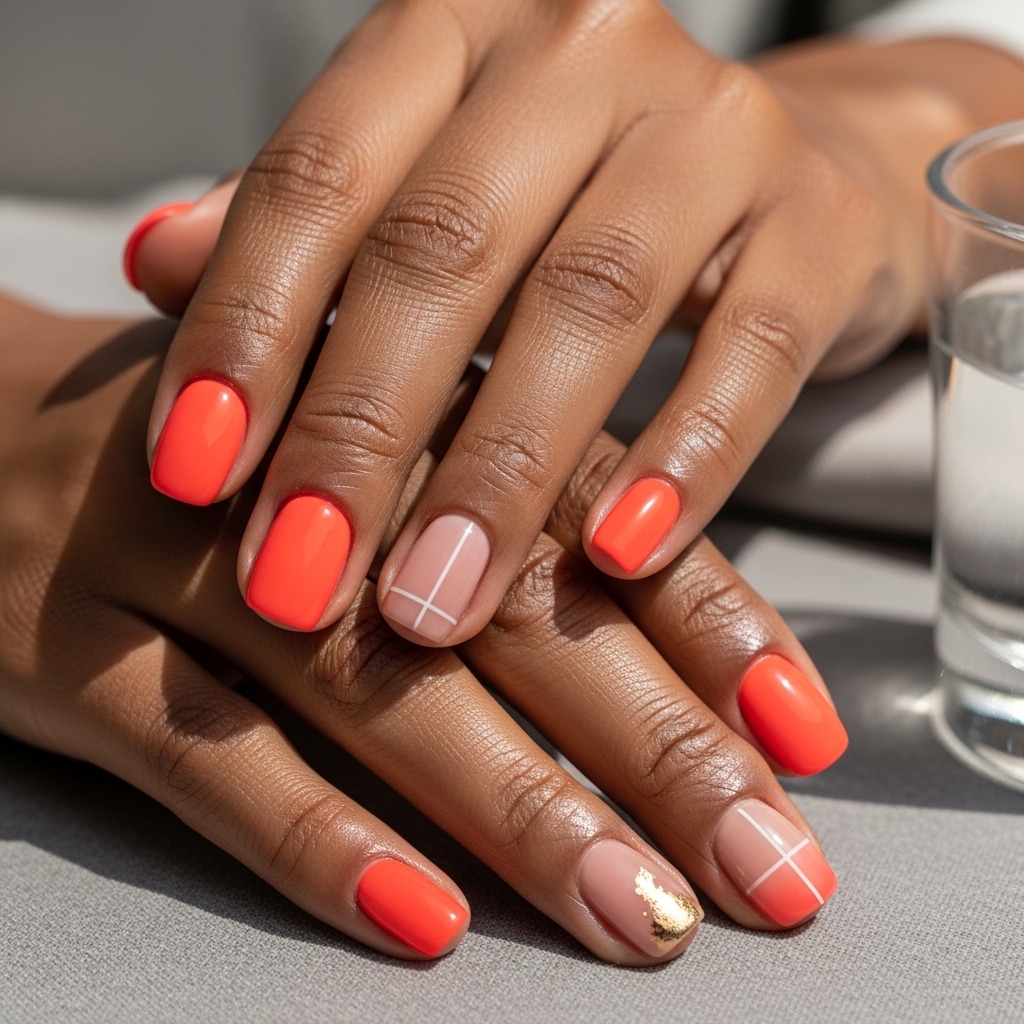
A full set of nails painted in a bright coral shade with a smooth, glossy finish. It’s a single-color design, no patterns, no extras, just a clean, vibrant look that feels fresh and perfect for warm weather.
Why it looks so Good
Coral is one of those shades that naturally comes alive on deeper skin tones. It doesn’t look dull or faded, it shows up rich, warm, and vibrant.
For summer nail designs for dark skin, coral works especially well because it adds brightness without clashing with your skin tone.
The warmth in the color blends beautifully, giving your hands a healthy, glowing look instead of washing them out.
How To Do It
Start with clean, shaped nails and apply a base coat for protection
Apply your coral polish in thin, even layers (2 coats usually gives the best color payoff)
Let each coat dry properly to avoid streaks
Finish with a glossy top coat to enhance shine and smoothness
Tip
Choose a coral shade with a slight warm or orange undertone instead of a pastel coral. The richer pigment is what makes it stand out beautifully on darker skin and keeps the look from feeling too soft or faded.
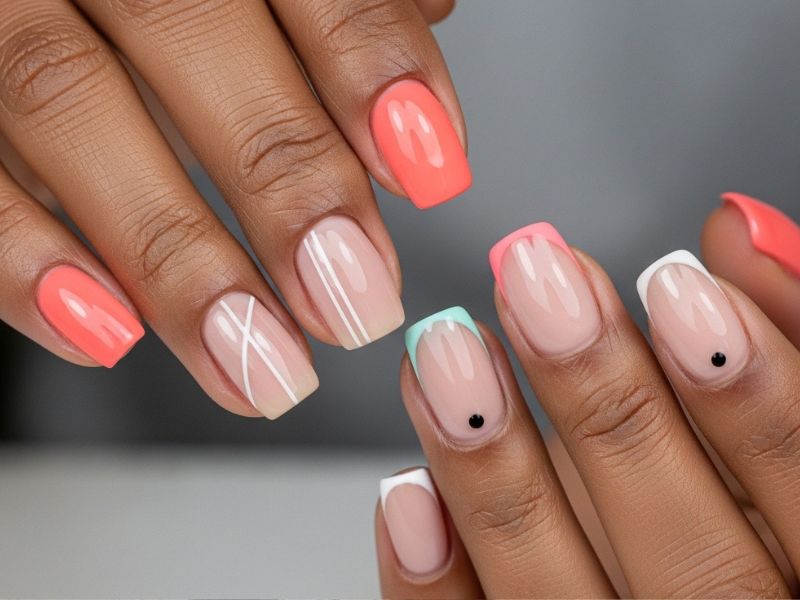
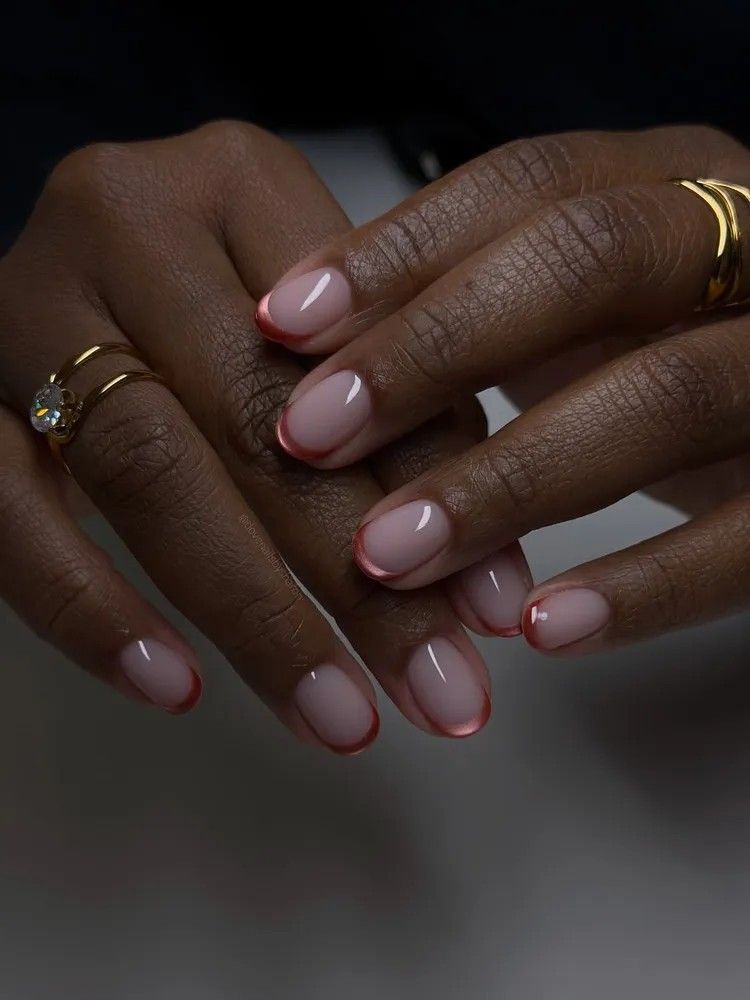
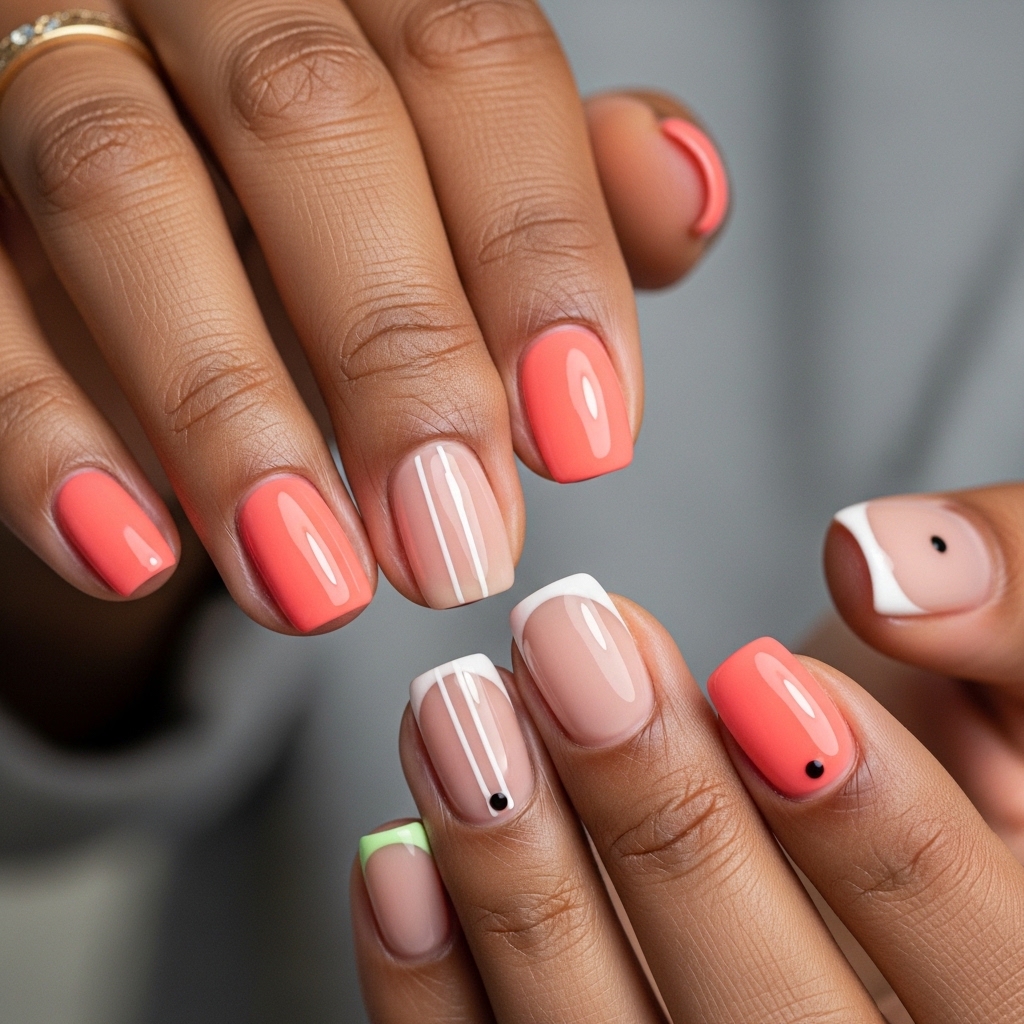
A clean, simple nail with a nude or soft base and a very thin line of color just along the tip of each nail. Instead of the usual thick French tip, this version is delicate and minimal, with a pop of color that sits neatly at the edge.
Why It Works
This design works because it keeps things subtle but still interesting. The thin colored edge adds definition without overwhelming the nail. It also avoids the “too much going on” effect that comes with heavier nail art, making it perfect if you want something neat, wearable, and low-effort.
How To Do It
Start with clean, shaped nails and apply a nude or soft base color
Let it dry completely so the tips don’t smudge
Use a thin brush or striping tool to lightly trace a colored line along the tip of each nail
Choose bold shades like cobalt blue, red, or orange for a clean contrast
Once dry, finish with a clear top coat for shine and smoothness
Tip
Keep the colored line very thin. The smaller the edge, the more elegant and modern the design looks. Thick lines can easily take away the minimal feel and make it harder to keep neat at home.
Bright, cheerful nail looks with a soft, wearable finish can be found in Yellow Almond Nail Ideas, especially if you like warm seasonal tones.
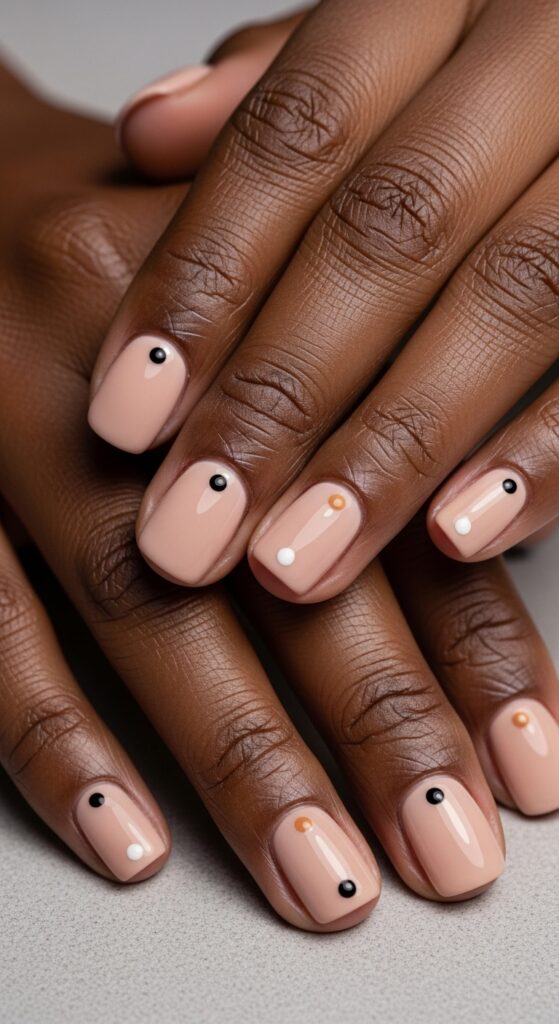
4. Single Dot Accent Design
A clean, simple nail look where each nail has a solid base color and just one small dot placed near the center or slightly off-center.
The dot can be the same color on all nails or a contrasting shade for a bit more detail. It’s minimal, neat, and very intentional without looking busy.
What Makes it Visually Appealing
This is one of the easiest styles for beginners because it doesn’t require precision-heavy nail art. The single dot adds just enough detail to make your nails look styled, not plain.
It also fits well with simple beauty looks where you want something cute but not complicated.
How To Do It
Start with clean, shaped nails and apply your chosen base color
Let it dry completely so the design doesn’t blur
Dip a toothpick, dotting tool, or bobby pin tip into nail polish
Place one small dot on each nail (center or slightly above center)
Let it dry fully, then seal with a clear top coat
Tip
Stick to one or two dot colors max. Using too many shades can take away from the minimal look. For a cleaner finish, choose a base color that contrasts gently with the dot so it stands out without looking harsh.
A smooth blend of two colors fading into each other across the nail. It can be subtle (like nude into pink) or slightly bolder (like coral into orange), but the transition is soft with no harsh lines.
It gives that “professional salon” finish even though it’s very simple to recreate.
What Gives it its Appeal
Ombre styles work well because they add depth without needing detailed nail art skills.
The gradual color transition makes the nails look more styled and intentional, while still feeling soft and wearable. It’s also forgiving, small imperfections in blending don’t ruin the final look.
How To Do It (Simple Steps)
Apply a base coat and let it dry
Paint your first color as the base layer
On a sponge, apply two chosen polish colors side by side
Gently dab the sponge onto the nail to blend the colors
Repeat lightly until you get the desired fade
Clean edges if needed and finish with a clear top coat
Tip
Choose colors that are close in tone (like peach and coral or nude and soft pink). It makes blending easier and prevents the fade from looking patchy.
6. Matte Nails With One Gloss Accent
A full matte finish across all nails, with just one nail (or a small section) left glossy. The contrast between the flat matte texture and the shiny accent creates a clean, modern look without needing any detailed nail art.
The Beauty behind this Design
This design stands out because of texture, not complexity. The matte finish gives a soft, velvety effect, while the glossy accent adds a small focal point that makes the whole set look intentional. It’s one of those styles that looks elevated even though it’s very easy to do.
How To Do It
Apply your base color evenly on all nails
Let it dry completely
Apply a matte top coat over all nails
Choose one nail (or a small section) and apply a regular glossy top coat on top
Let everything dry fully
Tip
Stick to neutral or rich shades (like deep brown, nude, or burgundy tones). The matte finish shows them off better, while the glossy accent stands out more clearly without looking messy.
Clean, low-maintenance styles that still feel stylish are explored in Cute Short Square Nail Ideas, perfect for everyday polished nails.
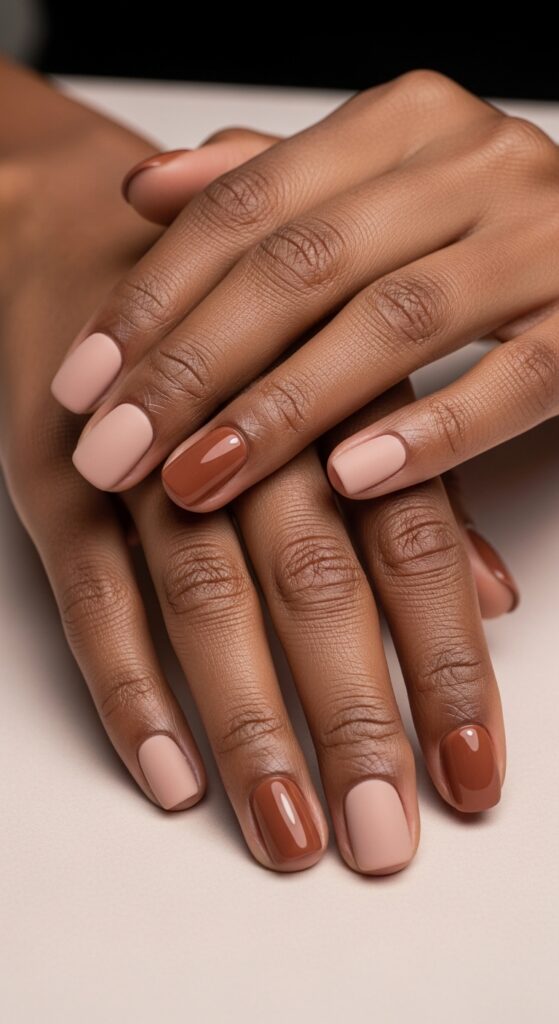
7. Bright Solid Color + One Accent Nail
All nails are painted in one bright, solid shade, with just one nail on each hand slightly different, either a shimmer, a glitter finish, or a contrasting color. It keeps the look simple but adds just enough detail to make it feel styled and intentional.
What makes it Eye-Catching
This style works because bold solid colors already look great on deeper skin tones, and the accent nail adds balance without overcomplicating things.
Instead of doing too much, it keeps the focus on one strong color while giving a small twist that makes the nails more interesting and less repetitive.
How To Do It
Apply a base coat on clean, shaped nails
Paint all nails with your chosen bright color (like coral, cobalt blue, or hot pink)
Choose one nail on each hand as your accent nail
Paint the accent nail with a different finish or shade (glitter, shimmer, or slightly lighter/darker tone)
Let everything dry and finish with a clear top coat
Tip
Pick an accent shade that still belongs in the same color family. This keeps the design cohesive instead of looking mismatched or random.
Simple yet elegant inspiration for different occasions can be found inBeautiful Nail Designs for Ladies, focusing on timeless, polished looks.
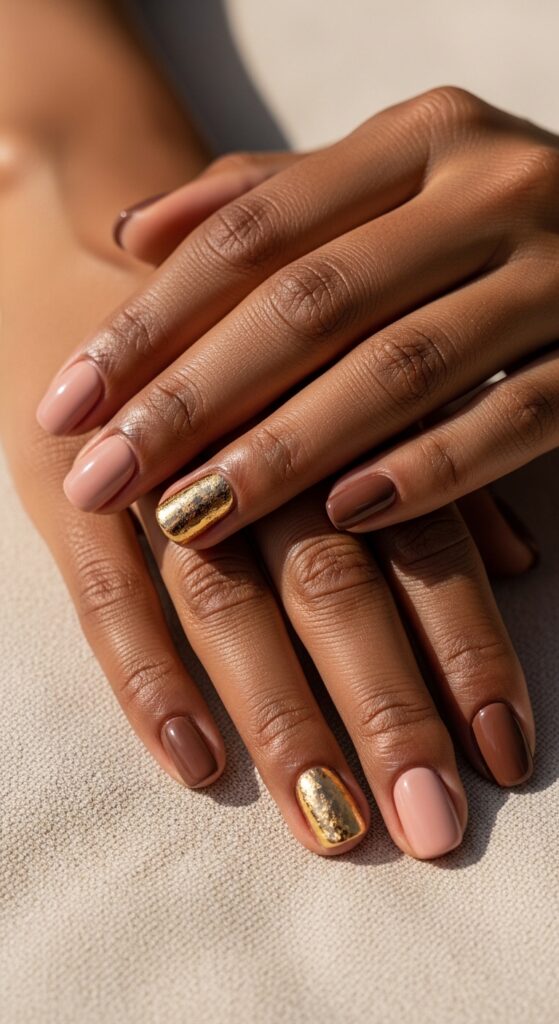
8. Gold Foil Or Metallic Accent
A clean base nail (nude, soft pink, or rich dark tone) with small pieces of gold foil or metallic accents placed randomly or lightly brushed onto one or two nails.
The finish is soft but catches light beautifully.
What Gives it its Appeal
Gold and metallic tones naturally complement deeper skin tones because they enhance warmth and richness instead of clashing. The reflective finish adds depth and glow, making the nails look more polished and elevated without needing detailed artwork.
How To Do It
Start with a base coat and apply your chosen nail color
Let it dry until slightly tacky (not wet)
Gently place gold foil or metallic flakes on selected nails
Press lightly to secure them in place
Seal everything with a clear top coat
Tip
Less is more with foil designs. A few scattered pieces look more elegant and expensive than covering the whole nail.
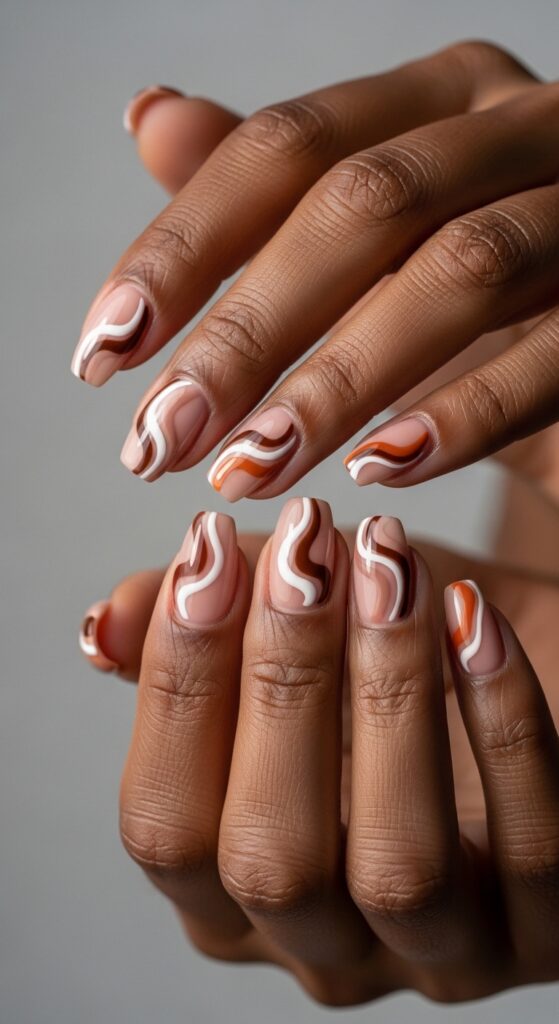
9. Abstract Swirl Designs
A soft, free-flowing design made of curved lines or swirl patterns across the nail. The lines don’t need to match or look identical, each nail can have its own small variation. It gives an artsy, modern feel without looking too structured or complicated.
Why It Works
This design works because it’s forgiving. There’s no pressure for perfect symmetry or exact shapes, which makes it ideal for beginners. The slightly imperfect lines actually add to the charm, giving it a relaxed, effortless look that still feels stylish.
How To Do It
Apply a base coat and your chosen nail color
Let it dry completely
Use a thin brush or toothpick dipped in a contrasting polish
Draw loose swirl or curved lines across each nail
Don’t aim for perfection—keep it light and flowing
Finish with a clear top coat
Tip
Stick to just two colors (a base and one swirl color). Too many shades can make the design look crowded instead of clean and modern.
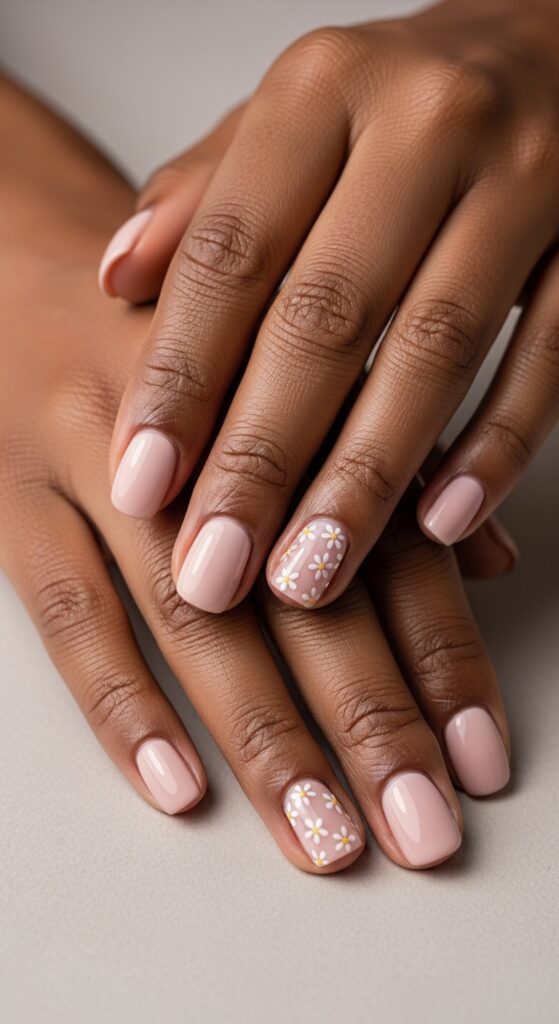
10. Soft Floral Accent (One Nail Only)
A simple nail design where most nails stay plain or lightly colored, and just one nail features a small, delicate floral pattern. The flower is usually minimal, like a tiny daisy or simple petal design, kept soft and not overly detailed.
Why it looks so Good
This style is easy to wear because it doesn’t overwhelm the whole set. The single floral accent adds a feminine touch while keeping the rest of the nails clean and simple. It’s a great way to try nail art without committing to a full design on every nail.
How To Do It
Apply a base coat and your main nail color
Let it dry fully
On one nail, use a dotting tool or toothpick to create small flower shapes
Add a center dot to complete each flower
Keep the design light and minimal
Seal with a clear top coat
Tip
Stick to soft, simple flower shapes instead of detailed petals. The cleaner the design, the more elegant and wearable it looks for everyday use.
Creative, expressive festival-ready designs appear in Coachella Nail Trends, ideal when you want something fun and different.
How To Make Your At-Home Nails Look Salon-Quality
Doing your nails at home can still give you that clean, polished “salon finish” if you pay attention to a few small but important details. It’s not really about doing complicated designs, it’s more about how you prep and finish everything.
Clean Cuticles
Take a few minutes to gently push back and clean your cuticles before applying polish. This instantly makes your nails look neater and more professional because the polish sits better on a clean nail bed instead of looking messy at the edges.
Shape Matters (Square, Almond, Etc.)
The shape of your nails changes the entire look. Even simple polish can look elevated when your nails are evenly shaped. Whether you prefer square, oval, or almond, keeping the shape consistent across all nails makes a big difference.
Use Natural Light To Check Color Accuracy
Always check your nails under natural light after applying polish. Indoor lighting can sometimes distort how colors actually look, so stepping near a window helps you see if the shade is even and properly applied.
Always Seal With Top Coat
A clear top coat is what pulls everything together. It smooths out the surface, adds shine (or matte finish if you prefer), and helps your nails last longer without chipping quickly.
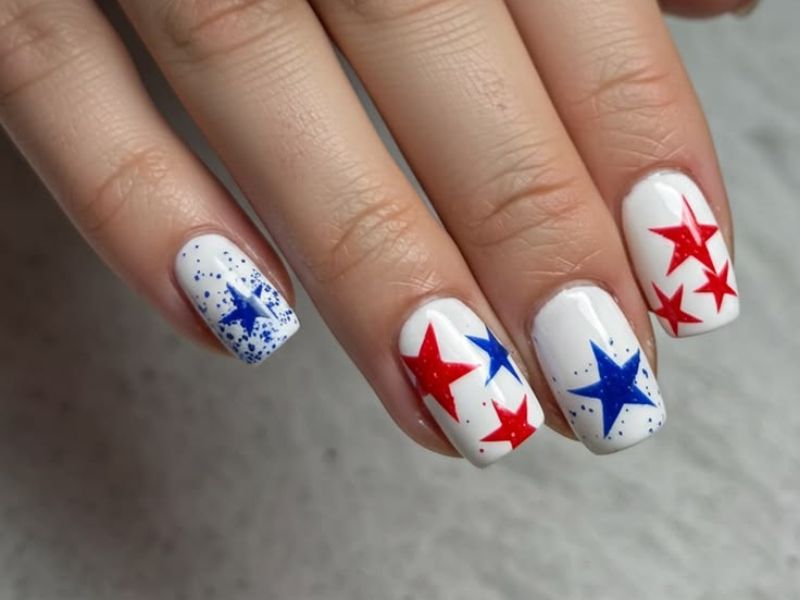
Bold, festive combinations that stand out are covered in 4th of July Nail Trends, great for seasonal inspiration.
Best Summer Colors That Actually Pop On Dark Skin
Choosing nail colors isn’t just about what looks pretty in the bottle, it’s about what actually shows up once it’s on your nails.
Some shades naturally stand out on deeper skin tones, while others tend to fade or look less defined. Understanding this makes it much easier to pick colors that feel intentional and flattering.
✔ Bright & Bold Colors
Coral, electric blue, hot pink, citrus yellow
These shades work because they create strong contrast against deeper skin tones. Instead of blending in, they stand out clearly, giving your nails a fresh and vibrant look. Bright colors also tend to reflect light better, which makes the overall finish feel more alive and energeti, perfect for summer.
✔ Metallics & Shine
Gold, bronze, chrome
Metallic tones naturally complement melanin-rich skin because they enhance warmth and depth. Gold and bronze, in particular, blend beautifully with darker tones, while chrome adds a reflective, modern edge. These finishes also catch light easily, which gives the nails a subtle glow without needing extra design work.
✔ Soft But Safe Colors (No Ashy Look)
Milky white (not chalk white), nude tones with warm undertones, sheer pinks
These are the “safe” shades that still look clean and polished when chosen correctly. The key is avoiding overly chalky or cool-toned versions. Warm-based nudes and soft pinks tend to sit better on darker skin because they don’t wash out the natural tone of the hand.
Colors To Be Careful With
Very pale pastels without base, grey-toned nudes, low-pigment polish
Some shades don’t translate well because they lack depth or pigment. Pale pastels without a base coat can look faded, while grey-toned nudes may appear dull instead of smooth.
Low-pigment polishes often require multiple coats but still don’t give full coverage, which can make the final result look uneven.
Why Some Nail Designs Don’t Look Good On Dark Skin (And How To Fix It)
A lot of the frustration people feel with nail designs isn’t about skill, it’s about why the color isn’t showing up the way it should.
Some shades just don’t translate well on deeper skin tones, and once you understand the reason, it becomes much easier to choose what actually works instead of guessing.
✔ Understanding Undertones
Every skin tone has an undertone, warm, cool, or neutral, and it quietly affects how colors sit on your nails.
Warm undertones usually work well with coral, gold, orange-based reds, and warm nudes
Cool undertones tend to suit blues, purples, silvers, and berry tones
Neutral undertones can balance between both warm and cool shades
This matters because the same polish can look completely different depending on your undertone. A color that looks soft and pretty on someone else might appear flat or off on you simply because it doesn’t align with your natural tone.
✔ The “Ashy Effect” Problem
This is one of the most common issues with nail colors on deeper skin.
Some lighter shades, especially chalky whites, pale pastels, or poorly pigmented nudes, can look dull instead of vibrant. Instead of standing out, they kind of disappear or take on a greyish tone.
Shimmery or pearly finishes can also be tricky. On some nails, they highlight uneven texture or dryness and end up looking less smooth than expected.
It’s not the design itself, it’s how the pigment interacts with the skin underneath.
How To Fix
Well, you don’t need complicated tricks to fix this, just smarter choices.
What to do:
Go for highly pigmented, saturated colors that actually show up in one or two coats
Use a white or nude base coat under lighter colors to help them pop instead of fading into your skin tone
Choose finishes intentionally:
Glossy = clean, vibrant, and smooth
Matte = soft, modern, and muted
Chrome/metallic = bold, reflective, and high-impact
When you understand how pigment and finish behave, you stop fighting your nail polish—and start choosing designs that naturally work with your skin instead of against it.